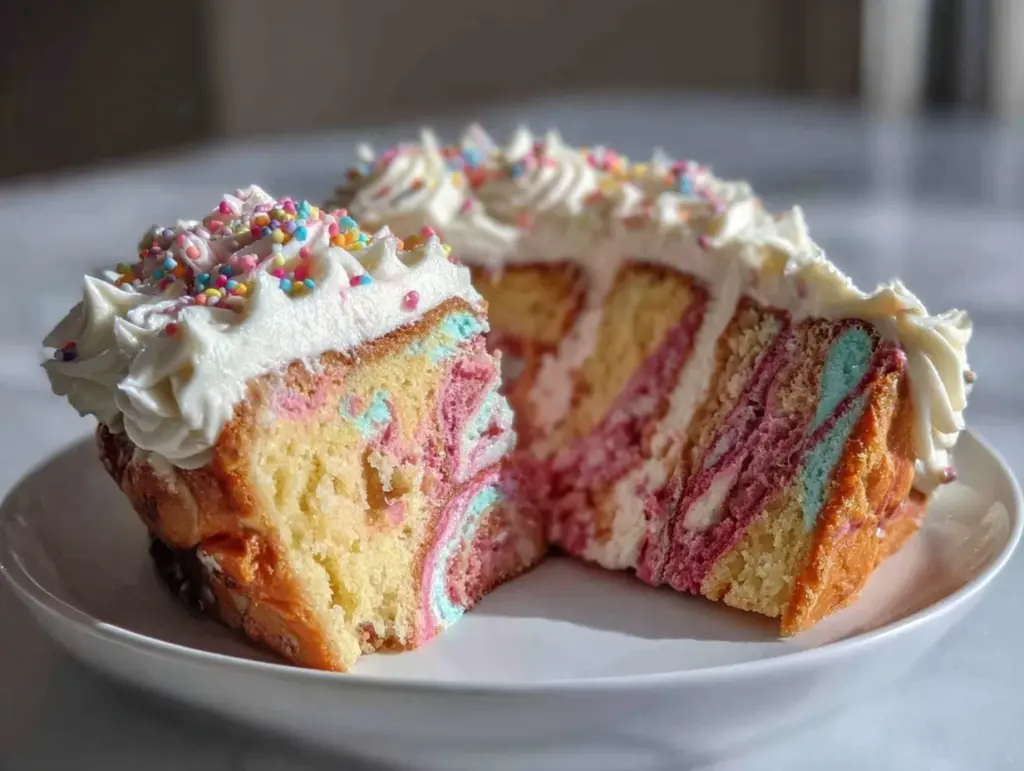
“Are you sure you want to go all-in with every color?” my friend asked over the phone, chuckling at my ambitious plan to make a tie-dye rainbow layer cake. Honestly, I wasn’t entirely sure myself. It started as a bit of a whimsy on a quiet Sunday afternoon, when the usual vanilla cakes felt a little too predictable. I had a craving for something that looked as joyful as it tasted, something that would make even a simple get-together feel special—without sending me into a baking marathon.
My kitchen quickly turned into a swirl of vibrant bowls, each filled with batter bright as a summer fair. Mixing colors was like watching paint come to life, and I couldn’t help but sneak little tastes between layers. The first bite was a burst of vanilla sweetness, but the real magic was in the surprise inside—the hidden rainbow peeking through every slice. It wasn’t just a cake; it was a little celebration on a plate, perfect for lifting spirits or marking a moment.
What stuck with me, beyond the colors and the vanilla buttercream’s silky hug, was how approachable this recipe felt. You don’t need to be a professional baker to pull off a cake that looks this fun. And honestly, it’s the kind of recipe I find myself coming back to, whether it’s for a birthday, an impromptu party, or just because the day calls for a little color. It’s a reminder that sometimes, the best creations come from a bit of boldness and a whole lot of vanilla buttercream.
Why You’ll Love This Recipe
This Perfect Tie-Dye Rainbow Layer Cake with Vanilla Buttercream isn’t just a feast for the eyes; it’s a joy to make and eat. I’ve tested this recipe multiple times, tweaking the balance between flavor and fun, and it reliably impresses every time.
- Quick & Easy: The batter comes together in under 30 minutes, making it a great pick for busy days when you want a show-stopping dessert without the stress.
- Simple Ingredients: You’ll mostly find everything you need in your pantry and fridge—no scavenger hunts required.
- Perfect for Celebrations: Whether it’s a birthday, baby shower, or a weekend treat, this cake’s playful look and classic flavor fit the bill.
- Crowd-Pleaser: Kids love the colors, adults appreciate the smooth vanilla buttercream, and everyone keeps asking for seconds.
- Unique Twist: The secret to the perfectly smooth and luscious frosting is a technique I picked up from making the Million Dollar Pound Cake—whipping the buttercream just right to get that dreamy texture.
This recipe feels like a little party every time you slice into it—no one expects such a colorful surprise hidden beneath a classic vanilla finish. It’s comfort food with a playful spin, which is why it’s become one of my go-to cakes for any occasion.
What Ingredients You Will Need
Creating this tie-dye rainbow layer cake means working with simple, wholesome ingredients that come together to form a soft, moist cake with a buttery vanilla finish. Most are pantry staples, and you can swap some easily if needed.
- For the Cake Batter:
- All-purpose flour (2 ½ cups / 315 grams) – for that tender crumb
- Baking powder (2 ½ teaspoons) – the secret to the perfect rise
- Salt (½ teaspoon) – balances sweetness
- Unsalted butter (1 cup / 227 grams), softened – I prefer Plugrá for the creaminess it adds
- Granulated sugar (1 ¾ cups / 350 grams) – just enough sweetness
- Large eggs (4), room temperature – helps with structure
- Pure vanilla extract (2 teaspoons) – the heart of vanilla flavor
- Whole milk (1 cup / 240 ml), room temperature – for moistness
- Gel food coloring (red, orange, yellow, green, blue, purple) – gel types work best for vivid colors without thinning the batter
- For the Vanilla Buttercream Frosting:
- Unsalted butter (1 cup / 227 grams), softened – again, Plugrá is my go-to
- Powdered sugar (4 cups / 480 grams), sifted – for silky smoothness
- Pure vanilla extract (2 teaspoons) – enhances the sweetness
- Heavy cream (2–3 tablespoons / 30-45 ml) – adjusts consistency
- Pinch of salt – to balance the sweetness
Feel free to swap the whole milk with almond milk if you need a dairy-free option. For a gluten-free cake, you can experiment with a 1:1 gluten-free baking flour, though the texture will differ slightly. I’ve made this cake successfully with funfetti cake batter as a playful variation, but the classic vanilla base here really lets the colors pop.
Equipment Needed
- Three 8-inch (20 cm) round cake pans – nonstick or well-greased
- Electric mixer (stand or hand) – essential for fluffy frosting and batter mixing
- Mixing bowls (at least 6) – for dividing and coloring batter
- Measuring cups and spoons – precise measurements make a big difference
- Rubber spatula – for gentle folding and scraping
- Cooling racks – to cool layers evenly
- Offset spatula – best for smooth frosting application
- Piping bags and tips (optional) – if you want to add decorative touches
If you’re short on cake pans, you can bake layers in batches, but it takes longer. I’ve also used silicone pans before, and while they’re easy to unmold, the edges don’t get quite as crisp, which some people prefer. For frosting, a stand mixer makes the process smoother, but a hand mixer works just fine if you go slowly.
Preparation Method
- Preheat and prepare pans: Set your oven to 350°F (175°C). Grease and flour the three 8-inch cake pans, or line them with parchment paper to ensure easy release (about 10 minutes prep).
- Mix dry ingredients: In a medium bowl, whisk together 2 ½ cups (315 g) flour, 2 ½ teaspoons baking powder, and ½ teaspoon salt. This combo ensures even rising and tender crumb (3 minutes).
- Cream butter and sugar: Using an electric mixer, beat 1 cup (227 g) softened butter and 1 ¾ cups (350 g) granulated sugar until pale and fluffy—about 4-5 minutes. This step builds the cake’s light texture.
- Add eggs and vanilla: Beat in 4 large eggs, one at a time, mixing well after each addition. Then stir in 2 teaspoons vanilla extract. The batter should look smooth and creamy (3 minutes).
- Alternate adding dry ingredients and milk: Add the dry mixture and 1 cup (240 ml) whole milk alternately to the butter mixture, starting and ending with dry ingredients. Mix gently but thoroughly; avoid overmixing (4 minutes). The batter will be smooth and pourable.
- Divide and color the batter: Evenly divide the batter into six bowls. Add a different gel food coloring to each bowl—red, orange, yellow, green, blue, and purple. Stir gently until the colors are vibrant and fully blended (5 minutes).
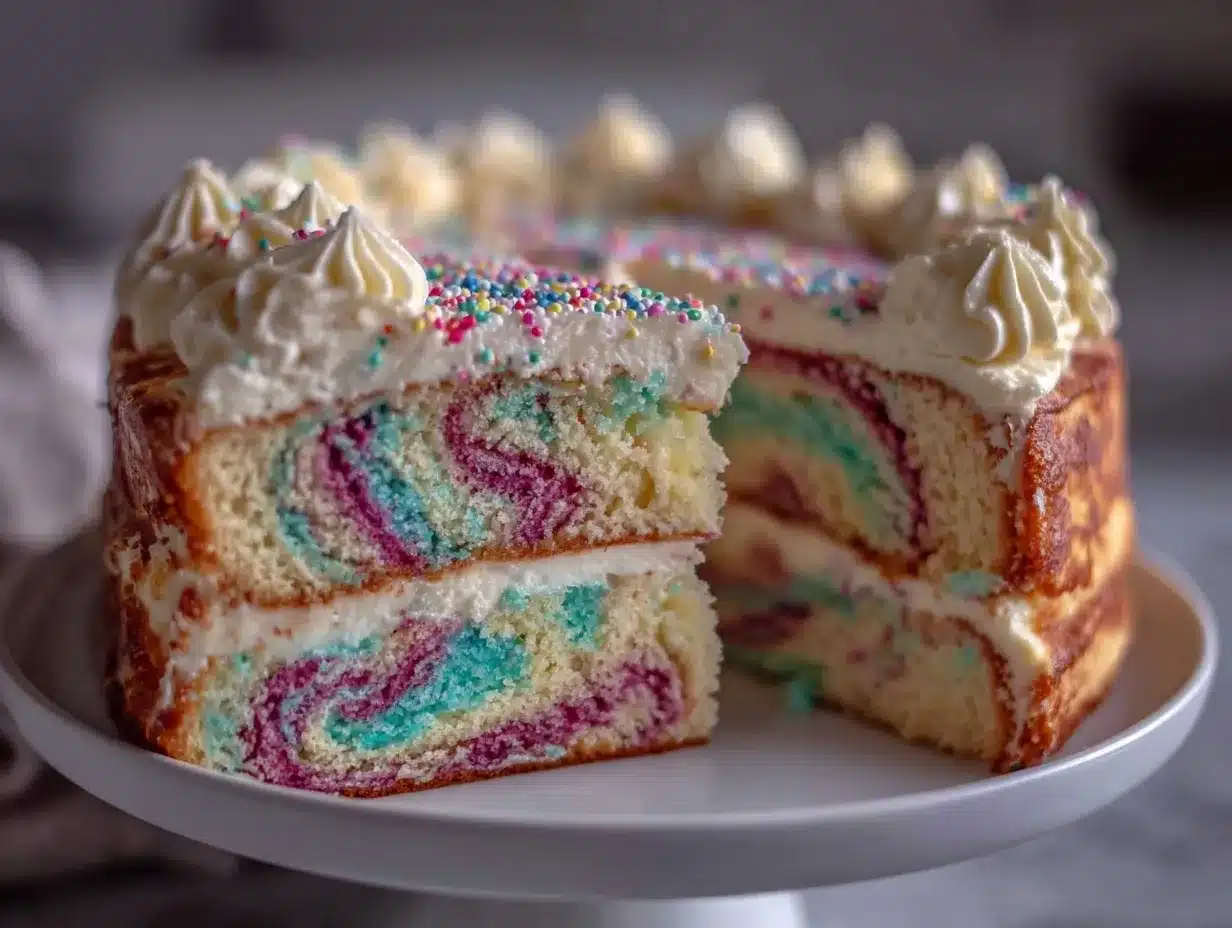
- Layer the colors: Working with one cake pan at a time, spoon small dollops of each colored batter into the center, alternating colors. The batter will spread naturally into a tie-dye pattern. Repeat for all pans (10 minutes).
- Bake: Place pans in the oven and bake for 25-30 minutes, or until a toothpick inserted comes out clean. Rotate pans halfway through baking for even cooking. The cake should spring back when lightly touched (25-30 minutes).
- Cool layers: Let cakes cool in pans for 10 minutes, then turn out onto wire racks to cool completely before frosting (at least 1 hour).
- Make the vanilla buttercream: Beat 1 cup (227 g) softened butter until creamy. Gradually add 4 cups (480 g) sifted powdered sugar, mixing on low speed. Add 2 teaspoons vanilla extract, pinch of salt, and 2-3 tablespoons heavy cream to reach a spreadable consistency. Beat on high for 3-4 minutes to get fluffy frosting.
- Assemble the cake: Place one cake layer on your serving plate. Spread a generous layer of buttercream on top. Repeat with remaining layers, finishing with frosting on top and sides. Use an offset spatula for smooth edges or a piping bag for decoration (15 minutes).
If the batter looks too thick when coloring, gently fold in a teaspoon of milk. Watch the cake closely near the end of baking—overbaking dries it out fast. When frosting, if the buttercream feels too soft, pop it in the fridge for 10 minutes before spreading.
Cooking Tips & Techniques
Getting this cake just right is about a few little tricks I’ve learned through trial and error. For instance, always use room temperature eggs and butter. Cold ingredients don’t mix as well and can cause a crumbly texture.
When dividing the batter for coloring, I find weighing each portion with a kitchen scale helps keep layers even. Gel food coloring is a game-changer, too—liquid ones can thin the batter, making it harder to get those bright, sharp tie-dye effects.
One common mistake is overmixing once you add the flour. It’s tempting to get every bit smooth, but too much mixing develops gluten, leading to a dense cake. Mix just until combined.
Another tip is not to rush the cooling process. If you start frosting a warm cake, the buttercream melts and you get a mess. Patience here really pays off.
If you want extra flair, try a crumb coat—a thin layer of frosting to trap crumbs before the final icing. It takes a bit more time but gives a polished finish, like the one I use for the Texas Sheet Cake.
Variations & Adaptations
- Dairy-Free Version: Use coconut oil in place of butter and almond or oat milk for the wet ingredients. Coconut cream whipped with powdered sugar makes a lovely frosting alternative.
- Flavor Twists: Add lemon zest and a splash of lemon juice to the batter for a zesty surprise. Or swirl in a bit of melted white chocolate for extra richness.
- Alternative Layers: Instead of six colors, try using three shades of a single color for an ombré effect. It’s less intense but just as stunning.
- Mini Cakes or Cupcakes: This batter works beautifully baked in cupcake tins for individual tie-dye treats—great for parties or lunchbox surprises.
- Personal Favorite: I once swapped the vanilla buttercream for a light cream cheese frosting, borrowing a trick from my Carrot Cake Swiss Roll recipe. It added a tangy depth that balanced the sweetness perfectly.
Serving & Storage Suggestions
This cake is best served at room temperature to enjoy the full creaminess of the vanilla buttercream and the delicate softness of the layers. I like to slice it up with a sharp serrated knife to keep the edges clean and the tie-dye pattern intact.
Pair it with a cup of lightly brewed tea or a creamy iced coffee for a relaxed afternoon treat. If you’re hosting, colorful sprinkles or edible glitter add a festive touch on top.
Store leftovers in an airtight container in the refrigerator for up to 4 days. Bring slices to room temperature before serving to soften the buttercream again. For longer storage, you can freeze the cake (wrapped tightly in plastic and foil) for up to 2 months. Thaw overnight in the fridge and let sit at room temperature before enjoying.
Interestingly, the flavors actually deepen after a day or two, making it a great make-ahead dessert for gatherings.
Nutritional Information & Benefits
Each slice of this cake (assuming 12 servings) contains approximately 350 calories, with 18 grams of fat, 45 grams of carbohydrates, and 3 grams of protein. The sugar content is moderate considering the size and indulgence level.
Key ingredients like eggs provide protein and essential nutrients, while real butter adds richness and satiety. Using whole milk instead of cream keeps the cake from being overly heavy.
This recipe is naturally gluten-containing but can be adapted for gluten-free diets with suitable flour blends. It’s not low-carb, but perfect for those balanced moments when you want a treat without going overboard.
From a wellness perspective, the homemade vanilla buttercream avoids preservatives and artificial additives found in store-bought frostings, making it a cleaner choice for a sweet celebration.
Conclusion
The Perfect Tie-Dye Rainbow Layer Cake with Vanilla Buttercream is a joyful, approachable recipe that turns a simple vanilla cake into a colorful statement. I love how it brings a little extra happiness to any occasion, whether it’s a planned party or a spontaneous celebration.
Feel free to adjust the colors, flavors, and frosting to suit your style—there’s plenty of room for creativity here. Baking this cake always reminds me that dessert can be a fun adventure, not just a routine.
If you give it a try, I’d love to hear how your cake turned out or any twists you added. Sharing those moments makes the whole process even sweeter. So, grab your mixing bowls, pick your favorite colors, and enjoy the magic of this one-of-a-kind cake!
Frequently Asked Questions
- Can I use natural food coloring instead of gel?
Natural colors tend to be less vibrant and can thin the batter. Gel food coloring is best for bright, bold tie-dye effects. - How do I prevent the colors from mixing too much?
Spoon each color gently into the pan and avoid swirling too much. The batter will spread slightly on its own to create the tie-dye look. - Can I make the cake layers ahead of time?
Yes! You can bake the layers a day in advance and wrap them tightly in plastic wrap. Store in the fridge until ready to frost. - What’s the best way to store leftover cake?
Keep leftovers in an airtight container in the fridge for up to 4 days. Bring to room temperature before serving for the best texture. - Is this recipe suitable for beginners?
Absolutely! The steps are straightforward, and the fun colors make the process enjoyable. Just take your time with the coloring and layering.
Pin This Recipe!
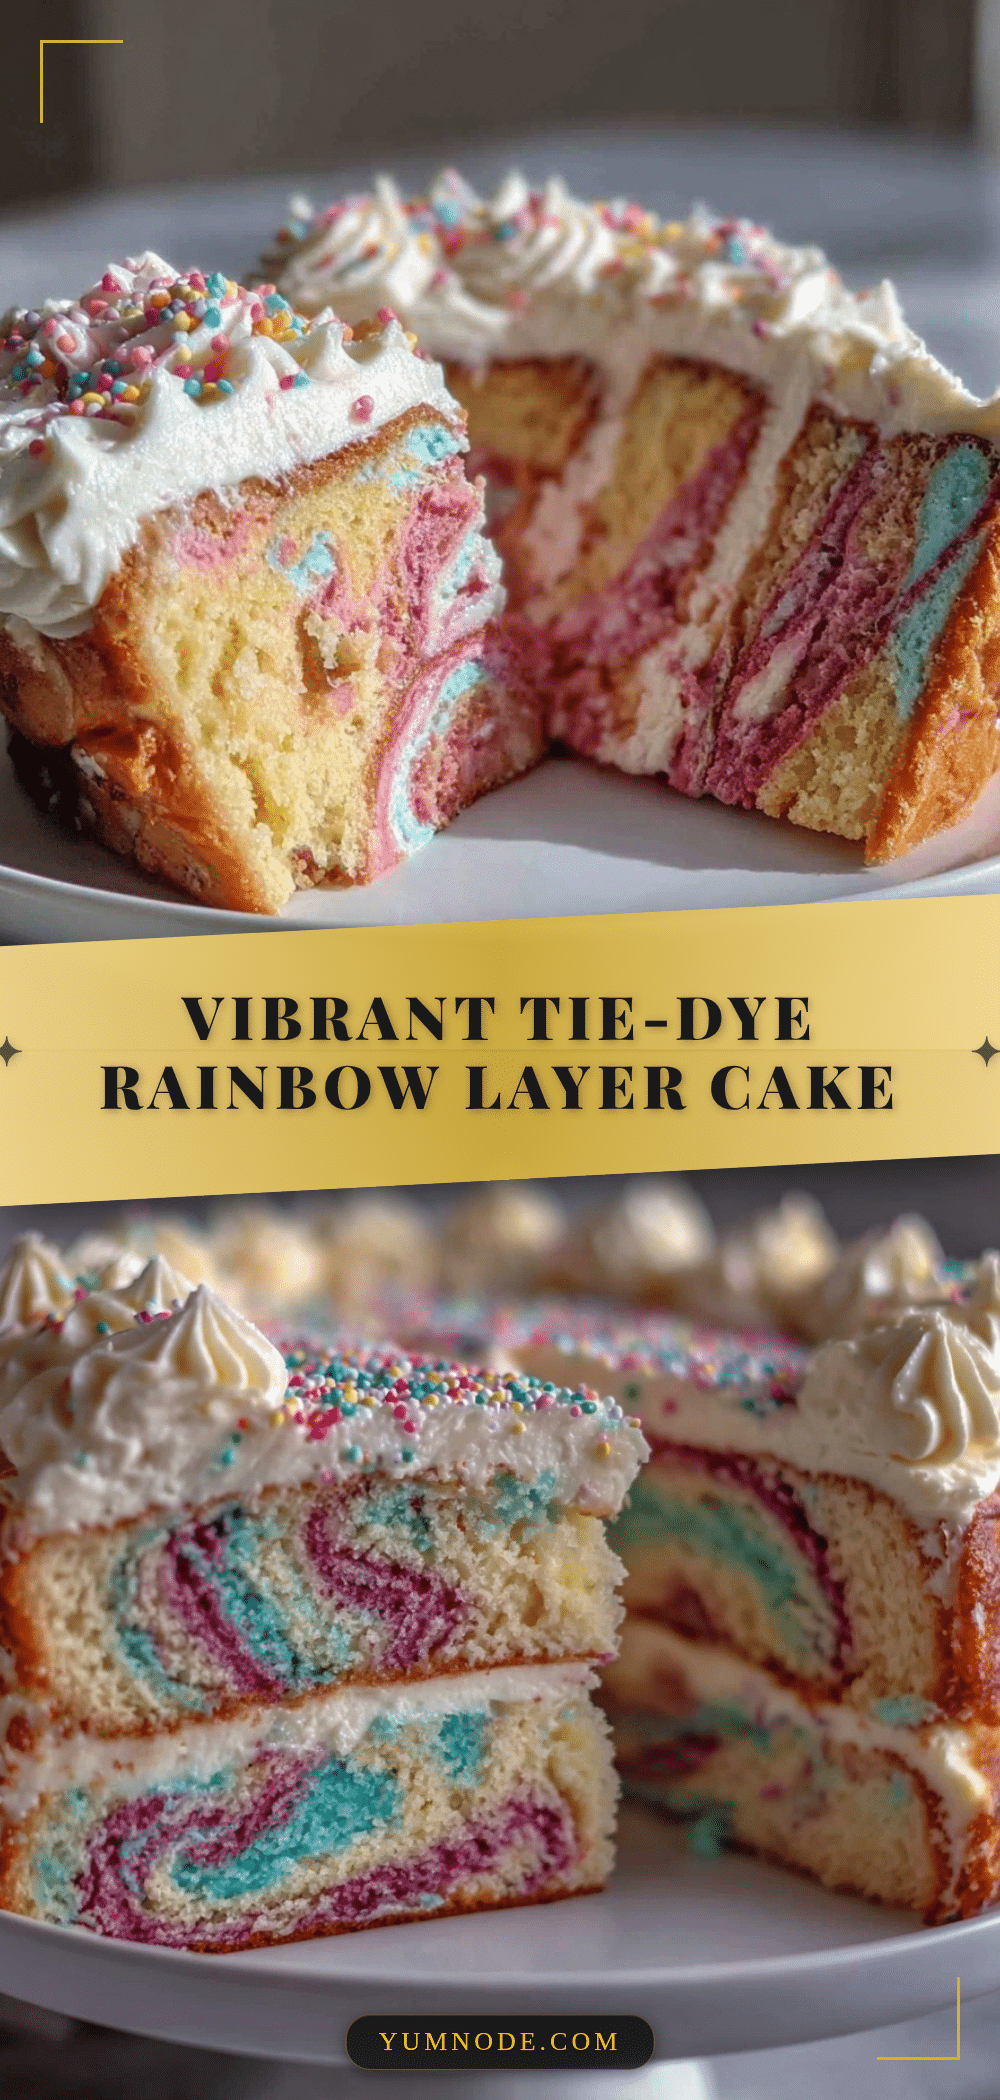
Perfect Tie-Dye Rainbow Layer Cake Recipe with Easy Vanilla Buttercream Frosting

A joyful and colorful vanilla layer cake with a silky vanilla buttercream frosting, perfect for celebrations and easy enough for beginners.
- Prep Time: 30 minutes
- Cook Time: 25-30 minutes
- Total Time: 1 hour 15 minutes
- Yield: 12 servings 1x
- Category: Dessert
- Cuisine: American
Ingredients
- 2 ½ cups (315 grams) all-purpose flour
- 2 ½ teaspoons baking powder
- ½ teaspoon salt
- 1 cup (227 grams) unsalted butter, softened
- 1 ¾ cups (350 grams) granulated sugar
- 4 large eggs, room temperature
- 2 teaspoons pure vanilla extract
- 1 cup (240 ml) whole milk, room temperature
- Gel food coloring (red, orange, yellow, green, blue, purple)
- For the Vanilla Buttercream Frosting:
- 1 cup (227 grams) unsalted butter, softened
- 4 cups (480 grams) powdered sugar, sifted
- 2 teaspoons pure vanilla extract
- 2–3 tablespoons (30-45 ml) heavy cream
- Pinch of salt
Instructions
- Preheat oven to 350°F (175°C). Grease and flour three 8-inch cake pans or line with parchment paper.
- In a medium bowl, whisk together flour, baking powder, and salt.
- Using an electric mixer, beat softened butter and granulated sugar until pale and fluffy, about 4-5 minutes.
- Beat in eggs one at a time, mixing well after each addition, then stir in vanilla extract.
- Add dry ingredients and whole milk alternately to the butter mixture, starting and ending with dry ingredients. Mix gently but thoroughly.
- Divide batter evenly into six bowls. Add a different gel food coloring to each bowl and stir gently until colors are vibrant.
- Spoon small dollops of each colored batter into the center of each cake pan, alternating colors to create a tie-dye pattern.
- Bake for 25-30 minutes or until a toothpick inserted comes out clean. Rotate pans halfway through baking.
- Cool cakes in pans for 10 minutes, then transfer to wire racks to cool completely.
- For the frosting, beat softened butter until creamy. Gradually add powdered sugar on low speed.
- Add vanilla extract, salt, and heavy cream to reach spreadable consistency. Beat on high for 3-4 minutes until fluffy.
- Assemble cake by layering cake and frosting, finishing with frosting on top and sides. Smooth with an offset spatula or decorate with piping bags.
Notes
Use room temperature eggs and butter for best texture. Weigh batter portions for even layers. Use gel food coloring for vibrant colors without thinning batter. Avoid overmixing after adding flour to prevent dense cake. Cool cakes completely before frosting to avoid melting buttercream. For extra flair, apply a crumb coat before final frosting. For dairy-free, substitute coconut oil and almond milk; use coconut cream frosting. Cake layers can be baked a day ahead and stored wrapped in fridge.
Nutrition
- Serving Size: 1 slice (1/12 of cak
- Calories: 350
- Fat: 18
- Carbohydrates: 45
- Protein: 3
Keywords: tie-dye cake, rainbow cake, vanilla buttercream, layer cake, colorful cake, celebration cake, easy cake recipe