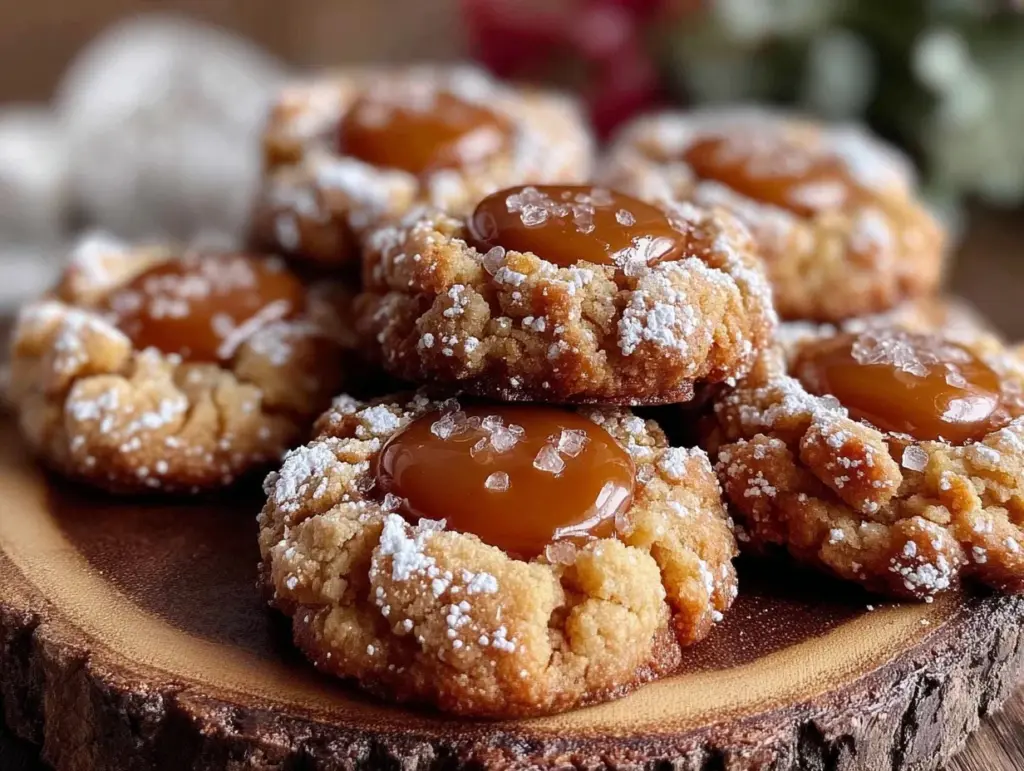
The first time I made these salted caramel thumbprint cookies, it was a complete accident. Honestly, I was halfway through making a batch of plain sugar cookies when I realized I forgot the vanilla extract. Instead of tossing the dough, I grabbed a jar of salted caramel sauce I had stashed in the fridge and decided to press a small well into each cookie, filling it with that sticky, buttery goodness. The result? Magic. The edges baked up impossibly crispy, while the centers held that gooey caramel that made every bite a little celebration. It was one of those “well, that turned out better than expected” moments that makes you want to bake the same batch over and over for a week straight.
These cookies quickly became my go-to treat when I wanted something that felt homemade but also a bit fancy. They’re perfect for when you have a quiet afternoon to yourself—or when you need a sweet pick-me-up after a long day. The way the caramel melts just right, mingling with the buttery cookie, is honestly something you have to experience to believe. It’s not just a cookie; it’s a cozy little moment of joy you can hold in your hand.
What’s funny is how the crispy edges came about. I tend to underbake cookies slightly, but this time I let the edges get that golden crunch, and that texture contrast became the real star. So, if you’ve ever felt skeptical about mixing caramel with cookies or worried about soggy centers, these salted caramel thumbprint cookies with crispy edges will softly nudge you into the “trust me” zone. They stuck with me because they’re simple, a bit indulgent, and honestly, just the kind of cookie you’ll want to share—or maybe not.
Why You’ll Love This Recipe
This salted caramel thumbprint cookies recipe isn’t just another sweet treat—it’s the kind of recipe that’s been tested, tweaked, and loved through many batches in my kitchen. I’ve made these cookies for friends, family, and even last-minute guests, and the feedback is always the same: “Can I have the recipe?” Here’s why you’ll want to bake these yourself:
- Quick & Easy: These cookies come together in under 30 minutes, perfect for those busy evenings when you want a homemade treat without the fuss.
- Simple Ingredients: No need to hunt down fancy stuff—basic pantry staples like butter, sugar, flour, and that luscious salted caramel sauce make this recipe straightforward and satisfying.
- Perfect for Any Occasion: Whether you’re bringing treats to a potluck, surprising someone special, or just craving a cozy dessert, these cookies fit the bill.
- Crowd-Pleaser: Kids and adults alike can’t resist the crispy edges paired with that gooey, salty-sweet center. It’s a crowd-pleaser every time.
- Uniquely Textured: The secret is in the perfectly crispy edges contrasting with the soft, tender cookie and molten caramel center. This recipe nails that balance.
What makes this cookie different from the rest? The thumbprint technique paired with a sprinkle of sea salt on top really brings out the caramel’s flavor without overpowering the cookie. Plus, a little insider tip: chilling the dough before baking helps keep the edges crisp while the centers stay soft and gooey. If you love treats like my soft funfetti cake batter cookies, you’ll find this salted caramel version just as irresistible, with that grown-up twist of salty sweetness that keeps you coming back.
What Ingredients You Will Need
This recipe uses simple, wholesome ingredients to deliver bold flavor and satisfying texture without the fuss. Most of these are pantry staples, and the salted caramel sauce is the star that brings everything together.
- For the Cookie Dough:
- 1 cup (227g) unsalted butter, softened (adds richness and helps with that melt-in-your-mouth texture)
- 3/4 cup (150g) granulated sugar
- 1 large egg, room temperature
- 1 teaspoon pure vanilla extract (you can use store-bought or homemade for best flavor)
- 2 1/4 cups (280g) all-purpose flour
- 1/2 teaspoon baking powder
- 1/4 teaspoon salt
- For the Filling:
- 3/4 cup salted caramel sauce (I prefer Trader Joe’s or homemade for that perfect balance of salty and sweet)
- For the Finish:
- Flaky sea salt, for sprinkling (this really amps up the salted caramel flavor)
Tips: If you don’t have salted caramel sauce handy, you can make a quick version by melting brown sugar with butter and a pinch of sea salt. For a dairy-free option, swap the butter for coconut oil and use a dairy-free caramel sauce. If you want a gluten-free twist, almond flour works well, though the texture will be a bit different but still delicious.
Equipment Needed
To get these salted caramel thumbprint cookies just right, you don’t need fancy gadgets—just basic kitchen tools that most home bakers have on hand.
- Mixing bowls (preferably one large for dough mixing)
- Electric hand mixer or stand mixer (makes creaming butter and sugar a breeze, but you can do it by hand if you’re up for it)
- Baking sheets lined with parchment paper or silicone mats (to prevent sticking and ensure even baking)
- Measuring cups and spoons (precision matters for baking!)
- Small spoon or melon baller (to create the perfect thumbprint indentations)
- Cooling racks (to let your cookies crisp up as they cool)
If you don’t have a hand mixer, no worries—just be ready for a bit more arm work. For baking sheets, I personally love silicone mats because they’re reusable and make cleanup so much easier. And remember, keeping your butter softened but not melted is key, so if you don’t have a microwave, just leave it out on the counter about 30 minutes before baking.
Preparation Method

- Cream Butter and Sugar: In a large mixing bowl, beat 1 cup (227g) softened unsalted butter with 3/4 cup (150g) granulated sugar until light and fluffy. This should take about 3-4 minutes with an electric mixer. The texture will be pale and soft—that’s your cue.
- Add Egg and Vanilla: Beat in 1 large egg and 1 teaspoon vanilla extract until combined. The mixture might look a bit glossy now.
- Combine Dry Ingredients: In a separate bowl, whisk together 2 1/4 cups (280g) all-purpose flour, 1/2 teaspoon baking powder, and 1/4 teaspoon salt. This step helps distribute the leavening evenly, so your cookies rise just right.
- Mix Dry and Wet Ingredients: Gradually add the dry ingredients to the butter mixture, mixing on low speed until just combined. Overmixing can lead to tough cookies, so stop as soon as you see no more flour streaks.
- Chill the Dough: Wrap the dough in plastic wrap and refrigerate for at least 30 minutes. This step keeps the dough firm, which helps maintain those crisp edges while baking.
- Preheat Oven: Set your oven to 350°F (175°C) and line baking sheets with parchment paper or silicone mats.
- Shape Cookies: Scoop dough into 1-inch (2.5 cm) balls and place them 2 inches apart on the baking sheets. Using your thumb or a small spoon, press a deep indentation into the center of each ball—this is where the caramel will go.
- Add Caramel Filling: Fill each indentation with about 1/2 teaspoon of salted caramel sauce. Be careful not to overfill, or the caramel might overflow while baking.
- Bake: Bake for 12-15 minutes, or until the edges are golden and crisp but the centers still look slightly soft. The caramel will bubble a little, and the aroma will be utterly mouthwatering.
- Cool and Finish: Remove from oven and immediately sprinkle a tiny pinch of flaky sea salt on each cookie. Transfer cookies to cooling racks and let cool completely. The caramel will firm up slightly but remain gooey inside.
Pro tip: If your caramel is too thick to spoon easily, warm it gently in the microwave for 10-15 seconds. Also, watch the baking time closely—too long and the caramel dries out; too short and the cookie might be underdone.
Cooking Tips & Techniques
Getting that perfect crispy edge with a soft, caramel-filled center is all about timing and temperature. Here are a few tips I’ve picked up along the way:
- Chill Your Dough: This isn’t just for convenience; chilled dough helps the cookies hold their shape and develop crisp edges rather than spreading flat and thin.
- Use Room Temperature Ingredients: Butter and eggs that are too cold won’t mix evenly, and your dough might be tough to work with.
- Don’t Overfill the Thumbprints: Too much caramel can bubble over and make a sticky mess in the oven. It’s tempting, but less is more here.
- Watch Your Oven: Every oven bakes differently. Start checking at 12 minutes, so you catch that golden edge without overbaking.
- Flaky Sea Salt Is a Game-Changer: A sprinkle right after baking adds just the right salty crunch that cuts through the sweetness.
- Storage Matters: Store cookies in an airtight container once cooled to keep the edges crispy. If they soften, a quick 5-minute toast in a 300°F (150°C) oven crisps them right back up.
Funny enough, I once tried scooping the caramel before baking, thinking it might caramelize more. Nope. It just made a mess. So, trust the method here—it really works. And if you ever feel like switching things up, try dipping half the cookie in melted chocolate after cooling—talk about next-level indulgence!
Variations & Adaptations
While these salted caramel thumbprint cookies are fantastic as is, I’ve played around with a few tweaks that turned out pretty great:
- Nutty Twist: Add chopped pecans or walnuts to the dough for a little crunch and to complement the caramel’s richness.
- Chocolate Drizzle: Once cooled, drizzle melted dark or milk chocolate over the cookies for an extra decadent touch.
- Spiced Caramel: Stir a pinch of cinnamon or chili powder into the caramel before filling for a warm, unexpected kick.
- Gluten-Free: Swap all-purpose flour with a 1:1 gluten-free baking flour blend. The texture will be slightly different but still delicious.
- Vegan Option: Use vegan butter and a dairy-free caramel sauce. Just be sure to use a flax egg or another egg substitute to keep the dough binding properly.
One personal favorite is adding a tiny bit of espresso powder to the dough—the subtle coffee note really enhances the caramel’s depth. If you like experimenting, these cookies are a forgiving canvas for your creativity. They’re also a nice companion to the creamy key lime pie bars for a summer dessert spread that balances tart and sweet beautifully.
Serving & Storage Suggestions
These salted caramel thumbprint cookies are best served at room temperature when the caramel is soft but not runny. They pair wonderfully with a cup of coffee or a glass of cold milk—honestly, that combo is hard to beat.
For a festive touch, arrange them on a decorative platter with a light dusting of powdered sugar or a few edible flowers for a party or holiday gathering. They also make lovely gifts when packed in a pretty tin or box.
To store, keep the cookies in an airtight container at room temperature for up to 4 days. If you want to keep them longer, freeze in a single layer on a baking sheet until solid, then transfer to a freezer-safe bag for up to 3 months. Thaw at room temperature before serving.
If the caramel firms up too much in the fridge or freezer, pop the cookies in a warm oven (about 300°F / 150°C) for 5 minutes to soften them back up without melting the edges. This trick also helps bring back their crispiness if they soften during storage.
Nutritional Information & Benefits
Each salted caramel thumbprint cookie provides approximately 150-170 calories depending on size, with moderate amounts of fat and sugar. The butter and caramel contribute to the richness, while the flour and egg add structure and protein.
While these cookies are definitely an indulgence, the use of real butter and a touch of sea salt balances the sweetness, making each bite satisfying enough that you don’t feel the need to overdo it. If you want to lighten them up, try the nutty variation for some added fiber and healthy fats.
For those with dietary restrictions, the recipe adapts well to gluten-free and vegan swaps, making it flexible for different needs. Just watch for caramel sauces that may contain dairy or other allergens.
Conclusion
If you’re looking for a cookie that’s simple yet special, these salted caramel thumbprint cookies with crispy edges should be on your baking list. They’re the kind of treat that feels homemade and thoughtful, even when you whip them up on a whim. What I love most is how they invite you to slow down and savor that perfect mix of crunch and gooey caramel—comfort food with a twist.
Don’t hesitate to make the recipe your own by trying the variations or pairing them with something zesty like a slice of pumpkin spice bread with cream cheese swirl. Baking these cookies has become one of my favorite little rituals, and I hope they bring that same warm feeling to your kitchen. Let me know how your batch turns out, and share any fun twists you try. Happy baking!
FAQs
Can I make the salted caramel thumbprint cookies ahead of time?
Yes! You can prepare the dough and refrigerate it for up to 24 hours before baking. You can also bake the cookies and store them in an airtight container for several days.
What’s the best way to prevent the caramel from leaking during baking?
Don’t overfill the thumbprint wells—use about 1/2 teaspoon of caramel per cookie. Also, chilling the dough helps the cookies keep their shape, reducing caramel overflow.
Can I use homemade caramel sauce instead of store-bought?
Absolutely! Homemade caramel adds a lovely personal touch. Just make sure it’s thick enough to hold shape but soft enough to spoon into the cookies.
How do I keep the cookie edges crispy after storing?
Store cookies in an airtight container at room temperature. If they soften, re-crisp them by warming in a 300°F (150°C) oven for 5 minutes before serving.
Are these cookies suitable for freezing?
Yes, you can freeze baked cookies in a single layer for up to 3 months. Thaw at room temperature and warm slightly before serving if desired.
Pin This Recipe!

Salted Caramel Thumbprint Cookies

These salted caramel thumbprint cookies feature crispy edges with a gooey, salty-sweet caramel center, making them a perfect homemade treat for any occasion.
- Prep Time: 15 minutes
- Cook Time: 15 minutes
- Total Time: 30 minutes
- Yield: 24 cookies 1x
- Category: Dessert
- Cuisine: American
Ingredients
- 1 cup (227g) unsalted butter, softened
- 3/4 cup (150g) granulated sugar
- 1 large egg, room temperature
- 1 teaspoon pure vanilla extract
- 2 1/4 cups (280g) all-purpose flour
- 1/2 teaspoon baking powder
- 1/4 teaspoon salt
- 3/4 cup salted caramel sauce
- Flaky sea salt, for sprinkling
Instructions
- In a large mixing bowl, beat 1 cup softened unsalted butter with 3/4 cup granulated sugar until light and fluffy, about 3-4 minutes with an electric mixer.
- Beat in 1 large egg and 1 teaspoon vanilla extract until combined.
- In a separate bowl, whisk together 2 1/4 cups all-purpose flour, 1/2 teaspoon baking powder, and 1/4 teaspoon salt.
- Gradually add the dry ingredients to the butter mixture, mixing on low speed until just combined.
- Wrap the dough in plastic wrap and refrigerate for at least 30 minutes.
- Preheat oven to 350°F (175°C) and line baking sheets with parchment paper or silicone mats.
- Scoop dough into 1-inch balls and place 2 inches apart on baking sheets. Press a deep indentation into the center of each ball using your thumb or a small spoon.
- Fill each indentation with about 1/2 teaspoon salted caramel sauce, being careful not to overfill.
- Bake for 12-15 minutes, until edges are golden and crisp but centers look slightly soft.
- Remove from oven and immediately sprinkle a tiny pinch of flaky sea salt on each cookie.
- Transfer cookies to cooling racks and let cool completely.
Notes
Chill the dough before baking to keep edges crisp and centers soft. Do not overfill the thumbprints to prevent caramel overflow. If caramel is too thick, warm gently in microwave for 10-15 seconds. Store cookies in an airtight container at room temperature for up to 4 days or freeze for up to 3 months. Re-crisp softened cookies by warming in a 300°F oven for 5 minutes.
Nutrition
- Serving Size: 1 cookie
- Calories: 160
- Sugar: 12
- Sodium: 90
- Fat: 9
- Saturated Fat: 5
- Carbohydrates: 20
- Fiber: 0.5
- Protein: 2
Keywords: salted caramel cookies, thumbprint cookies, caramel thumbprint, crispy edge cookies, homemade cookies, easy cookie recipe, caramel dessert



