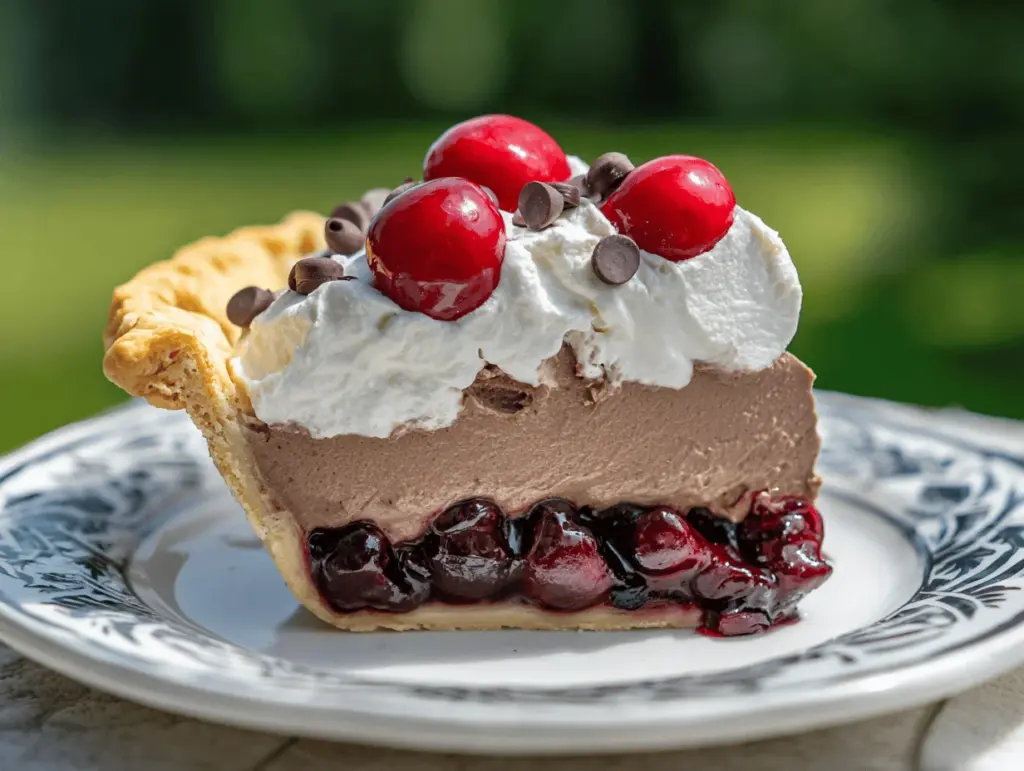
The first time I sliced into a chocolate cherry cream pie, the glossy, ruby-red cherries glistened like jewels against the pillowy whipped cream and rich chocolate filling. You know that moment when everyone at the table goes silent for just a second, then someone says, “Wow”? That’s the kind of magic this pie brings. Honestly, I stumbled upon this recipe during a holiday dessert swap, and it instantly became the most-requested treat in my family. There’s something about the blend of silky chocolate, tart cherries, and creamy layers that hits all the right notes—comforting, nostalgic, and just a little bit fancy.
I’ve made this chocolate cherry cream pie more times than I can count—sometimes as a showstopper for birthday parties, other times just because a Tuesday needed a boost. The beauty of this dessert is its flexibility: it’s impressive enough for guests but easy enough to whip up on a whim. Whether you’re a pie pro or a baking newbie, you’ll find this recipe forgiving and fun. I’ve tested it with fresh cherries in summer and canned ones in winter, swapped crusts, and even played around with the filling for friends who are dairy-free. Every time, it turns out dreamy.
If you love classic desserts with a twist or need a reliable, crowd-pleasing pie for any occasion, you’ll want to keep this chocolate cherry cream pie recipe in your back pocket. It’s become a staple in my kitchen for its irresistible flavor and the pure joy it brings to everyone who tries it. Trust me—once you taste that first creamy, chocolatey, cherry-laden bite, you’ll understand why I keep coming back to this recipe again and again.
Why You’ll Love This Chocolate Cherry Cream Pie
- Quick & Easy: Comes together in about an hour (plus chilling)—perfect for last-minute gatherings or when you need dessert in a pinch.
- Simple Ingredients: No rare or pricey ingredients—just classic pantry staples and a few fresh items.
- Perfect for Parties: This pie looks stunning on a dessert table and slices beautifully for serving at potlucks, celebrations, or holiday dinners.
- Crowd-Pleaser: Kids, adults, chocoholics, and fruit lovers all rave about the rich, creamy filling and that pop of cherry flavor.
- Unbelievably Delicious: The combination of velvety chocolate, tangy cherries, and luscious whipped cream is pure comfort with a touch of elegance.
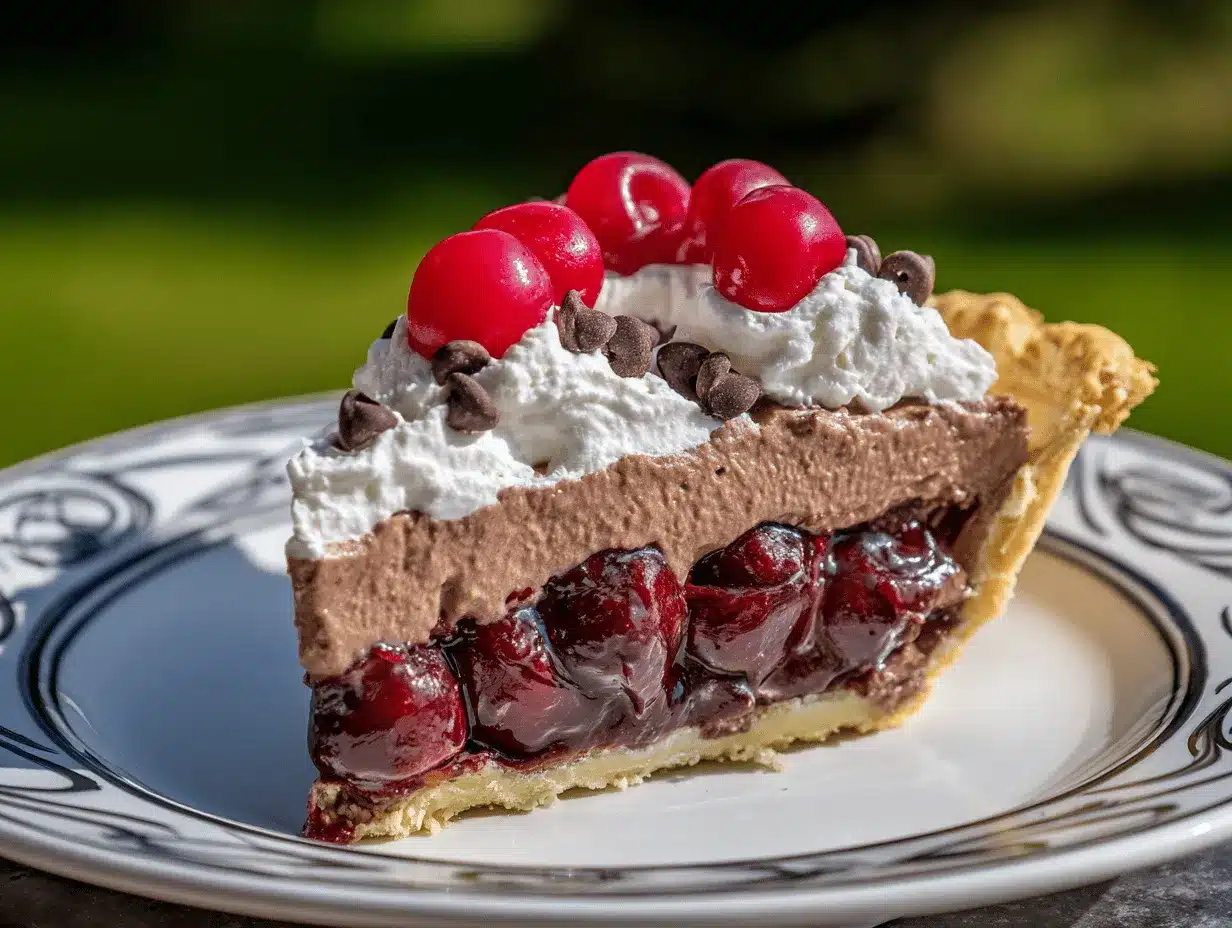
I’ve tested dozens of cream pies, but this chocolate cherry cream pie stands out because of its balanced layers. Instead of just folding cherries into chocolate filling, I layer a smooth chocolate custard, real whipped cream, and a vibrant cherry topping—each bite gives you a little of everything. Blending a touch of almond extract into the filling (my secret weapon) deepens the cherry flavor. The crust? A chocolate cookie crust that’s buttery, crisp, and totally foolproof, even if you’re not a regular baker.
Honestly, this isn’t just another chocolate pie. It’s that slice you save for yourself at the end of the night or the one you sneak out of the fridge for breakfast (no shame here). The recipe comes from years of tweaking and plenty of family taste tests—I know you’ll love it as much as we do. It’s perfect for making memories, impressing friends, or just treating yourself to a little decadence with minimal fuss.
What Ingredients You Will Need
This chocolate cherry cream pie recipe uses familiar ingredients that pack a ton of flavor. Most are probably in your kitchen right now, and a few can be swapped or adjusted to fit your needs. Let’s break it down:
- For the Crust:
- Chocolate wafer cookies (about 1 1/2 cups / 180g crushed) – I love using Nabisco Famous Wafers, but any crisp chocolate cookie works.
- Unsalted butter (6 tbsp / 85g, melted) – Adds richness and binds the crust.
- Pinch of salt – Just a hint to balance all that sweetness.
- For the Chocolate Cream Filling:
- Whole milk (1 1/2 cups / 360ml) – Gives the custard a creamy base.
- Heavy cream (1/2 cup / 120ml) – For extra silkiness.
- Egg yolks (3 large) – Thickens the filling and gives a luscious texture.
- Granulated sugar (2/3 cup / 135g) – Sweetens just right.
- Cornstarch (1/4 cup / 30g) – Helps set the custard.
- Semi-sweet chocolate (4 oz / 115g, finely chopped) – Use a good-quality bar for the richest flavor. Ghirardelli or Baker’s are my go-tos.
- Cocoa powder (2 tbsp / 12g, unsweetened) – Deepens the chocolate flavor.
- Unsalted butter (2 tbsp / 28g, softened) – Adds smoothness and shine.
- Vanilla extract (1 tsp / 5ml)
- Almond extract (1/4 tsp / 1ml, optional but recommended) – Boosts the cherry notes.
- For the Cherry Topping:
- Cherries (2 cups / 300g, pitted and halved) – Fresh in summer, or use thawed frozen or high-quality canned cherries in juice (drained).
- Granulated sugar (1/4 cup / 50g) – Helps the cherries get glossy and sweet.
- Lemon juice (1 tbsp / 15ml) – Brightens the flavor.
- Cornstarch (1 tbsp / 8g, mixed with 2 tbsp water)
- Almond extract (1/4 tsp / 1ml, optional) – Echoes the almond in the filling.
- For the Whipped Cream:
- Heavy cream (1 cup / 240ml, cold)
- Powdered sugar (2 tbsp / 15g)
- Vanilla extract (1/2 tsp / 2.5ml)
- Garnish (Optional):
- Shaved chocolate or chocolate curls (for topping)
- Extra cherries (for decoration)
If you need gluten-free, swap in gluten-free chocolate cookies for the crust. Dairy-free? Use coconut milk and coconut cream for the filling and topping. For a shortcut, you can use a store-bought chocolate crust, but homemade really does taste special. In winter, I’ve even used canned cherry pie filling in a pinch—no one complained!
Equipment Needed
- 9-inch (23cm) Pie Plate: Glass or ceramic works best—metal can make the crust brown too quickly.
- Food Processor or Plastic Bag & Rolling Pin: For crushing cookies. If you don’t have a food processor, place cookies in a zip-top bag and smash away (kids love helping with this part!).
- Medium Saucepan: For cooking the custard and cherry topping.
- Whisk: Crucial for lump-free filling.
- Mixing Bowls: At least two—one for cream, one for custard.
- Electric Mixer (Hand or Stand): For whipping cream. You can whip by hand, but it’s an arm workout.
- Measuring Cups & Spoons: Precision matters, especially for the custard.
- Rubber Spatula: For scraping every last bit of filling.
- Plastic Wrap: To cover the pie while chilling.
If you don’t own an electric mixer, a balloon whisk and some elbow grease work for the whipped cream—just chill your bowl first. I’ve tried making this in disposable pie pans for potlucks, but the crust sometimes sticks, so grease lightly or stick with glass. If your saucepan is prone to burning, keep the heat low and stir constantly.
Preparation Method
- Make the Crust:
- Preheat oven to 350°F (175°C).
- Crush chocolate wafer cookies into fine crumbs (about 1 1/2 cups / 180g) using a food processor or bag and rolling pin.
- Mix cookie crumbs with 6 tbsp (85g) melted butter and a pinch of salt.
- Press mixture firmly into bottom and up the sides of a 9-inch (23cm) pie plate. Use the bottom of a measuring cup for even packing.
- Bake for 8–10 minutes, until set and just fragrant. Cool completely. (Don’t skip cooling, or the filling will melt!)
- Prepare the Chocolate Cream Filling:
- In a medium saucepan, whisk together 1 1/2 cups (360ml) milk, 1/2 cup (120ml) heavy cream, 2/3 cup (135g) sugar, 1/4 cup (30g) cornstarch, and a pinch of salt.
- In a small bowl, whisk 3 egg yolks. Temper by slowly whisking in a few tablespoons of the hot milk mixture.
- Pour tempered eggs into saucepan, whisking constantly.
- Cook over medium heat, stirring constantly, until thick and bubbly—about 5–7 minutes.
- Remove from heat. Add 4 oz (115g) chopped chocolate, 2 tbsp (28g) butter, 2 tbsp (12g) cocoa powder, 1 tsp vanilla, and 1/4 tsp almond extract. Stir until smooth and glossy.
- Press filling through a sieve for extra silkiness (optional, but great if you want zero lumps).
- Pour chocolate filling into cooled crust. Smooth top. Cover with plastic wrap (press directly onto surface to prevent skin forming). Chill at least 2 hours, or until set.
- Make the Cherry Topping:
- In a saucepan, combine 2 cups (300g) cherries, 1/4 cup (50g) sugar, and 1 tbsp (15ml) lemon juice.
- Cook over medium heat, stirring, until cherries release juices and sugar dissolves—about 5 minutes.
- Mix 1 tbsp (8g) cornstarch with 2 tbsp water, then stir into cherries. Cook until thickened and glossy, about 1–2 minutes.
- Remove from heat. Stir in 1/4 tsp almond extract (if using). Cool to room temperature.
- Whip the Cream:
- In a chilled bowl, beat 1 cup (240ml) heavy cream, 2 tbsp (15g) powdered sugar, and 1/2 tsp vanilla until soft peaks form.
- Don’t overbeat—stop when the cream holds its shape but isn’t chunky.
- Assemble the Pie:
- Spread whipped cream evenly over chilled chocolate filling.
- Spoon cooled cherry topping on top, letting some juices drip down the sides for drama.
- Garnish with chocolate shavings or extra cherries if you’re feeling fancy.
- Chill & Serve:
- Chill at least 1 hour before slicing for neat pieces. For best results, use a sharp knife wiped clean between slices.
- Store leftovers covered in the fridge up to 3 days.
If your filling won’t set, double-check your cornstarch and cook it until it thickens. Watery cherry topping? Simmer a minute longer. My personal tip: make the crust and filling a day ahead, then assemble just before serving for maximum ease (and flavor!).
Cooking Tips & Techniques
- If you want the smoothest chocolate filling, take the extra minute to strain it through a fine sieve. It’s worth it—trust me, after one too many lumpy custards, I never skip this step!
- For the cherry topping, don’t walk away from the stove. Cherries can scorch quickly. Stir gently and keep the heat medium-low.
- Chill every layer well. A warm crust or filling will melt your cream and turn the pie into a puddle—learned that lesson the hard way after rushing for a picnic.
- Use real heavy cream for whipping. Some “whipping toppings” just don’t hold up or taste as rich.
- For perfect chocolate curls, use a vegetable peeler on a cold chocolate bar. If the curls break, warm the chocolate slightly with your hand for a few seconds.
- If you’re making the pie ahead, wait to add the cherry topping and garnishes until just before serving for best texture and color.
- Pie won’t slice cleanly? Dip your knife in hot water, wipe dry, then slice—works like a charm.
- If you’re short on time, assemble the pie with a store-bought chocolate crust. It’s not quite as special, but it’ll still wow your crowd.
Don’t be afraid to tweak the filling thickness or sweetness—taste as you go and adjust. I once made the cherry layer a little too tart, so I added a spoonful of extra sugar. The pie still disappeared in record time. Baking is half science, half happy accidents!
Variations & Adaptations
- Gluten-Free: Swap in gluten-free chocolate cookies for the crust, or use almond meal mixed with cocoa powder for a nutty version.
- Dairy-Free: Use coconut milk in place of dairy milk and coconut cream for the whipped cream. Earth Balance or another vegan butter works well for the crust.
- Seasonal Twist: In summer, use fresh pitted cherries and a splash of cherry liqueur (like Kirsch) for adults. In winter, canned or frozen cherries work just as well.
- Chocolate Lovers’ Version: Double the chocolate in the filling and top with mini chocolate chips for extra decadence.
- Nut-Free: Omit almond extract and use a plain vanilla cookie crust if needed.
I once added a swirl of peanut butter to the filling for my brother, who’s a peanut butter fanatic. It was a hit! You can also make mini pies in muffin tins for parties—just reduce the baking time for the crust and chill in individual cups. This chocolate cherry cream pie recipe is easy to make your own, so don’t be shy about experimenting.
Serving & Storage Suggestions
This chocolate cherry cream pie is best served chilled, straight from the fridge. It slices neatly and holds its shape, so it’s perfect for parties or potlucks. For a pretty presentation, add extra cherries and some chocolate curls on top just before serving. I love plating each slice with a drizzle of cherry syrup or a scoop of vanilla ice cream for an extra treat.
Got leftovers? Cover the pie loosely with plastic wrap or foil and refrigerate for up to 3 days. The crust stays crisp and the flavors meld even more. If you need to store longer, freeze individual slices (wrapped well) for up to a month—just thaw in the fridge overnight before serving. To refresh the whipped cream, you can add a quick dollop of freshly whipped cream on top after thawing.
Reheating isn’t necessary, but if you like a softer, mousse-like texture, let a slice sit at room temperature for 10–15 minutes before eating. Honestly, the flavors deepen with time, and the cherry topping stays bright and juicy even after a couple of days.
Nutritional Information & Benefits
Each slice of chocolate cherry cream pie (1/8th of the pie) clocks in at about 380–410 calories, with 5g protein, 22g fat, and 45g carbohydrates. The cherries pack in vitamin C and antioxidants, while the dark chocolate is rich in flavonoids—so you get a little boost of goodness with your treat! This pie can be made gluten-free or dairy-free to fit different dietary needs, and you can reduce sugar slightly if desired.
Allergens to watch for: dairy, eggs, gluten (unless using substitutions), and possible tree nuts if you use almond extract or nut-based crusts. Personally, I love that this dessert feels indulgent but still has real fruit and wholesome ingredients—it’s a little bit of self-care in pie form!
Conclusion
If you’re looking for a show-stopping, easy-to-make dessert that’ll have everyone asking for seconds, this chocolate cherry cream pie recipe is your new best friend. It’s got all the comfort of a classic cream pie, a surprise burst of cherry flavor, and enough chocolate to satisfy any sweet tooth. You can make it ahead, switch up the layers, and even sneak a slice for breakfast (I won’t judge).
I adore this pie because it’s deliciously reliable and never fails to impress—plus, it’s endlessly customizable. Don’t be afraid to put your own spin on it, whether you play with the crust, tweak the filling, or pile on extra cherries. If you give this chocolate cherry cream pie a try, I’d love to hear how it turns out! Leave a comment, share your photos, or let me know your favorite variation.
Happy baking, and may every slice bring a little extra joy to your table!
FAQs About Chocolate Cherry Cream Pie
Can I use frozen or canned cherries instead of fresh?
Absolutely! Just thaw and drain frozen cherries or use canned cherries packed in juice (not syrup). If using canned, drain well and reduce sugar in the cherry topping slightly.
How far in advance can I make this pie?
You can prepare the crust and chocolate filling up to 2 days ahead. Wait to add whipped cream and cherry topping until a few hours before serving for the freshest look.
What’s the best way to get clean slices?
Chill the pie thoroughly, then use a sharp knife dipped in hot water and wiped dry between cuts. This keeps the layers neat and picture-perfect.
Can I make this pie gluten-free or dairy-free?
Yes! Use gluten-free chocolate cookies for the crust and swap dairy ingredients for coconut-based alternatives in the filling and topping. The result is still rich and creamy.
Why is my chocolate filling runny?
This usually happens if the custard wasn’t cooked long enough or if the cornstarch measurement was off. Cook until it’s thick and coats the back of a spoon, and double-check your measurements for next time.
Pin This Recipe!

Chocolate Cherry Cream Pie

This decadent chocolate cherry cream pie features a buttery chocolate cookie crust, silky chocolate custard, fluffy whipped cream, and a vibrant cherry topping. It’s an easy, crowd-pleasing dessert perfect for parties, holidays, or any special occasion.
- Prep Time: 30 minutes
- Cook Time: 20 minutes
- Total Time: 3 hours
- Yield: 8 servings 1x
- Category: Dessert
- Cuisine: American
Ingredients
- 1 1/2 cups (about 180g) chocolate wafer cookies, crushed
- 6 tablespoons (85g) unsalted butter, melted
- Pinch of salt
- 1 1/2 cups (360ml) whole milk
- 1/2 cup (120ml) heavy cream
- 3 large egg yolks
- 2/3 cup (135g) granulated sugar
- 1/4 cup (30g) cornstarch
- 4 ounces (115g) semi-sweet chocolate, finely chopped
- 2 tablespoons (12g) unsweetened cocoa powder
- 2 tablespoons (28g) unsalted butter, softened
- 1 teaspoon vanilla extract
- 1/4 teaspoon almond extract (optional)
- 2 cups (300g) cherries, pitted and halved (fresh, thawed frozen, or canned in juice, drained)
- 1/4 cup (50g) granulated sugar
- 1 tablespoon (15ml) lemon juice
- 1 tablespoon (8g) cornstarch mixed with 2 tablespoons water
- 1/4 teaspoon almond extract (optional)
- 1 cup (240ml) heavy cream, cold
- 2 tablespoons (15g) powdered sugar
- 1/2 teaspoon vanilla extract
- Shaved chocolate or chocolate curls (for garnish, optional)
- Extra cherries (for garnish, optional)
Instructions
- Preheat oven to 350°F (175°C).
- Crush chocolate wafer cookies into fine crumbs using a food processor or by placing them in a plastic bag and crushing with a rolling pin.
- Mix cookie crumbs with melted butter and a pinch of salt.
- Press mixture firmly into the bottom and up the sides of a 9-inch pie plate. Use the bottom of a measuring cup for even packing.
- Bake for 8–10 minutes, until set and fragrant. Cool completely.
- In a medium saucepan, whisk together milk, heavy cream, sugar, cornstarch, and a pinch of salt.
- In a small bowl, whisk egg yolks. Temper by slowly whisking in a few tablespoons of the hot milk mixture.
- Pour tempered eggs into saucepan, whisking constantly.
- Cook over medium heat, stirring constantly, until thick and bubbly (about 5–7 minutes).
- Remove from heat. Add chopped chocolate, butter, cocoa powder, vanilla, and almond extract. Stir until smooth and glossy.
- Optional: Press filling through a sieve for extra smoothness.
- Pour chocolate filling into cooled crust. Smooth the top. Cover with plastic wrap (press directly onto surface). Chill at least 2 hours, or until set.
- For the cherry topping, combine cherries, sugar, and lemon juice in a saucepan. Cook over medium heat, stirring, until cherries release juices and sugar dissolves (about 5 minutes).
- Mix cornstarch with water, then stir into cherries. Cook until thickened and glossy, about 1–2 minutes.
- Remove from heat. Stir in almond extract (if using). Cool to room temperature.
- In a chilled bowl, beat heavy cream, powdered sugar, and vanilla until soft peaks form. Do not overbeat.
- Spread whipped cream evenly over chilled chocolate filling.
- Spoon cooled cherry topping on top, letting some juices drip down the sides.
- Garnish with chocolate shavings or extra cherries if desired.
- Chill at least 1 hour before slicing. For clean slices, use a sharp knife wiped clean between cuts.
- Store leftovers covered in the fridge up to 3 days.
Notes
For the smoothest chocolate filling, strain through a fine sieve. Chill each layer thoroughly to prevent melting. Use real heavy cream for best whipped cream texture. For gluten-free, use gluten-free chocolate cookies for the crust. For dairy-free, substitute coconut milk and coconut cream. Assemble the pie just before serving for best results. For clean slices, dip your knife in hot water and wipe dry between cuts.
Nutrition
- Serving Size: 1 slice (1/8th of pie)
- Calories: 400
- Sugar: 28
- Sodium: 160
- Fat: 22
- Saturated Fat: 13
- Carbohydrates: 45
- Fiber: 3
- Protein: 5
Keywords: chocolate cherry cream pie, chocolate pie, cherry pie, cream pie, party dessert, easy pie, holiday dessert, summer dessert, chocolate dessert, fruit pie



