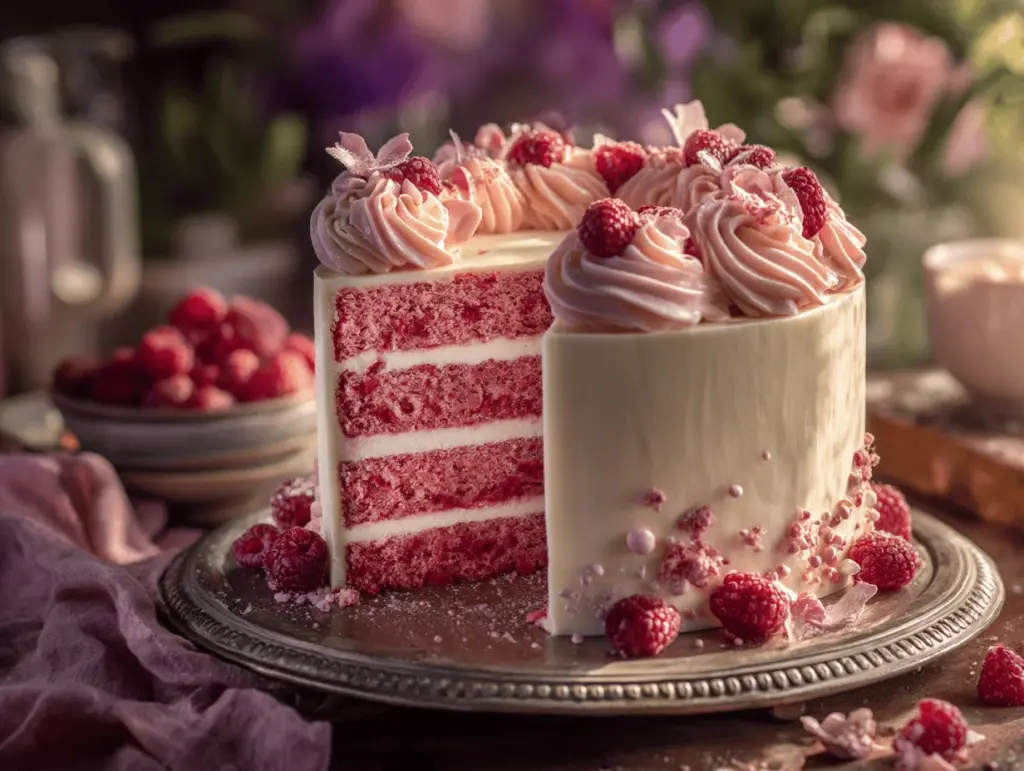
The first time I baked this raspberry pink velvet cake with vanilla bean buttercream, the whole kitchen filled with that sweet-tart berry aroma, and honestly, I knew I was hooked. There’s something about the way the pink crumb looks—like a sunset in a slice—that instantly brightens the table (and everyone’s mood). If you’ve ever wished for a cake that’s as pretty as it is delicious, this is it! It’s not just another red velvet copycat—it’s got real raspberry flavor, a tender, buttery crumb, and the most luxurious vanilla bean frosting that I’ve ever swirled on a cake.
I stumbled on the idea for this raspberry pink velvet cake recipe when my daughter wanted a “pink birthday cake that tastes like summer” (her words, not mine). After a few test runs—some a little too dense, some lacking that berry punch—I finally landed on the perfect method: using real raspberries, a touch of lemon zest, and a little buttermilk for that velvety texture. To me, this cake is pure celebration. It’s perfect for birthdays, baby showers, Valentine’s Day, or just because you need a slice of happiness. And let’s face it, the homemade vanilla bean buttercream is so good you might make extra just for sneaking spoonfuls (guilty as charged).
I’ve baked this cake more times than I can count, and every time it disappears faster than I expect. It’s become my go-to whenever I want to impress, or when I want that “wow, you made this?!” reaction. If you love that classic velvet cake feel but want something a little fresher and fruitier, you’ll adore this raspberry pink velvet cake. Whether you’re a seasoned baker or just getting started, this recipe is approachable and totally rewarding. Get ready for a cake that’s as gorgeous as it is scrumptious—your kitchen is about to smell amazing!
Why You’ll Love This Raspberry Pink Velvet Cake Recipe
- Quick & Easy: You can have this cake baked and frosted in under two hours. Perfect for when you need something show-stopping but don’t want to spend all day in the kitchen.
- Simple Ingredients: No specialty store runs required—most of what you need is likely in your pantry or fridge already. Just grab some raspberries (fresh or frozen work!), and you’re good to go.
- Perfect for Any Occasion: Whether it’s a birthday, bridal shower, or just an average Tuesday, this cake fits the bill. Its gorgeous pink hue makes it extra festive.
- Crowd-Pleaser: Every time I bring this to a party, people go back for seconds. Even kids who claim not to like “fruit cake” (my nephew!) can’t resist it.
- Unbelievably Delicious: The raspberry flavor is bright but not overpowering, and the vanilla bean buttercream is creamy, sweet, and flecked with real vanilla. The combo is next-level comfort food.
What sets this raspberry pink velvet cake apart? It’s not just about food coloring or a hint of berry. Real raspberries are blended right into the batter for a depth of flavor and a natural, stunning pink shade. The buttermilk keeps the crumb ultra-tender, while a splash of lemon zest balances everything out—trust me, this cake is anything but one-note. And the vanilla bean buttercream? It’s made with actual vanilla bean seeds, not just extract, so the flavor is pure and fragrant.
Honestly, this recipe is a little bit magical. You get that classic velvet cake vibe—moist, dense-crumbed, but still light on the palate. Every bite is a little burst of berry and cream, and let’s be real, you’ll want to lick the bowl. It’s also forgiving if you swap ingredients (I’ve learned this the hard way in a pinch). Whether you’re baking for a crowd or just treating yourself, this raspberry pink velvet cake with vanilla bean buttercream is the kind of dessert you’ll come back to again and again.
What Ingredients You Will Need
This raspberry pink velvet cake recipe relies on a handful of key ingredients to bring out the best flavor and that signature tender crumb. Most are simple, everyday staples you probably already have. Here’s what you’ll need:
- For the Cake:
- All-purpose flour (195g / 1 ½ cups, spooned and leveled) – Gives the cake its structure. I use King Arthur for consistent results.
- Granulated sugar (200g / 1 cup) – Sweetens and helps with tenderness.
- Unsalted butter, softened (113g / ½ cup) – Adds richness and moisture. Kerrygold is my go-to, but any unsalted butter works.
- Large eggs, room temperature (2) – Bind everything together and keep the crumb light.
- Buttermilk (120ml / ½ cup) – For that “velvet” texture and a slight tang. Whole milk with 1 tsp lemon juice is a decent sub in a pinch.
- Fresh or frozen raspberries (150g / 1 cup) – The star ingredient! If using frozen, thaw and drain excess liquid.
- Baking powder (1 ½ tsp) – Helps the cake rise evenly.
- Baking soda (¼ tsp) – Reacts with buttermilk for extra lift.
- Fine sea salt (¼ tsp) – Balances the sweetness.
- Pure vanilla extract (1 tsp) – For warmth and depth.
- Lemon zest (from 1 medium lemon) – Brightens the berry flavor. Meyer lemons are especially nice here.
- Pink or red gel food coloring (optional, a few drops) – For a more vibrant pink, but totally optional if your berries are extra bold.
- For the Vanilla Bean Buttercream:
- Unsalted butter, softened (226g / 1 cup) – The base of any good buttercream.
- Powdered sugar (375g / 3 cups, sifted) – Makes the frosting smooth and sweet.
- Heavy cream or whole milk (2-3 tbsp) – For a creamy, spreadable texture.
- Vanilla bean pod, seeds scraped (1) – You can use 2 tsp vanilla bean paste if that’s what you have. The specks are so pretty!
- Pinch of salt – Balances the sweetness.
Ingredient Tips: For the best raspberry pink velvet cake, always use ripe, juicy raspberries—if they’re tart, add an extra tablespoon of sugar. I’ve also swapped in strawberries when raspberries weren’t available, and it worked beautifully (the color will be lighter, but the flavor’s still great). Almond flour can be used for a gluten-free version (replace 1:1 and add an extra egg for structure). Don’t stress if you’re missing the vanilla bean pod; vanilla extract or paste works fine in the buttercream, though the flavor will be a bit less intense.
Equipment Needed
- Two 8-inch (20cm) round cake pans – For those perfect layers. I’ve used both metal and glass; metal gives a more even bake.
- Stand mixer or hand mixer – Makes creaming the butter and sugar a breeze. If you’re mixing by hand, just be ready for an arm workout!
- Large mixing bowls – At least two, one for dry and one for wet ingredients.
- Sifter or fine mesh sieve – For lump-free powdered sugar and flour.
- Spatula – For folding in raspberries and scraping the bowl clean (don’t waste a drop!).
- Microplane or zester – For zesting that lemon.
- Parchment paper – Makes removing the cake from pans totally stress-free.
- Cooling rack – You want those cakes to cool evenly—trust me, it prevents soggy bottoms.
- Offset spatula or butter knife – For smooth, swoopy buttercream.
I’ve baked this in both regular round pans and a square glass dish (for a “casual” snack cake vibe). If you only have one cake pan, just bake the layers one at a time—no biggie! For budget-friendly gear, I’ve found the Wilton cake pans hold up well, and a basic hand mixer does the trick if you don’t own a stand mixer. Just make sure to thoroughly wash your mixer paddles between cake and frosting—leftover berry bits in buttercream is…not ideal.
Preparation Method: How to Make Raspberry Pink Velvet Cake with Vanilla Bean Buttercream
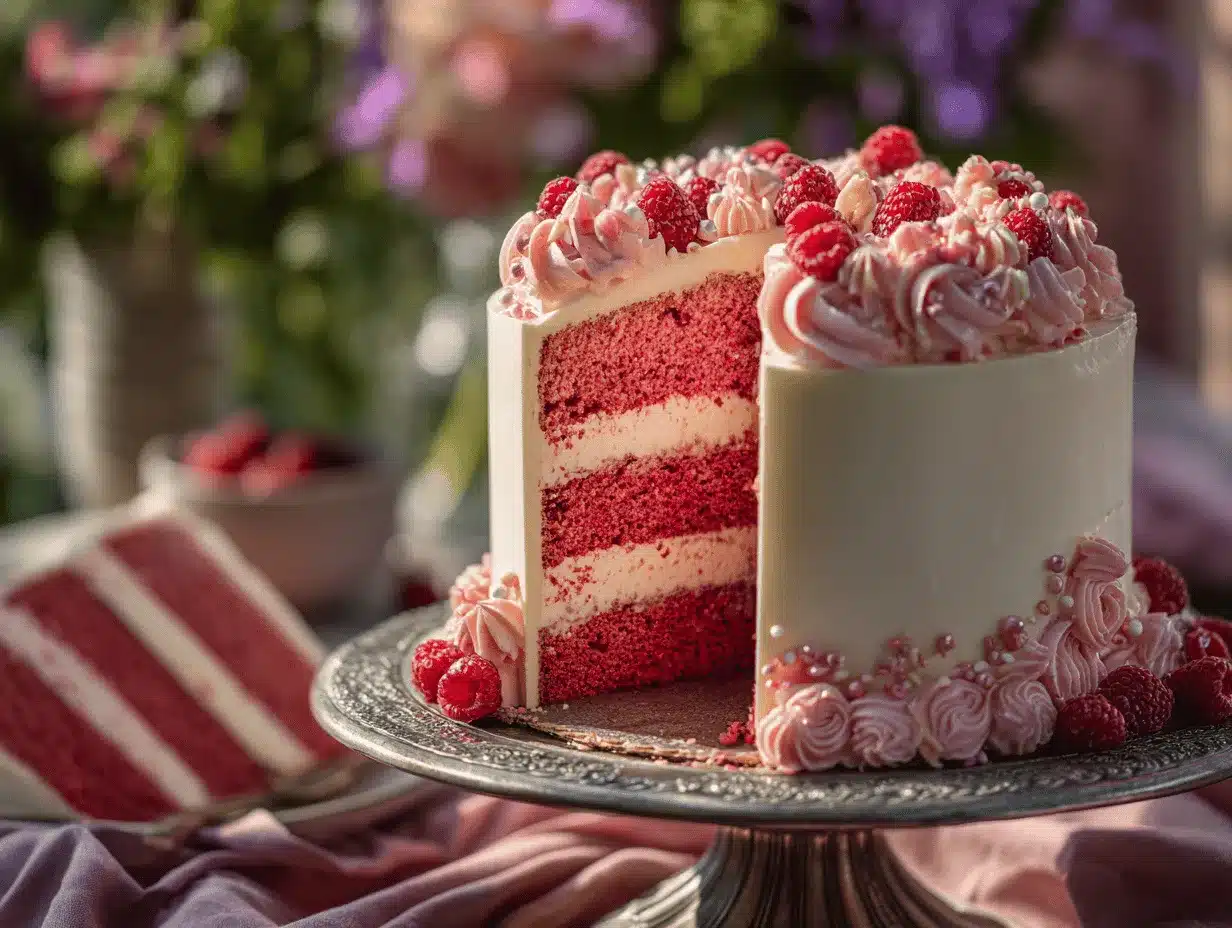
- Prep your pans and oven: Preheat the oven to 350°F (175°C). Grease two 8-inch (20cm) round cake pans and line the bottoms with parchment paper. Dust sides lightly with flour or sugar.
- Blend the raspberries: In a blender or food processor, puree the raspberries until smooth. If you want a super-smooth cake, strain the puree to remove seeds. Set aside. (This step takes about 5 minutes.)
- Mix dry ingredients: In a medium bowl, sift together flour (195g / 1 ½ cups), baking powder (1 ½ tsp), baking soda (¼ tsp), and salt (¼ tsp). Give it a quick whisk to combine.
- Cream butter and sugar: In a large mixing bowl, beat unsalted butter (113g / ½ cup) and granulated sugar (200g / 1 cup) until light and fluffy, about 3 minutes. Use medium-high speed with your mixer. The color should be pale and the texture airy.
- Add eggs and vanilla: Beat in eggs one at a time, mixing until fully incorporated. Add vanilla extract (1 tsp) and lemon zest. Scrape down the sides as needed.
- Add raspberry puree: Pour in the raspberry puree and mix just until combined. If you want a brighter pink cake, add a few drops of pink or red gel food coloring here. (Optional, but really makes the color pop!)
- Alternate dry ingredients and buttermilk: With the mixer on low, add half the dry ingredients, then all the buttermilk (120ml / ½ cup), then the remaining dry mix. Mix just until you no longer see flour streaks. Overmixing will make the cake dense—go gently!
- Divide and bake: Pour the batter evenly into the prepared pans. Smooth the tops with a spatula. Bake for 22-26 minutes, or until a toothpick inserted in the center comes out clean or with just a few moist crumbs.
- Cool the cakes: Let cakes cool in pans for 10 minutes, then run a knife around the edges and turn out onto a wire rack. Remove parchment paper and cool completely before frosting. Warm cakes will melt the buttercream, so don’t rush it (been there, regretted that…)
- Make the vanilla bean buttercream: In a clean bowl, beat the softened butter (226g / 1 cup) on medium-high until creamy and pale, about 2 minutes. Add sifted powdered sugar (375g / 3 cups) a cup at a time, mixing on low to start. Scrape in seeds from the vanilla bean pod (or add 2 tsp vanilla bean paste/extract) and a pinch of salt. Beat until fluffy, adding heavy cream or milk (2-3 tbsp) a little at a time until the frosting is smooth and spreadable.
- Assemble the cake: Place one cake layer on your serving plate. Spread a generous layer of buttercream on top. Add the second layer, then frost the top and sides. For swoopy, rustic frosting, use an offset spatula and don’t stress about perfection—homemade cakes are supposed to look homemade!
- Decorate and serve: Garnish with fresh raspberries, edible flowers, or a sprinkle of lemon zest if you like. Slice and enjoy!
Troubleshooting: If your cake sinks, it’s probably underbaked—pop it back in for a few more minutes. If the frosting seems too runny, chill it for 10 minutes, then re-whip. If your cake sticks to the pan, parchment paper is your best friend (I learned this after a few “rustic” cake disasters). For a super-moist cake, don’t overbake—the edges should be golden but the center gently springy.
Cooking Tips & Techniques for Pink Velvet Cake Success
- Room Temperature Ingredients: Make sure your eggs, butter, and buttermilk are at room temp. Cold ingredients don’t mix as smoothly, and you’ll end up with a lumpy batter (trust me, I’ve rushed it and regretted it).
- Gentle Mixing: Once you add the flour, switch to low speed or mix by hand. Overmixing develops gluten and leads to a tough cake. A few streaks of flour are fine—they’ll disappear as you fold in the raspberries.
- Fresh vs. Frozen Berries: Both work, but thaw and drain frozen raspberries or you’ll have watery batter. If using fresh, taste for sweetness—extra tart berries may need more sugar.
- Level the Layers: If your cakes dome in the oven, let them cool, then use a serrated knife to trim the tops. You’ll have flat, stackable layers (plus cake scraps for snacking!).
- Tasting as You Go: Taste the buttercream before frosting. If it’s too sweet, add a pinch more salt or a squeeze of lemon juice. If it’s too thick, add a splash of cream.
- Timing: Bake the cake layers the day before and store tightly wrapped. The flavor gets even better overnight, and you can frost when you’re ready. I often assemble the morning of a party for freshest results.
- Multitasking: While the cakes bake, make your buttercream and prep your decorations. This way, you’re not scrambling at the last minute.
- Common Mistakes: Don’t skip the parchment paper—removing stuck cake layers is heartbreak territory. And don’t frost warm cakes, or you’ll have buttercream soup!
I’ve had my share of cake fails—like the time I used cold butter and ended up with dense, greasy layers. Or when I forgot to sift my powdered sugar and the frosting was full of lumps (not cute). Each little mishap has made this raspberry pink velvet cake recipe better, so don’t stress if it’s not bakery-perfect. Homemade is always best.
Variations & Adaptations
- Gluten-Free Option: Substitute the all-purpose flour with a 1:1 gluten-free baking blend (like Cup4Cup or Bob’s Red Mill). Add an extra egg for structure. The cake will be slightly more delicate but just as tasty.
- Dairy-Free Version: Use plant-based butter (I like Miyoko’s or Earth Balance) and replace buttermilk with unsweetened almond milk + 1 tsp lemon juice. For the buttercream, use dairy-free milk and vegan butter. The flavor holds up beautifully.
- Lemon-Raspberry Twist: Increase lemon zest to 2 lemons for a zingy kick, and add a tablespoon of lemon juice to the batter. You can also fill the cake with a thin layer of lemon curd for extra tang (so good for summer parties!).
- Chocolate Pink Velvet: Fold in ¼ cup (30g) mini white chocolate chips to the batter before baking. The creamy sweetness is such a fun surprise in every bite.
- Different Baking Methods: Bake as cupcakes (makes about 16-18 regular cupcakes, bake 17-20 minutes), or as a sheet cake for easy slicing. I’ve even used a bundt pan—just adjust the baking time to about 35-40 minutes and check with a toothpick.
- Nut-Free: This cake is naturally nut-free, but always double-check your butter and vanilla for cross-contamination if allergies are a concern.
One of my favorites is making a “naked cake” version—just a thin layer of buttercream between layers and a rustic swipe on the outside. It feels fancy but is actually less work! And if you want a winter version, swirl a bit of orange zest and use blood oranges for garnish—so festive.
Serving & Storage Suggestions
This raspberry pink velvet cake is best served at room temperature, which keeps the crumb soft and the buttercream dreamy. For a party, I love placing it on a pretty cake stand and garnishing with fresh raspberries, a sprinkle of powdered sugar, or edible flowers. Pair it with sparkling lemonade, herbal tea, or a glass of bubbly for extra celebration vibes.
If you have leftovers (rare, but it happens!), store slices in an airtight container in the fridge for up to 4 days. The cake will firm up a little, but a quick 10-second zap in the microwave brings it right back to life. You can also freeze unfrosted cake layers, tightly wrapped in plastic and foil, for up to 2 months. Thaw overnight in the fridge before frosting.
Honestly, the flavors get even better on day two as the berry and vanilla meld together. If you want to prep ahead, you can make both the cake and buttercream a day in advance. Just store the buttercream separately at room temp if it’s cool, or in the fridge if your kitchen is warm. Give it a quick whip before frosting.
Nutritional Information & Benefits
Each slice of raspberry pink velvet cake (based on 1/12 of the cake) has approximately: 385 calories, 20g fat, 48g carbs, 3g protein, and 32g sugar. The real raspberries bring vitamin C, fiber, and antioxidants, while the lemon zest adds a little immune-boosting punch. The cake is nut-free and can be made gluten-free or dairy-free with the swaps above.
While it’s definitely a treat, you can feel good knowing there’s real fruit in every bite. If you’re watching sugar, you can reduce the sugar in both the cake and buttercream by 2-3 tablespoons without losing much flavor. Personally, I love this cake as a special-occasion splurge—sweet, satisfying, and full of berry goodness!
Conclusion
This raspberry pink velvet cake with vanilla bean buttercream isn’t just a recipe—it’s a celebration on a plate. It’s the cake I make to mark big moments, cheer up a friend, or just because I want something pretty and delicious. The combo of tart berries, tender crumb, and dreamy vanilla frosting is seriously hard to beat.
Customize away—swap berries, tweak the frosting, or try cupcakes instead. That’s the beauty of homemade cake: you can make it your own. If you try this recipe, I’d love to hear how it turns out! Share your tweaks, your triumphs, and even your cake fails (we’ve all been there) in the comments below. And hey, if you snap a pic for Pinterest or Instagram, tag me so I can swoon over your creations. Here’s to cake that’s as joyful to make as it is to eat—happy baking!
Frequently Asked Questions
Can I use frozen raspberries in the pink velvet cake?
Yes! Just make sure to thaw and drain any excess liquid before blending. Frozen berries work great and keep the color vibrant.
How do I get a bright pink color without food coloring?
The natural raspberry puree will give a lovely soft pink. For a more vivid hue, add a few drops of pink or red gel food coloring, but it’s totally optional.
Can I make this raspberry pink velvet cake ahead of time?
Absolutely! Bake the cake layers a day in advance, wrap them tightly, and frost the next day. You can also make the buttercream ahead—just bring it to room temp and re-whip before using.
What can I use instead of buttermilk?
If you don’t have buttermilk, mix ½ cup (120ml) whole milk with 1 teaspoon lemon juice or white vinegar and let it sit for 5 minutes. Works like a charm!
Is the vanilla bean buttercream super sweet?
It’s sweet but balanced by the pinch of salt and real vanilla bean. If you prefer less sweetness, reduce the powdered sugar by 2-3 tablespoons or add a squeeze of lemon juice to the frosting.
Pin This Recipe!
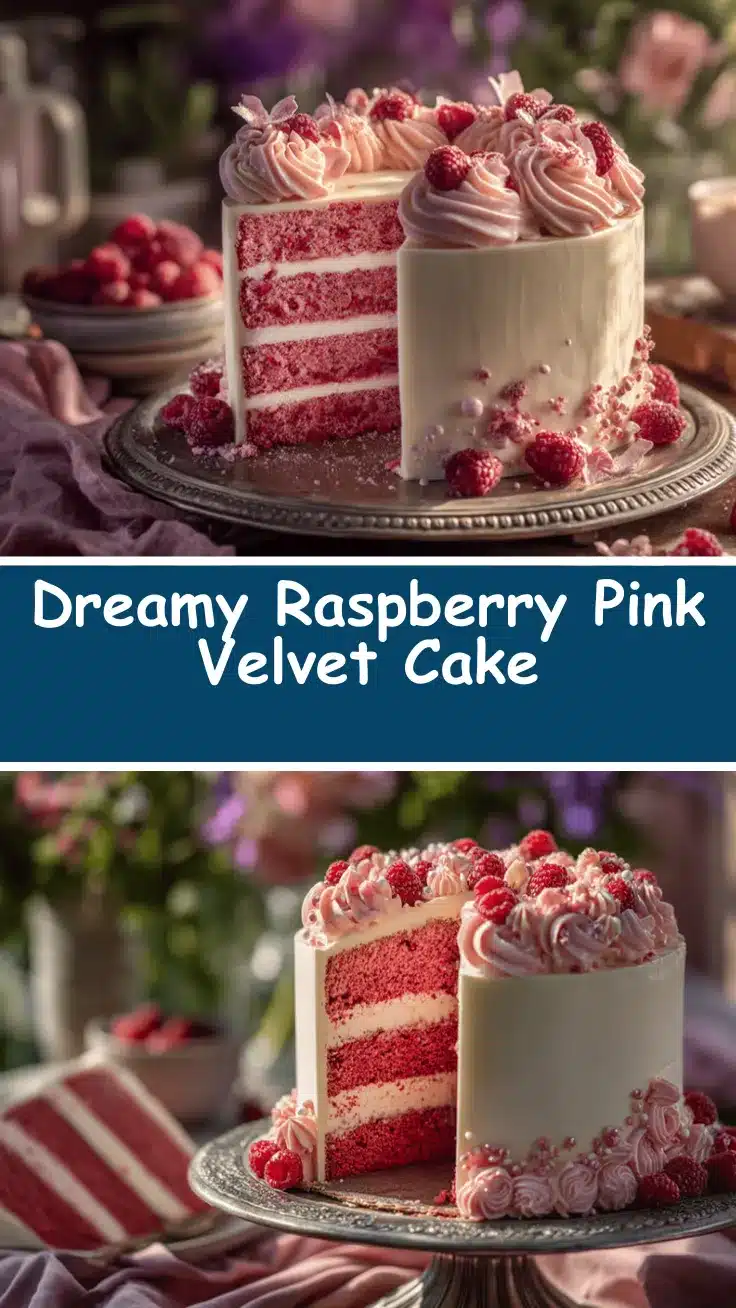
Raspberry Pink Velvet Cake with Easy Homemade Vanilla Bean Frosting

This raspberry pink velvet cake features real raspberries for a naturally vibrant color and fruity flavor, paired with a luxurious vanilla bean buttercream. Perfect for celebrations, it’s tender, moist, and sure to impress with its stunning appearance and delicious taste.
- Prep Time: 30 minutes
- Cook Time: 25 minutes
- Total Time: 1 hour 30 minutes
- Yield: 12 servings 1x
- Category: Dessert
- Cuisine: American
Ingredients
- 1 1/2 cups (195g) all-purpose flour, spooned and leveled
- 1 cup (200g) granulated sugar
- 1/2 cup (113g) unsalted butter, softened
- 2 large eggs, room temperature
- 1/2 cup (120ml) buttermilk
- 1 cup (150g) fresh or frozen raspberries (thawed and drained if frozen)
- 1 1/2 teaspoons baking powder
- 1/4 teaspoon baking soda
- 1/4 teaspoon fine sea salt
- 1 teaspoon pure vanilla extract
- Zest from 1 medium lemon
- Pink or red gel food coloring (optional, a few drops)
- For the Vanilla Bean Buttercream:
- 1 cup (226g) unsalted butter, softened
- 3 cups (375g) powdered sugar, sifted
- 2–3 tablespoons heavy cream or whole milk
- Seeds from 1 vanilla bean pod (or 2 teaspoons vanilla bean paste)
- Pinch of salt
Instructions
- Preheat oven to 350°F (175°C). Grease two 8-inch round cake pans and line bottoms with parchment paper. Dust sides lightly with flour or sugar.
- Puree raspberries in a blender or food processor until smooth. For a seedless cake, strain the puree. Set aside.
- In a medium bowl, sift together flour, baking powder, baking soda, and salt. Whisk to combine.
- In a large mixing bowl, beat softened butter and granulated sugar until light and fluffy, about 3 minutes.
- Add eggs one at a time, beating well after each addition. Mix in vanilla extract and lemon zest.
- Mix in raspberry puree until just combined. Add a few drops of pink or red gel food coloring if desired.
- With mixer on low, add half the dry ingredients, then all the buttermilk, then the remaining dry mix. Mix just until no flour streaks remain.
- Divide batter evenly between prepared pans. Smooth tops with a spatula.
- Bake for 22-26 minutes, or until a toothpick inserted in the center comes out clean or with a few moist crumbs.
- Cool cakes in pans for 10 minutes, then turn out onto a wire rack. Remove parchment and cool completely before frosting.
- For the buttercream: In a clean bowl, beat softened butter until creamy and pale, about 2 minutes. Add sifted powdered sugar a cup at a time, mixing on low. Add vanilla bean seeds (or paste) and a pinch of salt. Beat until fluffy, adding cream or milk as needed for spreadable consistency.
- Place one cake layer on a serving plate. Spread a generous layer of buttercream on top. Add the second layer and frost the top and sides.
- Decorate with fresh raspberries, edible flowers, or lemon zest if desired. Slice and serve.
Notes
For best results, use room temperature ingredients. If using frozen raspberries, thaw and drain well. For a gluten-free version, substitute a 1:1 gluten-free flour blend and add an extra egg. The cake can be made ahead and stored tightly wrapped; flavors improve overnight. Don’t overmix the batter after adding flour to keep the crumb tender. Frost only when cakes are completely cool.
Nutrition
- Serving Size: 1 slice (1/12 of cake)
- Calories: 385
- Sugar: 32
- Sodium: 180
- Fat: 20
- Saturated Fat: 12
- Carbohydrates: 48
- Fiber: 2
- Protein: 3
Keywords: raspberry pink velvet cake, pink velvet cake, raspberry cake, vanilla bean buttercream, birthday cake, celebration cake, homemade cake, berry cake, easy cake recipe, spring dessert, summer dessert



