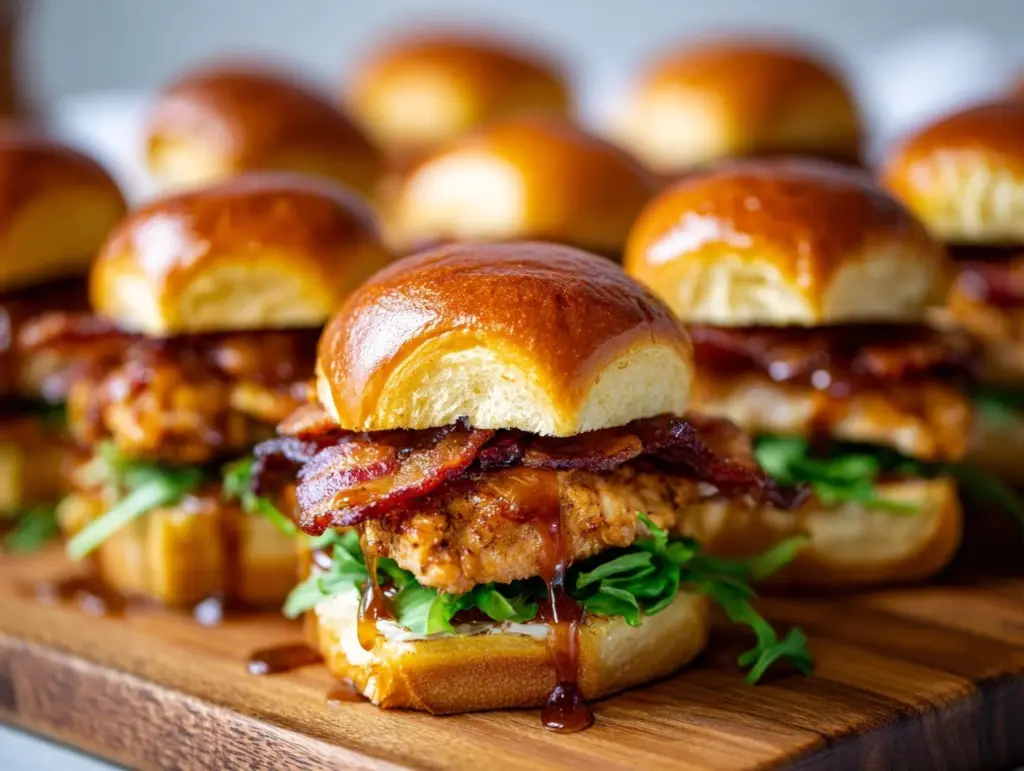
The first time I made maple chicken sliders, the kitchen smelled like Sunday brunch at an old-school diner—crispy chicken, sticky-sweet maple, a hint of smoky bacon. It honestly stopped my whole family in their tracks. You know that feeling when you bite into something and immediately wish you’d made a double batch? That’s what these sliders do every single time. They’re a little messy, totally addictive, and disappear faster than you can say “pass the napkins.”
I stumbled on the idea for maple chicken sliders when I needed a fun party snack for game day. Let’s face it, plain sandwiches can get boring, and I wanted something that felt a bit special without spending hours in the kitchen. Sweet and savory together is my ultimate weakness (think chicken and waffles vibes), so this combo just clicked. Plus, using maple syrup gives these sliders a playful twist everyone talks about long after the party’s over.
These maple chicken sliders have become my go-to for potlucks, birthday parties, and even those lazy nights when you want dinner to be both easy and memorable. They nail that perfect balance: the chicken is juicy and flavorful, the maple sauce is sticky and rich, and the buns soak up every last bit. If you’re looking for a crowd-pleaser that feels both comforting and a little fancy, you’ve just found your new favorite. Trust me, after making this recipe more times than I can count, I can honestly say it’s a keeper—and I’m excited to share all my best tips so yours turn out just right!
Why You’ll Love This Maple Chicken Sliders Recipe
- Quick & Easy: Ready in under 45 minutes—even less if you’ve got leftover chicken. Perfect for those days when you want to impress without the stress.
- Simple Ingredients: You won’t need a specialty grocery list. Most of what you need is probably already hanging around your kitchen.
- Perfect for Parties: These sliders are made for sharing! They’re bite-sized, easy to eat, and a guaranteed hit for birthdays, holiday gatherings, or game day spreads.
- Family Favorite: Both kids and adults love them. Even picky eaters can’t resist the sweet-meets-savory flavor profile.
- Unforgettable Flavor: The combination of juicy chicken, smoky bacon, and warm maple syrup is just… wow. It’s comfort food, but with a fun twist.
What makes this maple chicken sliders recipe stand out? Here’s the secret: I blend the maple syrup with a touch of Dijon and a bit of hot sauce, then brush it over crisped chicken before baking. The flavors soak in, and the sliders come out glazed and golden. No dry, bland chicken here! The bacon adds a salty crunch, while the pickles and slaw (if you add them) give a tangy, refreshing bite that cuts the richness. I’ve tested this maple chicken slider recipe at half a dozen parties, and there’s never a crumb left. My cousin even started making them for her work potlucks, and she’s not even a cook!
But it’s not just the taste—it’s the feeling. These sliders have that “close your eyes, savor the moment” thing going on. They’re the kind of bite that turns a regular get-together into something memorable. Plus, they’re so easy to make ahead, you’ll actually get to enjoy your own party. That’s the magic for me—delicious, stress-free, and always the first to vanish from the table!
What Ingredients You Will Need
This maple chicken sliders recipe is all about bold flavors with simple, real ingredients—no complicated steps or fancy shopping required. I like to break it down into three easy parts: the chicken, the maple glaze, and the slider assembly. Here’s exactly what you’ll need (plus a few of my favorite tips and swaps):
- For the Chicken:
- 1 1/2 lbs (680g) boneless, skinless chicken thighs or breasts (thighs stay juicier, but use what you prefer)
- 1 cup (120g) all-purpose flour
- 1/2 cup (60g) panko breadcrumbs (adds crunch, but regular breadcrumbs work too)
- 2 large eggs
- 1 tsp garlic powder
- 1 tsp smoked paprika (regular is fine, but smoked gives that “bacon-y” vibe!)
- 1/2 tsp salt
- 1/2 tsp black pepper
- Vegetable oil, for frying (or bake for a lighter version—see Tips)
- For the Maple Glaze:
- 1/3 cup (80ml) pure maple syrup (don’t use pancake syrup—real maple makes a difference!)
- 2 tbsp (30g) unsalted butter, melted
- 1 tbsp Dijon mustard (adds a little tang, balances the sweetness)
- 1-2 tsp hot sauce (optional, but I love the kick—Frank’s RedHot or Cholula work well)
- 1/2 tsp crushed red pepper flakes (optional, for heat lovers)
- For Assembly:
- 12 slider buns or small dinner rolls (Brioche is so good here, but Hawaiian rolls are a close second)
- 6 slices cooked bacon, cut in half (I like to bake mine until extra crispy)
- 1 cup (90g) shredded coleslaw mix (optional, but adds crunch)
- 1/4 cup (60ml) ranch or mayonnaise (spread on buns—totally optional, but delicious)
- Pickle slices (for a tangy bite—my secret must-have!)
Ingredient Swaps & Notes:
- No chicken? Shredded rotisserie chicken works—just toss with a little glaze and pile onto the buns.
- For gluten-free sliders, use gluten-free flour and breadcrumbs, and serve on GF buns.
- Vegetarian? Crispy breaded cauliflower steaks or tofu cutlets are surprisingly awesome with the maple glaze.
- Maple syrup: Always use pure maple (Grade A or B). If you’re in a pinch, honey can work, but it’s not quite the same.
- For dairy-free, swap butter for vegan butter or olive oil.
Trust your taste buds! I sometimes add a pinch of cayenne to the glaze or sneak in a slice of cheddar for melty goodness. Don’t be afraid to tweak it to your liking.
Equipment Needed
- Large mixing bowls: For dredging chicken and tossing with spices. I prefer glass—easy to clean, doesn’t hold onto smells.
- Shallow dish: For breading the chicken. Pie plates work great.
- Frying pan or skillet: Cast iron gives the best crust, but any sturdy pan will do. If you’re baking, a sheet pan lined with parchment is perfect.
- Wire rack: Not mandatory, but keeps chicken crispy after frying.
- Baking brush: For slathering on that maple glaze. I’ve used everything from a silicone brush to the back of a spoon—whatever works!
- Paper towels: For draining fried chicken. Don’t skip this or your sliders might end up soggy.
- Sharp knife: For halving buns and slicing bacon.
- Measuring cups and spoons: Accuracy matters, especially for the glaze.
Equipment Tips: If you don’t own a wire rack, just use an extra plate lined with paper towels. I’ve baked these on a regular old cookie sheet, and they turned out fine. For a budget option, dollar store mixing bowls and utensils totally work (I’ve built my collection slowly over the years—no shame in starting simple!). Just keep your frying pan well-seasoned for easy cleanup and better browning.
How to Make Maple Chicken Sliders
-
Prep the Chicken:
Cut 1 1/2 lbs (680g) chicken into slider-size pieces—about the size of the bun. Pat dry with paper towels to help the coating stick. (Moisture is the enemy of crispiness!) -
Bread the Chicken:
Set up your dredging station: In one bowl, whisk 2 eggs. In another, mix 1 cup (120g) flour, 1/2 cup (60g) panko, 1 tsp garlic powder, 1 tsp smoked paprika, 1/2 tsp salt, and 1/2 tsp pepper. Dip chicken in flour mixture, then egg, then back in flour mixture. Press gently to coat well. (Tip: Use one hand for wet, one for dry to avoid the dreaded “breaded claw!”) -
Cook the Chicken:
Heat 1/2 inch (1.25cm) oil in a skillet over medium-high until shimmering. Fry chicken in batches, 3–4 minutes per side, until golden and cooked through (165°F/74°C internal temp). Drain on paper towels or a wire rack. If baking, arrange on a parchment-lined sheet and bake at 425°F (220°C) for 18–22 minutes, flipping halfway. -
Make the Maple Glaze:
In a small saucepan, melt 2 tbsp (30g) butter over low. Stir in 1/3 cup (80ml) maple syrup, 1 tbsp Dijon, 1–2 tsp hot sauce, and 1/2 tsp red pepper flakes if using. Warm until just combined—don’t let it boil. Smell that? That’s party magic right there. -
Glaze the Chicken:
Brush warm glaze generously over cooked chicken pieces. For extra flavor, toss them all in a bowl with the glaze and let sit for 2–3 minutes. (Be warned: It’s sticky and glorious.) -
Toast the Buns (Optional):
For even more flavor, split the slider buns and toast cut-side down in a dry skillet for 1–2 minutes. This keeps them from getting soggy and adds that bakery-fresh touch. -
Assemble the Sliders:
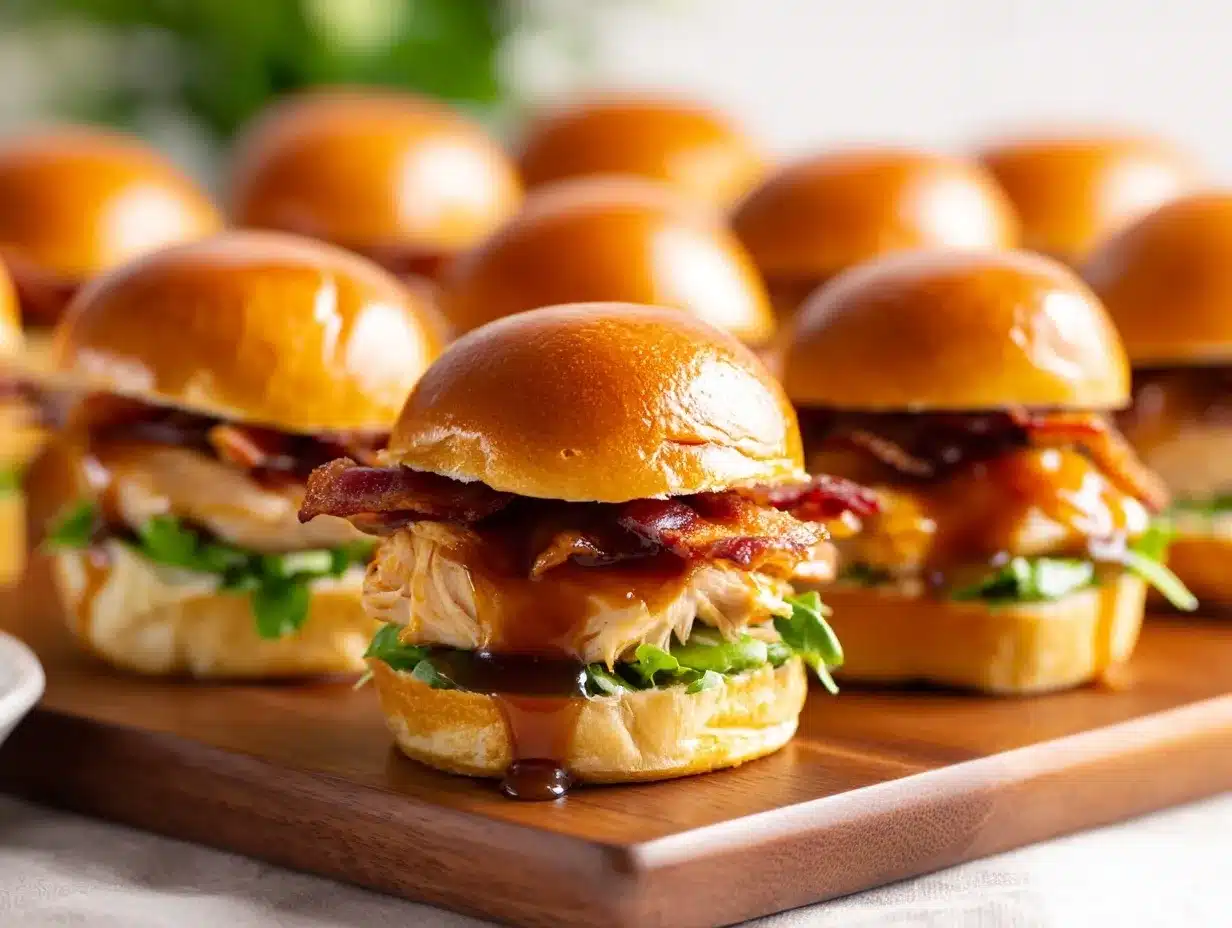
Spread a little ranch or mayo on each bun if you like. Layer with glazed chicken, half a slice of crispy bacon, a scoop of slaw, and a pickle slice. Top with the other bun. (I sometimes add a little extra glaze on top—no regrets!) -
Serve Right Away:
These are best fresh—but if you’re making ahead, keep chicken and buns separate until ready to serve. Warm the chicken in a low oven, then assemble just before guests arrive.
Troubleshooting & Notes: If your coating falls off, your chicken might have been too wet—pat it dry next time. If the glaze is too runny, simmer it gently for a minute or two to thicken. And don’t overcrowd the pan when frying or you’ll lose that crunch. I learned that the hard way during my first big party!
Cooking Tips & Techniques
- Don’t Overcrowd the Pan: Fry chicken in batches for the crispiest results. Too many pieces at once drops the oil temperature and leaves you with soggy breading.
- Use a Thermometer: Chicken is safest (and juiciest) at 165°F (74°C) inside. Undercooked chicken is a party foul, and overcooked gets dry.
- Double Dredge for Extra Crunch: If you want a super-thick crust, dip chicken in flour, then egg, then flour again. I picked this up after a fried chicken fail—now it’s my go-to method.
- Keep Finished Chicken Warm: Place cooked pieces on a wire rack in a low (200°F/95°C) oven until ready to glaze and assemble. This keeps everything hot and crispy.
- Make-Ahead Magic: You can fry or bake the chicken up to a day ahead. Cool, then refrigerate. When it’s party time, reheat in a hot oven for 8–10 minutes, glaze, and assemble.
- Customize the Glaze: Taste as you go! Add more mustard for tang, extra maple for sweetness, or a splash of vinegar if you want brightness. I once swapped in bourbon for half the maple—let’s just say, it was a hit with the grown-ups.
- Slider Size Matters: Use small buns so each bite is balanced—too much bread can drown out the flavors. And don’t be shy with the pickles!
Lessons Learned: My first batch was too sweet because I didn’t balance the maple with enough salt and mustard. Now, I always taste the glaze before brushing it on. Don’t be afraid to adjust!
Variations & Adaptations
- Spicy Maple Chicken Sliders: Add extra hot sauce and a pinch of cayenne to the glaze for serious heat. Top with sliced jalapeños for a fiery finish—I like to do this for adult game nights.
- Gluten-Free Option: Use gluten-free flour and breadcrumbs, and swap buns for your favorite GF rolls. The recipe works just as well, and my celiac friend swears they’re a must-make.
- Vegetarian Maple Cauliflower Sliders: Swap chicken for thick slices of cauliflower, breaded and baked or fried. Brush with glaze as usual. It’s surprisingly satisfying and so good with extra slaw.
- Cheesy Maple Chicken Sliders: Add a slice of sharp cheddar or smoked gouda between chicken and bun. When the cheese melts into the maple glaze—oh man, it’s next-level comfort food.
- Slow Cooker Version: For a hands-off approach, cook chicken with a little broth, then shred and toss with maple glaze before piling onto buns. It’s not crispy, but it’s super juicy and easy for big crowds.
- Allergen-Friendly: For dairy-free, use vegan butter in the glaze and skip cheese. For egg-free, dredge chicken in a mixture of non-dairy milk and a bit of cornstarch instead of egg.
My personal favorite? I once made a “breakfast slider” version: maple-glazed chicken, bacon, and a fried quail egg on top. It’s a little over-the-top, but wow, what a treat for brunch!
Serving & Storage Suggestions
Serving: Maple chicken sliders are best served warm, right after assembly. Arrange them on a wooden board or platter—stacked up, they look irresistible! Sprinkle with chopped chives or parsley for a pop of color. I like to put extra pickles and slaw on the side so everyone can customize their own.
Pair these sliders with crisp coleslaw, sweet potato fries, or a crunchy salad. For drinks, lemonade, iced tea, or a light beer are all slam dunks. If you’re feeling fancy, a maple bourbon cocktail is fun for adults.
Storage: Leftover chicken keeps in the fridge for up to 3 days. Store buns and toppings separately to avoid sogginess. To reheat, warm chicken pieces in a 375°F (190°C) oven for 8–10 minutes or until hot and crisp again, then re-glaze lightly if needed. Assembled sliders don’t freeze well, but the cooked chicken does—just cool completely, wrap tightly, and freeze for up to 2 months. Thaw overnight and reheat as above.
Honestly, the flavors get deeper after a day in the fridge, so sneaking a leftover slider for lunch might be my favorite “chef’s treat.”
Nutritional Information & Benefits
Each maple chicken slider (with bun, glaze, and bacon) is about 280 calories, 13g protein, 11g fat, and 28g carbs (estimates, since toppings can vary). Using chicken breast cuts down on fat, while the maple syrup provides natural sweetness without refined sugar. You can bump up fiber by using whole wheat buns and adding extra slaw.
Chicken is a great source of lean protein, and if you bake instead of fry, you’ll shave off some extra calories. Maple syrup contains minerals like manganese and zinc, and cabbage slaw brings in vitamin C and crunch. For gluten-free or dairy-free diets, the swaps above have you covered. Do note: contains egg, wheat, and possible dairy (depending on your buns and glaze), so adjust as needed for allergies.
For me, these sliders are all about balance: a little indulgence, a lot of flavor, and enough protein to keep everyone happy and satisfied—win-win!
Conclusion
If you’re searching for a party hit that’ll have everyone asking for the recipe, these maple chicken sliders are it. The sweet and savory flavors, crispy chicken, and sticky maple glaze are just unbeatable. They’re simple enough for weeknights but special enough for celebrations—honestly, they turn any gathering into something memorable.
Don’t be afraid to make this recipe your own. Swap in your favorite toppings, try a different hot sauce, or tweak the glaze to your liking. That’s the fun of cooking at home! I genuinely love how these sliders bring people together—my family requests them year-round, and they’ve become a “must” for every potluck and birthday party.
Give this maple chicken sliders recipe a try, and let me know how it goes! Leave a comment, share your creative twists, or tag me if you post your creation online. I can’t wait to hear your slider stories. Happy cooking—and even happier eating!
FAQs About Maple Chicken Sliders
Can I make maple chicken sliders ahead of time?
Yes! Cook the chicken in advance and store it in the fridge. Reheat in a hot oven, glaze, and assemble just before serving for best texture and taste.
Can I use rotisserie chicken instead of frying my own?
Absolutely. Shred the rotisserie chicken, toss with maple glaze, and pile onto buns. It’s faster and still super flavorful, though you’ll miss the crispy coating.
What’s the best bread for sliders?
Brioche slider buns are my top pick—they’re soft and slightly sweet. Hawaiian rolls work well too, or use mini potato rolls for a sturdier bite.
How spicy are these sliders?
The base recipe is mild, but you can adjust the heat by adding more hot sauce or red pepper flakes to the glaze. For a totally kid-friendly version, leave the spice out.
Can I freeze leftover chicken?
Yes! Let fried or baked chicken cool completely, then wrap tightly and freeze for up to 2 months. Reheat in a hot oven for best results. Assembled sliders don’t freeze well.
Pin This Recipe!
Maple Chicken Sliders

These maple chicken sliders combine juicy, crispy chicken with a sticky-sweet maple glaze, smoky bacon, and tangy pickles for the ultimate sweet and savory party snack. Perfect for potlucks, game days, or weeknight dinners, they’re easy to make and always a crowd-pleaser.
- Prep Time: 20 minutes
- Cook Time: 20 minutes
- Total Time: 40 minutes
- Yield: 12 sliders 1x
- Category: Appetizer
- Cuisine: American
Ingredients
- 1 1/2 lbs boneless, skinless chicken thighs or breasts
- 1 cup all-purpose flour
- 1/2 cup panko breadcrumbs
- 2 large eggs
- 1 tsp garlic powder
- 1 tsp smoked paprika
- 1/2 tsp salt
- 1/2 tsp black pepper
- Vegetable oil, for frying
- 1/3 cup pure maple syrup
- 2 tbsp unsalted butter, melted
- 1 tbsp Dijon mustard
- 1–2 tsp hot sauce (optional)
- 1/2 tsp crushed red pepper flakes (optional)
- 12 slider buns or small dinner rolls (Brioche or Hawaiian rolls recommended)
- 6 slices cooked bacon, cut in half
- 1 cup shredded coleslaw mix (optional)
- 1/4 cup ranch or mayonnaise (optional)
- Pickle slices
Instructions
- Cut chicken into slider-sized pieces (about the size of the buns) and pat dry with paper towels.
- Set up a dredging station: In one bowl, whisk eggs. In another, mix flour, panko, garlic powder, smoked paprika, salt, and black pepper.
- Dip chicken pieces in flour mixture, then egg, then back in flour mixture. Press gently to coat well.
- Heat 1/2 inch of vegetable oil in a skillet over medium-high heat. Fry chicken in batches for 3–4 minutes per side, until golden and cooked through (165°F internal temperature). Drain on paper towels or a wire rack. (For baking: arrange on a parchment-lined sheet and bake at 425°F for 18–22 minutes, flipping halfway.)
- In a small saucepan, melt butter over low heat. Stir in maple syrup, Dijon mustard, hot sauce, and red pepper flakes (if using). Warm until just combined.
- Brush warm glaze generously over cooked chicken pieces. Optionally, toss all chicken in a bowl with the glaze and let sit for 2–3 minutes.
- Optional: Split slider buns and toast cut-side down in a dry skillet for 1–2 minutes.
- Spread ranch or mayonnaise on each bun if desired. Layer with glazed chicken, half a slice of crispy bacon, a scoop of slaw, and a pickle slice. Top with the other bun.
- Serve immediately. If making ahead, keep chicken and buns separate until ready to serve. Warm chicken in a low oven, then assemble.
Notes
For gluten-free sliders, use gluten-free flour, breadcrumbs, and buns. For dairy-free, swap butter for vegan butter or olive oil. For a vegetarian version, use breaded cauliflower or tofu. Chicken can be made ahead and reheated before glazing and assembling. Adjust glaze to taste—add more mustard for tang, more maple for sweetness, or a splash of vinegar for brightness. Don’t overcrowd the pan when frying for best crispiness.
Nutrition
- Serving Size: 1 slider
- Calories: 280
- Sugar: 7
- Sodium: 480
- Fat: 11
- Saturated Fat: 3
- Carbohydrates: 28
- Fiber: 1
- Protein: 13
Keywords: maple chicken sliders, party sliders, sweet and savory chicken, game day snacks, chicken slider recipe, bacon sliders, easy party food, maple glaze chicken, potluck recipes, finger food



