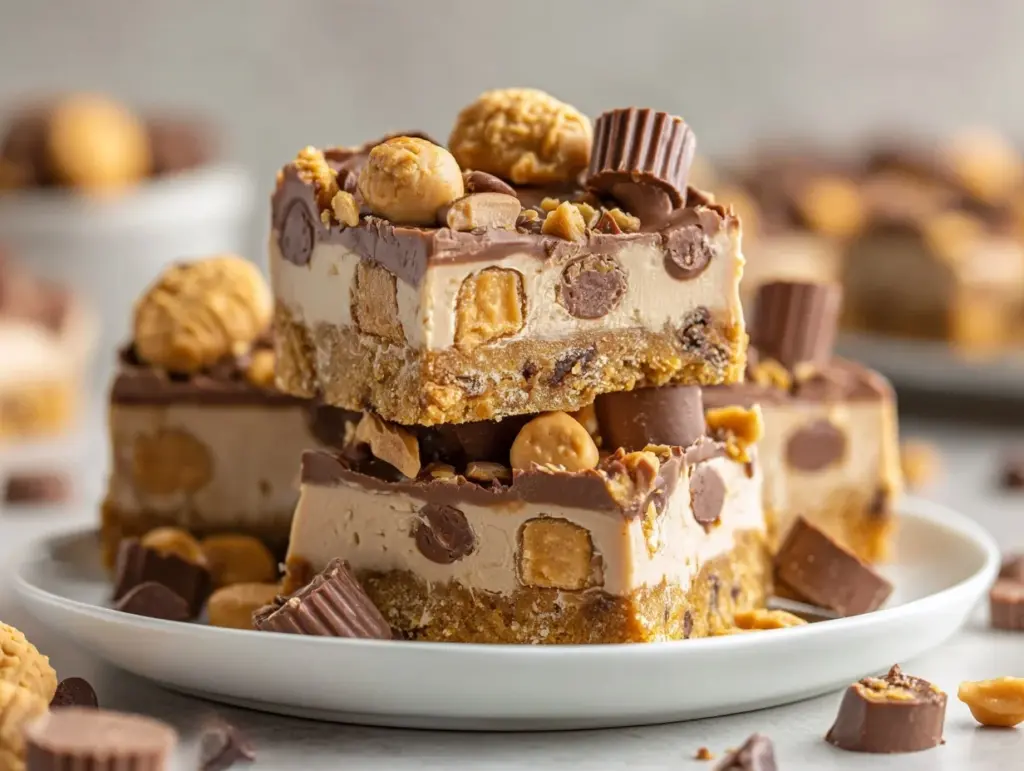
The first time I sank my teeth into a Reese’s Peanut Butter No-Bake Bar, I swear, the world stopped for a second. That rich, nutty peanut butter layer paired with silky chocolate on top—oh wow, it’s everything you crave in a treat and then some. There’s no oven preheating, no waiting around for things to cool (well, almost none), and definitely no fancy ingredients hiding in the back of your pantry. This recipe is the ultimate “fix your sweet tooth, stat” kind of deal, and honestly, it’s hard to find anyone who doesn’t adore that classic chocolate and peanut butter combo.
I first whipped up these bars on a hot summer afternoon when I just couldn’t bear to turn on the oven. My kitchen was already steamy, and I needed dessert for a backyard barbecue. Reese’s Peanut Butter No-Bake Bars became my go-to because they’re ridiculously easy, make a big batch, and never fail to impress. You know those times when you want to channel your inner pastry chef but don’t have the energy? This is that recipe. It’s a perfect choice for busy families, dorm-dwellers, or anyone craving homemade comfort without the hassle.
What I love most is how forgiving these bars are. I’ve made them with kids, tested variations for gluten-free friends, and brought them to just about every potluck. They always turn out—no pastry degree required. If you’re a peanut butter fanatic or just need a crowd-pleasing dessert, you’re in for a treat. Let’s get into why these Reese’s Peanut Butter No-Bake Bars will become your new obsession.
Why You’ll Love This Reese’s Peanut Butter No-Bake Bars Recipe
- Quick & Easy: These bars come together in under 20 minutes of actual work—no oven, no fuss. Perfect for those last-minute dessert emergencies or when you just want something sweet, fast.
- Simple Ingredients: You probably have everything you need already in your kitchen. There’s nothing fancy here, just pantry staples delivering big on flavor.
- Perfect for Any Occasion: Whether it’s a birthday party, a simple weeknight treat, or a holiday cookie swap, these bars fit right in. They look festive and taste like a million bucks.
- Crowd-Pleaser: Kids and adults both go wild for these. They’re nostalgic, comforting, and just the right amount of indulgent. Trust me, there won’t be leftovers.
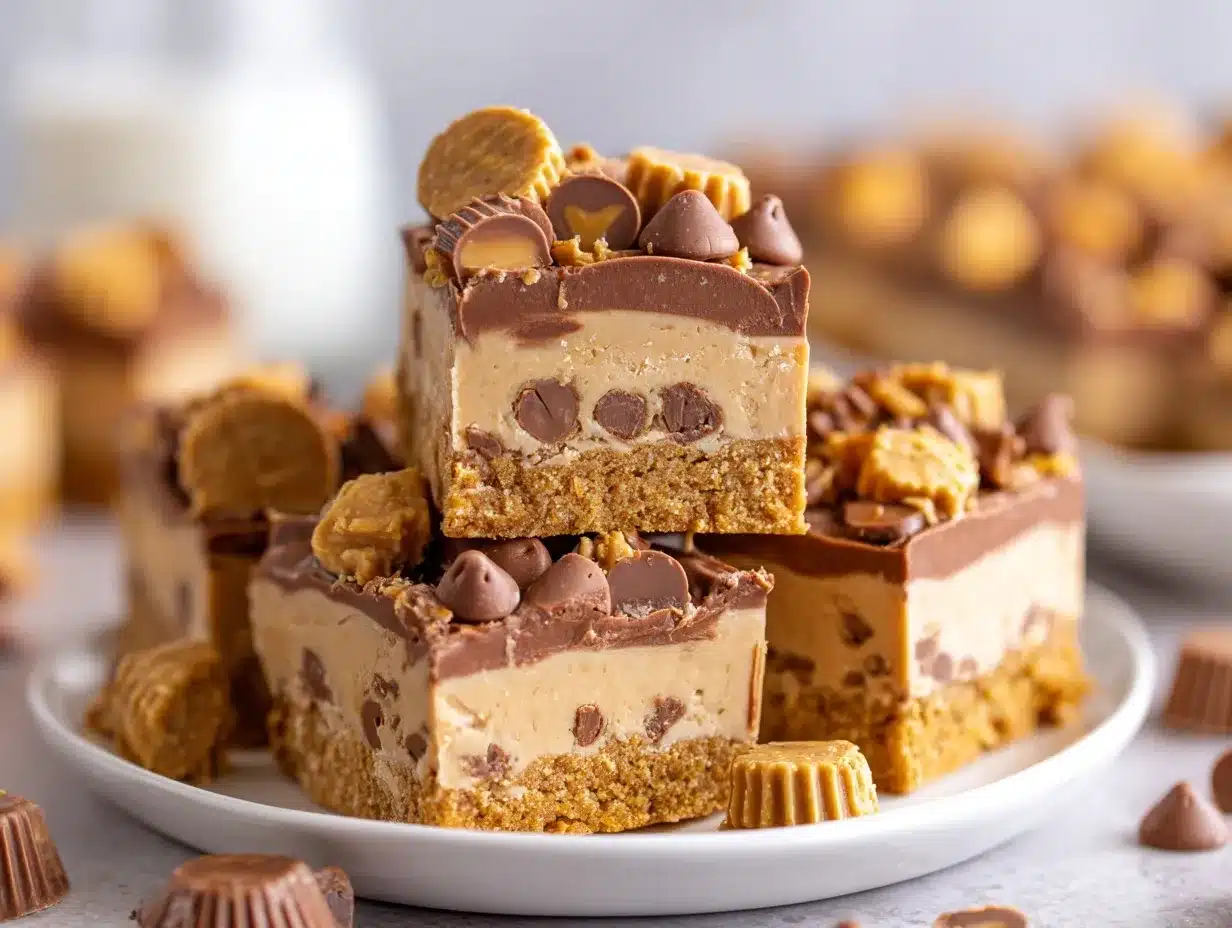
- Unbelievably Delicious: The texture is spot on—soft, creamy peanut butter with a slightly crunchy base, topped with that melt-in-your-mouth chocolate. It’s got all the magic of a Reese’s cup but homemade and even better.
What sets this Reese’s Peanut Butter No-Bake Bars recipe apart? For starters, I blend the peanut butter base until it’s extra smooth, then add just a bit more powdered sugar for stability. You don’t end up with a runny mess or a rock-hard brick—just perfect, sliceable bars every time. Plus, a little vanilla amps up the flavor more than you’d think. And let’s face it, it’s hard to argue with a dessert that goes from mixing bowl to fridge in minutes.
If you’ve ever been let down by dry, crumbly no-bake treats, this recipe will change your mind. It’s rich but not cloying, and you can tweak the sweetness to your taste. Homemade comfort meets classic candy bar vibes—these bars have saved me from many a dessert dilemma, and I know they’ll do the same for you. Ready for dessert bliss?
What Ingredients You Will Need
This recipe uses simple, wholesome ingredients to deliver bold peanut butter-chocolate flavor without any drama. Most of them are probably already sitting in your pantry, and if not, there are easy swaps. Here’s what you’ll need for these irresistible Reese’s Peanut Butter No-Bake Bars:
- For the Peanut Butter Base:
- 1 cup (240g) creamy peanut butter (go for classic, not the all-natural kind for best texture)
- 1/2 cup (115g) unsalted butter, melted (adds richness and helps everything stick)
- 2 cups (240g) powdered sugar (for sweetness and structure—sift if lumpy)
- 1 cup (100g) graham cracker crumbs (for that subtle crunch; digestive biscuits also work)
- 1 teaspoon pure vanilla extract (gives a warm, rounded flavor—don’t skip!)
- Pinch of salt (balances all the sweet notes perfectly)
- For the Chocolate Topping:
- 1 1/2 cups (270g) semi-sweet chocolate chips (I like Ghirardelli or Nestlé, but most brands work)
- 1/4 cup (60g) creamy peanut butter (keeps the chocolate layer soft and sliceable)
Ingredient Notes & Substitutions:
- Peanut Butter: Skippy or Jif work great. Natural peanut butters separate and make the bars oily. For a nut-free version, use sunflower butter.
- Graham Crackers: Gluten-free graham crackers or even oat cookies will do if you need a celiac-friendly option.
- Chocolate Chips: Swap for milk chocolate or dark chocolate chips depending on your preference. Even chopped chocolate bars work in a pinch.
- Butter: Use plant-based butter for a dairy-free version. I’ve tried Earth Balance with good results.
That’s it! No eggs, no flour, no baking powder—just the good stuff. I always say, don’t sweat the small stuff here. If you’re out of one thing, chances are, you can swap it and still end up with delicious bars. Trust your instincts and have a little fun with it!
Equipment Needed
- 8×8-inch (20x20cm) Baking Pan: This size gives you thick, bakery-style bars. If you only have a 9×9-inch (23x23cm) pan, the bars will be a bit thinner but still delicious.
- Mixing Bowls: You’ll want one large and one small. Glass or metal—no biggie.
- Rubber Spatula: For scraping every last bit of peanut butter out (don’t waste a drop!).
- Measuring Cups & Spoons: Both US and metric work—just be precise for best texture.
- Microwave-Safe Bowl: For melting chocolate and butter. You can also use a double boiler if you prefer.
- Parchment Paper: Makes removing the bars a breeze—no sticking, no mess.
- Sharp Knife: For slicing clean, neat bars. Warm it under hot water for perfect edges.
If you’re missing parchment paper, you can grease the pan really well with butter or non-stick spray. I’ve made these with old-school metal pans and even glass casserole dishes—whatever you have should work! Just make sure you don’t use flimsy foil pans, as they can buckle under the weight.
Pro tip: Keep your chocolate-melting bowl dry. Any water will seize the chocolate, and nobody wants that. For budget-friendly gear, basic IKEA or Target kitchen tools are more than enough. Just show them a little love after each use, and they’ll last forever.
How to Make Reese’s Peanut Butter No-Bake Bars
-
Line Your Pan:
Line an 8×8-inch (20x20cm) square baking pan with parchment paper, letting some hang over the sides for lifting later. You can grease the pan if that’s easier. This makes removing the bars (and cleaning up) so much better. -
Make the Peanut Butter Base:
In a large bowl, combine 1 cup (240g) creamy peanut butter and 1/2 cup (115g) melted unsalted butter. Stir until completely blended and smooth—no streaks! Add 2 cups (240g) powdered sugar, 1 cup (100g) graham cracker crumbs, 1 teaspoon vanilla extract, and a pinch of salt. Mix with a spatula or wooden spoon until it’s thick and dough-like. If it feels too dry, add a tablespoon more peanut butter; if too sticky, add a tablespoon of crumbs. -
Press into Pan:
Scoop the peanut butter mixture into your prepared pan. Press it firmly into an even layer using your spatula or the bottom of a measuring cup. You want it packed tight so the bars hold together when sliced. If it feels crumbly, press harder or let it sit for a few minutes before smoothing. It should look smooth and slightly glossy. -
Melt the Chocolate:
In a microwave-safe bowl, combine 1 1/2 cups (270g) semi-sweet chocolate chips and 1/4 cup (60g) creamy peanut butter. Microwave in 30-second bursts, stirring after each, until smooth and fully melted (about 1-2 minutes total). Alternatively, melt gently over a double boiler on the stove. Don’t overheat—if the chocolate seizes or looks grainy, add a tiny splash of milk and stir until smooth. -
Spread the Chocolate Layer:
Pour the melted chocolate mixture over the peanut butter base. Spread it evenly with a spatula, reaching all the edges. Give the pan a gentle tap on the counter to pop any bubbles and settle the chocolate. -
Chill:
Refrigerate the pan for at least 2 hours, or until the chocolate is set and the bars are firm. If you’re in a rush, pop them in the freezer for 45 minutes. Don’t slice too soon; the chocolate will crack and the base might be too soft. -
Slice & Serve:
Lift the bars out using the parchment paper. Run a sharp knife under hot water, wipe dry, and slice into 16 squares. For super clean cuts, wipe the knife between slices. The bars should be firm but soft when you bite in—just like the best Reese’s cup!
Prep Note: If the bars feel a little too soft after slicing, pop them back in the fridge for 10 minutes. They’ll firm right up. And if you like a salty-sweet vibe, try sprinkling a few flakes of sea salt on the chocolate before chilling. It’s my secret upgrade!
Cooking Tips & Techniques
Here’s what I’ve learned from making Reese’s Peanut Butter No-Bake Bars a (probably embarrassing) number of times:
- Use Room Temperature Ingredients: Cold peanut butter or butter can make the base seize up and get lumpy. Let them sit out for 10-15 minutes before mixing.
- Don’t Overmix the Base: Stir just until combined. Overmixing can make it greasy or tough. If it looks a little dry, that’s okay—it’ll settle as it chills.
- Line Your Pan Well: Parchment is your friend. If you skip it, the bars might stick, and trust me, prying them out with a spatula is not fun. Been there, done that.
- Cut with a Hot Knife: Run your knife under hot water and dry it before slicing. The chocolate layer will cut cleanly, and you won’t smush the peanut butter base.
- Watch the Chocolate: Melting chocolate in the microwave is quick, but easy to burn. Go slow and stir every 30 seconds. If you see any seizing, add a teaspoon of milk and whisk like crazy.
- Chill Completely: Don’t rush the fridge time. If you try to slice too soon, the chocolate cracks and the base can fall apart. Patience pays off here.
I’ve definitely made the mistake of using too much butter once (the bars turned greasy and wouldn’t set), and another time, I forgot the salt—shockingly, it was way too sweet. Little things make a big difference, so trust your senses. If it smells nutty and rich and looks smooth, you’re on the right track. And always taste as you go—someone’s got to lick the spoon!
Variations & Adaptations
- Gluten-Free Version: Swap the graham crackers for gluten-free cookies. I’ve tried both Schär and Kinnikinnick brands, and both work beautifully. You’ll never miss the gluten.
- Nut-Free Option: Sunflower seed butter or Wowbutter can replace peanut butter for those with allergies. The flavor is slightly different but still totally delicious.
- Dark Chocolate Dream: Use dark chocolate chips (70% cocoa or higher) for a more grown-up, less sweet twist. Add a little espresso powder to the chocolate layer for depth.
- Holiday Flair: Sprinkle crushed candy canes or mini M&Ms on the chocolate before chilling for a festive touch. Kids love this!
- Different Pan Shapes: Make them in a muffin tin with liners for grab-and-go portions, or double the recipe in a 9×13-inch (23x33cm) pan for a crowd.
One of my favorite spins is adding a thin layer of raspberry jam between the peanut butter and chocolate layers. It’s unexpected and makes the bars taste like a PB&J with a chocolate twist—so good! Don’t be afraid to get creative. Whether it’s adding a pinch of cinnamon, a swirl of caramel, or a handful of chopped nuts, these bars are basically a blank canvas for your sweet cravings.
Serving & Storage Suggestions
These Reese’s Peanut Butter No-Bake Bars are best served slightly chilled, straight from the fridge. The chocolate stays snappy, and the peanut butter layer is perfectly creamy. If you’re prepping for a party, cut them into squares and stack on a pretty platter with a few peanut butter cups tucked around for fun.
Pair with a cold glass of milk, a mug of coffee, or even a scoop of vanilla ice cream if you’re feeling extra indulgent. They’re rich, so small squares go a long way!
For storage, keep the bars in an airtight container in the fridge for up to 1 week. I like to separate layers with parchment to prevent sticking. They also freeze well—just wrap tightly and freeze for up to 2 months. Thaw overnight in the fridge, or let sit at room temperature for 30 minutes before serving.
Honestly, the flavors get even better after a day or two. The layers meld together, and it’s pure peanut butter-chocolate bliss. If you somehow have leftovers (rare in my house!), just pop them back in the fridge and enjoy a sweet treat whenever you want.
Nutritional Information & Benefits
Each bar (based on 16 servings) has roughly:
- Calories: 255
- Fat: 16g
- Carbs: 27g
- Protein: 4g
- Sugar: 18g
Peanut butter provides healthy fats and a little protein, while chocolate brings antioxidants (if you use dark chocolate, even more!). You can reduce sugar by using a sugar substitute or cutting back on the powdered sugar by 1/4 cup.
These bars are naturally egg-free and can be made gluten-free and dairy-free with the right swaps. They do contain peanuts and dairy (unless adapted), so keep that in mind for allergies. I always say dessert should make you happy—so enjoy a bar, savor the moment, and don’t stress the numbers too much!
Conclusion
Reese’s Peanut Butter No-Bake Bars are the dessert I turn to when I need something fast, foolproof, and guaranteed to please. They’re rich, comforting, and so easy, you’ll wonder why you ever bothered with store-bought treats. The fact that you don’t even need to turn on the oven? Just makes them that much better.
Don’t be afraid to play with flavors or adjust the sweetness to your liking. These bars are endlessly adaptable—make them your own! I love sharing a plate at family gatherings and watching everyone’s eyes light up after that first bite.
If you try this recipe, let me know in the comments or tag me on social media. I’d love to see your creations and swaps. Happy no-baking, friends! May your chocolate always be melty and your peanut butter always creamy.
Frequently Asked Questions About Reese’s Peanut Butter No-Bake Bars
Can I use natural peanut butter in this recipe?
It’s best to use classic creamy peanut butter like Jif or Skippy. Natural peanut butters separate and can make the bars oily or crumbly. If you must use natural, stir it VERY well, and expect a softer base.
How do I make these bars gluten-free?
Easy! Just swap the graham cracker crumbs for a gluten-free cookie crumb (like Schär or Kinnikinnick). The rest of the ingredients are naturally gluten-free.
Can I freeze Reese’s Peanut Butter No-Bake Bars?
Absolutely. Wrap the bars tightly and freeze for up to 2 months. Thaw in the fridge or at room temperature before serving. They hold up great!
Why is my chocolate layer cracking when I slice the bars?
This usually happens if the bars are too cold or the chocolate is too thick. Try letting them sit at room temperature for 10 minutes, and always slice with a hot, dry knife for cleaner cuts.
Can I add other mix-ins or toppings?
Definitely! Mini chocolate chips, chopped nuts, sea salt, or even a swirl of caramel are all fantastic. Get creative and make these bars your own.
Pin This Recipe!
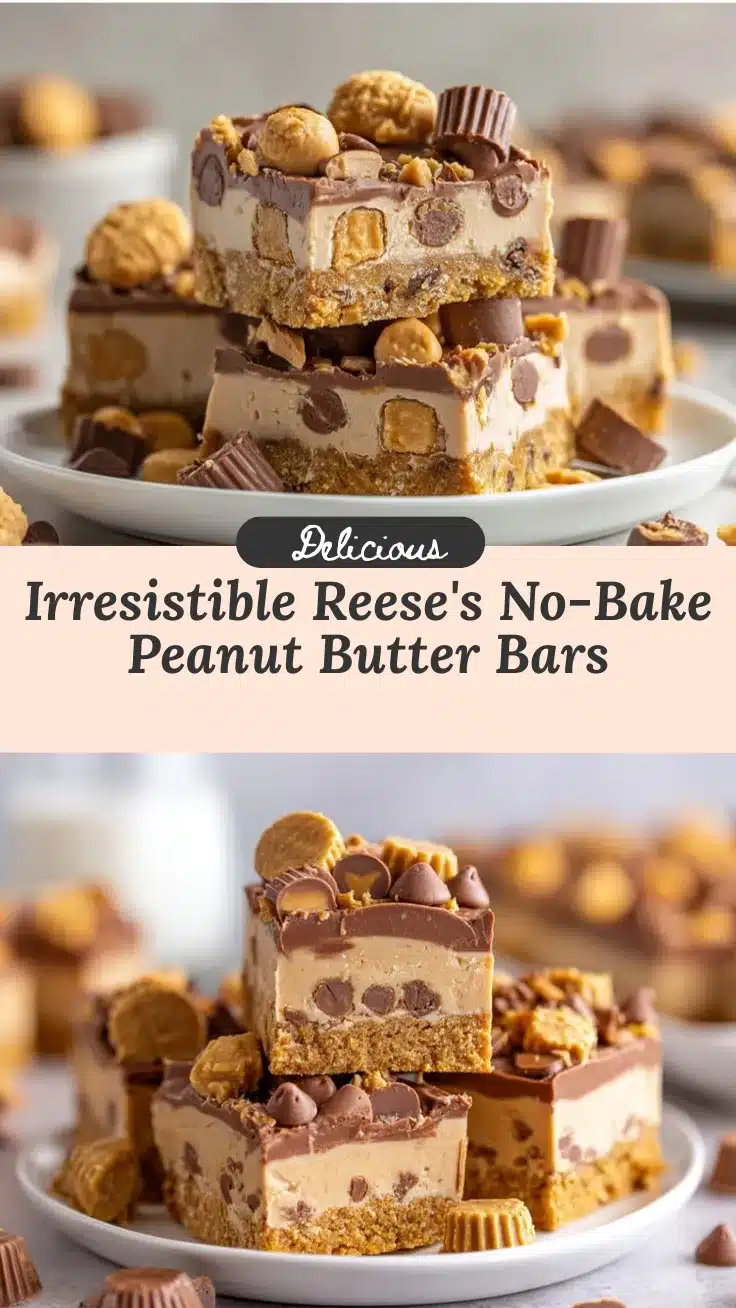
Reese’s Peanut Butter No-Bake Bars

These Reese’s Peanut Butter No-Bake Bars are a quick and easy dessert featuring a creamy peanut butter base topped with a silky chocolate layer. Perfect for satisfying your sweet tooth without turning on the oven, they’re a crowd-pleasing treat for any occasion.
- Prep Time: 15 minutes
- Cook Time: 5 minutes
- Total Time: 2 hours 20 minutes
- Yield: 16 bars 1x
- Category: Dessert
- Cuisine: American
Ingredients
- 1 cup (240g) creamy peanut butter (not natural style)
- 1/2 cup (115g) unsalted butter, melted
- 2 cups (240g) powdered sugar, sifted if lumpy
- 1 cup (100g) graham cracker crumbs
- 1 teaspoon pure vanilla extract
- Pinch of salt
- 1 1/2 cups (270g) semi-sweet chocolate chips
- 1/4 cup (60g) creamy peanut butter (for chocolate topping)
Instructions
- Line an 8×8-inch (20x20cm) square baking pan with parchment paper, letting some hang over the sides for easy removal.
- In a large bowl, combine 1 cup creamy peanut butter and 1/2 cup melted unsalted butter. Stir until smooth.
- Add 2 cups powdered sugar, 1 cup graham cracker crumbs, 1 teaspoon vanilla extract, and a pinch of salt. Mix until thick and dough-like. Adjust with more peanut butter or crumbs if needed.
- Press the peanut butter mixture firmly and evenly into the prepared pan.
- In a microwave-safe bowl, combine 1 1/2 cups semi-sweet chocolate chips and 1/4 cup creamy peanut butter. Microwave in 30-second bursts, stirring after each, until smooth (about 1-2 minutes). Alternatively, melt over a double boiler.
- Pour the melted chocolate mixture over the peanut butter base and spread evenly. Tap the pan gently to remove air bubbles.
- Refrigerate for at least 2 hours, or until the chocolate is set and bars are firm. For faster setting, freeze for 45 minutes.
- Lift the bars out using the parchment paper. Slice into 16 squares with a sharp knife warmed under hot water for clean cuts.
- Serve chilled. Store leftovers in an airtight container in the fridge for up to 1 week or freeze for up to 2 months.
Notes
For gluten-free bars, use gluten-free graham crackers or oat cookies. For dairy-free, use plant-based butter. Slice with a hot, dry knife for clean edges. Sprinkle sea salt on top for a salty-sweet twist. Bars are best served chilled and can be frozen for up to 2 months.
Nutrition
- Serving Size: 1 bar (1/16 of recipe)
- Calories: 255
- Sugar: 18
- Sodium: 90
- Fat: 16
- Saturated Fat: 6
- Carbohydrates: 27
- Fiber: 2
- Protein: 4
Keywords: no-bake, peanut butter bars, Reese's, chocolate, easy dessert, quick, potluck, kid-friendly, gluten-free option, dairy-free option



