Introduction
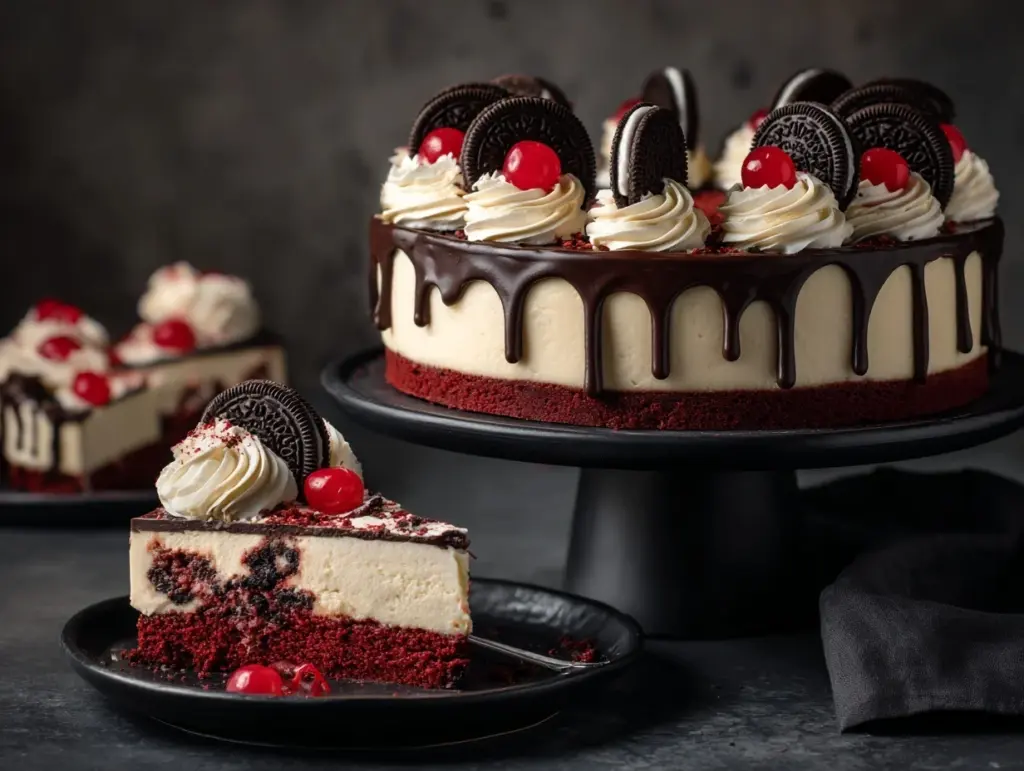
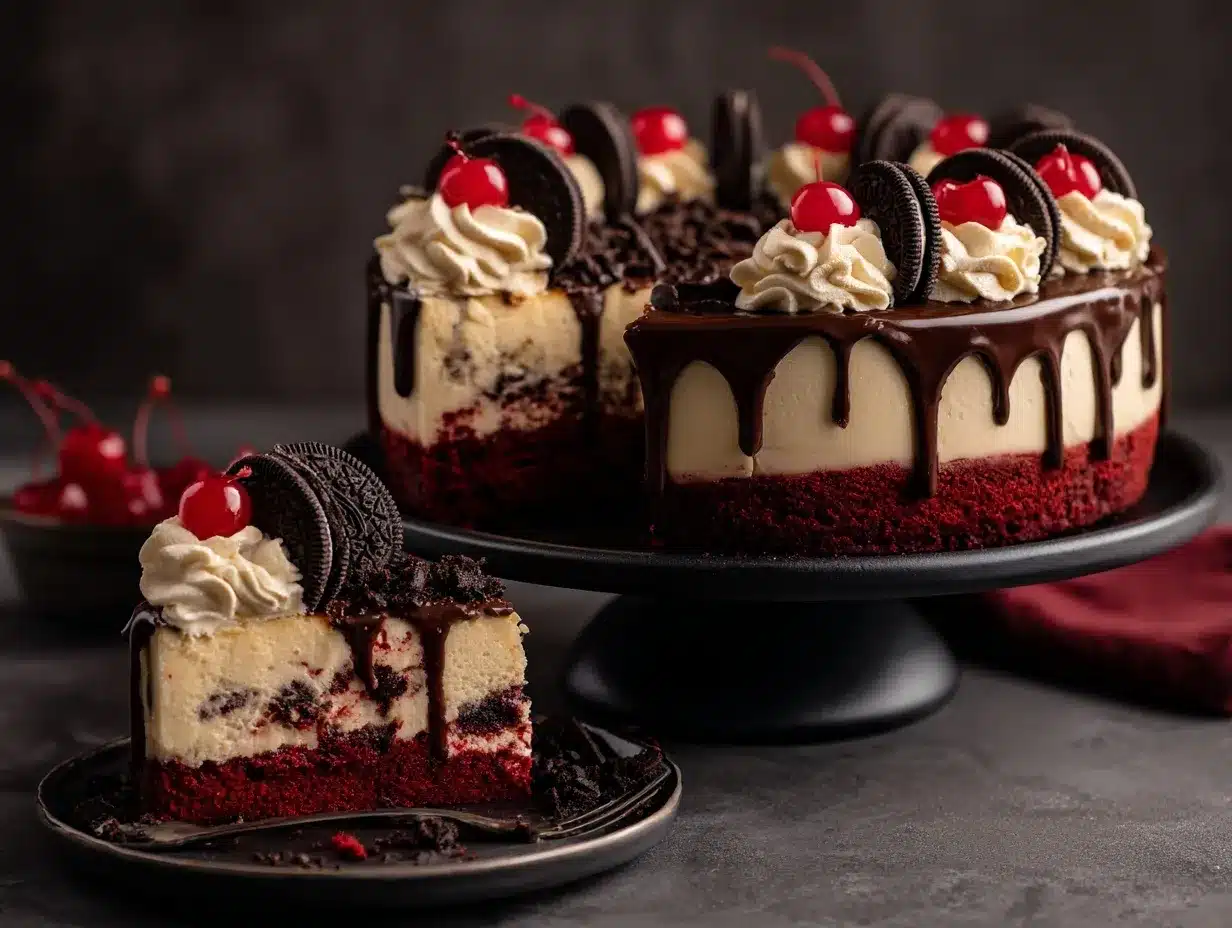
The moment you cut into this Red Velvet Oreo Cheesecake and see those luscious crimson layers with flecks of cookies, you know you’re about to taste something special. There’s just something magical about the combination of velvety red chocolate, creamy cheesecake, and that familiar crunch from Oreo cookies. I still remember the first time I made this for my family—there were no leftovers, not even a crumb. Honestly, it was one of those desserts that had everyone sneaking back into the kitchen for “just one more bite,” as if the calories didn’t count if you ate them standing up.
My love for red velvet started early, probably because it always felt like a celebration cake—rich, vibrant, and a little mysterious thanks to its cocoa undertones. But when you mash that up with Oreos (my guilty pleasure) and a creamy cheesecake base, you get something that’s out-of-this-world good. This Red Velvet Oreo Cheesecake recipe is my answer to every sweet tooth’s prayers. It’s indulgent but not fussy, striking that perfect balance between wow-factor looks and honest-to-goodness homemade flavor.
What I adore about this recipe is that it looks like you spent hours on it, but, truth be told, it’s pretty straightforward. Whether you’re baking for a birthday, holiday, or just because you need a pick-me-up, this cheesecake fits the bill. It’s great for impressing guests, making memories with kids, or simply treating yourself on a random Tuesday night. After testing and tweaking this recipe too many times to count (and eating more than my fair share), I can confidently say: you’re going to fall hard for this Red Velvet Oreo Cheesecake. Trust me, one slice and you’ll see why it’s my ultimate yummy dessert.
Why You’ll Love This Recipe
If you’ve ever wished for a showstopping dessert that’s actually doable in your own kitchen, this Red Velvet Oreo Cheesecake is it. I’ve made this for everything from family reunions to my best friend’s bridal shower, and it never fails to steal the spotlight. Here’s why this recipe is bound to become a favorite in your dessert rotation:
- Quick & Easy: You don’t need to be a pastry chef—this comes together with simple steps and minimal fuss. No water bath headaches, either!
- Simple Ingredients: Most of the ingredients are probably already in your pantry or fridge. No fancy specialty items or wild-goose chases at the store.
- Perfect for Any Occasion: Whether it’s Valentine’s Day, a birthday bash, or a Tuesday night treat, this cheesecake is always a hit. It’s festive and comforting all at once.
- Crowd-Pleaser: Kids go wild for the Oreo crust, adults swoon over the creamy red velvet filling. It’s genuinely hard to find someone who won’t ask for seconds.
- Unbelievably Delicious: The texture is a dreamy blend of creamy, tangy, and chocolatey, with that signature Oreo crunch at the base and scattered throughout. It’s like three desserts in one.
What sets my Red Velvet Oreo Cheesecake apart? Well, I use a generous amount of crushed Oreos both in the crust and folded into the batter itself. This means every bite is packed with cookies-and-cream goodness—not just the bottom! I also like to blend the cream cheese until it’s ultra-smooth (no lumps, thank you very much), and I add just enough cocoa powder to give the red velvet its classic flavor without overpowering the cheesecake’s tang.
This isn’t just another red velvet cheesecake. It’s the kind of dessert that makes people lean back in their chairs, close their eyes, and let out a happy sigh. It’s comfort food at its most decadent, but with a playful, celebratory twist. If you’re looking to win over a crowd—or just your own taste buds—this is the recipe you’ll want to keep coming back to.
What Ingredients You Will Need
This recipe uses straightforward ingredients—think pantry staples and fridge basics—but the magic comes from how they all blend together into a seriously crave-worthy dessert. Here’s what you’ll need to make your Red Velvet Oreo Cheesecake:
- For the Oreo Crust:
- 24 Oreo cookies, finely crushed (about 240g; regular or double-stuffed work great)
- 1/4 cup (60g) unsalted butter, melted (adds richness and helps the crust hold together)
- For the Red Velvet Cheesecake Filling:
- 24 oz (680g) cream cheese, softened (full-fat for best texture—I love using Philadelphia brand for extra creaminess)
- 1 cup (200g) granulated sugar
- 3 large eggs, room temperature
- 2/3 cup (160ml) sour cream (adds tang and moisture)
- 1/4 cup (60ml) heavy cream
- 1/4 cup (30g) unsweetened cocoa powder (Dutch-process if you want deeper color and flavor)
- 2 tsp vanilla extract
- 1 tbsp red food coloring (liquid or gel; adjust to your preferred shade of red)
- 12 Oreo cookies, roughly chopped (for folding into the batter)
- For the Topping (Optional, but so worth it):
- 1 cup (240ml) heavy whipping cream, cold
- 2 tbsp powdered sugar
- 6 Oreo cookies, crushed (for garnish)
- Chocolate shavings or a drizzle of melted chocolate (totally optional, but makes for a gorgeous finish)
Ingredient Notes & Swaps:
- If you want a gluten-free version, use gluten-free chocolate sandwich cookies instead of regular Oreos.
- No red food coloring? The cake will still taste amazing—just with a more natural cocoa color.
- Out of sour cream? Plain Greek yogurt works in a pinch (I’ve tried it, and it’s still delicious).
- For a slightly less sweet version, reduce the sugar by 1/4 cup (50g)—I promise, it’s still decadent.
In summer, I’ve even added a handful of fresh raspberries on top for a fruity twist. This ingredient list is flexible, so don’t be afraid to experiment.
Equipment Needed
Making this Red Velvet Oreo Cheesecake doesn’t require a professional kitchen setup—just a few trusty tools you probably already have:
- 9-inch (23cm) springform pan: This is non-negotiable for easy cheesecake release. If you don’t have one, you can use a deep 9-inch cake pan lined with parchment paper, but unmolding will be trickier.
- Electric mixer or stand mixer: Essential for getting that silky-smooth cheesecake texture. Hand mixing works too, but it takes some muscle!
- Mixing bowls: A couple of medium and large bowls for crust, filling, and whipped cream.
- Measuring cups and spoons: Accuracy matters here, especially with baking.
- Rubber spatula: For scraping down the sides and folding in those Oreo chunks.
- Food processor or rolling pin (for crushing Oreos): I usually toss the cookies in a zip-top bag and go to town with a rolling pin for less mess.
- Baking sheet: Placing your springform pan on a sheet helps catch any butter leaks. Trust me, you don’t want to clean burnt butter from your oven.
If you’re on a budget, you can often find springform pans at thrift stores or online for cheap. Just check that the latch is secure. And after use, always wash and thoroughly dry your springform pan to keep it from rusting—I learned that the hard way after losing my favorite pan to a little leftover moisture!
Preparation Method
-
Prepare the Oreo Crust (10 minutes):
- Preheat your oven to 325°F (163°C). Grease a 9-inch (23cm) springform pan with nonstick spray or line the bottom with parchment paper.
- Finely crush 24 Oreo cookies (cream filling included) in a food processor or by hand in a zip-top bag with a rolling pin.
- Mix the crushed Oreos with 1/4 cup (60g) melted unsalted butter until evenly combined. The mixture should resemble wet sand and hold together when squeezed.
- Press the mixture firmly into the bottom of your prepared pan. Use the flat bottom of a glass to get it nice and compact—no loose crumbs.
- Bake the crust for 8 minutes, then set aside to cool while you make the filling. (Don’t skip pre-baking—it keeps the crust crisp!)
-
Make the Red Velvet Cheesecake Filling (20 minutes):
- In a large bowl, beat 24 oz (680g) softened cream cheese with 1 cup (200g) granulated sugar using an electric mixer on medium speed. Mix for about 2-3 minutes until completely smooth and creamy—scrape the sides and bottom of the bowl a couple of times to catch any lumps.
- Add 3 large eggs, one at a time, mixing just until incorporated after each addition. (Overbeating at this stage can cause cracks, so go gently.)
- Blend in 2/3 cup (160ml) sour cream, 1/4 cup (60ml) heavy cream, 1/4 cup (30g) unsweetened cocoa powder, 2 tsp vanilla extract, and 1 tbsp red food coloring. Beat until the color is uniform and the batter is silky.
- Gently fold in 12 roughly chopped Oreo cookies using a spatula—don’t overmix or you’ll crush them into oblivion. You want big cookie pockets in every slice.
- Pour the batter over your cooled Oreo crust and smooth the top with a spatula.
-
Bake the Cheesecake (55-65 minutes):
- Place the springform pan on a baking sheet (just in case of leaks) and bake at 325°F (163°C) for 55–65 minutes. The edges should look set, but the center will still jiggle slightly when gently shaken—don’t worry, it’ll firm up as it cools.
- If the top starts to brown too fast, gently tent with foil for the last 15 minutes.
Troubleshooting Tip: If your cheesecake cracks, don’t panic! The whipped cream topping and extra Oreos cover it right up. Even the best bakers get cracks sometimes—it’s just part of the cheesecake adventure.
-
Cool and Chill (at least 4 hours, preferably overnight):
- Turn off the oven and crack the door open. Let the cheesecake cool inside for 1 hour—this helps prevent sudden temperature changes that cause cracks.
- After 1 hour, remove from the oven and cool completely at room temperature. Then refrigerate for at least 4 hours (overnight is best for perfect texture).
-
Prepare the Whipped Cream Topping (5 minutes):
- In a chilled bowl, whip 1 cup (240ml) heavy cream with 2 tbsp powdered sugar until stiff peaks form. (You want it fluffy but not overbeaten—watch out, it can go from perfect to buttery quickly!)
- Spread or pipe the whipped cream on top of the chilled cheesecake. Sprinkle with 6 crushed Oreo cookies and, if you’re feeling fancy, a little chocolate drizzle or shavings.
-
Serve and Enjoy:
- Run a thin knife around the edge of the cheesecake before releasing the springform pan. Slice with a sharp knife, wiping between cuts for clean pieces.
Personal Tip: For the neatest slices, dip your knife in hot water and wipe dry before each cut. It makes a difference, trust me!
Cooking Tips & Techniques
Making cheesecake can feel intimidating, but with a few tricks up your sleeve, it’s a breeze. Here are my best tips for getting that picture-perfect Red Velvet Oreo Cheesecake every time:
- Room Temperature Ingredients: Always let your cream cheese, eggs, and sour cream come to room temp before mixing. Cold ingredients lead to lumps—learned that the hard way!
- Don’t Overbeat: Once you add eggs, mix just until combined. Overbeating adds air, which can make your cheesecake puff up and crack as it cools.
- Cookie Crushing: If you like bigger Oreo chunks in your cheesecake, crush some cookies by hand instead of using a food processor. It gives you those dreamy cookie pockets.
- Avoid Drastic Temperature Changes: Sudden cooling can cause cracks. Letting your cheesecake loosen up in a turned-off oven is one of those “don’t skip this!” steps.
- Trouble with Leaks? Wrap the outside of your springform pan with foil to catch any butter drips. I’ve forgotten before and had to scrub my oven… not fun.
- Timing is Everything: Bake just until the edges are set and the middle jiggles. Overbaking is the enemy of creamy cheesecake.
- Multitask Smart: While the crust bakes and cools, prep your filling and chop Oreos. That way, you’re not wasting time waiting around.
- Whipped Cream Wisdom: Chill your mixing bowl and beaters for fluffier, more stable whipped cream topping.
And remember, even if your cheesecake isn’t “Pinterest perfect,” it’ll still taste absolutely amazing. The best desserts always have a little character!
Variations & Adaptations
One of the best things about this Red Velvet Oreo Cheesecake recipe is how easy it is to customize. Here are some of my favorite twists and tweaks:
- Gluten-Free Version: Swap regular Oreos for gluten-free chocolate sandwich cookies. I’ve made this for a friend with celiac, and no one could tell the difference.
- Chocolate Lover’s Dream: Add a handful of mini chocolate chips or chunks to the batter for extra gooey bites. You can also swap the cocoa powder for dark cocoa to intensify the chocolate flavor.
- Festive Swirl: Omit the food coloring and layer plain and red velvet batters for a gorgeous marbled effect. Just drop spoonfuls in and swirl with a knife before baking.
- Fruit Twist: Top the cheesecake with fresh raspberries, strawberries, or even a cherry compote for a bright, tangy finish.
- Dairy-Free Adaptation: Use dairy-free cream cheese, coconut cream instead of heavy cream, and vegan butter for the crust. Make sure your sandwich cookies are dairy-free, too.
- Nut Allergy-Friendly: This recipe is naturally nut-free, but always check your cookie and cream cheese brands for cross-contamination warnings if needed.
Personally, I love making a mini version in a muffin tin for parties—just line with cupcake wrappers, press in a little Oreo crust, pour in the batter, and bake for about 20-22 minutes. Instant portion control (or so I tell myself) and super cute for sharing!
Serving & Storage Suggestions
This Red Velvet Oreo Cheesecake is best served chilled, right out of the fridge. The creamy texture and Oreo crunch are at their peak when it’s cold. For an extra-special touch, pipe whipped cream around the edge and sprinkle a few more crushed cookies on top. If you’re feeling fancy, a drizzle of melted chocolate or a few chocolate curls make it party-ready.
Pair slices with a cup of strong coffee, a glass of cold milk, or even a little bubbly for celebrations—there’s really no wrong way to enjoy it. If you’re serving a crowd, slice with a hot knife and wipe between cuts for bakery-style presentation.
Leftovers (if you have any!) keep well in an airtight container in the refrigerator for up to 5 days. For longer storage, wrap individual slices tightly and freeze for up to 2 months. Thaw overnight in the fridge before serving. The flavors actually deepen and meld after a day or two in the fridge, making this a great make-ahead dessert for parties or holiday gatherings.
Reheat? Honestly, cheesecake is best served cold, but if you like it slightly warm, a few seconds in the microwave does the trick—just watch closely so it doesn’t melt into a puddle.
Nutritional Information & Benefits
Let’s be real—this Red Velvet Oreo Cheesecake is a treat, not a health food. But it does have some redeeming qualities! Each (generous) slice is about 420 calories, with creamy protein from the cream cheese and a little calcium, too. The cocoa powder adds a touch of antioxidants, while the Oreos… well, they bring joy, and that counts for something, right?
This recipe is nut-free and can be easily adapted for gluten-free or dairy-free diets as noted above. It contains dairy, eggs, and gluten in its classic form. If you’re watching your sugar intake, you can reduce the sugar by about 1/4 cup, and it will still be rich and satisfying.
From a wellness perspective, I’m a believer in balance—indulge when it’s worth it, and enjoy every single bite. This cheesecake is definitely worth it.
Conclusion
There’s just something irresistible about this Red Velvet Oreo Cheesecake. It’s decadent, playful, and always leaves people asking for the recipe. Whether you’re whipping it up for a special occasion or just because you want to treat yourself, it’s the kind of dessert that turns an ordinary day into something memorable.
Don’t be afraid to make it your own—add a swirl, switch up the toppings, or sneak in your favorite flavor twist. I’ve made this in so many ways, and honestly, it’s a winner every single time.
If you try this recipe, let me know how it turned out! Leave a comment below, share your photo, or tag me on Pinterest. I’d love to see your delicious creations. Now, go grab those Oreos and get baking—you deserve it!
FAQs
How long does the Red Velvet Oreo Cheesecake need to chill before serving?
For best results, chill the cheesecake for at least 4 hours, but overnight is even better for firm slices and full flavor.
Can I make this cheesecake ahead of time?
Absolutely! You can prepare it a day or two in advance. The flavors actually get better as it sits in the fridge.
What if I don’t have a springform pan?
You can use a deep 9-inch cake pan lined with parchment for easier removal, but a springform pan is ideal for cheesecakes.
Do I need to use gel or liquid red food coloring?
Either works! Gel food coloring is more concentrated, so you might need less for a vibrant color. Adjust to your liking.
Can I freeze leftover cheesecake?
Yes, wrap individual slices tightly and freeze for up to 2 months. Thaw in the fridge before serving—still tastes amazing!
Pin This Recipe!

Red Velvet Oreo Cheesecake

This Red Velvet Oreo Cheesecake combines velvety red chocolate cheesecake with a crunchy Oreo crust and cookies folded throughout. It’s a showstopping, crowd-pleasing dessert that’s surprisingly easy to make at home.
- Prep Time: 30 minutes
- Cook Time: 65 minutes
- Total Time: 6 hours
- Yield: 12 servings 1x
- Category: Dessert
- Cuisine: American
Ingredients
- 24 Oreo cookies, finely crushed (about 240g; regular or double-stuffed)
- 1/4 cup (60g) unsalted butter, melted
- 24 oz (680g) cream cheese, softened
- 1 cup (200g) granulated sugar
- 3 large eggs, room temperature
- 2/3 cup (160ml) sour cream
- 1/4 cup (60ml) heavy cream
- 1/4 cup (30g) unsweetened cocoa powder
- 2 tsp vanilla extract
- 1 tbsp red food coloring (liquid or gel)
- 12 Oreo cookies, roughly chopped
- 1 cup (240ml) heavy whipping cream, cold (for topping, optional)
- 2 tbsp powdered sugar (for topping, optional)
- 6 Oreo cookies, crushed (for garnish, optional)
- Chocolate shavings or melted chocolate drizzle (optional, for garnish)
Instructions
- Preheat oven to 325°F (163°C). Grease a 9-inch springform pan or line the bottom with parchment paper.
- Finely crush 24 Oreo cookies (cream included) in a food processor or zip-top bag with a rolling pin.
- Mix crushed Oreos with melted butter until evenly combined. Press firmly into the bottom of the prepared pan.
- Bake crust for 8 minutes, then set aside to cool.
- In a large bowl, beat softened cream cheese with granulated sugar using an electric mixer on medium speed until smooth and creamy (2-3 minutes). Scrape bowl as needed.
- Add eggs one at a time, mixing just until incorporated after each addition.
- Blend in sour cream, heavy cream, cocoa powder, vanilla extract, and red food coloring. Beat until color is uniform and batter is silky.
- Gently fold in 12 roughly chopped Oreo cookies with a spatula.
- Pour batter over cooled Oreo crust and smooth the top.
- Place springform pan on a baking sheet and bake at 325°F (163°C) for 55–65 minutes, until edges are set but center still jiggles slightly.
- If top browns too quickly, tent with foil for the last 15 minutes.
- Turn off oven, crack door open, and let cheesecake cool inside for 1 hour.
- Remove from oven and cool completely at room temperature, then refrigerate at least 4 hours (preferably overnight).
- For the topping: In a chilled bowl, whip heavy cream with powdered sugar until stiff peaks form. Spread or pipe on top of chilled cheesecake.
- Garnish with 6 crushed Oreo cookies and chocolate shavings or drizzle, if desired.
- To serve, run a thin knife around the edge before releasing the springform pan. Slice with a sharp knife, wiping between cuts.
Notes
For best results, use room temperature ingredients to avoid lumps. Do not overbeat after adding eggs to prevent cracks. Chill the cheesecake thoroughly for clean slices. For gluten-free, use gluten-free sandwich cookies. Cheesecake can be made ahead and freezes well.
Nutrition
- Serving Size: 1 slice (1/12 of cheesecake)
- Calories: 420
- Sugar: 27
- Sodium: 340
- Fat: 29
- Saturated Fat: 16
- Carbohydrates: 38
- Fiber: 2
- Protein: 6
Keywords: red velvet cheesecake, oreo cheesecake, red velvet oreo dessert, easy cheesecake, homemade cheesecake, holiday dessert, birthday cake, cookies and cream cheesecake



