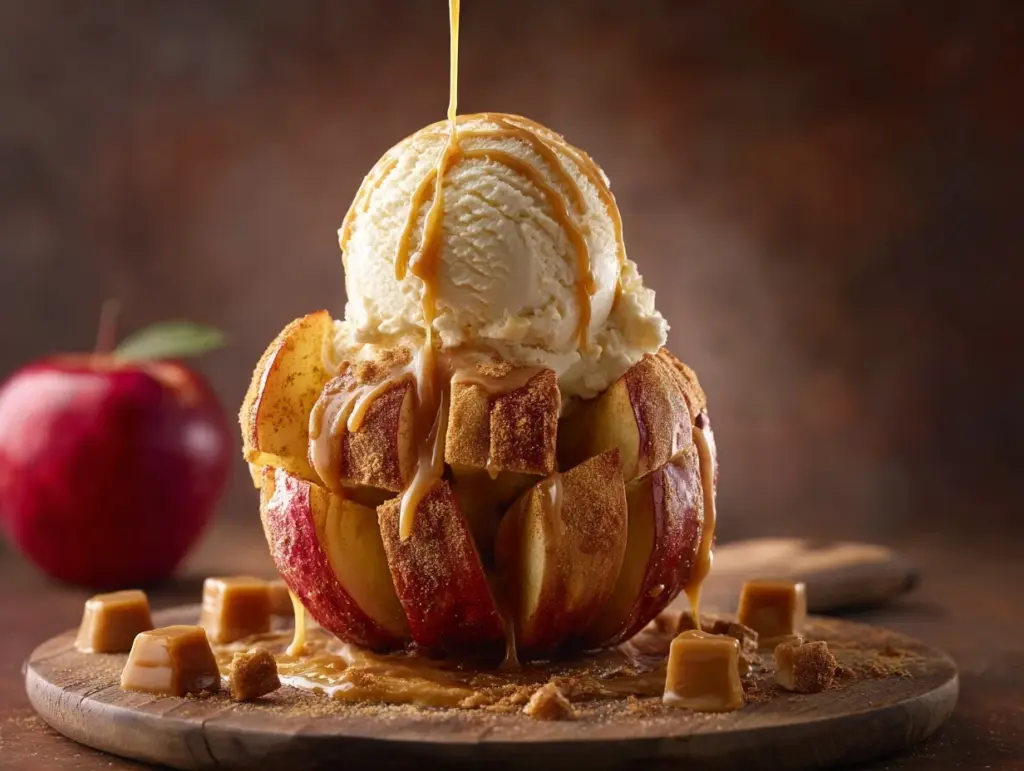
There’s just something about the scent of spiced apples and caramelizing sugar wafting from the oven that stops you in your tracks. For me, baked bloomin’ apples are that kind of recipe—they’re pure autumn in every bite, filling your kitchen with the warm, nostalgic aroma of cinnamon, brown sugar, and melting butter. I first stumbled upon this baked bloomin apples recipe on a chilly October afternoon, hunting for a dessert that was quick, comforting, and didn’t require a shopping spree for fancy ingredients. It turned out to be the perfect sweet treat for those sweater weather days when you crave something homemade but don’t want to fuss over pie dough.
This version of baked bloomin’ apples is one I’ve tweaked and tested more times than I can count (yep, I’m that person who experiments until it’s just right). It’s simple enough for a last-minute weeknight dessert, yet pretty enough for a holiday dinner party—guaranteed to steal the show at any fall gathering. You know what I love most? Each apple transforms into a tender, caramelized flower—easy to serve, fun to eat, and totally Instagram-worthy.
What makes this baked bloomin apples recipe so special? It’s the combination of gooey brown sugar filling, soft apple petals, and a buttery crisp topping—all ready in under an hour. Plus, there’s no rolling pins or pastry skills needed. If you’re looking for a fuss-free, crowd-pleasing dessert that screams fall, you’ve landed in the right spot. Whether you’re baking for family, friends, or just yourself (no judgement—I’ve done it!), these baked bloomin’ apples are a cozy hug in dessert form.
Why You’ll Love This Baked Bloomin Apples Recipe
Honestly, I can’t count the number of times these baked bloomin’ apples have rescued my dessert plans. I’ve made them for everything from Sunday brunch to Thanksgiving dinner, and they’re always a hit—no leftovers, ever. Here’s why this recipe deserves a spot in your fall dessert lineup:
- Quick & Easy: Ready in less than an hour, with just fifteen minutes of hands-on time. Perfect for busy evenings or when the dessert craving hits out of nowhere.
- Simple Ingredients: No need to hunt for fancy stuff—just apples, pantry staples, and a few cozy spices. I bet you already have everything on hand.
- Perfect for Any Occasion: These apples work for brunch, cozy family dinners, or festive holiday tables. I’ve even served them at a fall potluck, and they disappeared in minutes.
- Crowd-Pleaser: Kids love how fun and interactive they are (“It looks like a flower, Mom!”), and adults go back for seconds. Trust me, nobody can resist that gooey, cinnamon-sugar center.
- Unbelievably Delicious: The apples bake up soft and tender, with crispy, caramelized edges and a molten brown sugar core. Add a scoop of vanilla ice cream, and it’s next-level comfort food.
What sets this baked bloomin apples recipe apart? Instead of just stuffing the core, I cut each apple into blooming “petals”—so every bite is coated in buttery, spiced goodness. It’s a technique I picked up after a few not-so-pretty attempts at classic baked apples (let’s just say, those first versions were a little sad and soggy). Now, the apples bake evenly, soak up all the flavors, and look stunning on the plate.
This isn’t just another fall apple dessert—it’s the kind that brings everyone to the kitchen, forks in hand, waiting for a taste. It’s comfort food at its best, with a little showstopper twist. If you want to impress your guests (or just treat yourself after a long day), you can’t go wrong with these baked bloomin apples.
What Ingredients You Will Need for Baked Bloomin Apples
This recipe uses simple, wholesome ingredients to deliver bold flavor and that signature cozy texture. Most are pantry staples, and there’s plenty of room for swaps if you need them. Here’s what you’ll need:
- Large Apples (4; Honeycrisp, Fuji, or Granny Smith are my go-to’s—choose firm apples so they hold their shape, about 200g each)
- Lemon Juice (1 tablespoon; keeps the apples from browning and adds brightness)
- Brown Sugar (1/2 cup, packed; creates that gooey, caramel-like center—light or dark both work)
- Unsalted Butter (4 tablespoons/56g, melted; for richness and a crisp topping—salted butter is fine if that’s what you have, just skip extra salt)
- Ground Cinnamon (2 teaspoons; don’t skimp! Cinnamon is the cozy hero here)
- Ground Nutmeg (1/4 teaspoon; a little goes a long way for warmth and depth)
- Vanilla Extract (1 teaspoon; I love the subtle sweetness it brings—use pure vanilla for best flavor)
- Pecans or Walnuts (1/3 cup, chopped; optional, but adds crunch and a nutty twist—toast them for extra flavor)
- Old-Fashioned Oats (1/4 cup; optional, for a crispier topping—use gluten-free if needed)
- Pinch of Salt (balances the sweetness—skip if using salted butter)
- Optional Extras:
- Raisins or dried cranberries (2 tablespoons, for a chewy-sweet accent)
- Maple syrup or honey (drizzle after baking for an extra treat)
- Vanilla ice cream (for serving—it’s almost a requirement!)
Ingredient Tips: If you’re gluten-free, just skip the oats or use certified GF oats. For dairy-free, swap the butter for coconut oil or a vegan butter (I’ve tried both—still delicious). I like Honeycrisp apples for their juicy snap, but Granny Smith gives you a tangy contrast if you prefer something less sweet. And honestly, use whatever nuts or dried fruit you have—this recipe is super forgiving.
Equipment Needed for Baked Bloomin Apples
You don’t need fancy gadgets to get these apples looking (and tasting) like a Pinterest dream. Here’s what I reach for:
- Sharp Paring Knife: For careful cutting of the apple “petals.” If you don’t have one, a small serrated knife works too—just go slow!
- Melon Baller or Spoon: Handy for scooping out the apple core and seeds. A regular teaspoon will do the trick if you don’t have a melon baller.
- Baking Dish or Oven-Safe Skillet: I use an 8×8-inch (20x20cm) glass baking dish, but a cast iron skillet gives extra rustic vibes. Even a pie pan works in a pinch.
- Small Mixing Bowl: For prepping your brown sugar, spice, and butter filling.
- Basting Brush (Optional): Makes it easy to brush melted butter over the petals, but a spoon gets the job done, too.
- Aluminum Foil: For tenting over the apples so they don’t brown too quickly.
I’ve made these apples in everything from a thrift-store casserole dish to a fancy Le Creuset pan—no difference in taste! Just make sure your baking vessel has sides, since the apples release juices as they bake. Pro tip: Give your knife a quick sharpen for the smoothest “petal” cuts. And if you’re new to baking, don’t stress about perfect shapes—the apples will bloom and look gorgeous, even if they’re a bit quirky.
How to Make Baked Bloomin Apples – Step-by-Step Preparation
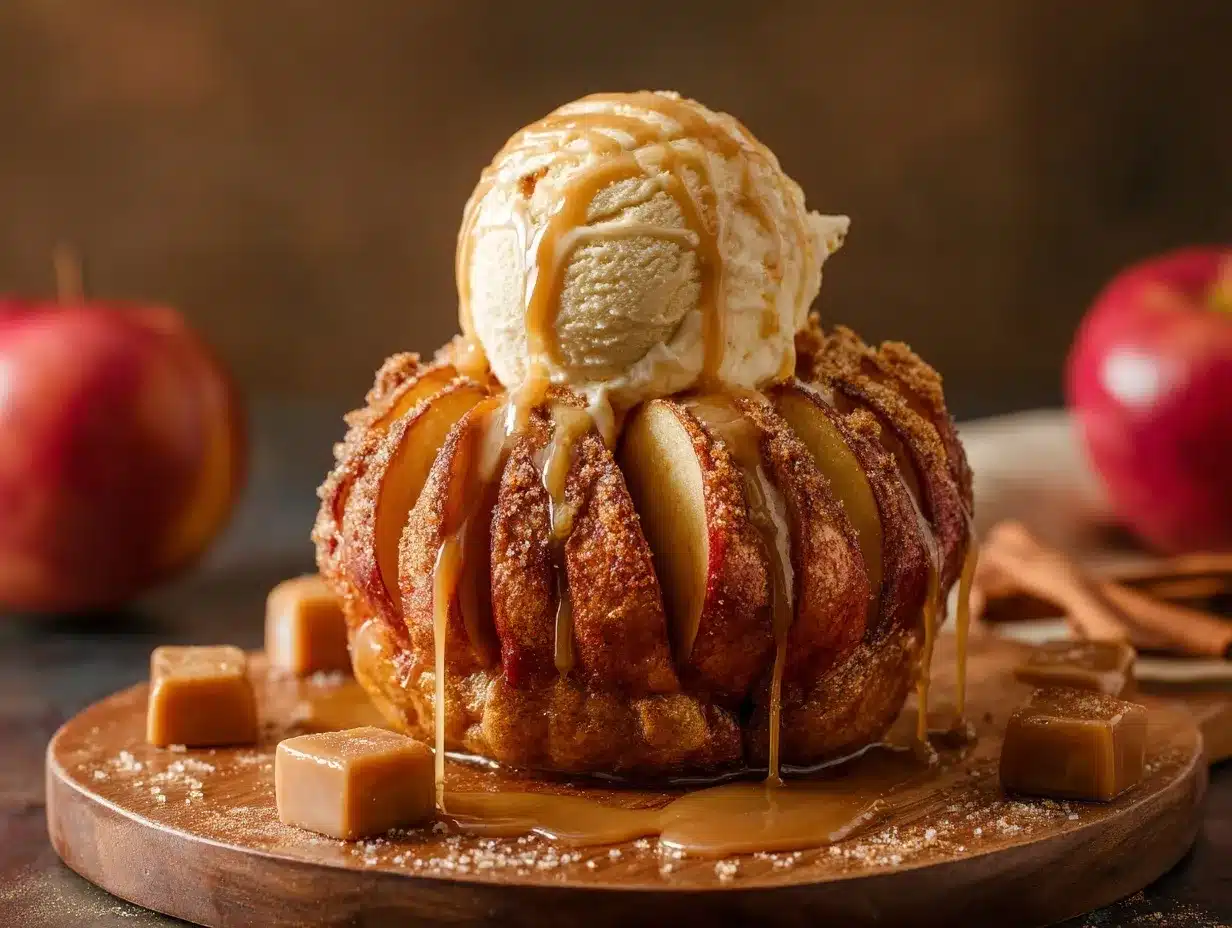
- Preheat the Oven: Set your oven to 375°F (190°C). This gives you the perfect balance—hot enough to caramelize the topping, but gentle so the apples get tender without falling apart.
- Prep the Apples: Wash and dry 4 large apples. Using a sharp paring knife, slice off the top 1/4 inch (about 0.5 cm) of each apple. Scoop out the core and seeds with a melon baller or small spoon, being careful not to cut through the bottom. If you accidentally poke a hole, just patch it with a little piece of apple—it’ll still bake up fine!
- Make the “Bloomin” Cuts: Place each apple cut-side up. Starting about 1/2 inch (1.25 cm) from the center, make 8 vertical cuts all around (think of flower petals), slicing down to about 1/2 inch from the base so the apple holds together. Don’t stress if it’s not perfectly even—the petals will open as they bake.
- Prevent Browning: Brush the cut surfaces with 1 tablespoon lemon juice. This keeps them looking fresh and adds a little zing.
- Mix the Filling: In a small bowl, combine 1/2 cup brown sugar, 2 teaspoons cinnamon, 1/4 teaspoon nutmeg, 1 teaspoon vanilla extract, and a pinch of salt. Stir in 4 tablespoons melted butter until you have a thick, sandy mixture. If adding nuts, oats, or dried fruit, toss them in now.
- Fill and Top the Apples: Place the apples in your baking dish. Spoon the brown sugar filling into the center and down between each petal. I like to use my fingers to really work it in (gets a little messy, but it’s worth it!). Brush any extra melted butter over the tops for extra shine.
- Cover and Bake: Tent the dish loosely with aluminum foil and bake for 20 minutes. This helps the apples steam and start softening. Remove the foil, then bake for another 20-25 minutes, basting once with the juices from the bottom of the pan. The apples are ready when they’re tender (poke with a fork to check) and the tops are bubbling and golden.
- Cool and Serve: Let the apples cool for 5 minutes—they’ll be piping hot! Spoon over some pan juices, then serve warm, preferably with a scoop of vanilla ice cream or whipped cream.
Troubleshooting: If your apples are too firm after baking, cover them and bake an extra 5-10 minutes. If they start to brown too quickly, keep them loosely covered with foil. Sometimes the filling bubbles over a bit—just scoop it back on top before serving. And if the petals don’t “bloom” much, don’t worry—they’ll still taste amazing.
Personal Tip: I prep the apples up to a day ahead, store them in the fridge (tossed with a bit of lemon juice), then fill and bake just before serving. Makes a weeknight treat feel totally doable!
Cooking Tips & Techniques for the Best Baked Bloomin Apples
After making these baked bloomin apples more times than I can remember, I’ve learned a few tricks that make a big difference:
- Don’t Overcore: Leave a solid base at the bottom of each apple, or you’ll end up with leaky filling and a mushy mess. If you slip, patch with a little extra apple flesh.
- Even Slices Matter: Try to make your “petal” cuts evenly spaced so the apples bloom nicely. But honestly, a quirky shape never hurt—the flavor’s what counts.
- Choose the Right Apple: Firm, baking-friendly varieties like Honeycrisp or Granny Smith hold their shape best. Softer apples might collapse (learned that the hard way with some Red Delicious—oops).
- Don’t Skimp on the Filling: Get that buttery sugar mix into every nook and cranny. I use my fingers to make sure every “petal” is coated. Messy hands, happy dessert.
- Baste for Extra Flavor: About halfway through baking, spoon the pan juices over the apples. It keeps them juicy and adds a glossy, caramelized finish.
- Cover and Uncover: Start with foil so the apples steam, then finish uncovered for a crisp topping. If you forget to uncover, you’ll miss out on those golden, sticky tops.
- Let Them Rest: The apples are molten-hot straight from the oven. Give them a few minutes to cool and set up before digging in.
Timing is everything—if you’re multitasking, set a timer for both foil and open baking stages. My first few tries, I left them in too long and ended up with applesauce (tasty, but not “bloomin”). If you’re baking for a crowd, prep all the apples at once and have the filling ready. You’ll look like a pro, even if you’re just winging it in your kitchen slippers.
Variations & Adaptations for Baked Bloomin Apples
This baked bloomin apples recipe is so easy to customize—here are my favorite ways to mix things up:
- Dietary Friendly: For gluten-free, skip the oats or use GF-certified oats. Need dairy-free? Swap butter for coconut oil or vegan margarine (I’ve tried both—still crazy good).
- Seasonal Swaps: In winter, I add dried cranberries and a splash of orange zest to the filling. For spring, try chopped strawberries instead of nuts or add a sprinkle of cardamom.
- Flavor Twists: Top with caramel sauce instead of ice cream for a caramel apple vibe. Or add a few chocolate chips to the filling for a gooey, melty surprise.
- Different Cooking Methods: You can make these in the air fryer—just use a small dish and bake at 350°F (175°C) for 15-20 minutes, checking for tenderness.
- Personal Favorite: I love adding a handful of granola to the topping before baking—it gives extra crunch and feels a bit like dessert-for-breakfast (no judgment here!).
- Allergen Substitutions: Allergic to nuts? Leave them out or try toasted sunflower or pumpkin seeds for a similar crunch.
Let your pantry and taste buds guide you—there’s no wrong way to make these baked bloomin apples your own. Sometimes I even drizzle a little bourbon or spiced rum into the filling for a grown-up twist (shh, don’t tell the kids!).
Serving & Storage Suggestions
These baked bloomin apples are best served warm, right out of the oven, with a generous scoop of vanilla ice cream (let it melt into those apple petals—trust me, it’s next level). If you want a lighter touch, whipped cream or a dollop of Greek yogurt works too.
For a showstopper dessert plate, dust with powdered sugar and sprinkle with extra chopped nuts. I love serving them family-style in the baking dish for a rustic, cozy vibe—everyone digs in together.
Complementary Pairings: Pair with hot apple cider, chai tea, or even a glass of mulled wine if you’re feeling festive. They’re also delicious with a side of sharp cheddar for a sweet-and-savory twist (sounds odd, but it’s classic in some regions!).
Storage: Leftovers (if you’re lucky enough to have any) keep in the fridge for up to 3 days. Store the apples in an airtight container. To reheat, microwave for 30-40 seconds, or bake at 350°F (175°C) for 10 minutes. The apples stay tender, and the flavors deepen as they sit—sometimes I think they’re even better the next day!
Freeze the apples only if you must—they’ll get a bit softer, but still taste good. Wrap tightly in plastic wrap and freeze for up to 1 month. Thaw in the fridge overnight, then reheat as above.
Nutritional Information & Benefits
Each baked bloomin apple (without ice cream) is approximately 280 calories, 8g fat, 52g carbohydrates, 4g fiber, and 2g protein. This dessert is naturally gluten-free if you skip or sub the oats, and can be made dairy-free with a simple swap.
Apples are packed with fiber, vitamin C, and antioxidants, making this a more wholesome treat compared to heavy pies or cakes. Pecans and oats add a dose of healthy fats and fiber. Watch out for nuts if you have allergies, and be mindful of the sugar if you’re low-carb—feel free to halve the brown sugar or use a sugar substitute like coconut sugar or monk fruit.
From a wellness perspective, I love that this dessert satisfies my sweet tooth with real fruit and simple ingredients. It feels like a treat, but you know exactly what’s in it—no weird fillers or preservatives.
Conclusion: Your New Favorite Fall Dessert Awaits
If you’re searching for a cozy, easy, and totally irresistible fall dessert, this baked bloomin apples recipe is it. It’s simple enough to whip up on a weeknight, but special enough for any autumn celebration. Plus, it’s endlessly customizable—make it your own with whatever’s in your pantry.
Personally, baked bloomin apples have become my go-to “comfort food” dessert. I love how the scent fills my kitchen, and the look on everyone’s faces when they see those blooming apple petals—pure joy. Don’t be afraid to experiment! Add your family’s favorite twist, or keep it classic and simple.
I’d love to hear how your apples turn out—leave a comment below with your favorite variation, or snap a pic and share it on Pinterest. Happy baking, and may your kitchen always smell like warm cinnamon and apples!
Frequently Asked Questions About Baked Bloomin Apples
Can I make baked bloomin apples ahead of time?
Absolutely! Prep the apples and filling up to a day in advance; store the prepped apples in the fridge with a little lemon juice to prevent browning. Bake just before serving for best results.
What are the best apples for baked bloomin apples?
Firm, tart-sweet apples like Honeycrisp, Granny Smith, or Fuji work best—they hold their shape and get perfectly tender. Softer apples may collapse during baking.
How do I keep the apples from turning mushy?
Don’t overbake! Bake until just tender (check with a fork). Also, use firm apples and cut petals thick enough to hold up during baking.
Can I make this recipe without nuts or oats?
Yes, you can skip both nuts and oats. The apples will still turn out delicious and gooey—just a little less crunchy on top.
What’s the best way to reheat leftovers?
Microwave individual apples for about 30 seconds, or reheat in the oven at 350°F (175°C) for 10 minutes until warmed through. Add a fresh scoop of ice cream and enjoy!
Pin This Recipe!
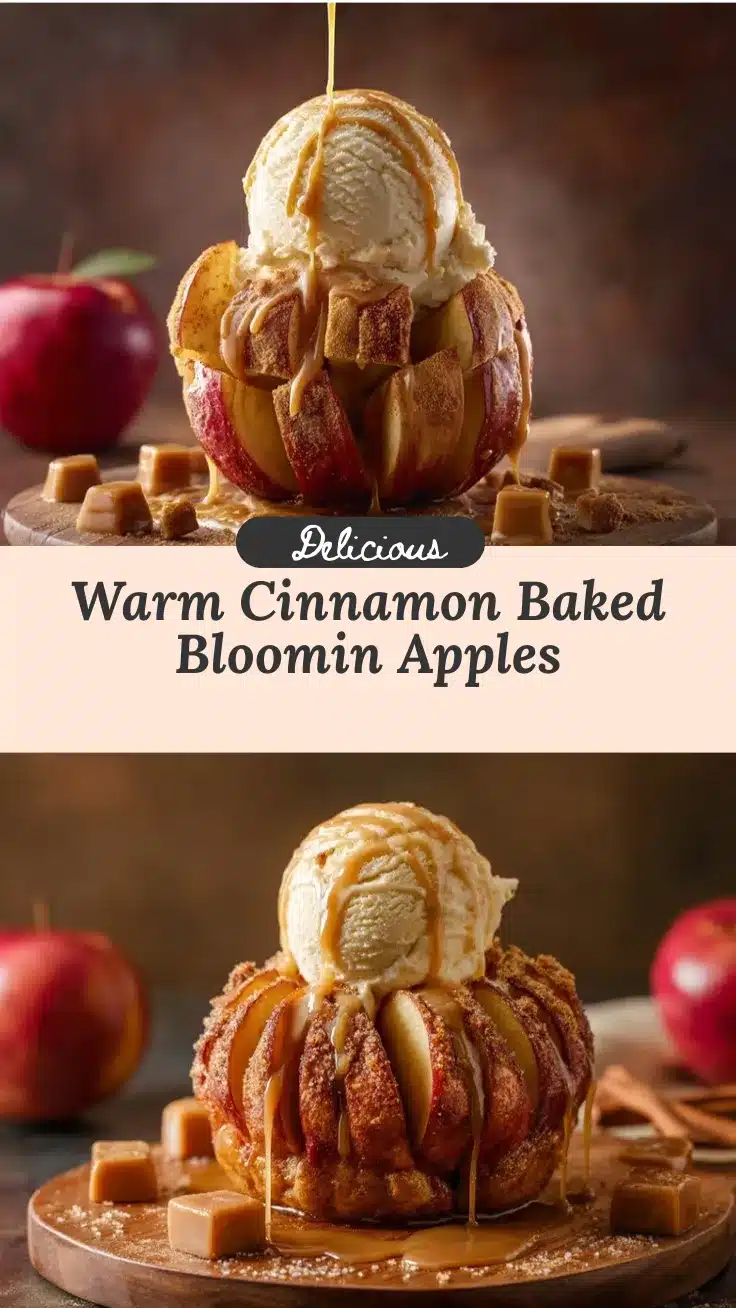
Baked Bloomin Apples

Baked bloomin’ apples are a cozy, easy fall dessert featuring tender apple ‘petals’ filled with gooey brown sugar, cinnamon, and butter, then baked until caramelized and golden. This fuss-free treat is perfect for weeknights or holiday gatherings and can be customized with nuts, oats, or dried fruit.
- Prep Time: 15 minutes
- Cook Time: 40-45 minutes
- Total Time: 55-60 minutes
- Yield: 4 servings 1x
- Category: Dessert
- Cuisine: American
Ingredients
- 4 large apples (Honeycrisp, Fuji, or Granny Smith, about 7 oz each)
- 1 tablespoon lemon juice
- 1/2 cup packed brown sugar (light or dark)
- 4 tablespoons unsalted butter, melted (or salted butter, omit extra salt)
- 2 teaspoons ground cinnamon
- 1/4 teaspoon ground nutmeg
- 1 teaspoon vanilla extract
- 1/3 cup chopped pecans or walnuts (optional)
- 1/4 cup old-fashioned oats (optional, use gluten-free if needed)
- Pinch of salt (omit if using salted butter)
- 2 tablespoons raisins or dried cranberries (optional)
- Maple syrup or honey, for drizzling (optional, after baking)
- Vanilla ice cream, for serving (optional)
Instructions
- Preheat oven to 375°F (190°C).
- Wash and dry apples. Slice off the top 1/4 inch of each apple. Core the apples with a melon baller or small spoon, being careful not to cut through the bottom.
- Place each apple cut-side up. Starting about 1/2 inch from the center, make 8 vertical cuts around each apple, slicing down to about 1/2 inch from the base so the apple holds together.
- Brush cut surfaces with lemon juice to prevent browning.
- In a small bowl, mix brown sugar, cinnamon, nutmeg, vanilla extract, and salt. Stir in melted butter until combined. Add nuts, oats, and dried fruit if using.
- Place apples in a baking dish. Spoon the filling into the center and between each petal. Brush any extra melted butter over the tops.
- Tent the dish loosely with aluminum foil and bake for 20 minutes.
- Remove foil and bake for another 20-25 minutes, basting once with pan juices, until apples are tender and tops are bubbling and golden.
- Let apples cool for 5 minutes. Spoon over pan juices and serve warm, optionally with vanilla ice cream or whipped cream.
Notes
Use firm apples like Honeycrisp or Granny Smith for best results. For gluten-free, use GF oats or omit them. For dairy-free, substitute butter with coconut oil or vegan butter. Add nuts, oats, or dried fruit as desired. Baste apples with pan juices halfway through baking for extra flavor. Serve warm with ice cream or whipped cream. Prep apples up to a day ahead and bake just before serving.
Nutrition
- Serving Size: 1 baked apple
- Calories: 280
- Sugar: 40
- Sodium: 60
- Fat: 8
- Saturated Fat: 4
- Carbohydrates: 52
- Fiber: 4
- Protein: 2
Keywords: baked apples, bloomin apples, fall dessert, easy apple dessert, gluten-free dessert, dairy-free option, cinnamon apples, holiday dessert, apple recipe, comfort food



