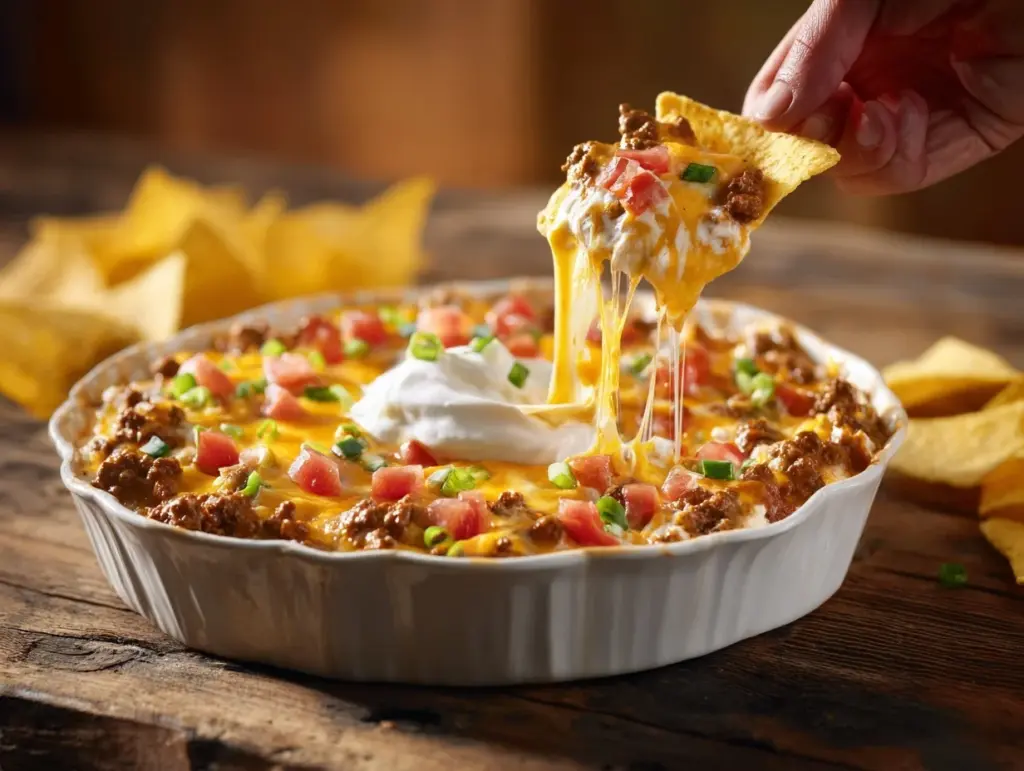
The sizzle of cheesy beef, the tang of salsa, and that first swoop of a crunchy chip—honestly, this loaded taco dip is pure party magic. I still remember the first time I made it: my kitchen smelled like a Tex-Mex dream, and I nearly ate half the pan before guests even arrived! There’s just something about that bubbly layer of cheese, the cool sour cream, and those fresh toppings that brings everyone together. If you’re looking for a crowd-pleasing appetizer, or even a last-minute game day snack, this loaded taco dip with cheesy beef checks every box.
This recipe is more than just a dip; it’s a full-on flavor experience. I first started making it for family movie nights, but it quickly turned into a must-have at every party I host. What’s so great? It’s easy, it’s fast, and you can customize it a hundred different ways. The cheesy beef base keeps things hearty (nobody leaves hungry—trust me), and the fresh toppings make every bite pop. Loaded taco dip is one of those recipes that’s survived every test: picky kids, hungry teens, even my friend who “doesn’t like spicy food.” And it’s been requested so many times, I’ve practically got the ingredient list memorized.
If you’re after a loaded taco dip that’s both easy and irresistible, you’re in for a treat. I’ve tested this recipe more times than I can count, tweaking the cheese types and spice mixes until it was just right. Whether you’re prepping for a potluck, a big birthday bash, or just want something fun for Friday night, this cheesy beef appetizer has you covered. Let’s get dipping!
Why You’ll Love This Loaded Taco Dip Recipe
- Easy & Quick: You can whip this up in under 30 minutes—seriously, you’ll spend more time munching than cooking.
- Simple Ingredients: Nothing fancy here. Most of it is probably already in your fridge or pantry.
- Perfect for Parties: It’s always the first thing to disappear from the table at birthday parties, potlucks, and game nights. No leftovers? That’s a win in my house!
- Crowd-Pleasing Flavors: Cheesy beef, tangy salsa, creamy layers, and those fresh toppings—what’s not to love?
- Customizable: Make it as spicy or as mild as you want. Add more cheese (I won’t judge), or sneak in some veggies for good measure.
Let’s face it: there are a million taco dip recipes out there. But this one stands out for a couple of reasons. First, the cheesy beef layer is hearty enough to satisfy even the hungriest guests. I brown the beef with taco seasoning for max flavor, then melt in cream cheese and shredded cheddar until it’s ultra-creamy. That base alone is dangerous—I’ve caught people sneaking spoonfuls before the dip is even assembled!
Next comes the cool, creamy layer—sour cream blended with a bit of salsa. It balances the richness of the beef and gives that classic taco tang. But here’s my not-so-secret trick: I always top it with a mountain of fresh veggies (diced tomatoes, green onions, and sometimes jalapeños for a kick) and more cheese. It’s like a taco salad and nachos had a delicious baby.
This loaded taco dip recipe is honestly the kind of dish that makes people ask for the recipe on the spot. It’s comfort food with a party vibe—easy to assemble, impossible to mess up, and guaranteed to make you the star of snack hour. Whether you’re hosting a backyard BBQ, a holiday get-together, or just want to make Friday night special, this dip brings the fun (and the flavor) every single time.
What Ingredients You Will Need
This recipe uses simple, reliable ingredients that come together for bold flavor and a satisfying, cheesy texture—without a lot of fuss. Most of these are pantry or fridge staples, and you can swap things in or out based on what you have on hand.
- For the Cheesy Beef Base:
- 1 pound (450g) lean ground beef (I like 90% lean for less grease)
- 1 packet taco seasoning (about 1 ounce/28g; homemade or store-bought)
- 1/2 cup (120ml) water
- 4 ounces (113g) cream cheese, softened (full-fat or light both work)
- 1 cup (115g) shredded cheddar cheese (or a Mexican blend)
- For the Creamy Layer:
- 1 cup (240g) sour cream (can substitute Greek yogurt for extra protein)
- 1/2 cup (120ml) salsa (choose your favorite—chunky, mild, or hot)
- For Toppings:
- 1 cup (115g) shredded lettuce (iceberg or romaine work best for crunch)
- 1 medium tomato, diced
- 1/2 cup (60g) sliced black olives (optional, but highly recommended for that classic taco vibe)
- 1/2 cup (50g) shredded cheddar or Mexican blend cheese (for extra melty goodness)
- 2 green onions, thinly sliced
- 1 small jalapeño, diced (optional, for heat)
- Fresh cilantro, chopped (totally optional, but adds a nice pop of color and flavor)
- For Dipping:
- Tortilla chips (sturdy, scoopable chips are best—thin chips might break under all this dip!)
- Fresh veggie sticks (carrots, bell peppers, celery, if you want to mix it up)
Ingredient Tips: I usually grab Tillamook for shredded cheddar—melts like a dream. If you prefer less dairy, swap cream cheese for a plant-based version. Got vegetarians? Use plant-based crumbles instead of beef. And if you’re gluten-free, double-check your taco seasoning packet (some blends sneak in wheat).
Equipment Needed
- Large Skillet or Frying Pan: For browning the beef and melting the cheeses. I use my trusty cast iron—it gives the beef a great sear, but any nonstick skillet works fine.
- Mixing Bowls: At least two. One for the creamy layer, one for toppings.
- 8×8-inch (20x20cm) Baking Dish or Pie Plate: Glass or ceramic is best. You can also use a 9-inch (23cm) pie dish.
- Spatula or Wooden Spoon: For stirring the beef and spreading layers. A silicone spatula makes spreading the creamy layer easier.
- Measuring Cups & Spoons: Accuracy counts—especially for the cheese and sour cream.
- Cheese Grater: If you shred your own cheese (it melts better than pre-shredded, but no judgment if you’re short on time).
No baking dish? You can use a deep plate or even a disposable aluminum pan for easy cleanup. If you don’t have a skillet, a regular saucepan will do—the beef just might take a bit longer to brown. I always recommend hand-washing nonstick pans to keep them lasting longer. And if you’re on a budget, Dollar Store bakeware holds up better than you’d think for party dips!
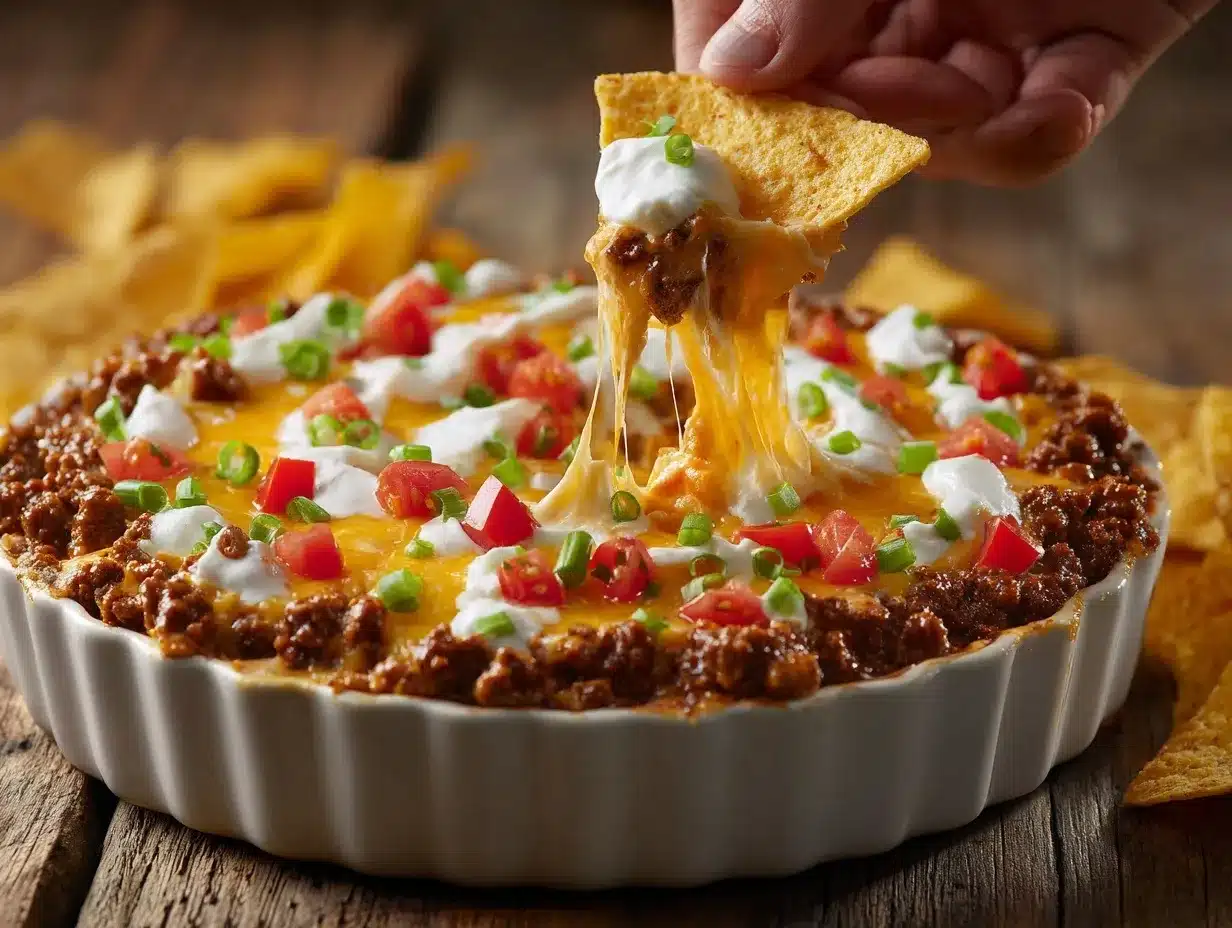
How to Make Loaded Taco Dip with Cheesy Beef
-
Cook the Beef:
Add 1 pound (450g) ground beef to a large skillet over medium-high heat. Break it up with a wooden spoon and cook for 5–7 minutes, until browned and no pink remains. Drain off any excess grease (very important or your dip will get soupy).
-
Season and Simmer:
Sprinkle in 1 packet (1 ounce/28g) taco seasoning and pour in 1/2 cup (120ml) water. Stir well, scraping up any browned bits. Let it simmer for about 2–3 minutes, until thickened and saucy. If it looks too dry, add a splash more water.
-
Add the Cheeses:
Reduce heat to low. Stir in 4 ounces (113g) cream cheese and 1 cup (115g) shredded cheddar. Keep stirring until everything is melted and combined—about 2–3 minutes. The beef should be creamy, cheesy, and scoopable. If it looks greasy, stir vigorously (it’ll come together, promise!).
-
Assemble the Dip:
Transfer the cheesy beef mixture to an 8×8-inch (20x20cm) baking dish. Smooth it into an even layer with your spatula—press it gently into the corners for even coverage.
-
Mix the Creamy Layer:
In a mixing bowl, combine 1 cup (240g) sour cream and 1/2 cup (120ml) salsa. Mix until smooth and pinkish. Taste and adjust with more salsa if you want extra tang.
-
Spread and Chill:
Spread the creamy mixture evenly over the cheesy beef base. Cover tightly with plastic wrap and refrigerate for at least 30 minutes (or up to 24 hours ahead). This helps the layers firm up for easier scooping. If you’re in a rush, you can serve it right away, but chilling makes it sturdier.
-
Add Toppings:
Just before serving, sprinkle on 1 cup (115g) shredded lettuce, 1 diced tomato, 1/2 cup (60g) black olives, 1/2 cup (50g) shredded cheese, 2 green onions, and diced jalapeño (if using). Add chopped cilantro for color.
-
Serve:
Set out with a big bowl of tortilla chips or fresh veggie sticks. Get ready for incoming compliments!
Prep Notes: If your beef layer seems too thick, add a splash of milk. If it’s too runny, let it cool for 5 minutes before assembling. I always taste the salsa before using—some brands can be sweet or super salty. And don’t stress about making perfect layers—the messier, the better, honestly.
Pro Cooking Tips & Techniques
- Use Freshly Shredded Cheese: Pre-shredded cheese has anti-caking agents that make it a little less melty. If you have time, shred your own for that gooey pull.
- Don’t Overcook the Beef: Once browned, take it off the heat right away. Overcooked beef gets tough and loses the juicy taco flavor.
- Let the Dip Chill: Giving the assembled dip time in the fridge helps the layers set, so you don’t end up with a gloopy mess when scooping.
- Layer Order Matters: Always spread the creamy layer over the beef, not under it, or the dip will get watery as it sits.
- Season to Taste: Taco seasoning packets vary in saltiness and spice. Taste the beef before layering—add a pinch of salt or a dash of hot sauce if needed.
I’ve definitely made the mistake of adding too much salsa once—ended up with a soupy dip. Lesson learned: drain watery salsa or use a chunky style for best results. If you’re multitasking, prep toppings while the beef cools. And if you want to make sure every scoop has a bit of everything, chop the toppings smaller. Don’t forget, it’s okay if the layers blend a bit—flavor comes first!
Variations & Adaptations
- Vegetarian Loaded Taco Dip: Swap the ground beef for cooked lentils or plant-based crumbles. Add extra beans (black or pinto) for heartiness.
- Low-Carb/Keto-Friendly: Use full-fat cream cheese and sour cream, skip the beans, and serve with low-carb tortillas or sliced bell peppers.
- Spicy Southwest Style: Stir in a small can of diced green chiles or pickled jalapeños to the beef layer, and top with pepper jack cheese.
You can also bake the assembled dip (without lettuce/tomatoes) at 350°F (175°C) for 10–12 minutes for a warm, melty version—add fresh toppings after baking. For a gluten-free version, double-check your taco seasoning and choose certified gluten-free chips. Allergic to dairy? Use plant-based cheeses and dairy-free sour cream. My personal favorite twist is tossing in a handful of corn and black beans to the beef for extra texture. The options are endless, so make it yours!
Serving & Storage Suggestions
This loaded taco dip is best served chilled or at room temperature. If you want it extra melty, assemble all but the lettuce and tomatoes, then bake until bubbly—add fresh toppings just before serving. I love serving it right in the baking dish, surrounded by chips and veggie sticks for easy scooping. It also looks great on a wooden platter for that rustic, Pinterest-worthy vibe.
Pair with icy margaritas or a cold Mexican lager for a real fiesta feel. For sides, a simple guacamole or fresh fruit salad keeps things light. Leftovers? Store the dip tightly covered in the fridge for up to 3 days (though the lettuce may wilt a bit—just scoop it off and add fresh if needed). To reheat, microwave individual portions for 30–60 seconds, or pop the whole dish in a low oven until just warmed through. The flavors actually deepen after a day, making it even tastier!
Nutritional Information & Benefits
Each serving (about 1/8th of the pan) has roughly 250–300 calories, 15g protein, 18g fat, and 7g net carbs (without chips). You’ll get a solid dose of protein from the beef, calcium from the cheese, and plenty of vitamins from the fresh toppings.
This loaded taco dip can be made gluten-free (just check seasonings and chips), and it’s easily adapted for low-carb diets. The biggest allergens are dairy (cheese, cream cheese, sour cream) and gluten (depending on chips and seasonings). I find it’s a satisfying, high-protein snack that fits well into a balanced party menu—plus, you can always adjust portions and toppings to suit your needs.
Conclusion
If you need an easy, crowd-pleasing appetizer, this loaded taco dip with cheesy beef is the answer. It’s bold, cheesy, fresh, and gone in minutes every time I serve it. The recipe is super flexible—swap meats, cheeses, or toppings to fit your party crew or your pantry.
I love this dip because it brings people together—there’s always laughter and plenty of requests for seconds. Whether you’re hosting a birthday bash or just want a fun Friday snack, give this loaded taco dip a try. Leave a comment to let me know how you topped yours, or share your favorite twist! Now, go grab those chips and dig in—you won’t regret it!
Frequently Asked Questions About Loaded Taco Dip
Can I make loaded taco dip ahead of time?
Absolutely! Assemble the beef and creamy layers up to 24 hours in advance. Add fresh toppings just before serving for best texture.
How spicy is this loaded taco dip?
It’s mild as written, but you can adjust the heat by choosing spicier salsa or adding jalapeños to the beef or as a topping.
What should I serve with loaded taco dip?
Tortilla chips are classic, but sturdy veggie sticks (like bell peppers and carrots) work great for dipping too.
Can I freeze leftover taco dip?
I wouldn’t recommend freezing, as the dairy and fresh veggies don’t thaw well. It’s best enjoyed fresh or within a couple of days from the fridge.
Is this recipe gluten-free?
The dip itself is gluten-free if you use gluten-free taco seasoning and chips. Always double-check labels if you’re cooking for someone with celiac or gluten sensitivity.
PrintLoaded Taco Dip Recipe Easy Cheesy Beef Appetizer for Parties

This loaded taco dip features a hearty cheesy beef base, a creamy salsa-sour cream layer, and fresh toppings for a crowd-pleasing appetizer that’s perfect for parties, game days, or family gatherings. It’s easy, customizable, and guaranteed to disappear fast!
- Prep Time: 15 minutes
- Cook Time: 10 minutes
- Total Time: 25 minutes (plus 30 minutes chilling time, optional)
- Yield: 8 servings 1x
- Category: Appetizer
- Cuisine: Tex-Mex
Ingredients
- 1 pound lean ground beef (90% lean preferred)
- 1 packet taco seasoning (about 1 ounce)
- 1/2 cup water
- 4 ounces cream cheese, softened
- 1 cup shredded cheddar cheese (or Mexican blend)
- 1 cup sour cream (or Greek yogurt)
- 1/2 cup salsa (chunky, mild, or hot)
- 1 cup shredded lettuce (iceberg or romaine)
- 1 medium tomato, diced
- 1/2 cup sliced black olives (optional)
- 1/2 cup shredded cheddar or Mexican blend cheese (for topping)
- 2 green onions, thinly sliced
- 1 small jalapeño, diced (optional)
- Fresh cilantro, chopped (optional)
- Tortilla chips (for serving)
- Fresh veggie sticks (carrots, bell peppers, celery, optional for serving)
Instructions
- Add ground beef to a large skillet over medium-high heat. Break up with a wooden spoon and cook for 5–7 minutes until browned and no pink remains. Drain excess grease.
- Sprinkle in taco seasoning and pour in water. Stir well, scraping up any browned bits. Simmer for 2–3 minutes until thickened and saucy.
- Reduce heat to low. Stir in cream cheese and 1 cup shredded cheddar. Stir until melted and combined, about 2–3 minutes.
- Transfer cheesy beef mixture to an 8×8-inch baking dish. Smooth into an even layer.
- In a mixing bowl, combine sour cream and salsa. Mix until smooth.
- Spread creamy mixture evenly over the beef layer. Cover and refrigerate for at least 30 minutes (or up to 24 hours).
- Just before serving, top with shredded lettuce, diced tomato, black olives, 1/2 cup shredded cheese, green onions, jalapeño, and cilantro if using.
- Serve with tortilla chips and/or veggie sticks.
Notes
For best results, use freshly shredded cheese for optimal melt. Let the dip chill for at least 30 minutes to help layers set. Customize toppings to taste—add beans, corn, or swap beef for plant-based crumbles for a vegetarian version. If baking for a warm dip, assemble without lettuce/tomato and bake at 350°F for 10–12 minutes, then add fresh toppings.
Nutrition
- Serving Size: About 1/8th of the pan
- Calories: 275
- Sugar: 3
- Sodium: 650
- Fat: 18
- Saturated Fat: 9
- Carbohydrates: 9
- Fiber: 2
- Protein: 15
Keywords: taco dip, cheesy beef dip, party appetizer, Tex-Mex dip, loaded dip, game day snack, easy dip recipe, crowd-pleaser, make ahead appetizer, gluten-free option



