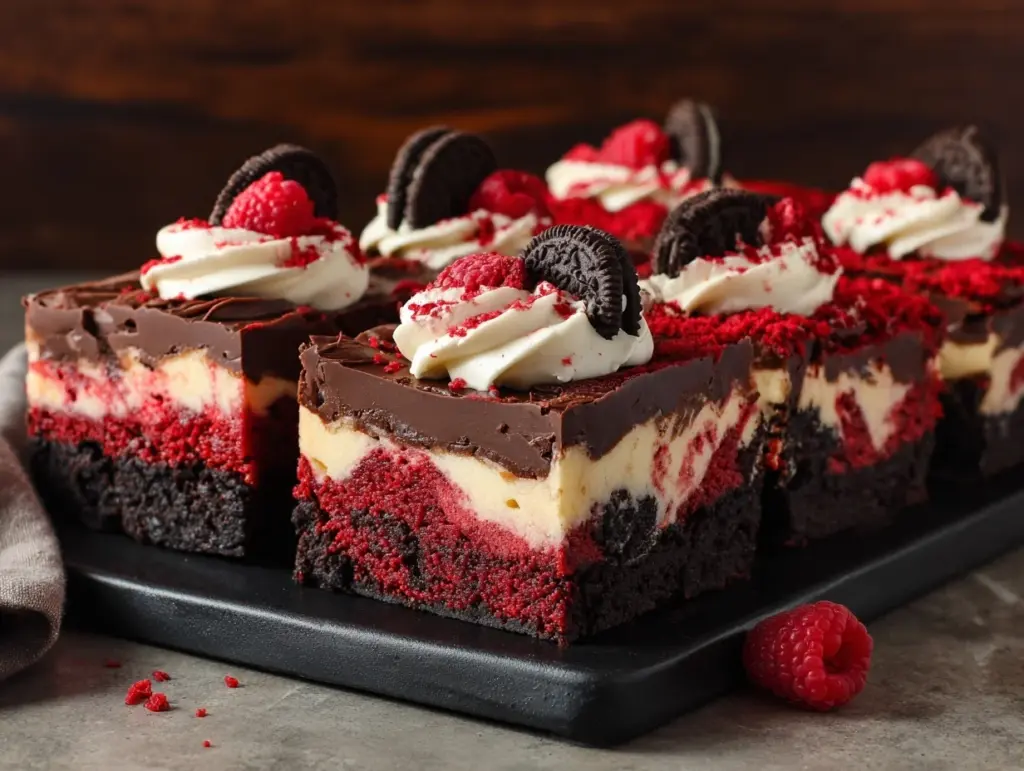
The first time I pulled a tray of these red velvet Oreo cheesecake brownie bars from the oven, the kitchen smelled like a bakery in full swing—sweet, slightly tangy, with a whiff of cocoa and that signature cream cheese aroma. I swear, the swirl of cheesecake and the crunch of Oreo cookies peeking through the vibrant red velvet layer made me do a happy dance (yes, right in front of the oven!). If you’re the kind of person who can’t choose between brownies, cheesecake, or cookies for dessert, I’m telling you—this recipe is about to settle that internal debate in the most delicious way.
I came up with this recipe during a snow day, when my pantry was looking a little sad but I had a sudden craving for something outrageous. I’d made red velvet brownies before, and I’ve definitely made more than my fair share of cheesecake bars, but I’d never combined them with Oreos. Let’s just say, after a few tweaks and a couple of overbaked edges (oops), these bars have become my go-to for birthdays, holidays, and those “just because” moments. They check every box: rich, creamy, fudge-like, and beautifully marbled with that classic Oreo crunch. Honestly, if you love red velvet cake, brownies, cheesecake, or even just Oreos, you’re in for a treat.
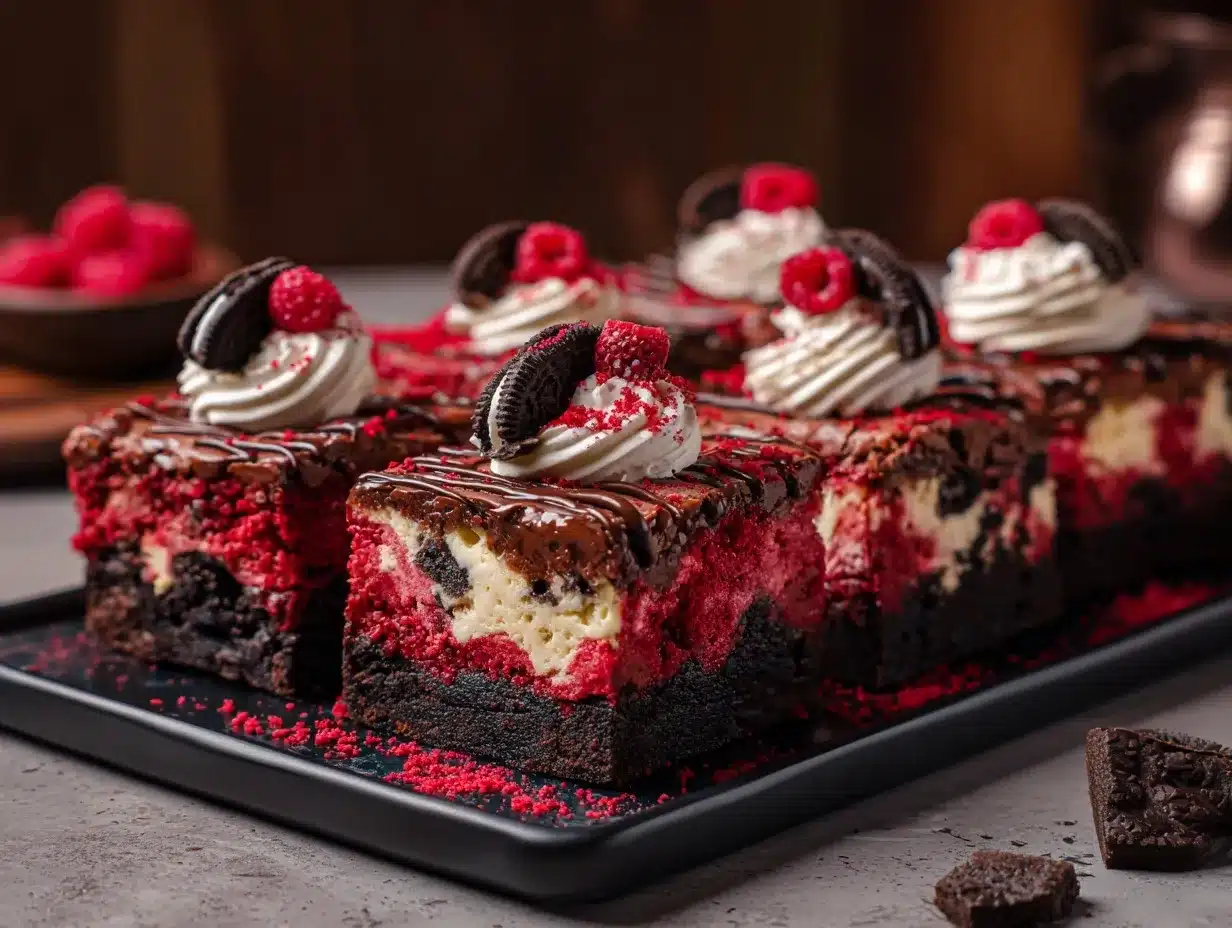
Red velvet Oreo cheesecake brownie bars aren’t just a feast for your taste buds—they’re a total showstopper for the eyes too. That pretty red base, topped with creamy white cheesecake and speckled with black-and-white Oreo chunks, looks like a Pinterest dream. But here’s the best part: they’re surprisingly easy to make, and you don’t need any fancy equipment or rare ingredients. Whether you’re baking for a crowd, a family movie night, or just to treat yourself after a long week, these bars will hit the spot. After testing this recipe in my own kitchen more times than I care to admit, I can promise you—these bars are impossibly decadent, super simple, and seriously irresistible.
Why You’ll Love These Red Velvet Oreo Cheesecake Brownie Bars
Let’s face it: not all desserts are created equal. Some promise a lot and deliver a little, but these red velvet Oreo cheesecake brownie bars? They deliver every single time. Here’s why I (and my friends, family, and basically everyone who’s tried them) am absolutely obsessed:
- Quick & Easy: They come together in under an hour, including bake time! Perfect for when you want a decadent treat but don’t want to spend all afternoon in the kitchen.
- Simple Ingredients: You don’t need anything fancy—just a few pantry staples plus cream cheese and Oreos. If you bake even occasionally, you probably have everything on hand.
- Perfect for Every Occasion: These bars look stunning and taste even better, making them ideal for birthdays, Valentine’s Day, potlucks, or a random Tuesday night.
- Crowd-Pleaser: Kids, teens, adults—everyone goes back for seconds. I’ve brought these to office parties and family picnics, and not a crumb was left!
- Unbelievably Delicious: You get fudgy red velvet brownie, tangy cheesecake, and crunchy Oreo pieces all in one bite. It’s like having three desserts at once, and somehow it just works.
What sets these red velvet Oreo cheesecake brownie bars apart from the rest is the texture. By blending the cheesecake layer just right, you get a creamy swirl that doesn’t bake up rubbery or dense. The red velvet base is super moist (not dry at all, which is a big pet peeve of mine with some brownie recipes). And then, there’s the Oreos—just enough to add crunch and a hint of nostalgia without overpowering everything else.
This is the kind of dessert that makes people ask for the recipe before they’ve even finished their first bar. There’s something about the combination of flavors that feels comforting and special all at once. I’ve made versions with all kinds of tweaks, but this one is the best—trust me, I’ve tested it enough to know! Whether you’re aiming to impress guests, make a regular night feel fancy, or just treat yourself, these bars are the answer.
What Ingredients You Will Need
This recipe uses basic ingredients to create layers of flavor and texture—no fuss, just the good stuff. Here’s what you’ll need for your red velvet Oreo cheesecake brownie bars:
- For the Red Velvet Brownie Base:
- 1/2 cup (115g) unsalted butter, melted (adds richness and moisture)
- 1 cup (200g) granulated sugar
- 2 large eggs, room temperature
- 2 teaspoons vanilla extract (pure vanilla gives the best flavor—go for real, not imitation)
- 1 tablespoon red food coloring (liquid or gel; gel makes for a deeper red, but either works)
- 2/3 cup (85g) all-purpose flour (sifted for best results)
- 1/4 cup (25g) unsweetened cocoa powder (Dutch-processed if you want a richer chocolate taste)
- 1/4 teaspoon salt
- 1/2 teaspoon white vinegar (it’s classic in red velvet—don’t skip this!)
- For the Cheesecake Swirl:
- 8 oz (225g) cream cheese, softened (full-fat gives the best texture)
- 1/4 cup (50g) granulated sugar
- 1 large egg, room temperature
- 1/2 teaspoon vanilla extract
- For the Oreo Layer:
- 10 Oreo cookies, roughly chopped or broken (you can use the classic, Double Stuf, or even a flavored version—mint Oreos are fun for St. Patrick’s Day!)
Ingredient Tips:
- If you want to make these gluten-free, swap the all-purpose flour with your favorite 1:1 gluten-free baking blend and use gluten-free chocolate sandwich cookies.
- No red food coloring? The bars will still taste amazing—just less vibrant. You can also use beet powder for a natural option, though the color will be more subtle.
- For an extra-luxe finish, sprinkle a handful of white chocolate chips on top before baking.
- Don’t skimp on the salt—it brings out the chocolate and balances the sweetness.
- I like Philadelphia cream cheese for the creamiest swirl, but any brick-style cream cheese will work.
Most of what you need is probably already in your pantry or fridge, and you can always get creative with the cookie layer. Honestly, that’s part of the fun—use what you’ve got, and these red velvet Oreo cheesecake brownie bars will never let you down.
Equipment Needed
- 8×8-inch (20×20 cm) Baking Pan: Metal pans bake more evenly, but glass works too—just keep an eye on the edges.
- Mixing Bowls: At least two—one for the red velvet brownie batter, one for the cheesecake mix.
- Whisk and Rubber Spatula: Whisk for the batter, spatula for scraping and smoothing—trust me, you’ll want every last bit.
- Electric Hand Mixer or Stand Mixer (optional): Makes whipping the cheesecake layer easier, but a sturdy whisk and some elbow grease work fine.
- Parchment Paper: Lining your pan is a game changer—no sticking, no broken bars.
- Measuring Cups and Spoons: Accurate measuring is key for brownies and cheesecake.
- Knife or Offset Spatula: For swirling the cheesecake layer—an offset spatula makes it look extra pretty, but a butter knife does the trick.
If you don’t have an 8×8-inch pan, you can use a 9×9-inch pan for slightly thinner bars, or double the recipe for a 9×13-inch (just add a few minutes to the baking time). I’ve used both metal and glass pans—metal gives a chewier edge, glass bakes up a little softer. If you’re looking for a budget-friendly hand mixer, I love my basic Hamilton Beach (it’s survived many, many batches of brownies). And don’t forget to wash your tools right after—dried brownie batter is no fun to scrub off!
Preparation Method
-
Preheat & Prep:
- Preheat your oven to 350°F (175°C).
- Line an 8×8-inch (20×20 cm) baking pan with parchment paper, leaving a 2-inch overhang for easy lifting. Lightly spray with nonstick spray if you want extra insurance—trust me, you’ll thank yourself later.
-
Make the Red Velvet Brownie Batter:
- In a large bowl, whisk together 1/2 cup (115g) melted unsalted butter and 1 cup (200g) granulated sugar until glossy.
- Add 2 large eggs, one at a time, whisking well after each. Stir in 2 teaspoons vanilla extract and 1 tablespoon red food coloring.
- In a separate bowl, sift together 2/3 cup (85g) all-purpose flour, 1/4 cup (25g) unsweetened cocoa powder, and 1/4 teaspoon salt.
- Gently fold the dry ingredients into the wet mix. Add 1/2 teaspoon white vinegar and stir until just combined—don’t overmix or your brownies will be tough.
- Pour about 3/4 of the red velvet batter into the prepared pan, smoothing into an even layer with a spatula.
-
Prepare the Cheesecake Layer:
- In another bowl, beat 8 oz (225g) softened cream cheese with 1/4 cup (50g) sugar until creamy and smooth. (A hand mixer is great here, but a sturdy whisk works—just go for no lumps.)
- Beat in 1 large egg and 1/2 teaspoon vanilla extract until just combined. Don’t overmix.
- Dollop the cheesecake mixture in big spoonfuls over the brownie base.
-
Add Oreos & Swirl:
- Scatter 10 roughly chopped Oreos evenly over the cheesecake layer.
- Spoon the remaining red velvet batter over the top in dollops.
- Using a butter knife or offset spatula, gently swirl the layers together. Don’t go overboard—just a few times back and forth for pretty marbling.
-
Bake:
- Bake for 35–40 minutes or until the center is just set and a toothpick inserted comes out with a few moist crumbs (a little jiggle in the middle is okay; it’ll firm as it cools).
- If the edges start to brown too quickly, cover loosely with foil for the last 10 minutes.
-
Cool & Cut:
- Let the bars cool completely in the pan on a wire rack (about 2 hours, or speed it up in the fridge).
- Use the parchment overhang to lift out of the pan. Cut into squares with a sharp knife, wiping between cuts for clean edges.
Notes: Don’t rush the cooling or you’ll get messy bars (I’ve tried—patience wins!). If your cheesecake layer seems runny, chill the bars before slicing. For a glossy look, store bars in the fridge and serve cold, or let them come to room temp for a softer bite.
Cooking Tips & Techniques
- Don’t Overmix: Overworking the brownie batter makes it tough. Stop stirring as soon as the dry streaks disappear—some lumps are okay.
- Room Temp Ingredients: Cream cheese and eggs blend much smoother when not straight from the fridge. Trust me, it saves you from lumpy cheesecake swirl!
- Swirl With Care: For that dreamy marbled look, use gentle strokes. Too much swirling blends everything and you’ll lose those striking layers.
- Check Doneness Early: Ovens can be sneaky—start checking at 32 minutes. The edges should be set and pulling away from the pan, but the center will have a slight jiggle.
- Cool Fully: This is the hardest part, especially if you’re impatient like me. Cutting too soon leads to a gooey mess (which, let’s be honest, still tastes great, but doesn’t look as pretty).
- Use Parchment Paper: It makes lifting and cutting bars so much easier, and cleanup is a breeze.
- If You Want Even Squares: Chill the whole pan for 30–60 minutes before cutting, then use a hot, clean knife for each slice.
I’ve definitely had a few “learning moments” with these bars—like the time I forgot to soften the cream cheese and ended up with tiny lumps (still tasty, but not Pinterest-pretty). Don’t stress if your swirls aren’t perfect, either. Every batch is unique and, honestly, those little imperfections are part of the charm! Multitasking tip: While the bars bake, clean up your bowls and start making coffee—the aroma alone will have everyone circling the kitchen.
Variations & Adaptations
- Gluten-Free Version: Use a 1:1 gluten-free flour blend and swap in gluten-free sandwich cookies. You won’t even notice the difference!
- Holiday Twist: Try using mint Oreos and a swirl of green gel coloring in the cheesecake for St. Patrick’s Day, or orange food coloring and Halloween Oreos for a spooky treat.
- Peanut Butter Swirl: Warm 2 tablespoons of creamy peanut butter and drizzle it over the cheesecake layer before swirling. You get a salty-sweet vibe that’s hard to beat.
- Lower Sugar: Reduce the sugar in both layers by 1/4 cup each. The bars will be slightly less sweet but still full of flavor.
- Dairy-Free Adaptation: Use dairy-free cream cheese (like Kite Hill) and plant-based butter. The texture changes a bit, but they’re still delicious.
My personal favorite variation? Swapping in Golden Oreos and adding a few white chocolate chips to the brownie layer. It’s a little less intense than the classic, but absolutely scrumptious. You can also try using flavored Oreos—birthday cake or red velvet Oreos are super fun if you can find them. Don’t be afraid to get creative, especially if you have dietary needs or just want to play with flavors!
Serving & Storage Suggestions
These red velvet Oreo cheesecake brownie bars are best served slightly chilled or at cool room temperature—the cheesecake holds its shape, and the brownie stays fudgy. Arrange bars on a pretty platter with a sprinkle of crushed Oreos or a dusting of powdered sugar for extra flair (they’ll look stunning in photos, just saying!).
For a party, cut into small squares or rectangles—these are rich, and a little goes a long way. Pair with coffee, tea, or a cold glass of milk. If you’re feeling extra, a scoop of vanilla ice cream on the side never hurts.
- Storage: Store bars in an airtight container in the fridge for up to 5 days. They actually taste even better after a day or two, as the flavors meld.
- Freezing: Wrap individual bars in plastic wrap and then foil, and freeze for up to 2 months. Thaw overnight in the fridge before serving.
- Reheating: If you want a warm treat, microwave a bar for 10–15 seconds. The chocolate gets melty and the cheesecake gets even creamier.
As the bars sit, the Oreo pieces soften just enough to blend into the creamy cheesecake, while the red velvet layer stays moist. Honestly, they’re almost better as leftovers—if you manage to save any!
Nutritional Information & Benefits
Each bar (assuming 16 servings) is approximately:
- Calories: 220
- Fat: 11g
- Carbohydrates: 28g
- Protein: 3g
- Sugar: 18g
Red velvet Oreo cheesecake brownie bars are definitely a treat, but they do offer a little bit of protein from the cream cheese and eggs. If you go with a gluten-free flour, they’re celiac-friendly. To make them nut-free, just be sure your Oreos and other ingredients are processed in a nut-free facility. For a slightly lighter option, you can swap in reduced-fat cream cheese, though the texture will be a little less creamy.
From a wellness perspective, I’m a big believer in joyful eating—these bars are rich and indulgent, and that’s okay! Enjoy them as part of a balanced lifestyle and savor every bite (I sure do!).
Conclusion
Red velvet Oreo cheesecake brownie bars are the kind of dessert that never fails to impress. They’re easy enough for a weeknight, but fancy enough for any special occasion. The layers are bold, the flavors are classic with a twist, and the texture is pure magic—fudgy, creamy, crunchy, all in one bite. Plus, they’re endlessly customizable, so you can make them your own every time.
I genuinely love these bars because they take three of my favorite desserts and mash them into a treat that’s both nostalgic and totally new. If you’ve never tried making a layered bar before, this is the perfect place to start. Let me know how yours turn out—drop a comment, share a photo, or tell me your favorite variation! Your kitchen (and your taste buds) will thank you. Happy baking, friends!
Frequently Asked Questions
Can I use boxed brownie mix for the red velvet layer?
Yes, you can! Just prepare the mix as directed, add a tablespoon of red food coloring, and continue with the cheesecake and Oreo layers as described. It’s a great shortcut if you’re in a rush.
Can I double the recipe for a bigger crowd?
Absolutely! Double all ingredients and use a 9×13-inch pan. Baking time will be a bit longer—start checking at 40 minutes, but it could take up to 50 minutes.
Are there any nut allergens in this recipe?
As written, no nuts are included. Just double-check your specific Oreo and ingredient packaging to be sure, especially if you’re baking for someone with allergies.
Do I need to refrigerate the bars after baking?
Yes, because of the cream cheese layer, it’s safest to store these bars in the fridge. They’ll keep their texture and taste great chilled.
Can I make these bars ahead of time?
Definitely! You can bake them a day or two in advance. In fact, the flavors develop even more after a night in the fridge. Just wait to slice until you’re ready to serve for the cleanest cuts.
PrintRed Velvet Oreo Cheesecake Brownie Bars

These decadent dessert bars combine fudgy red velvet brownies, creamy cheesecake swirls, and crunchy Oreo pieces for a showstopping treat that’s surprisingly easy to make. Perfect for birthdays, holidays, or any time you want to impress with minimal effort.
- Prep Time: 15 minutes
- Cook Time: 35-40 minutes
- Total Time: 55 minutes
- Yield: 16 bars 1x
- Category: Dessert
- Cuisine: American
Ingredients
- 1/2 cup (115g) unsalted butter, melted
- 1 cup (200g) granulated sugar
- 2 large eggs, room temperature
- 2 teaspoons vanilla extract
- 1 tablespoon red food coloring (liquid or gel)
- 2/3 cup (85g) all-purpose flour, sifted
- 1/4 cup (25g) unsweetened cocoa powder
- 1/4 teaspoon salt
- 1/2 teaspoon white vinegar
- 8 oz (225g) cream cheese, softened
- 1/4 cup (50g) granulated sugar
- 1 large egg, room temperature
- 1/2 teaspoon vanilla extract
- 10 Oreo cookies, roughly chopped or broken
Instructions
- Preheat your oven to 350°F (175°C). Line an 8×8-inch baking pan with parchment paper, leaving a 2-inch overhang. Lightly spray with nonstick spray if desired.
- In a large bowl, whisk together melted butter and 1 cup sugar until glossy. Add eggs one at a time, whisking well after each. Stir in 2 teaspoons vanilla extract and red food coloring.
- In a separate bowl, sift together flour, cocoa powder, and salt. Gently fold dry ingredients into wet mixture. Add vinegar and stir until just combined. Do not overmix.
- Pour about 3/4 of the red velvet batter into the prepared pan and smooth into an even layer.
- In another bowl, beat softened cream cheese with 1/4 cup sugar until creamy and smooth. Beat in 1 egg and 1/2 teaspoon vanilla extract until just combined.
- Dollop the cheesecake mixture in big spoonfuls over the brownie base.
- Scatter chopped Oreos evenly over the cheesecake layer. Spoon remaining red velvet batter over the top in dollops.
- Using a butter knife or offset spatula, gently swirl the layers together for a marbled effect.
- Bake for 35–40 minutes, or until the center is just set and a toothpick inserted comes out with a few moist crumbs. If edges brown too quickly, cover loosely with foil for the last 10 minutes.
- Let bars cool completely in the pan on a wire rack (about 2 hours, or chill in the fridge). Use parchment overhang to lift out and cut into squares with a sharp knife, wiping between cuts for clean edges.
Notes
Don’t overmix the brownie batter for best texture. Use room temperature cream cheese and eggs for a smooth cheesecake swirl. Cool bars completely before cutting for clean slices. Store in the fridge for up to 5 days or freeze for up to 2 months. For gluten-free, use a 1:1 gluten-free flour blend and gluten-free sandwich cookies.
Nutrition
- Serving Size: 1 bar (1/16 of recipe)
- Calories: 220
- Sugar: 18
- Sodium: 140
- Fat: 11
- Saturated Fat: 6
- Carbohydrates: 28
- Fiber: 1
- Protein: 3
Keywords: red velvet, oreo, cheesecake, brownie bars, dessert, easy, decadent, chocolate, cream cheese, layered bars