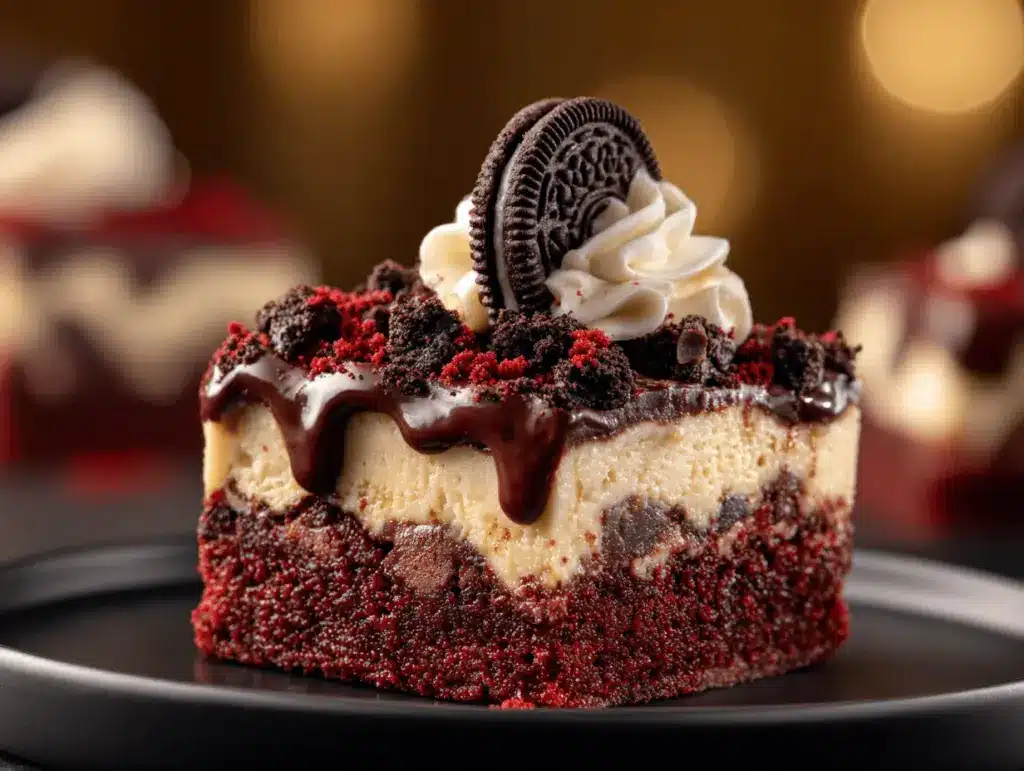
The swirl of creamy cheesecake, the rich red velvet base, and the crunch of Oreo cookies—these Red Velvet Oreo Cheesecake Brownies are the dessert trifecta you didn’t know you needed. Whether it’s a birthday party, a holiday gathering, or just a random Tuesday, this recipe will steal the show. I first brought these to a family barbecue, and let’s just say they disappeared faster than I could grab seconds. Trust me, this isn’t just a brownie—it’s an experience.
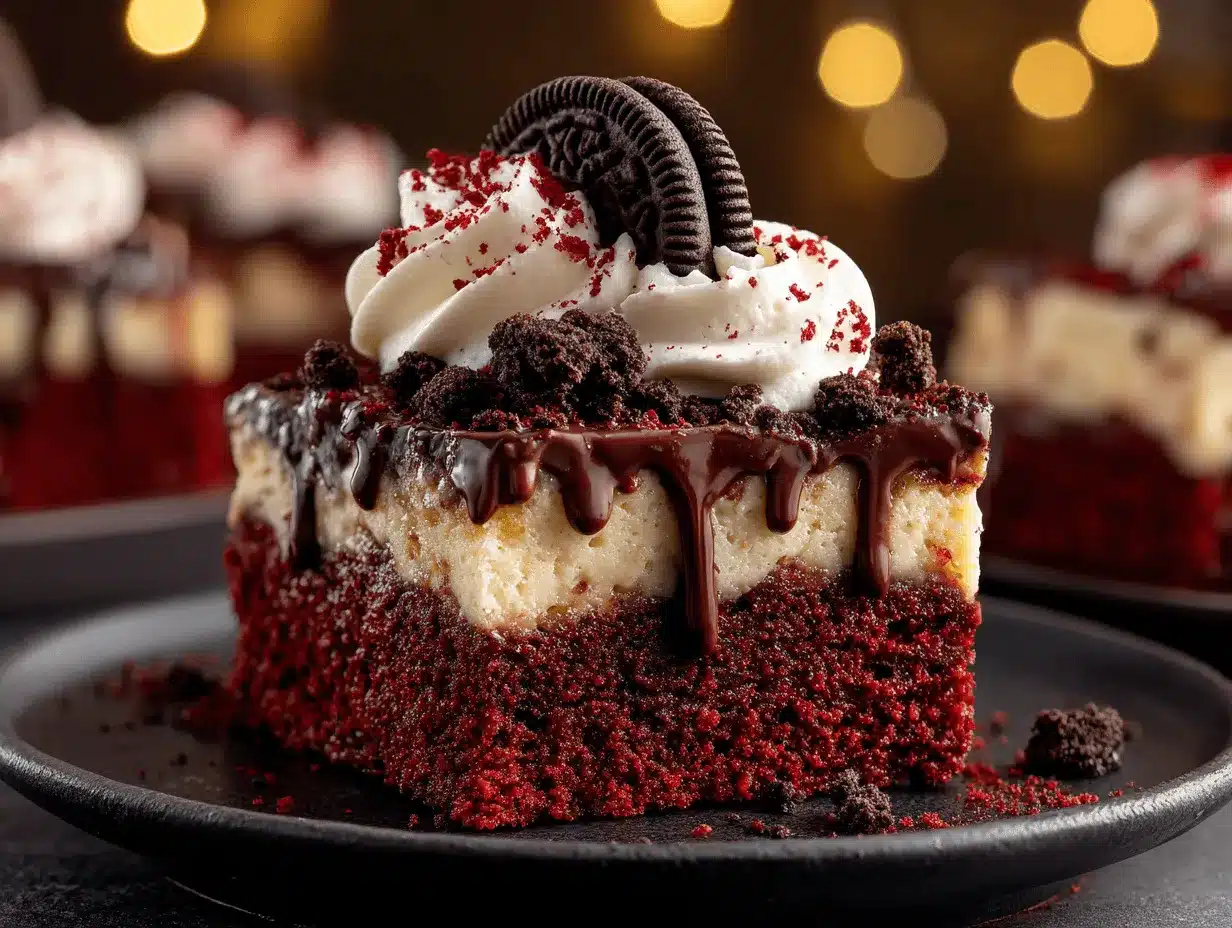
What makes this recipe so special is the combination of textures and flavors. The vibrant red velvet layer is moist and cake-like, the cheesecake swirl is creamy and tangy, and the crushed Oreos add just the right amount of crunch. Plus, they look stunning—perfect for impressing your guests without spending hours in the kitchen. If you’re a fan of indulgent desserts with a touch of elegance, you’re in for a treat!
Why You’ll Love This Recipe
- Showstopper Dessert: The eye-catching red velvet and cheesecake layers, topped with Oreos, make these brownies perfect for parties, potlucks, or any special occasion.
- Easy to Make: Despite how impressive they look, they’re surprisingly simple to whip up with basic ingredients.
- Amazing Texture: Every bite is the perfect balance of creamy, crunchy, and cake-like textures.
- Crowd-Pleaser: Both kids and adults rave about these brownies. They’re guaranteed to be the first dessert gone at any gathering.
- Customizable: You can adjust the sweetness, swap out the Oreos for other cookies, or even add a touch of espresso for a deeper flavor.
What makes these brownies truly stand out is how they combine classic flavors in a unique way. The cheesecake layer perfectly complements the slightly tangy red velvet base, while the Oreos add a playful crunch. Plus, they’re just plain fun to make—you’ll feel like an artist swirling the cheesecake into the red velvet batter!
What Ingredients You Will Need
This recipe uses everyday ingredients that you likely already have in your pantry, with a few extras to make it unforgettable. Here’s the breakdown:
- For the Red Velvet Layer:
- 1 cup (125g) all-purpose flour
- 1/4 cup (25g) unsweetened cocoa powder
- 1/2 tsp baking powder
- 1/4 tsp salt
- 1/2 cup (115g) unsalted butter, melted
- 1 cup (200g) granulated sugar
- 2 large eggs, room temperature
- 1 tsp vanilla extract
- 1 tbsp red food coloring
- For the Cheesecake Layer:
- 8 oz (225g) cream cheese, softened
- 1/4 cup (50g) granulated sugar
- 1 large egg, room temperature
- 1/2 tsp vanilla extract
- For the Oreo Topping:
- 8-10 Oreo cookies, crushed
Pro Tip: If you’re out of red food coloring, you can skip it—the brownies will still taste amazing, but they’ll lose their signature red hue.
Equipment Needed
- A large mixing bowl for the red velvet batter
- Another mixing bowl for the cheesecake layer
- A whisk or hand mixer
- A rubber spatula for folding and swirling
- 8×8-inch baking pan (you can use a 9×9 pan if that’s what you have—just adjust the baking time slightly)
- Parchment paper for easy removal
Tip: If you don’t have a hand mixer, a regular whisk works just fine for the cheesecake layer—it may just take a little more elbow grease!
Preparation Method
- Preheat your oven: Set it to 350°F (175°C). Line your 8×8-inch baking pan with parchment paper, leaving a bit of overhang for easy removal.
- Make the red velvet batter: In a large bowl, whisk together the melted butter and sugar until smooth. Add the eggs, vanilla extract, and red food coloring, and whisk until fully combined.
- In a separate bowl, sift together the flour, cocoa powder, baking powder, and salt. Gradually fold the dry ingredients into the wet ingredients using a rubber spatula. Mix until just combined—don’t overmix!
- Prepare the cheesecake layer: In another bowl, beat the softened cream cheese and sugar together until smooth. Add the egg and vanilla extract, mixing until fully incorporated.
- Layer and swirl: Pour the red velvet batter into the prepared pan, smoothing it out evenly. Spoon dollops of the cheesecake mixture on top, then use a knife or skewer to swirl the layers together for a marbled effect.
- Add the Oreo topping: Sprinkle the crushed Oreo cookies evenly over the top.
- Bake: Place the pan in the preheated oven and bake for 30-35 minutes, or until a toothpick inserted into the center comes out mostly clean (a few crumbs are okay).
- Cool and serve: Let the brownies cool completely in the pan before lifting them out using the parchment paper. Slice into squares and enjoy!
Tip: If you want cleaner slices, refrigerate the brownies for 30 minutes before cutting.
Cooking Tips & Techniques
- Don’t Overmix: Overmixing the red velvet batter can lead to dense brownies. Fold gently until the dry ingredients are just incorporated.
- Room Temperature Ingredients: Using room temperature eggs and cream cheese ensures smooth mixing and even baking.
- Swirling Technique: For beautiful swirls, use the tip of a knife and make figure-eight patterns. Don’t worry if it looks messy—it will bake into perfection!
- Oreo Crunch: Crush the Oreos into medium-sized pieces for a balance of crunch and texture. Avoid pulverizing them into dust.
- Test for Doneness: Insert a toothpick into the center—it should come out with a few moist crumbs but no wet batter.
Variations & Adaptations
- Gluten-Free Option: Swap the all-purpose flour for a 1:1 gluten-free baking flour.
- Seasonal Twist: Add crushed peppermint candies to the Oreo topping for a festive holiday version.
- Dairy-Free Adaptation: Use dairy-free cream cheese and butter substitutes. The texture may vary slightly, but the flavor will still be fantastic.
- Flavor Boost: Add 1 tsp of espresso powder to the red velvet batter for a richer, more complex flavor.
- Cookie Swap: Replace Oreos with your favorite cookies—chocolate chip, peanut butter, or even graham crackers work beautifully.
My Favorite Variation: I once swapped the Oreos for crushed chocolate chip cookies and added mini marshmallows for a s’mores-inspired twist. It was a hit!
Serving & Storage Suggestions
The brownies are best served at room temperature, but they’re equally delicious chilled. Here’s how to make the most of them:
- Presentation: Arrange the brownie squares on a platter and sprinkle a few extra crushed Oreos on top for a polished look.
- Pairings: Serve with a scoop of vanilla ice cream or a drizzle of chocolate sauce for extra indulgence.
- Storage: Keep the brownies in an airtight container at room temperature for up to 3 days, or refrigerate for up to 5 days.
- Freezing: Wrap individual slices in plastic wrap and store in a freezer-safe container for up to 3 months. Thaw in the fridge overnight before serving.
Tip: The flavors deepen after a day, so they’re even better if made ahead of time!
Nutritional Information & Benefits
Here’s a rough estimate per serving (based on 12 servings):
- Calories: 290
- Protein: 4g
- Fat: 15g
- Carbohydrates: 35g
- Sugar: 22g
The cream cheese adds a dose of calcium, while the cocoa powder provides antioxidants. While these brownies are definitely a treat, they’re perfect for sharing and celebrating special moments.
Conclusion
If you’re looking for a dessert that’s as delicious as it is Instagram-worthy, these Red Velvet Oreo Cheesecake Brownies are the ultimate choice. They’re easy to make, endlessly customizable, and an instant crowd-pleaser. Whether you’re hosting a party or just craving something indulgent, this recipe is one you’ll want to save and make again.
I personally love how versatile they are—you can get creative with toppings or change up the flavors without losing that signature wow factor. So, grab your mixing bowls and let your inner baker shine!
If you try this recipe, let me know how it turned out in the comments below. Don’t forget to share a photo—I love seeing your creations. Happy baking!
FAQs
Can I make these brownies ahead of time?
Absolutely! They taste even better the next day as the flavors deepen. Just store them in an airtight container at room temperature or in the fridge.
What can I use instead of Oreos?
You can use any cookie you love—chocolate chip, peanut butter, or graham crackers all work beautifully.
Do I have to use red food coloring?
No, the food coloring is optional. The brownies will still taste amazing but won’t have the signature red hue.
How do I avoid overbaking?
Check for doneness with a toothpick around the 30-minute mark. It should come out with a few moist crumbs but no wet batter.
Can I freeze these brownies?
Yes, you can freeze them! Wrap individual slices in plastic wrap and store in a freezer-safe container for up to 3 months. Thaw overnight in the fridge before serving.
Pin This Recipe!

Red Velvet Oreo Cheesecake Brownies

These Red Velvet Oreo Cheesecake Brownies combine a moist red velvet base, creamy cheesecake swirl, and crunchy Oreo topping for a showstopping dessert perfect for any occasion.
- Prep Time: 15 minutes
- Cook Time: 35 minutes
- Total Time: 50 minutes
- Yield: 12 servings 1x
- Category: Dessert
- Cuisine: American
Ingredients
- 1 cup (125g) all-purpose flour
- 1/4 cup (25g) unsweetened cocoa powder
- 1/2 tsp baking powder
- 1/4 tsp salt
- 1/2 cup (115g) unsalted butter, melted
- 1 cup (200g) granulated sugar
- 2 large eggs, room temperature
- 1 tsp vanilla extract
- 1 tbsp red food coloring
- 8 oz (225g) cream cheese, softened
- 1/4 cup (50g) granulated sugar
- 1 large egg, room temperature
- 1/2 tsp vanilla extract
- 8–10 Oreo cookies, crushed
Instructions
- Preheat your oven to 350°F (175°C). Line an 8×8-inch baking pan with parchment paper, leaving an overhang for easy removal.
- In a large bowl, whisk together the melted butter and sugar until smooth. Add the eggs, vanilla extract, and red food coloring, and whisk until fully combined.
- In a separate bowl, sift together the flour, cocoa powder, baking powder, and salt. Gradually fold the dry ingredients into the wet ingredients using a rubber spatula. Mix until just combined—do not overmix.
- In another bowl, beat the softened cream cheese and sugar together until smooth. Add the egg and vanilla extract, mixing until fully incorporated.
- Pour the red velvet batter into the prepared pan, smoothing it out evenly. Spoon dollops of the cheesecake mixture on top, then use a knife or skewer to swirl the layers together for a marbled effect.
- Sprinkle the crushed Oreo cookies evenly over the top.
- Bake for 30-35 minutes, or until a toothpick inserted into the center comes out mostly clean (a few crumbs are okay).
- Let the brownies cool completely in the pan before lifting them out using the parchment paper. Slice into squares and enjoy.
Notes
For cleaner slices, refrigerate the brownies for 30 minutes before cutting. Use room temperature ingredients for smoother mixing and even baking.
Nutrition
- Serving Size: 1 brownie
- Calories: 290
- Sugar: 22
- Sodium: 150
- Fat: 15
- Saturated Fat: 9
- Carbohydrates: 35
- Fiber: 1
- Protein: 4
Keywords: Red Velvet, Cheesecake, Brownies, Oreo, Party Dessert, Easy Baking



