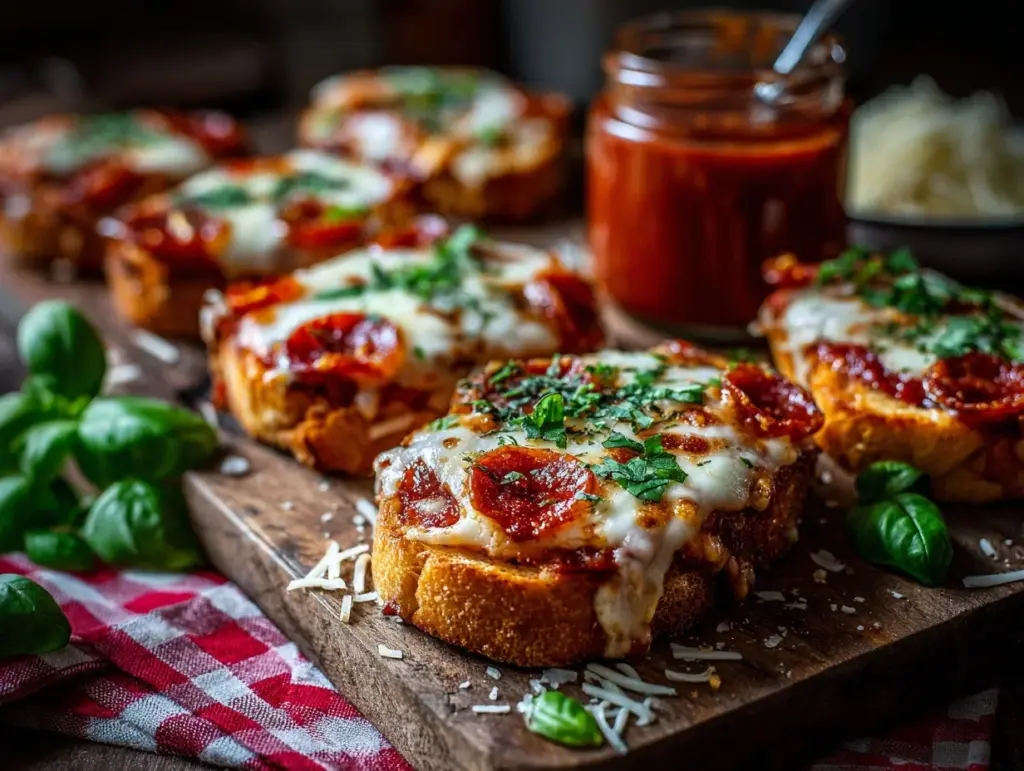
The smell of garlic wafting through the kitchen, paired with bubbling melted cheese and a touch of oregano—there’s really nothing better. Mini garlic toast pizzas are my go-to for those hectic evenings when all I really want is comfort food without the hassle. They’re crispy, cheesy, and ready in minutes, making them the ultimate solution for quick dinners. Whether you’re feeding picky eaters or just craving something indulgent, this recipe is guaranteed to hit all the right notes.
I first discovered this idea while rummaging through my freezer for dinner inspiration. Garlic toast and pizza toppings? It was a match made in food heaven. Since then, I’ve perfected the method, tested countless topping combinations, and even found ways to make it healthier when needed. Trust me when I say this recipe is as easy as it is delicious, and it’s one you’ll be turning to again and again.
Why You’ll Love This Recipe
- Quick & Easy: Ready in under 20 minutes, including prep time, this recipe is perfect for those busy weeknights or impromptu dinner cravings.
- No Fancy Ingredients: All you need is garlic toast, your favorite pizza toppings, and a little creativity. Chances are, you already have everything in your fridge.
- Customizable: Whether you’re a pepperoni lover, veggie fan, or prefer a Hawaiian twist, you can tailor these mini pizzas to suit your taste.
- Kid-Friendly: These are a hit with kids! Let them top their own pizzas for a fun family activity.
- Irresistibly Delicious: Crispy garlic toast as the base, gooey cheese, and flavorful toppings make each bite a perfect combination of crunch and melt-in-your-mouth goodness.
This recipe isn’t just another pizza hack—it’s a game-changer. The garlic toast base adds a flavorful twist that sets it apart from traditional pizza crust. Plus, it’s fast, versatile, and ideal for feeding a crowd or indulging solo.
What Ingredients You Will Need
This recipe uses simple, everyday ingredients that come together to create something magical. Here’s what you’ll need:
- Frozen Garlic Toast: The pre-made kind is perfect for this recipe, saving time and delivering consistent crispy results.
- Pizza Sauce: Use your favorite store-bought version or make a quick homemade sauce with canned tomato puree, garlic, and Italian seasoning.
- Shredded Mozzarella Cheese: The star of the show! Feel free to mix in some cheddar or provolone for extra flavor.
- Toppings: Choose from classics like pepperoni, mushrooms, bell peppers, onions, or olives. The options are endless!
- Italian Seasoning: A sprinkle of oregano, basil, and thyme brings the pizza flavors together beautifully.
- Optional Garnishes: Fresh basil, red pepper flakes, or grated Parmesan to finish things off.
If you’re looking to make it healthier, swap frozen garlic toast for whole-grain toast or use reduced-fat cheese. The toppings can also be tailored to fit your dietary needs—think fresh veggies, lean proteins, or dairy-free alternatives.
Equipment Needed
You don’t need anything fancy to make these mini garlic toast pizzas, which is part of what makes them so appealing:
- Baking Sheet: A sturdy sheet pan works best for even cooking and crispy bottoms.
- Spatula: For transferring your pizzas without losing any toppings.
- Knife: To chop your toppings if needed.
If you don’t have a baking sheet, you can use a pizza stone or even bake them directly on the oven rack for extra crispiness. No specialized tools required—just grab what you have and get started!
Preparation Method
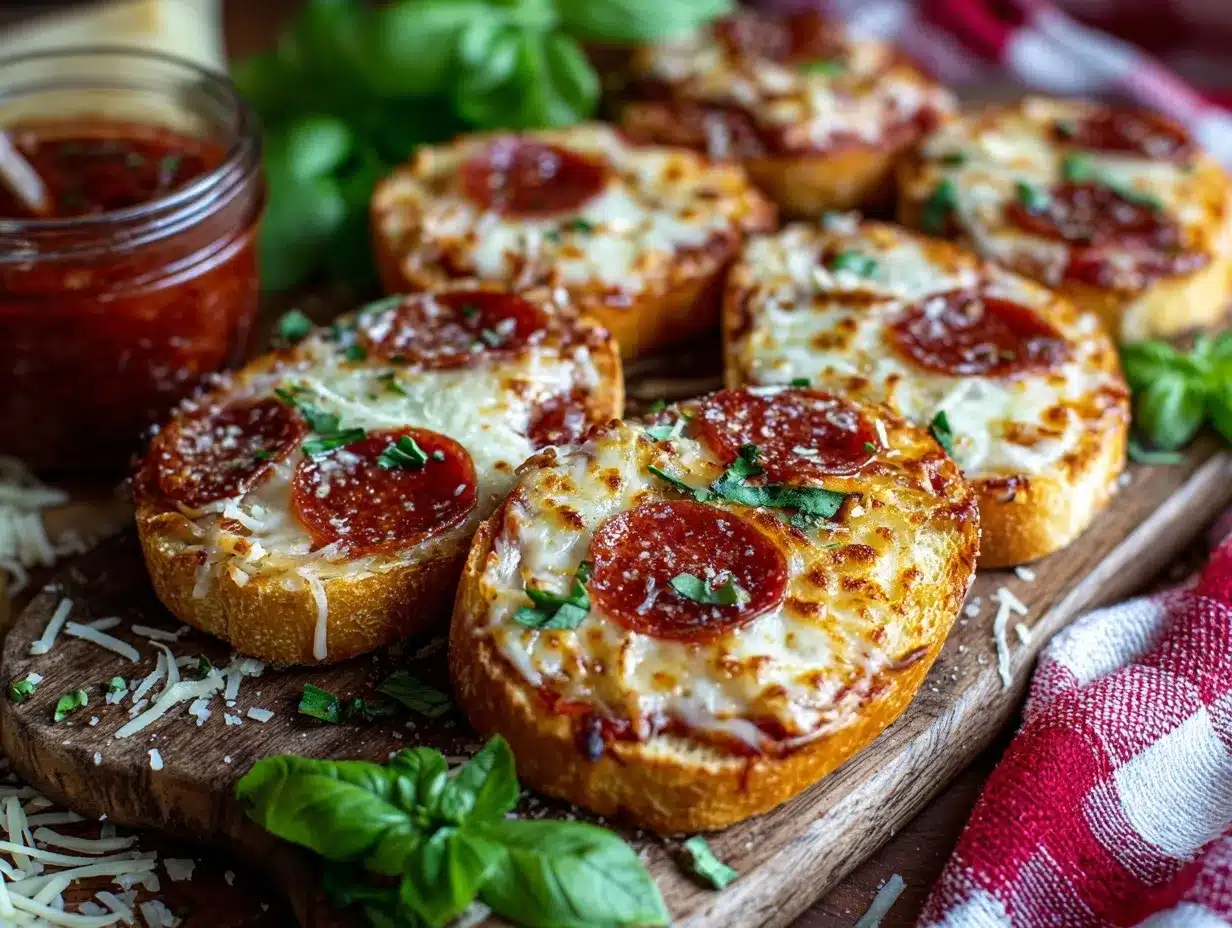
Follow these simple steps to whip up your mini garlic toast pizzas:
- Preheat the oven: Set your oven to 425°F (220°C). This ensures the garlic toast gets crispy while the cheese melts perfectly.
- Prepare the garlic toast: Arrange the frozen garlic toast slices on your baking sheet, leaving space between each piece.
- Add the sauce: Spread a thin layer of pizza sauce over each slice. Don’t go overboard—too much sauce can make them soggy.
- Top with cheese: Sprinkle shredded mozzarella generously over the sauce, ensuring full coverage for that gooey cheese pull.
- Add toppings: Customize each mini pizza with your favorite toppings. Keep it simple or mix and match for variety.
- Season: Sprinkle a pinch of Italian seasoning over each pizza for added flavor.
- Bake: Place the baking sheet in the oven and bake for 8-10 minutes, or until the cheese is melted and bubbly.
- Finish & Serve: Remove from the oven and garnish with fresh basil, red pepper flakes, or Parmesan if desired. Serve hot and enjoy!
Pro tip: Keep a close eye on the pizzas during baking. Garlic toast can burn quickly, so check them after 8 minutes to avoid overcooking.
Cooking Tips & Techniques
- Don’t overload the toppings: Too many toppings can weigh down the garlic toast, making it harder to crisp up.
- Preheat your oven well: A hot oven ensures crispy results, so don’t rush this step.
- Experiment with cheeses: While mozzarella is classic, try mixing in Parmesan, Gouda, or Fontina for a more complex flavor.
- Use parchment paper: Lining your baking sheet makes cleanup a breeze and prevents sticking.
- Make it a family affair: Set up a topping station and let everyone customize their own mini pizzas!
The key to success is balancing crispiness with melty goodness. Start with less sauce and toppings, then adjust as needed—trust me, it makes a difference.
Variations & Adaptations
Here are some fun ways to switch up your mini garlic toast pizzas:
- Gluten-Free: Use gluten-free garlic toast or gluten-free bread as the base.
- Low-Carb: Swap the garlic toast for roasted zucchini slices or portobello mushroom caps.
- Seasonal Twist: Add fresh summer veggies like cherry tomatoes and zucchini, or go hearty in the winter with caramelized onions and roasted butternut squash.
- Vegan Option: Use dairy-free garlic toast and vegan cheese, and load up on veggies for a delicious plant-based version.
My personal favorite variation? Adding pineapple and ham for a Hawaiian-style twist—it’s sweet, salty, and oh-so-good.
Serving & Storage Suggestions
Mini garlic toast pizzas are best served hot, right out of the oven, but here are some tips for serving and storing:
- Serving: Pair these pizzas with a simple green salad or a bowl of soup for a complete meal. They also make a great appetizer or snack.
- Storage: Leftovers can be stored in an airtight container in the refrigerator for up to 2 days.
- Reheating: Reheat in a toaster oven or regular oven at 375°F (190°C) for 5-7 minutes to restore crispiness.
While these pizzas are delicious fresh, the flavors deepen after a day in the fridge, making reheated leftovers surprisingly tasty!
Nutritional Information & Benefits
Here’s a quick snapshot of the nutritional profile for one mini garlic toast pizza (based on standard toppings):
- Calories: Approximately 200-250 per slice (depending on toppings).
- Protein: High in protein from the cheese and toppings.
- Carbohydrates: Moderate, with some fiber depending on your choice of base.
- Fat: Can be adjusted by choosing lower-fat cheese or lean toppings.
Garlic toast pizzas also offer flexibility for dietary preferences, making them a great option for families with mixed needs.
Conclusion
Mini garlic toast pizzas are everything you want in a quick dinner—easy, delicious, and endlessly customizable. Whether you’re whipping these up for a weeknight meal or serving them at a casual get-together, they’re sure to be a crowd-pleaser. Plus, they’re so simple to make that even beginner cooks can nail them on their first try.
If you try this recipe, let me know in the comments below! I’d love to hear your favorite topping combinations or any creative spins you put on it. Don’t forget to share this recipe with friends—it’s too good to keep to yourself. Happy cooking!
FAQs
Can I use fresh garlic bread instead of frozen?
Absolutely! Just make sure to toast it lightly before adding the toppings to prevent it from getting soggy.
What’s the best way to make these gluten-free?
Use gluten-free garlic toast or substitute with gluten-free bread brushed with garlic butter.
Can I make these ahead of time?
Yes! Prepare the pizzas, cover tightly, and refrigerate. Bake them fresh when ready to serve.
How do I prevent the garlic toast from burning?
Keep a close eye on them while baking, especially after 8 minutes. You can also lower the oven temperature slightly if needed.
What toppings work best for picky eaters?
Stick to simple options like cheese, pepperoni, or plain marinara sauce—they’re always a hit!
Pin This Recipe!

Mini Garlic Toast Pizzas

Crispy, cheesy, and ready in minutes, these mini garlic toast pizzas are the perfect quick dinner solution for busy weeknights or impromptu cravings.
- Prep Time: 5 minutes
- Cook Time: 10 minutes
- Total Time: 15 minutes
- Yield: 4 servings
- Category: Main Course
- Cuisine: American
Ingredients
- Frozen garlic toast
- Pizza sauce
- Shredded mozzarella cheese
- Toppings (e.g., pepperoni, mushrooms, bell peppers, onions, olives)
- Italian seasoning (oregano, basil, thyme)
- Optional garnishes: fresh basil, red pepper flakes, grated Parmesan
Instructions
- Preheat the oven to 425°F (220°C).
- Arrange the frozen garlic toast slices on a baking sheet, leaving space between each piece.
- Spread a thin layer of pizza sauce over each slice.
- Sprinkle shredded mozzarella cheese generously over the sauce.
- Customize each mini pizza with your favorite toppings.
- Sprinkle a pinch of Italian seasoning over each pizza.
- Bake for 8-10 minutes, or until the cheese is melted and bubbly.
- Remove from the oven and garnish with fresh basil, red pepper flakes, or Parmesan if desired. Serve hot.
Notes
Keep a close eye on the pizzas during baking to prevent the garlic toast from burning. Experiment with different cheeses and toppings for variety.
Nutrition
- Serving Size: 1 mini pizza
- Calories: 200250
- Sugar: 2
- Sodium: 400
- Fat: 10
- Saturated Fat: 5
- Carbohydrates: 20
- Fiber: 1
- Protein: 10
Keywords: quick dinner, mini pizzas, garlic toast pizza, easy recipe, kid-friendly, customizable pizza



