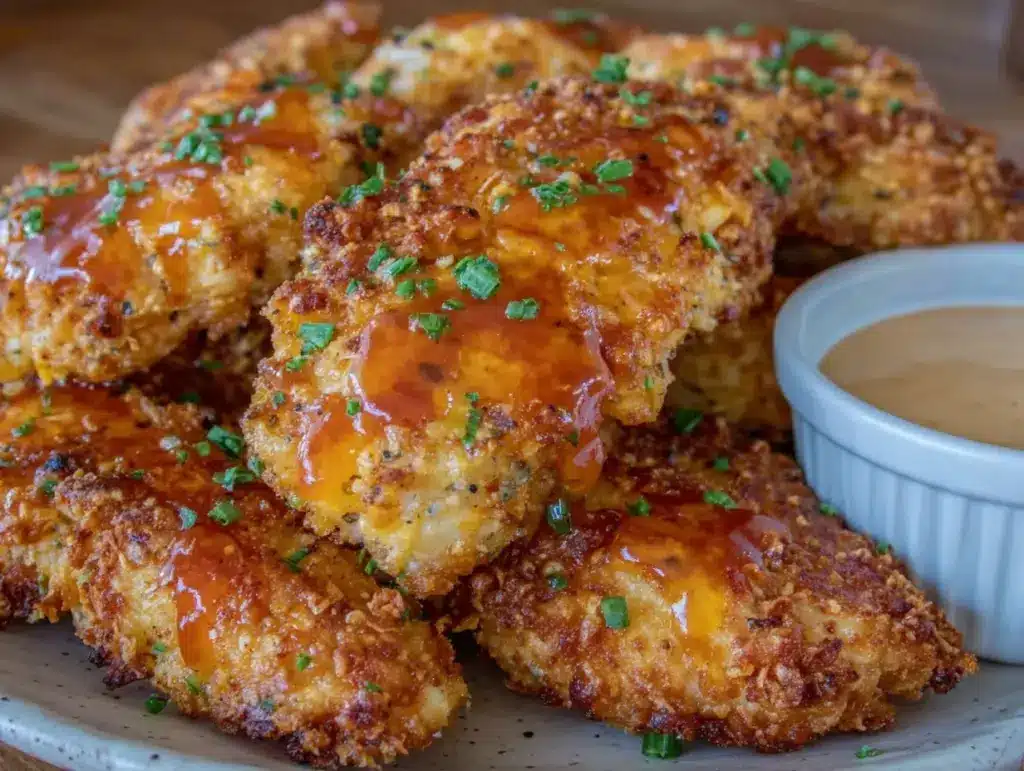
The crunch of perfectly golden chicken tenders, paired with that addictive savory seasoning—that’s what Crispy Crack Chicken Tenders bring to the table. Honestly, the first time I made these, I couldn’t believe how quickly they disappeared from the plate. It was one of those nights when I needed a fast dinner fix but didn’t want to sacrifice flavor or texture. The name “crack” might sound dramatic, but trust me, it’s all about that crispy, salty, slightly spicy coating that hooks you in for every bite.
I stumbled upon this recipe during a busy week when I was juggling work and family dinners. After tweaking it a few times, it became our go-to for a fuss-free meal that feels like a treat. If you’re someone who loves crispy chicken but hates the mess or wait time, this recipe is your new best friend. Plus, it’s great for busy families, quick weeknight dinners, or even when friends drop by unexpectedly.
These Crispy Crack Chicken Tenders stand out because they manage to be crunchy on the outside and juicy on the inside without deep frying or complicated steps. I’ve tested this recipe more times than I can count, adjusting seasonings and cooking techniques to get that perfect crackly texture that keeps everyone coming back. Whether you’re a seasoned cook or a beginner, this recipe is straightforward, reliable, and downright delicious.
Why You’ll Love This Recipe
- Quick & Easy: Ready in under 30 minutes, making it perfect for those hectic weeknights.
- Simple Ingredients: No need for fancy spices or obscure ingredients—most are pantry staples.
- Perfect for Any Occasion: Whether it’s a casual family dinner or a last-minute get-together, these tenders hit the spot.
- Crowd-Pleaser: Kids and adults alike rave about the crispy texture and flavorful coating.
- Unbelievably Delicious: The combination of crispy coating, juicy chicken, and a hint of spice gives you that comfort food feel without the guilt.
What really sets this Crispy Crack Chicken Tenders recipe apart is the clever seasoning blend and the cooking method that creates that signature crunch without using a ton of oil. I love blending a bit of smoked paprika and garlic powder in the coating—it adds a subtle smoky depth that’s hard to resist. Honestly, the first bite makes you close your eyes and smile, and that’s why I keep coming back to this recipe time and again.
This isn’t just your typical fried chicken tender recipe; it’s crispy, flavorful, and quick, making it a staple in my kitchen and hopefully yours too!
What Ingredients You Will Need
This recipe uses straightforward ingredients that come together to give you maximum flavor and crunch without the hassle. Most of these are probably already hanging out in your pantry or fridge, which is always a win in my book.
- Chicken Tenders: About 1.5 pounds (680 grams) of fresh, skinless chicken tenders or chicken breast strips. I prefer organic or free-range if possible for that extra juiciness.
- All-Purpose Flour: 1 cup (120 grams) for the base of the crispy coating. You can swap for gluten-free flour if needed without losing much crunch.
- Cornstarch: 1/4 cup (30 grams) to amp up the crispiness—this little trick works wonders.
- Seasoning Mix:
- 2 teaspoons smoked paprika (adds subtle smokiness)
- 1 teaspoon garlic powder (for that savory punch)
- 1 teaspoon onion powder
- 1/2 teaspoon cayenne pepper (optional, for a touch of heat)
- 1 teaspoon salt
- 1/2 teaspoon black pepper
- Eggs: 2 large, beaten to help the coating stick perfectly.
- Buttermilk or Milk: 1/2 cup (120 ml). Buttermilk is my personal favorite because it tenderizes the chicken, but regular milk or a dairy-free alternative works too.
- Cooking Oil: About 1/4 cup (60 ml) vegetable or canola oil for frying. You can also use avocado oil for a healthier option.
Tip: For best results, use fresh, firm chicken tenders and avoid overcrowding the pan while frying to keep them crispy. I like to prepare the seasoning mix in bulk and store it for quick use next time.
Equipment Needed
- Large Mixing Bowls: For dredging the chicken first in the egg mixture, then in the seasoned flour blend. I usually use two bowls to keep things clean and efficient.
- Large Skillet or Frying Pan: A heavy-bottomed skillet (about 10-12 inches) works great for frying the tenders evenly. Cast iron is ideal if you have it, but a non-stick pan is fine too.
- Tongs: For safely flipping the chicken tenders without messing up the crispy coating.
- Wire Rack: To drain the tenders after frying. Placing them on paper towels works, but a wire rack keeps them crispier by letting air circulate.
- Measuring Cups and Spoons: For precise measurements to get that perfect balance of seasoning and crunch.
If you don’t have a skillet handy, a deep fryer or even an air fryer could work with some adjustments. I’ve tried air frying this recipe and it’s a nice shortcut, though the traditional pan-fried method wins for that classic texture. Keep your tools clean and dry for the best results, especially the bowls and utensils used for dredging.
Detailed Preparation Method
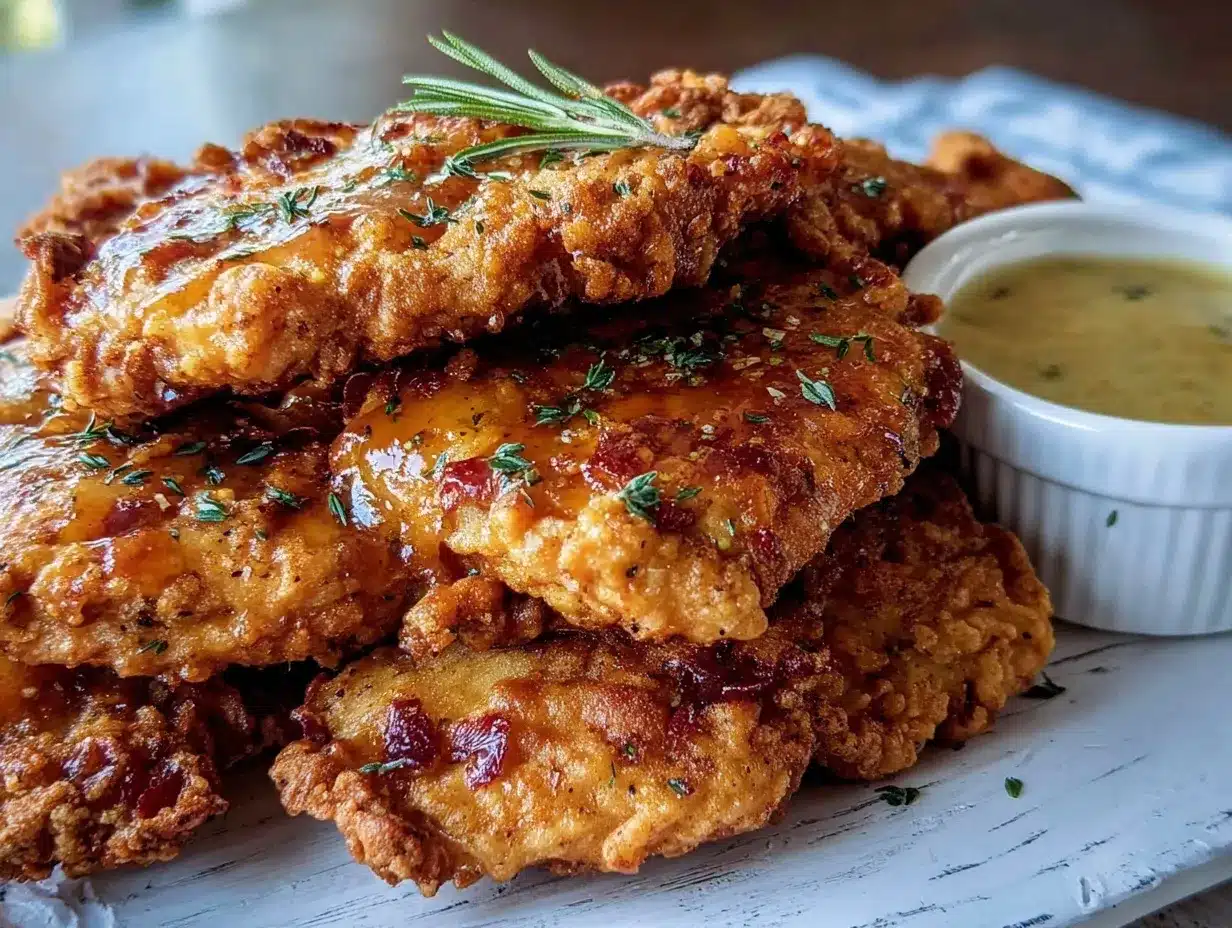
- Prep the Chicken: Pat 1.5 pounds (680 grams) of chicken tenders dry with paper towels. Dry chicken helps the coating stick better and fry up crispier. Set aside.
- Mix the Dry Ingredients: In a large bowl, combine 1 cup (120 grams) all-purpose flour, 1/4 cup (30 grams) cornstarch, 2 teaspoons smoked paprika, 1 teaspoon garlic powder, 1 teaspoon onion powder, 1 teaspoon salt, 1/2 teaspoon black pepper, and 1/2 teaspoon cayenne pepper if using. Stir well to evenly distribute the spices.
- Prepare the Wet Mixture: In another bowl, whisk together 2 large eggs and 1/2 cup (120 ml) buttermilk or milk. This will act as your binding agent.
- Dredge the Chicken: Dip each chicken tender first into the egg mixture, letting any excess drip off, then coat thoroughly in the seasoned flour mixture. For extra crunch, double dredge by dipping back into the egg and then the flour again.
- Heat the Oil: Pour 1/4 cup (60 ml) vegetable or avocado oil into a large skillet and heat over medium-high heat. The oil should shimmer but not smoke—about 350°F (175°C) if you have a thermometer.
- Fry the Tenders: Carefully place the chicken tenders in the hot oil without overcrowding the pan. Fry for about 3-4 minutes per side until golden brown and cooked through (internal temperature should reach 165°F or 74°C). Flip gently with tongs to keep the coating intact.
- Drain and Rest: Transfer cooked tenders to a wire rack set over a baking sheet or plate lined with paper towels. Let them rest for a few minutes to keep crispy.
- Serve: Enjoy immediately with your favorite dipping sauce or sides.
Pro tip: If you find your coating slipping off, try chilling the coated tenders in the fridge for 10-15 minutes before frying. This helps it set better!
Cooking Tips & Techniques
One of the biggest challenges with crispy chicken tenders is getting the coating to stay put and crisp up nicely. For this recipe, the mix of flour and cornstarch is key—it dries out the surface just enough to crisp without becoming heavy.
Don’t rush the frying temperature. Too low and the tenders soak up oil and become greasy; too hot and the coating burns before the chicken is fully cooked. Medium-high heat around 350°F (175°C) is your sweet spot. A kitchen thermometer can be a game-changer here.
Another trick I learned the hard way: don’t overcrowd the pan. Crowding causes the temperature to drop and steams the tenders, making them soggy. Fry in batches if needed and keep cooked tenders warm in a low oven (about 200°F / 95°C) while you finish the rest.
For extra crispy tenders, try double dredging (egg, flour, egg, flour). Also, resting the coated chicken on a wire rack before frying helps the coating dry slightly, which leads to better crunch.
Lastly, let your fried tenders rest briefly after cooking. This helps the juices redistribute and keeps the outside crisp without steam making it soggy.
Variations & Adaptations
- Gluten-Free Option: Swap all-purpose flour with a gluten-free blend and use cornstarch or arrowroot powder to maintain crispiness.
- Spicy Kick: Add extra cayenne pepper or toss cooked tenders in a spicy buffalo sauce for an extra punch.
- Air Fryer Method: Spray tenders lightly with oil and cook in an air fryer at 400°F (200°C) for 10-12 minutes, flipping halfway. The texture is slightly different but still delicious.
- Herb-Infused: Mix dried herbs like thyme or oregano into the flour for a fresh twist.
- Dairy-Free: Use almond milk or another plant-based milk instead of buttermilk and ensure your flour blend is dairy-free.
One variation I tried recently was adding a teaspoon of Parmesan cheese to the flour mixture. It gave a subtle cheesy flavor that paired amazingly with homemade ranch dip. Honestly, it was a hit at the dinner table!
Serving & Storage Suggestions
These Crispy Crack Chicken Tenders are best served hot and fresh to enjoy that perfect crunch. I like to plate them with a side of crisp celery sticks and a creamy ranch or honey mustard dipping sauce.
For sides, think about something fresh and light like a crisp salad or roasted veggies to balance the richness. They also pair well with classic comfort sides like mashed potatoes or mac and cheese for a hearty meal.
If you have leftovers, store them in an airtight container in the refrigerator for up to 3 days. To reheat, pop them in a preheated oven at 375°F (190°C) for 8-10 minutes. This helps bring back the crunch better than microwaving, which tends to make them soggy.
Over time, the flavors of the seasoning blend mellow and blend into the chicken, making leftovers quite tasty in sandwiches or wraps.
Nutritional Information & Benefits
Per serving (approximate for 4 servings):
| Calories | 350 |
|---|---|
| Protein | 35g |
| Fat | 15g |
| Carbohydrates | 20g |
| Fiber | 1g |
This recipe offers a good protein punch thanks to the chicken tenders, making it suitable for active lifestyles and muscle recovery. Using cornstarch and flour in moderation keeps the carbs reasonable. The smoked paprika and garlic powder add antioxidants and anti-inflammatory benefits, while the option to air fry reduces overall fat content.
For those watching gluten or dairy, the substitutions mentioned earlier keep this recipe accessible without losing that crave-worthy texture. Just be mindful of the oil amount when frying if you’re counting calories.
Conclusion
To wrap it up, these Crispy Crack Chicken Tenders are a fantastic recipe to have in your dinner rotation. They’re quick, flavorful, and crispy in all the right ways. Whether you’re feeding a family or just craving a no-fuss comfort meal, this recipe delivers every time.
Feel free to tweak the seasoning or try the variations to suit your taste buds—there’s plenty of room to make it your own. Personally, I love how easy it is to get that satisfying crunch without a lot of hassle or fancy equipment.
If you try this recipe, I’d love to hear how it went! Leave a comment below or share your favorite twists. Happy cooking!
FAQs About Crispy Crack Chicken Tenders
Can I bake these chicken tenders instead of frying?
Yes! Bake at 425°F (220°C) on a greased baking sheet for 20-25 minutes, flipping halfway through. They won’t be quite as crispy as frying but still tasty.
How do I keep the coating from falling off?
Make sure to pat the chicken dry before dredging, don’t overcrowd the pan, and consider chilling the coated tenders before frying to help set the coating.
What dipping sauces go well with these tenders?
Ranch, honey mustard, BBQ sauce, or a spicy buffalo sauce are all fantastic choices that complement the seasoning well.
Can I use frozen chicken tenders?
It’s best to use fresh or fully thawed chicken tenders to ensure even cooking and proper coating adhesion.
Is there a way to make this recipe healthier?
Try air frying instead of pan-frying and use low-fat buttermilk or milk alternatives. Also, serving with fresh veggies helps balance the meal.
Pin This Recipe!

Crispy Crack Chicken Tenders Recipe Easy Quick Dinner Idea

Crispy Crack Chicken Tenders offer a crunchy outside and juicy inside with a savory, slightly spicy coating. This quick and easy recipe is perfect for busy weeknights and family dinners.
- Prep Time: 10 minutes
- Cook Time: 15 minutes
- Total Time: 25 minutes
- Yield: 4 servings 1x
- Category: Main Course
- Cuisine: American
Ingredients
- 1.5 pounds (680 grams) fresh, skinless chicken tenders or chicken breast strips
- 1 cup (120 grams) all-purpose flour (can substitute gluten-free flour)
- 1/4 cup (30 grams) cornstarch
- 2 teaspoons smoked paprika
- 1 teaspoon garlic powder
- 1 teaspoon onion powder
- 1/2 teaspoon cayenne pepper (optional)
- 1 teaspoon salt
- 1/2 teaspoon black pepper
- 2 large eggs, beaten
- 1/2 cup (120 ml) buttermilk or milk (or dairy-free alternative)
- 1/4 cup (60 ml) vegetable or canola oil (or avocado oil)
Instructions
- Pat 1.5 pounds (680 grams) of chicken tenders dry with paper towels and set aside.
- In a large bowl, combine 1 cup (120 grams) all-purpose flour, 1/4 cup (30 grams) cornstarch, 2 teaspoons smoked paprika, 1 teaspoon garlic powder, 1 teaspoon onion powder, 1 teaspoon salt, 1/2 teaspoon black pepper, and 1/2 teaspoon cayenne pepper if using. Stir well.
- In another bowl, whisk together 2 large eggs and 1/2 cup (120 ml) buttermilk or milk.
- Dip each chicken tender into the egg mixture, letting excess drip off, then coat thoroughly in the seasoned flour mixture. For extra crunch, double dredge by dipping back into the egg and then the flour again.
- Heat 1/4 cup (60 ml) vegetable or avocado oil in a large skillet over medium-high heat until shimmering (about 350°F / 175°C).
- Carefully place chicken tenders in the hot oil without overcrowding. Fry for 3-4 minutes per side until golden brown and cooked through (internal temperature 165°F / 74°C). Flip gently with tongs.
- Transfer cooked tenders to a wire rack set over a baking sheet or plate lined with paper towels. Let rest for a few minutes.
- Serve immediately with your favorite dipping sauce or sides.
Notes
Pat chicken dry before dredging to help coating stick. Avoid overcrowding the pan to keep tenders crispy. Double dredging and chilling coated tenders before frying improves crunch. Use a kitchen thermometer to maintain oil temperature around 350°F (175°C). Rest tenders after frying to keep crispiness.
Nutrition
- Serving Size: Approximately 4-5 ch
- Calories: 350
- Fat: 15
- Carbohydrates: 20
- Fiber: 1
- Protein: 35
Keywords: crispy chicken tenders, quick dinner, easy chicken recipe, fried chicken, weeknight meal, chicken coating, savory chicken, family dinner