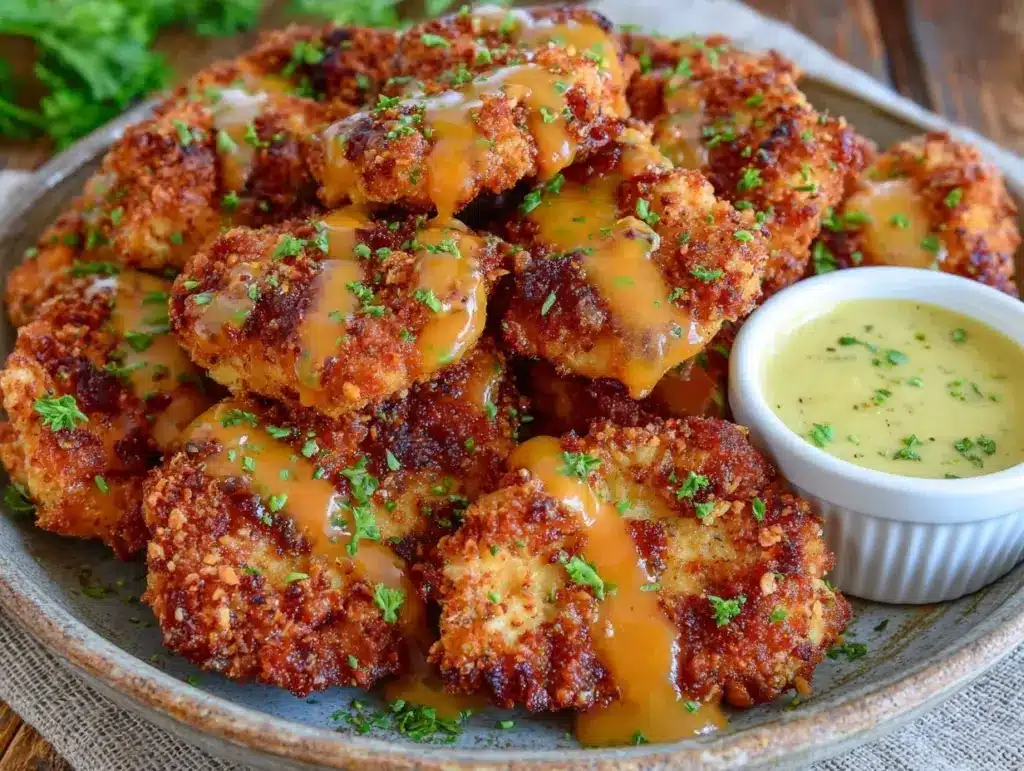
The first time I bit into these crispy crack chicken tenders, I swear I heard a tiny crunch chorus in my kitchen. Honestly, the smell of golden, perfectly seasoned chicken sizzling in the pan is one of those moments that makes you stop and smile. I stumbled upon this recipe during a chaotic weeknight when I needed something fast but absolutely satisfying. Since then, it’s become my go-to dinner hack on busy evenings.
Crispy crack chicken tenders have this magical way of combining comfort and convenience. You know how sometimes you want that crispy crunch without the greasy guilt? Well, these tenders deliver just that, with a flavor punch that’s both addictive and heartwarming. I’ve played with the recipe multiple times—tweaking the seasoning, trying different breadings, and even testing it out on my pickiest eaters. Each time, it nails that perfect balance of juicy inside and crunchy outside.
What makes these chicken tenders really stand out is how straightforward they are. You don’t need fancy gadgets or obscure ingredients. It’s all about simple pantry staples coming together to create a dinner that feels special but takes less than 30 minutes to whip up. Whether you’re feeding hungry teens, hosting a casual game night, or just want a fuss-free meal, these crispy crack chicken tenders fit right in.
Plus, if you ever thought chicken tenders were just kid food, think again. These are bursting with flavor and texture that adults adore too. As someone who’s tried countless chicken recipes, I can tell you this one has that crave-worthy crunch and juicy tenderness combo that keeps everyone asking for seconds. So, if you’re ready for a quick and easy dinner delight, let’s get cooking!
Why You’ll Love This Recipe
- Quick & Easy: Ready in under 30 minutes, perfect for those hectic weeknights when time isn’t on your side.
- Simple Ingredients: No need for special trips—basic pantry items like flour, spices, and chicken tenders are all you need.
- Perfect for Any Occasion: Whether it’s a casual family dinner, a potluck, or a game day snack, these tenders always impress.
- Crowd-Pleaser: Kids, teens, and adults all love the crispy texture and flavorful seasoning—it’s a universal winner.
- Unbelievably Delicious: The secret blend of spices and the method of breading create that addictive crunch and juicy bite combo.
This recipe isn’t just another chicken tender dish. What sets it apart is the way the coating crisps up perfectly without feeling heavy or oily. The seasoning mix gives it a bold but balanced flavor — just enough kick without overpowering the chicken’s natural taste. And the method? It’s a little trick I picked up after a few trial runs: coating the tenders in a seasoned flour mix, then a quick dip in buttermilk, and back again for double crunch. Trust me, it’s worth the extra step.
The emotional connection? It’s that feeling when you find a recipe that feels like a hug after a long day. That satisfying crunch, the juicy tenderness inside, and the ease of making it come together quickly—this one has become a comfort staple in my kitchen. You’ll close your eyes after the first bite and just savor every mouthful. Honestly, it’s comfort food with a little attitude, perfect for impressing guests or treating yourself without the fuss.
What Ingredients You Will Need
This recipe uses simple, wholesome ingredients that come together to create a crispy, flavorful dinner without the fuss. Most of these are pantry staples or easy to find in any grocery store. Here’s what you’ll need:
- Chicken tenders: about 1.5 pounds (680 grams), fresh or thawed if frozen
- All-purpose flour: 1 cup (120 grams) for the breading base
- Cornstarch: ¼ cup (30 grams), helps add extra crispiness
- Seasoning blend:
- 1 teaspoon garlic powder
- 1 teaspoon onion powder
- 1 teaspoon smoked paprika (adds a subtle smokey flavor)
- ½ teaspoon cayenne pepper (optional, for a little heat)
- Salt and black pepper to taste
- Buttermilk: 1 cup (240 ml), room temperature – I like the tang it adds and it helps tenderize the chicken
- Eggs: 2 large, beaten, to help the coating stick well
- Cooking oil: about 1 cup (240 ml) vegetable or canola oil for frying (you can also use avocado oil for a cleaner option)
If you want to customize, here are some tips:
- Gluten-free option: Swap all-purpose flour with almond flour or a gluten-free flour blend.
- Dairy-free: Use coconut milk mixed with a teaspoon of lemon juice instead of buttermilk.
- Healthier twist: Bake the tenders instead of frying (instructions below).
- Spice it up: Add chili powder or Cajun seasoning for a bolder flavor.
For the best results, I recommend using fresh chicken tenders rather than frozen. Also, I’ve found that small-curd buttermilk works best for coating — it clings nicely and isn’t too runny. Brands like Organic Valley or Butchery Fresh have never let me down.
Equipment Needed
- Large mixing bowls: For dredging the chicken and mixing the wet and dry ingredients separately.
- Deep frying pan or skillet: A heavy-bottomed pan about 10-12 inches in diameter works great for frying. I personally use a cast iron skillet for even heat distribution.
- Slotted spoon or tongs: To carefully flip and remove chicken tenders from the hot oil.
- Cooling rack and baking sheet: Essential for draining excess oil and keeping the tenders crispy.
- Measuring cups and spoons: For accuracy in seasoning and flour measurements.
- Thermometer (optional but helpful): Use a kitchen thermometer to monitor oil temperature; 350°F (175°C) is ideal.
If you don’t have a deep frying pan, a heavy-bottomed saucepan or even a deep fryer works fine. For those keeping an eye on budget, any sturdy non-stick skillet will do, but watch your oil temperature carefully to avoid soggy coating. Cleaning tip: If you use cast iron, wipe it down immediately after use to prevent rusting.
Detailed Preparation Method
- Prep your ingredients: Pat the chicken tenders dry with paper towels. This helps the coating stick better and avoids soggy spots.
- Mix the dry coating: In a large bowl, combine 1 cup (120 g) all-purpose flour, ¼ cup (30 g) cornstarch, garlic powder, onion powder, smoked paprika, cayenne pepper (if using), salt, and black pepper. Stir until evenly blended.
- Prepare the wet mixture: In another bowl, whisk together the buttermilk (1 cup/240 ml) and eggs (2 large) until smooth.
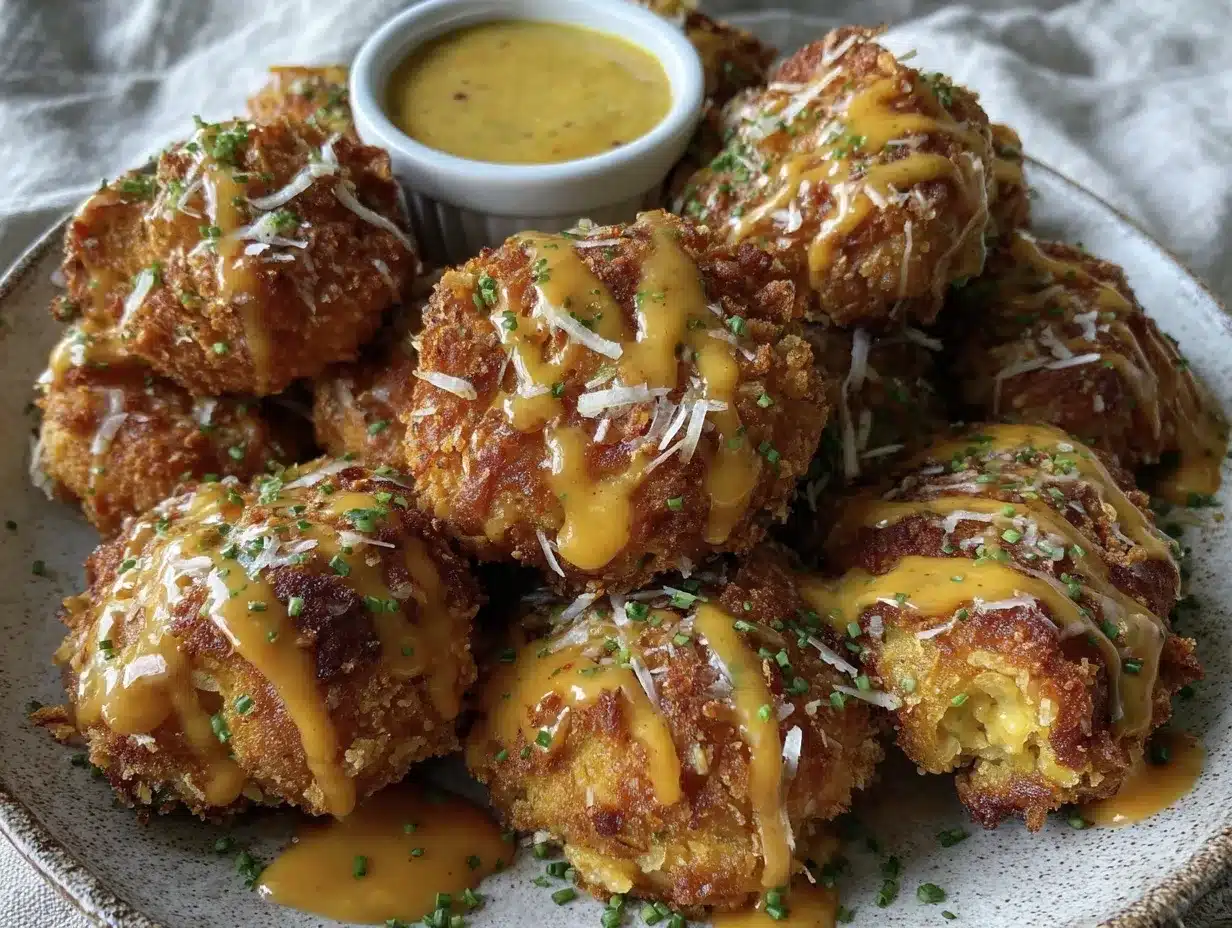
- Coat the chicken tenders: One by one, dredge each tender in the dry flour mixture, shaking off excess. Then dip it into the wet buttermilk-egg mix, letting the excess drip off. Finally, dip it again into the dry flour mixture for a double coating. This double dip is the secret to that extra crunch you’re craving.
- Heat the oil: Pour about 1 cup (240 ml) of oil into your skillet and heat over medium-high until it reaches 350°F (175°C). If you don’t have a thermometer, test by dropping a pinch of flour into the oil — it should sizzle immediately.
- Fry the tenders: Carefully place a few tenders into the hot oil without overcrowding the pan (work in batches). Fry for about 3-4 minutes per side, turning once, until golden brown and cooked through. The internal temperature should hit 165°F (74°C).
- Drain and rest: Use tongs or a slotted spoon to transfer the tenders to a cooling rack over a baking sheet. This keeps them crispy instead of soggy. Let them rest for 5 minutes before serving.
Pro tip: Keep the oil temperature steady to avoid greasy tenders. If the oil gets too hot, the coating might burn before the chicken cooks through. Too low, and the tenders soak up oil and become heavy. Adjust the heat as needed during frying.
Cooking Tips & Techniques
One thing I learned the hard way is that drying your chicken well before coating is non-negotiable. Moisture competes with the flour and buttermilk, making the coating slip off or get soggy. Also, the double-dipping method isn’t just for show — it forms a thick, crunchy crust that holds up even after dipping in sauces.
Maintaining oil temperature is crucial. Use a thermometer if you can, but if not, watch for the perfect sizzle when you add the chicken. Too hot? The coating browns too fast and leaves the inside undercooked. Too cool? The tenders soak up oil and lose the crispness we all crave.
Another trick: don’t overcrowd the pan. It lowers oil temperature and causes uneven cooking. Fry in batches and keep cooked tenders warm in a low oven (around 200°F/95°C) while you finish the rest.
For a healthier twist, bake instead of fry. Place tenders on a parchment-lined baking sheet, spray lightly with cooking oil, and bake at 425°F (220°C) for 15-20 minutes, flipping halfway through. They won’t be as crispy as fried but still delicious and less oily.
Variations & Adaptations
- Spicy Crispy Crack Chicken: Add ½ teaspoon cayenne pepper and a pinch of chili powder to the flour mix for an extra kick.
- Herbed Version: Mix in 1 teaspoon dried Italian herbs or fresh chopped parsley into the flour for a fragrant twist.
- Gluten-Free Option: Substitute all-purpose flour and cornstarch with a gluten-free flour blend or almond flour. Note that texture will be slightly different but still tasty.
- Baked Variation: For a lighter option, bake the tenders as described above, using panko breadcrumbs mixed with the seasoning for crunch.
- Dipping Sauces: Try pairing with honey mustard, ranch, or a spicy sriracha mayo for added flavor variety.
One personal favorite adaptation? Tossing the fried tenders in a little garlic parmesan butter right after frying. It’s indulgent but absolutely worth it for a special occasion or when you want to impress guests.
Serving & Storage Suggestions
These crispy crack chicken tenders are best served hot and fresh from the pan. I like to plate them with a colorful side salad or some crispy oven fries for a classic combo. They also make great finger food for parties, paired with dipping sauces like ranch, BBQ, or honey mustard.
If you have leftovers (rare, but it happens!), store them in an airtight container in the fridge for up to 3 days. To keep the crispiness intact, reheat in an oven or air fryer at 350°F (175°C) for about 8-10 minutes. Microwaving tends to make the coating soggy, so avoid that if you want to keep the crunch.
Interestingly, the flavors mellow and meld together a bit after resting, making the tenders taste even better the next day. So if you’re prepping ahead for a meal, no worries — just reheat properly and enjoy!
Nutritional Information & Benefits
Each serving (about 4 tenders) roughly contains:
| Calories | 350-400 kcal |
|---|---|
| Protein | 35 grams |
| Fat | 18 grams (mostly from frying oil) |
| Carbohydrates | 15 grams |
The key ingredient, chicken tenders, offer a great source of lean protein essential for muscle repair and satiety. Using buttermilk helps tenderize the meat and adds calcium and probiotics. While frying does add fat, using a quality oil like avocado or canola keeps it better for heart health.
For those watching gluten or dairy, substitutions are straightforward, making this recipe adaptable for many dietary needs. It’s a balanced meal option when paired with vegetables or a salad, providing a satisfying and nourishing dinner.
Conclusion
In summary, these crispy crack chicken tenders are a quick, easy, and incredibly tasty dinner option that fits effortlessly into busy schedules. They’ve earned a permanent spot in my recipe box because they turn simple ingredients into a meal that feels like a treat. Whether you stick to the classic version or try one of the variations, you’ll find yourself reaching for this recipe again and again.
Give it a try, tweak it to your taste, and don’t forget to share your own delicious adaptations! I love hearing how readers make it their own—drop a comment below or tag me if you post your version. Happy cooking and crunching!
Frequently Asked Questions
Can I bake the crispy crack chicken tenders instead of frying?
Yes! Baking at 425°F (220°C) for 15-20 minutes on a parchment-lined sheet, flipping halfway through, works well for a lighter option. They won’t be quite as crispy as fried but still tasty.
What’s the secret to getting the coating extra crispy?
The double-dip method—flour, then wet mixture, then flour again—creates a thick crust that crisps up beautifully. Also, maintaining hot oil at about 350°F (175°C) is crucial.
Can I use frozen chicken tenders?
You can, but thaw them completely and pat dry before coating. Excess moisture can make the coating soggy or cause oil splatter during frying.
What are good dipping sauces for these tenders?
Honey mustard, ranch, BBQ sauce, or spicy sriracha mayo all complement the flavors perfectly.
How do I store and reheat leftovers?
Store in an airtight container in the fridge for up to 3 days. Reheat in an oven or air fryer at 350°F (175°C) for 8-10 minutes to keep them crispy. Avoid microwaving if you want to retain crunch.
Pin This Recipe!

Crispy Crack Chicken Tenders

A quick and easy recipe for crispy, flavorful chicken tenders with a juicy inside and crunchy outside, perfect for busy weeknights or casual gatherings.
- Prep Time: 10 minutes
- Cook Time: 15 minutes
- Total Time: 25 minutes
- Yield: 4 servings 1x
- Category: Main Course
- Cuisine: American
Ingredients
- 1.5 pounds (680 grams) chicken tenders, fresh or thawed
- 1 cup (120 grams) all-purpose flour
- 1/4 cup (30 grams) cornstarch
- 1 teaspoon garlic powder
- 1 teaspoon onion powder
- 1 teaspoon smoked paprika
- 1/2 teaspoon cayenne pepper (optional)
- Salt and black pepper to taste
- 1 cup (240 ml) buttermilk, room temperature
- 2 large eggs, beaten
- 1 cup (240 ml) vegetable or canola oil for frying (or avocado oil)
Instructions
- Pat the chicken tenders dry with paper towels.
- In a large bowl, combine flour, cornstarch, garlic powder, onion powder, smoked paprika, cayenne pepper (if using), salt, and black pepper. Stir until evenly blended.
- In another bowl, whisk together buttermilk and eggs until smooth.
- Dredge each chicken tender in the dry flour mixture, shaking off excess.
- Dip the tender into the wet buttermilk-egg mixture, letting excess drip off.
- Dip the tender again into the dry flour mixture for a double coating.
- Heat oil in a skillet over medium-high heat to 350°F (175°C).
- Fry tenders in batches for 3-4 minutes per side until golden brown and cooked through (internal temperature 165°F/74°C).
- Transfer tenders to a cooling rack over a baking sheet to drain excess oil and keep crispy.
- Let rest for 5 minutes before serving.
Notes
Pat chicken dry before coating to avoid soggy crust. Maintain oil temperature at 350°F for best results. Fry in batches to prevent overcrowding. For a healthier option, bake at 425°F for 15-20 minutes, flipping halfway.
Nutrition
- Serving Size: About 4 chicken tend
- Calories: 350400
- Sugar: 1
- Sodium: 400
- Fat: 18
- Saturated Fat: 3
- Carbohydrates: 15
- Fiber: 1
- Protein: 35
Keywords: crispy chicken tenders, quick dinner, easy chicken recipe, fried chicken, comfort food, weeknight meal