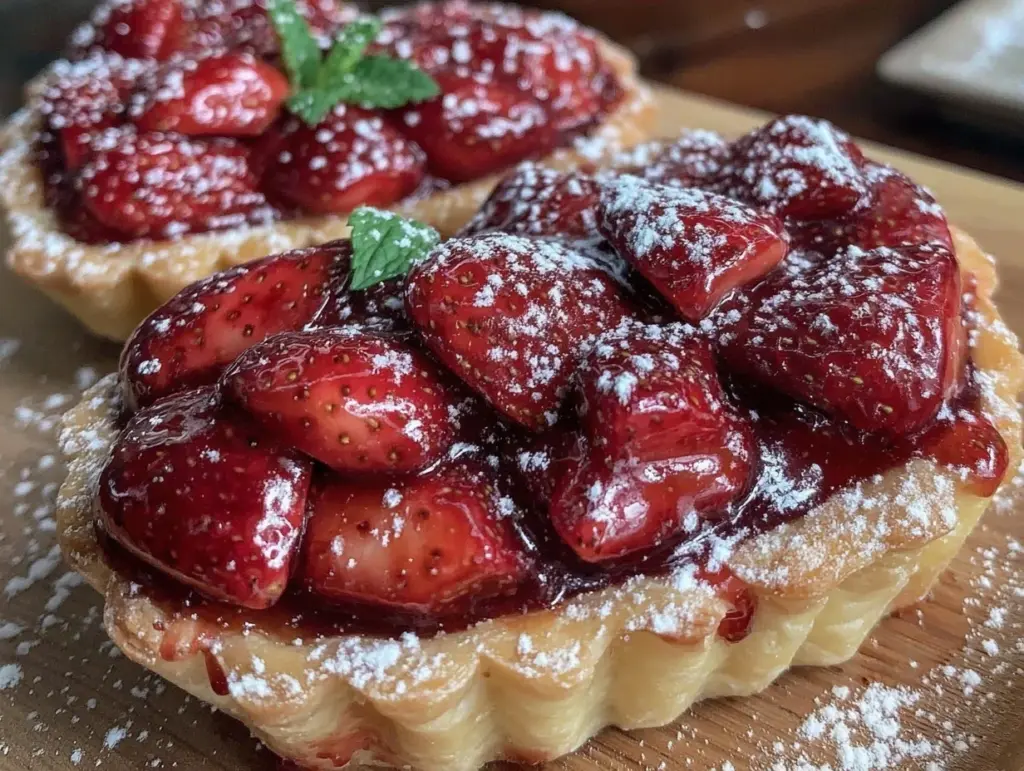
The sweet aroma of fresh strawberries mingled with buttery pastry always brings a smile to my face, but nothing quite captures the feeling of love like these irresistible Valentine’s heart-shaped strawberry tarts. Honestly, I first whipped these up on a whim one chilly February evening, hoping to surprise my partner with a dessert that looked as charming as it tasted. Let me tell you, the moment I pulled those golden, heart-shaped beauties from the oven, I knew this recipe was a keeper.
These tarts aren’t just cute—they’re a celebration of fresh flavors wrapped in a flaky, tender crust that melts in your mouth. What’s more, making them feels like a cozy little ritual, perfect for anyone who loves baking but wants a romantic twist without the fuss. Whether you’re planning a special date night or just craving a sweet treat that says “I adore you,” this recipe for irresistible Valentine’s heart-shaped strawberry tarts is going to become your new secret weapon.
I’ve baked these tarts countless times, tweaking the balance between the crisp pastry and luscious filling to get it just right. Plus, I’ve got a few insider tips to help you avoid common pitfalls—because let’s face it, nobody wants soggy bottoms or a crust that’s too tough. So, grab your apron, and let’s make a dessert that’s as delightful to create as it is to eat.
Why You’ll Love This Recipe
- Quick & Easy: Comes together in under 45 minutes, making it perfect for last-minute Valentine’s Day plans or sweet cravings.
- Simple Ingredients: Uses pantry staples and fresh strawberries—no fancy or hard-to-find items needed.
- Perfect for Romantic Occasions: Ideal for Valentine’s Day, anniversaries, or any moment when you want to impress without stress.
- Crowd-Pleaser: Kids, adults, and even picky eaters rave about the balance of sweet, tangy, and buttery flavors.
- Unbelievably Delicious: The crisp, flaky crust pairs beautifully with the juicy strawberry filling for a melt-in-your-mouth experience.
What sets this recipe apart is the attention to detail in shaping the tarts into perfect hearts—because let’s be honest, presentation counts. Plus, the filling isn’t just sweet; it has a subtle hint of lemon zest that brightens every bite. I’ve also experimented with blending a bit of cream cheese into the filling to add a silky richness, which I highly recommend if you want to spoil someone special.
This isn’t just another strawberry tart recipe—it’s the one that makes you pause, close your eyes, and savor the moment. It’s comfort food with a romantic soul, easy enough for beginners but impressive enough to wow your guests.
What Ingredients You Will Need
This recipe relies on fresh, wholesome ingredients to bring that perfect harmony of flavor and texture. You’ll find most of these in your kitchen already, and if not, they’re easy to pick up without hunting down specialty stores.
- For the Pastry:
- All-purpose flour, 2 cups (240g) – the base for a tender, flaky crust
- Unsalted butter, 1 cup (225g), cold and cubed – I use Plugrá for extra richness
- Granulated sugar, 2 tablespoons – adds a subtle sweetness to the crust
- Salt, 1/4 teaspoon – balances the flavors
- Ice water, 4-6 tablespoons – just enough to bring the dough together
- For the Strawberry Filling:
- Fresh strawberries, 2 cups (about 300g), hulled and sliced – choose ripe, bright red berries for best flavor
- Granulated sugar, 1/4 cup (50g) – sweetens and helps macerate the fruit
- Fresh lemon juice, 1 tablespoon – adds brightness and cuts through the sweetness
- Lemon zest, 1 teaspoon – for that subtle citrus aroma
- Cornstarch, 1 tablespoon – thickens the filling so it doesn’t get runny
- Vanilla extract, 1 teaspoon – deepens the flavor profile
- Optional: Cream cheese, 2 ounces (56g), softened – for a richer, creamier filling
- For Finishing:
- Egg, 1 large, beaten – for brushing on the crust to get that beautiful golden color
- Powdered sugar, for dusting (optional)
For gluten-free options, swapping all-purpose flour with almond flour can work, but expect a slightly denser crust. If you’re dairy-free, using coconut oil chilled in place of butter is a decent substitute, though the flavor will be different. When picking strawberries, I avoid overly soft or mushy ones to keep the filling fresh and vibrant.
Equipment Needed
- Mixing bowls – a couple of sizes for dough and filling
- Pastry blender or food processor – these help cut cold butter into the flour quickly (I personally find a food processor saves time but a good pastry blender does the trick)
- Rolling pin – essential for flattening the dough evenly
- Heart-shaped cookie cutter (about 3-4 inches) – to get those perfect tart shapes
- Baking sheet lined with parchment paper – for easy cleanup and even baking
- Wire rack – to cool the tarts properly so the bottoms stay crisp
- Small brush – for egg wash application
If you don’t have a heart cookie cutter, a sharp knife and a steady hand work fine (I’ve done it plenty of times!). For budget-friendly options, a rolling pin can be substituted with a clean wine bottle, just wrap it with plastic wrap to keep it smooth.
Keeping your butter cold during prep is key, so I recommend chilling your mixing bowls and equipment briefly if your kitchen is warm. Also, a kitchen scale helps with precision, especially if you want consistent tart sizes.
Detailed Preparation Method
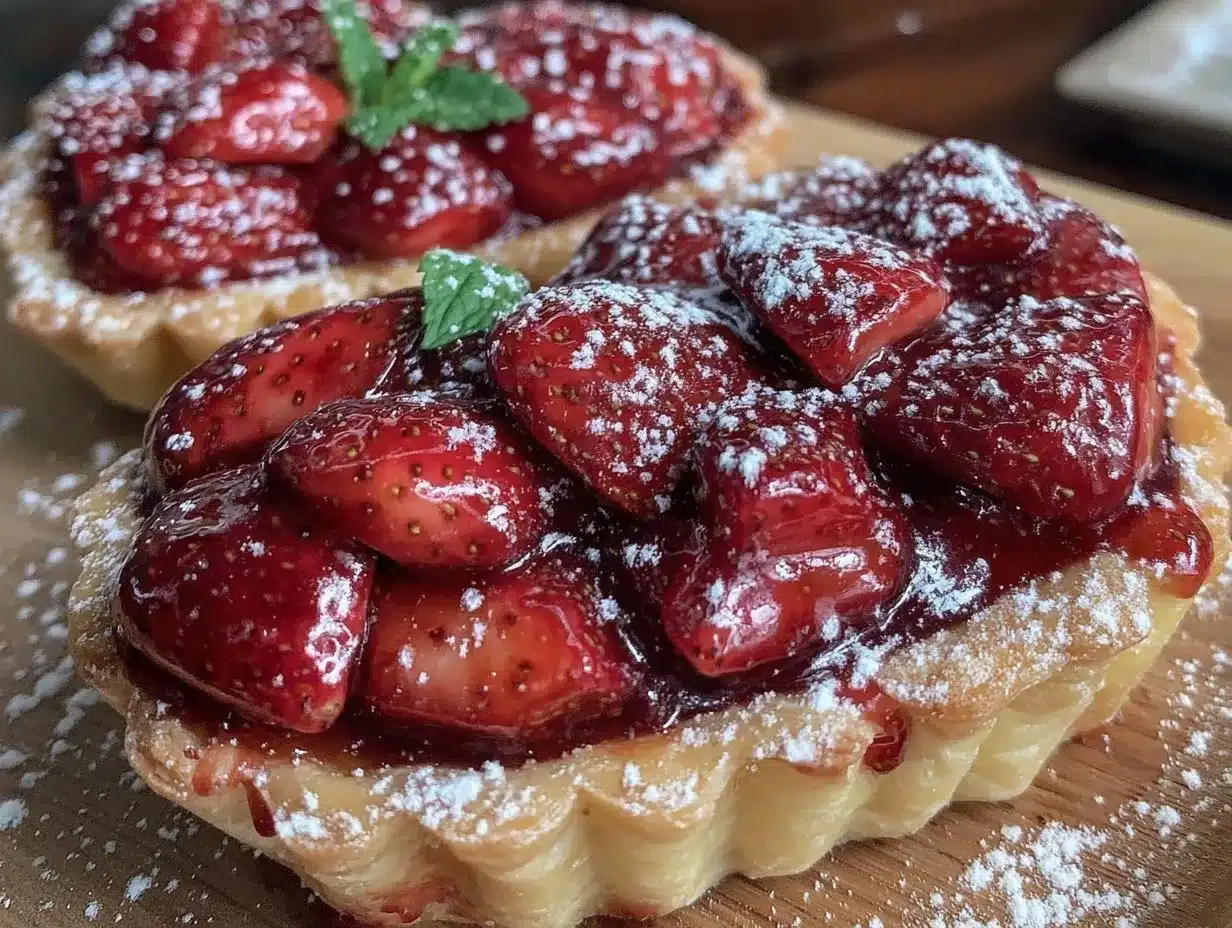
- Make the pastry dough: In a large bowl or food processor, combine 2 cups (240g) of all-purpose flour, 2 tablespoons of granulated sugar, and 1/4 teaspoon salt. Add 1 cup (225g) of cold, cubed unsalted butter. Use a pastry blender or pulse your processor until the mixture resembles coarse crumbs with some pea-sized pieces. Slowly add 4-6 tablespoons of ice water, one tablespoon at a time, mixing gently until the dough just comes together. Avoid overworking to keep it tender. Wrap the dough in plastic and chill for at least 30 minutes.
- Prepare the strawberry filling: While the dough chills, mix 2 cups (300g) sliced fresh strawberries with 1/4 cup (50g) sugar, 1 tablespoon lemon juice, 1 teaspoon lemon zest, 1 tablespoon cornstarch, and 1 teaspoon vanilla extract in a bowl. If you’re adding cream cheese, fold in 2 ounces (56g) softened cream cheese now, blending gently. Let the mixture sit for 10-15 minutes to macerate and thicken.
- Preheat the oven: Set your oven to 375°F (190°C) to warm up while you work on shaping the tarts.
- Roll out the dough: On a lightly floured surface, roll out the chilled dough to about 1/8 inch (3mm) thickness. Using your heart-shaped cookie cutter (3-4 inches), cut out as many hearts as possible. Transfer half the hearts to a parchment-lined baking sheet; these will be the tart bases.
- Fill the tarts: Spoon about 1 tablespoon of the strawberry filling onto each dough heart on the baking sheet, spreading gently but leaving a small border around the edges.
- Top the tarts: Place the remaining heart-shaped dough pieces over the filling. Press the edges gently to seal—don’t worry about perfect seals; rustic charm works here. Use a fork to crimp the edges for a decorative touch and to help seal.
- Apply egg wash: Brush each tart with the beaten egg to get a beautiful golden finish once baked.
- Bake: Pop the tarts into the preheated oven for 18-22 minutes, or until the crust is golden brown and the filling is bubbling. Keep an eye on them after 15 minutes to avoid over-browning.
- Cool and serve: Let tarts cool on a wire rack for at least 15 minutes so the filling sets. Dust with powdered sugar if you like before serving.
Pro tip: If the edges brown too quickly before the filling is cooked, tent the tarts loosely with foil halfway through baking. Also, don’t rush cooling—cutting too soon can cause the filling to spill out.
Cooking Tips & Techniques
One key to success with these heart-shaped strawberry tarts is keeping your ingredients cold—especially the butter and water when making the dough. This helps create that flaky, tender crust we all love. I’ve learned the hard way that warm butter turns the dough dense, so chilling is non-negotiable.
Don’t overfill your tarts. It’s tempting to pile on the strawberries, but too much filling can make the crust soggy or cause leaks. About a tablespoon per tart strikes the perfect balance.
When rolling out the dough, keep it even in thickness to avoid some tarts baking faster than others. I like rolling between two sheets of parchment paper to prevent sticking and to make cleanup easier.
Timing is everything. Preheat the oven fully before baking, and watch your tarts closely after 15 minutes. Ovens vary, and you don’t want burnt edges stealing the show.
Lastly, for a glossy finish, brushing with egg wash is a game changer. If you want to skip eggs, a light brush of milk or cream works too, though the color won’t be as rich.
Variations & Adaptations
Feel like switching things up? Here are a few variations I’ve enjoyed:
- Chocolate Strawberry Tarts: Add a thin layer of melted dark chocolate on the base before adding strawberry filling for a decadent twist.
- Vegan Version: Use coconut oil in place of butter in the crust and substitute egg wash with almond milk. For the filling, swap cream cheese with a vegan cream cheese alternative.
- Mixed Berry Filling: Combine strawberries with blueberries and raspberries for a colorful, tangy filling perfect in summer.
- Almond Crust: Mix a handful of ground almonds into the dough for a nutty flavor and slight crunch.
Cooking method-wise, these tarts also bake beautifully in a toaster oven if you’re making a smaller batch. Just keep a close eye on the browning as toaster ovens can be hotter on the edges.
Personally, I once tried adding a touch of rose water to the filling for a romantic floral note—delicate and perfect for Valentine’s Day, but use sparingly to avoid overpowering.
Serving & Storage Suggestions
These Valentine’s heart-shaped strawberry tarts are best served slightly warm or at room temperature, allowing the flavors to shine and the crust to stay crisp. I love pairing them with a scoop of vanilla ice cream or a dollop of freshly whipped cream for an indulgent touch.
For drinks, a lightly chilled sparkling rosé or a cup of fragrant Earl Grey tea complements the fruity sweetness beautifully.
Store any leftovers in an airtight container at room temperature for up to 24 hours. Beyond that, refrigeration is better to keep the filling fresh, but note the crust may lose some crispness. To revive it, pop the tarts in a preheated 350°F (175°C) oven for 5-7 minutes before serving.
These tarts also freeze well—wrap individually in plastic wrap and place in a freezer bag for up to 2 months. Thaw overnight in the fridge and reheat gently in the oven to bring back that fresh-baked charm.
Fun fact: the flavors mellow and deepen if you let the tarts sit overnight, making them an excellent make-ahead dessert for Valentine’s Day celebrations.
Nutritional Information & Benefits
Each heart-shaped strawberry tart contains roughly 220-250 calories depending on size and optional ingredients. They provide a modest boost of vitamin C from fresh strawberries, which are great for immunity and skin health. The butter-based crust adds healthy fats that keep you satisfied.
For those mindful of dietary needs, this recipe can be adjusted to be gluten-free or dairy-free with simple swaps. Strawberries are naturally low in calories and high in antioxidants, making this dessert a lighter choice compared to heavy cakes or chocolates.
Personally, I appreciate that these tarts offer a balance of indulgence and nutrition—perfect when you want to treat yourself without feeling weighed down afterward.
Note: Contains gluten and dairy unless substitutions are made.
Conclusion
In a nutshell, these irresistible Valentine’s heart-shaped strawberry tarts are more than just a dessert—they’re a little love letter you bake yourself. With simple ingredients, straightforward steps, and that charming heart shape, they’re perfect for making anyone feel special. Whether you’re a seasoned baker or just starting out, this recipe delivers delightful results that never fail to impress.
Feel free to tweak the filling or crust to your taste, and don’t hesitate to get creative with toppings or serving ideas. I love how making these tarts has become a sweet tradition in my home, and I hope they bring that same joy to yours.
If you try this recipe, please share your thoughts or your own tweaks in the comments—I’m always excited to hear how you make it your own. Happy baking, and here’s to delicious moments shared with the ones you love!
FAQs
How do I keep the tart crust from getting soggy?
Make sure not to overfill the tarts and use cornstarch in the filling to thicken it. Also, bake the tarts until the filling bubbles and the crust is golden to help set everything firmly.
Can I prepare the tart dough ahead of time?
Yes! You can make the dough up to 2 days ahead and keep it wrapped in the fridge. Just let it sit at room temperature for 10 minutes before rolling out.
What if I don’t have a heart-shaped cookie cutter?
No worries. Use a small knife to carefully cut heart shapes freehand or shape the tarts into rounds or squares for a rustic look.
Can I use frozen strawberries for the filling?
Fresh strawberries are best for texture, but you can use frozen if you thaw and drain them well to avoid excess moisture.
How do I store leftover tarts?
Keep them in an airtight container at room temperature for up to 24 hours or refrigerate for up to 3 days. Reheat in the oven to refresh the crust before serving.
Pin This Recipe!
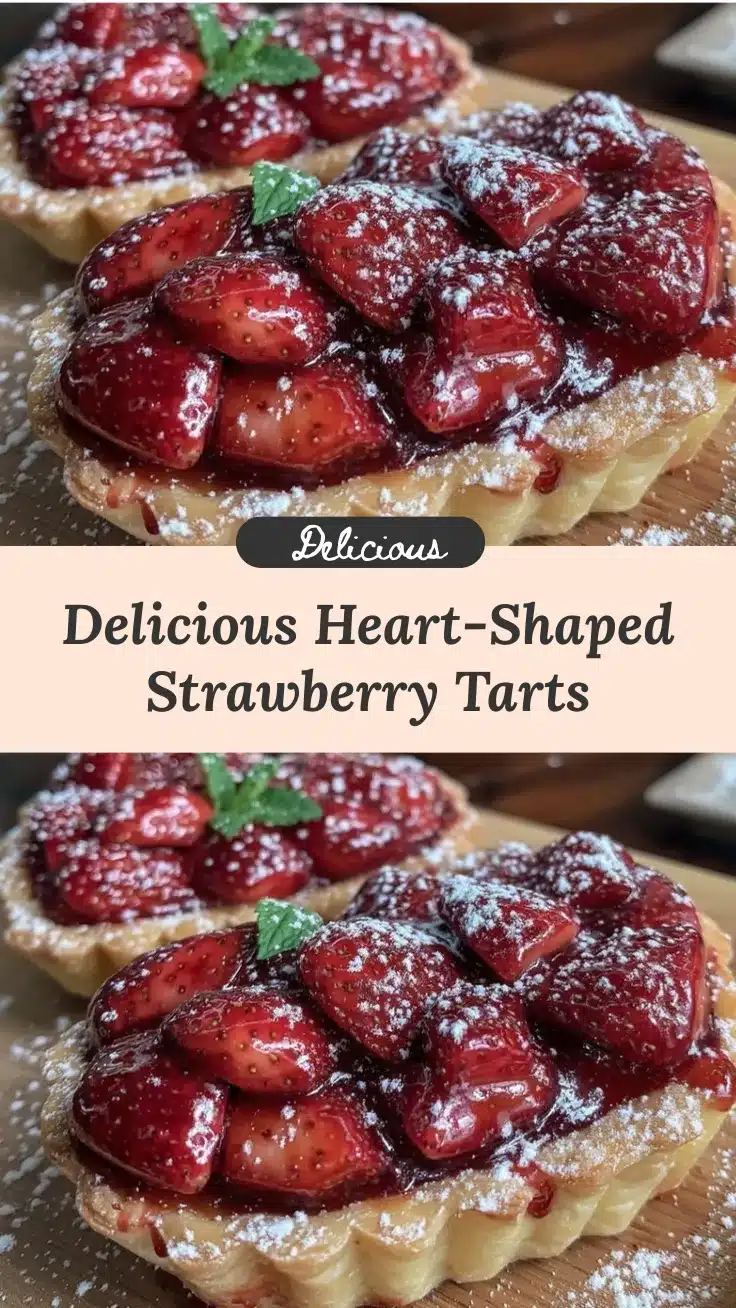
Irresistible Valentine’s Heart-Shaped Strawberry Tarts

These heart-shaped strawberry tarts feature a flaky, tender crust filled with a luscious strawberry filling brightened with lemon zest, perfect for romantic occasions like Valentine’s Day.
- Prep Time: 15 minutes
- Cook Time: 20 minutes
- Total Time: 45 minutes
- Yield: 12 tarts 1x
- Category: Dessert
- Cuisine: American
Ingredients
- 2 cups (240g) all-purpose flour
- 1 cup (225g) unsalted butter, cold and cubed
- 2 tablespoons granulated sugar (for crust)
- 1/4 teaspoon salt
- 4–6 tablespoons ice water
- 2 cups (about 300g) fresh strawberries, hulled and sliced
- 1/4 cup (50g) granulated sugar (for filling)
- 1 tablespoon fresh lemon juice
- 1 teaspoon lemon zest
- 1 tablespoon cornstarch
- 1 teaspoon vanilla extract
- Optional: 2 ounces (56g) cream cheese, softened
- 1 large egg, beaten (for egg wash)
- Powdered sugar for dusting (optional)
Instructions
- Make the pastry dough: In a large bowl or food processor, combine 2 cups (240g) all-purpose flour, 2 tablespoons granulated sugar, and 1/4 teaspoon salt. Add 1 cup (225g) cold, cubed unsalted butter. Use a pastry blender or pulse processor until mixture resembles coarse crumbs with some pea-sized pieces. Slowly add 4-6 tablespoons ice water, one tablespoon at a time, mixing gently until dough just comes together. Avoid overworking. Wrap dough in plastic and chill for at least 30 minutes.
- Prepare the strawberry filling: While dough chills, mix 2 cups (300g) sliced fresh strawberries with 1/4 cup (50g) sugar, 1 tablespoon lemon juice, 1 teaspoon lemon zest, 1 tablespoon cornstarch, and 1 teaspoon vanilla extract in a bowl. If using, fold in 2 ounces (56g) softened cream cheese gently. Let sit 10-15 minutes to macerate and thicken.
- Preheat oven to 375°F (190°C).
- Roll out dough on lightly floured surface to about 1/8 inch (3mm) thickness. Using a 3-4 inch heart-shaped cookie cutter, cut out as many hearts as possible. Transfer half the hearts to a parchment-lined baking sheet as tart bases.
- Spoon about 1 tablespoon of strawberry filling onto each dough heart on baking sheet, leaving a small border around edges.
- Place remaining heart-shaped dough pieces over filling. Press edges gently to seal. Use a fork to crimp edges for decoration and sealing.
- Brush each tart with beaten egg for a golden finish.
- Bake in preheated oven for 18-22 minutes, until crust is golden brown and filling bubbles. Check after 15 minutes to avoid over-browning.
- Cool tarts on wire rack for at least 15 minutes to set filling. Dust with powdered sugar if desired before serving.
Notes
Keep butter and water cold to ensure a flaky crust. Avoid overfilling tarts to prevent soggy crusts. If edges brown too quickly, tent with foil halfway through baking. Let tarts cool fully before cutting to prevent filling spill. For gluten-free, substitute almond flour; for dairy-free, use coconut oil and vegan cream cheese. Egg wash can be substituted with milk or cream for a lighter color.
Nutrition
- Serving Size: 1 tart
- Calories: 235
- Sugar: 14
- Sodium: 110
- Fat: 14
- Saturated Fat: 8
- Carbohydrates: 26
- Fiber: 2
- Protein: 3
Keywords: Valentine's Day, strawberry tarts, heart-shaped dessert, romantic dessert, homemade tarts, easy strawberry dessert