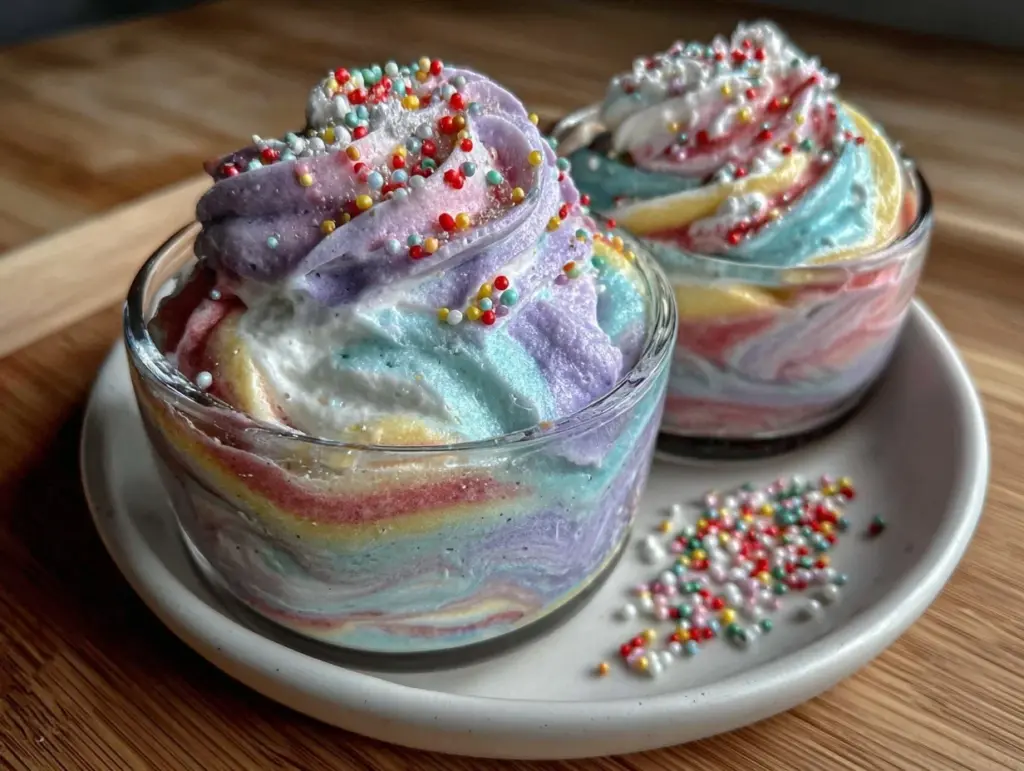
The moment I first whipped up these Delightful Dr. Seuss Rainbow Pink & Blue Pudding Cups, I was instantly transported back to childhood afternoons filled with colorful books and whimsical tales. Honestly, there’s something magical about vibrant layers of pink and blue pudding swirling together that just makes dessert time feel like a celebration of imagination. I stumbled upon this idea when trying to create a fun, no-fuss treat for a kids’ party, and after several tries, it became my go-to for cheering up any day.
These pudding cups are not only eye-catching but also surprisingly simple to make — which is a lifesaver when you’re juggling a busy schedule. You know how sometimes desserts look fancy but take forever? This one’s the opposite. Plus, it’s a crowd-pleaser whether you’re serving picky kids or adults who appreciate a nostalgic nod to Dr. Seuss’s colorful world.
What I love most about this recipe is how it blends playful presentation with delicious flavor and texture. The pink and blue layers aren’t just pretty; they’re creamy, smooth, and just the right balance of sweet without being overwhelming. After testing this recipe multiple times, I can confidently say it’s a fun way to bring a bit of whimsy to your dessert table, perfect for birthdays, themed parties, or whenever you need a pick-me-up.
So, if you’re looking for a recipe that’s as delightful to make as it is to eat, these Dr. Seuss Rainbow Pink & Blue Pudding Cups might just become your new favorite. Let’s get into why you’ll love them!
Why You’ll Love This Recipe
- Quick & Easy: Ready in about 20 minutes, no weird ingredients or complicated steps.
- Simple Ingredients: Basic pantry staples and common grocery finds—no scavenger hunts required!
- Perfect for Parties: Whether it’s a Dr. Seuss-themed birthday or a casual get-together, these pudding cups bring the fun.
- Crowd-Pleaser: Kids adore the bright colors, and adults appreciate the creamy, nostalgic taste.
- Unbelievably Delicious: The pink and blue layers have distinct but complementary flavors, making every spoonful exciting.
- Standout Twist: Using natural food coloring options and a layering technique gives these pudding cups a smooth, vibrant look that’s way beyond basic.
Unlike other pudding recipes that can be a bit dull, this one gives you that wow factor. The layering is a fun technique I perfected after a few messy tries, and it really makes the colors pop. Plus, the slight hint of vanilla in both layers keeps things classic yet special. This isn’t just a dessert; it’s a joyful experience that makes you want to smile with every bite.
What Ingredients You Will Need
This recipe uses simple, wholesome ingredients to deliver bold color and sweet, creamy flavor without any fuss. Most of these should be in your kitchen already, and substitutions are easy if you like.
- Milk: 3 cups (720 ml) whole milk or any milk of your choice (dairy or plant-based works well)
- Instant Vanilla Pudding Mix: 2 packages (about 3.4 oz or 96 g each) for that smooth texture and classic taste
- Powdered Sugar: 2 tablespoons (for added sweetness and smoothness)
- Natural Pink Food Coloring: A few drops (like beet juice powder or natural pink gel coloring for vibrant but gentle color)
- Natural Blue Food Coloring: A few drops (spirulina or butterfly pea powder-based coloring for that perfect blue without artificial dyes)
- Vanilla Extract: 1 teaspoon (adds depth and warmth to the pudding flavor)
- Whipped Cream (optional): For topping, either store-bought or homemade
Pro tip: I recommend brands like Jell-O for pudding mix since their texture is reliably creamy. For the natural coloring, I’ve found that powdered forms dissolve more evenly, giving a smooth finish without streaks.
If you need a gluten-free option, double-check your pudding mix ingredients or try a homemade pudding base with cornstarch. For dairy-free, almond or oat milk combined with a plant-based pudding mix works wonders. You can also swap vanilla extract for almond or coconut extract for a fun twist.
Equipment Needed
- Mixing Bowls: Two medium-sized bowls to prepare pink and blue pudding separately
- Whisk: To combine pudding mix into the milk smoothly without lumps
- Measuring Cups and Spoons: For precise ingredient amounts (3 cups milk, teaspoons for extracts and sugar)
- Small Spatula or Spoon: To gently layer puddings without mixing colors
- Clear Dessert Cups or Mason Jars: For showcasing those gorgeous rainbow layers
- Refrigerator: To chill and set the pudding (no baking required!)
If you don’t have dessert cups, you can use small bowls or even sturdy glasses. For whisking, a hand mixer is handy but not necessary—whisking by hand works just fine. I’ve found that silicone spatulas are best to scoop pudding smoothly without scraping too hard, which could disturb the layers.
Detailed Preparation Method
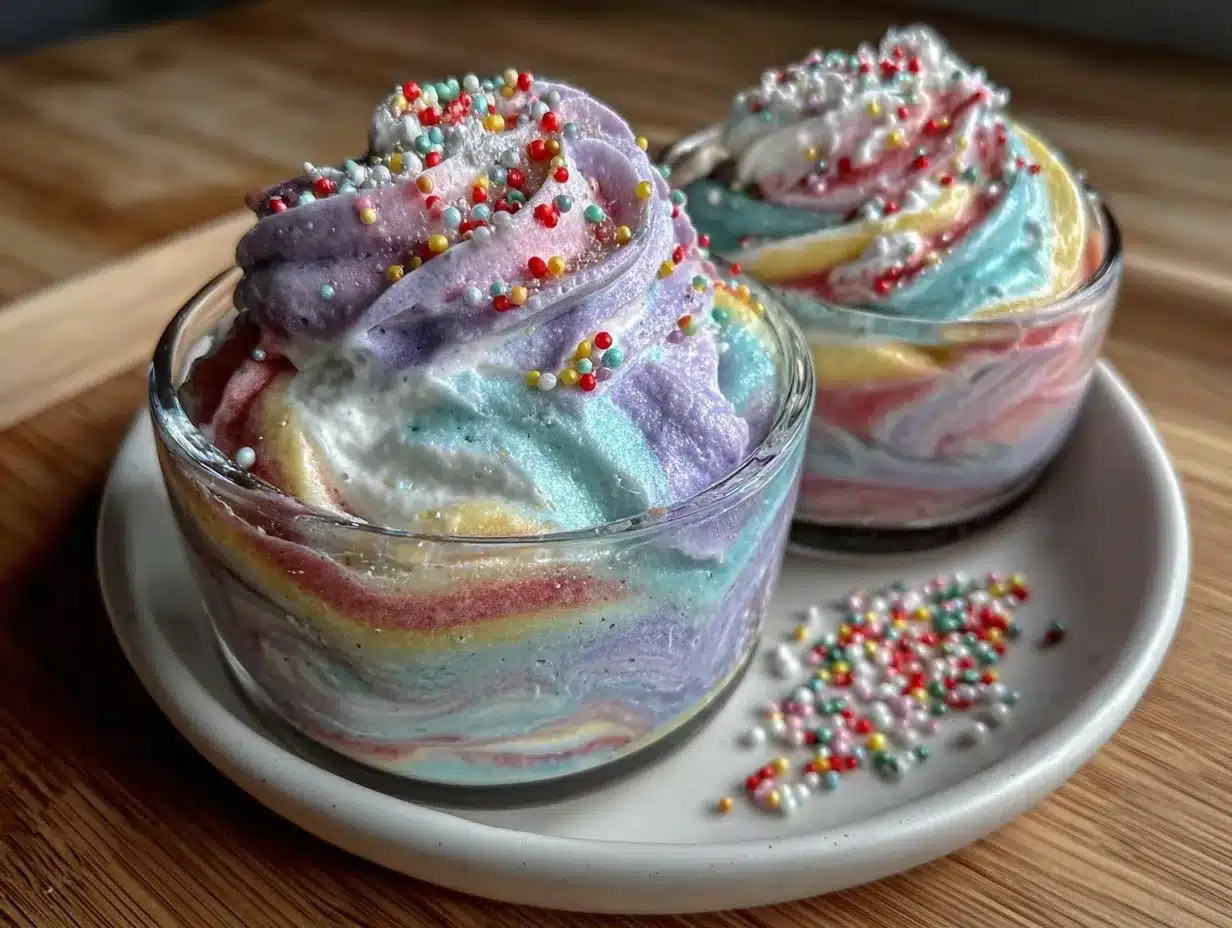
- Prepare the Base Pudding: In a large bowl, whisk together 3 cups (720 ml) of cold milk and both packages (about 192 g total) of instant vanilla pudding mix along with 2 tablespoons powdered sugar until thickened. This usually takes around 2 minutes. The pudding should be smooth and start to set but still pourable.
- Divide the Pudding: Split the prepared pudding evenly into two separate bowls. Each should hold about 1.5 cups (360 ml).
- Color the Puddings: Add a few drops of natural pink food coloring to one bowl, whisk gently until fully blended and a vibrant pink color develops. Repeat with the natural blue food coloring in the other bowl. Taste to make sure the coloring hasn’t altered the flavor noticeably.
- Add Vanilla Extract: Stir 1 teaspoon of vanilla extract into each bowl to give both layers that warm, inviting flavor.
- Layer the Pudding Cups: Using a spoon or small ladle, pour about 2 tablespoons of pink pudding into the bottom of each clear dessert cup. Tilt the cup slightly to help the pudding settle evenly.
- Add Blue Layer: Carefully spoon 2 tablespoons of blue pudding on top of the pink layer. To keep the layers neat, hold the spoon close to the surface and pour gently.
- Repeat Layers: Continue layering pink and blue pudding alternately until the cup is almost full (about 3-4 layers total). The top layer should be blue for a nice finish.
- Chill the Pudding Cups: Place the layered cups in the refrigerator for at least 1 hour or until fully set and chilled.
- Optional Whipped Cream Topping: Just before serving, add a dollop of whipped cream on top and maybe a sprinkle of edible confetti or colorful sprinkles to keep the playful theme going.
Note: If you notice any lumps during mixing, whisk a bit longer or strain the pudding before dividing. The key to those perfect layers is patience and gentle pouring—rushing can mix colors and lose the rainbow effect.
Cooking Tips & Techniques
One thing I learned the hard way is that the pudding needs to be thick enough to hold layers without bleeding into each other. Instant pudding mix makes this easy, but if using homemade pudding, allow extra chilling time.
Also, using natural food coloring can be tricky because it sometimes doesn’t tint as boldly as artificial dyes. My trick? Start with a few drops, stir, then add more if needed. This helps you avoid overpowering flavors or muddy colors.
When layering, a small spoon or even a piping bag can help keep edges clean. I’ve tried pouring straight from the bowl and ended up with a colorful mess—so trust me, slow and steady wins here.
Timing is everything: prepare the pudding, layer, and refrigerate without long delays to keep that fresh, creamy texture. If you’re making these ahead of time, cover them tightly with plastic wrap to prevent fridge odors from sneaking in.
Variations & Adaptations
- Dairy-Free Version: Use coconut or almond milk with a dairy-free pudding mix. For the pink layer, add a touch of strawberry puree instead of food coloring for natural sweetness.
- Flavor Twists: Swap vanilla for lemon extract in the pink pudding and blueberry extract in the blue for a fruity spin that pairs beautifully with the colors.
- Layered Parfait Style: Add crushed cookies or granola between layers for texture contrast, turning this pudding into an even more exciting treat.
- Seasonal Theme: For holidays, switch colors to red and green using natural food coloring or purees—keeping the fun layered concept alive year-round.
Personally, I once made a version with lavender extract in the blue layer, and it was surprisingly delightful—floral notes with the creamy pudding created a soothing treat perfect for grown-up gatherings.
Serving & Storage Suggestions
Serve these pudding cups chilled for the best texture and refreshing taste. They look fantastic on a dessert table, especially when presented in clear cups that show off the colorful layers. Try pairing them with simple sugar cookies or fresh berries for a light contrast.
To store, cover each cup tightly with plastic wrap and refrigerate. They keep well for up to 3 days, though the layers might soften slightly over time—honestly, they still taste amazing even then.
If you need to store longer, these pudding cups don’t freeze well due to texture changes, so it’s best to enjoy fresh or within a few days. When reheating (if you must), let them come to room temperature but don’t microwave, or the pudding will separate.
Flavor-wise, the pudding actually tastes better after a few hours in the fridge as the vanilla deepens and the colors settle—kind of like a mini flavor party in your mouth.
Nutritional Information & Benefits
Each serving of these pudding cups (about one cup or 240 ml) contains roughly 200–250 calories, depending on milk choice and toppings. They offer a good source of calcium and protein from the milk and pudding base.
The natural food coloring options add antioxidants (like beet or spirulina powders), making this dessert a little more nutritious than the average pudding. Plus, it’s free from artificial dyes and preservatives if you stick to natural ingredients.
For dietary considerations, this recipe can easily be made gluten-free and dairy-free, as mentioned, catering to a variety of needs. Just watch out for allergies to milk or specific additives in pudding mixes.
From a wellness perspective, I love that this dessert satisfies sweet cravings without overloading on sugar or artificial additives, making it a nicer choice for families who want a fun treat without guilt.
Conclusion
Making these Delightful Dr. Seuss Rainbow Pink & Blue Pudding Cups is like adding a splash of joy to your kitchen. Whether it’s a party, a rainy day, or just because, this recipe brings together simplicity, fun, and flavor in a way that’s hard to beat. The colorful layers, creamy texture, and nostalgic vibe make it a winner every time I serve it.
Feel free to tweak colors, flavors, or toppings to suit your mood or occasion—the recipe is forgiving and encourages creativity. I promise, once you try it, you’ll find yourself coming back to these pudding cups whenever you want to brighten the day with a little edible magic.
Don’t forget to share your pudding cup creations or any fun twists you try in the comments below—I’d love to hear how you make this recipe your own! Happy layering and happy eating!
Frequently Asked Questions
Can I make these pudding cups ahead of time?
Yes! Prepare and layer the pudding cups, then refrigerate them covered for up to 3 days. Just avoid freezing to keep the texture smooth.
What if I don’t have natural food coloring?
You can use artificial food coloring, but natural options like beet juice or spirulina powder create lovely hues without chemicals.
Can I use homemade pudding instead of instant mix?
Absolutely. Homemade pudding works well but may need extra chilling time to thicken enough for layering.
Are these pudding cups suitable for kids with allergies?
They can be adapted! Use dairy-free milk and pudding mix for lactose intolerance, and check all ingredients for allergens like gluten or nuts.
How do I get clean, distinct layers without mixing colors?
Pour each layer slowly and close to the previous layer’s surface. Chill briefly between layers if needed to help set them before adding the next.
Pin This Recipe!
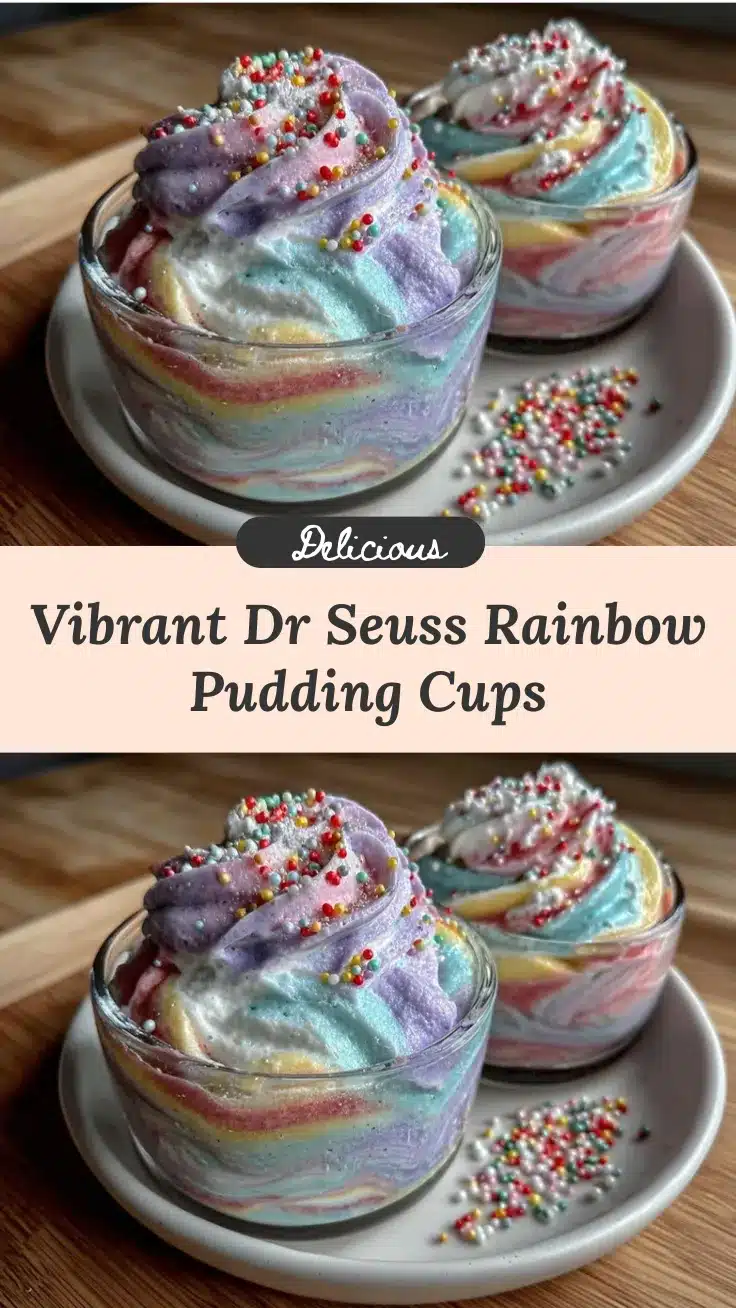
Delightful Dr Seuss Rainbow Pink and Blue Pudding Cups

A fun and easy layered pudding dessert featuring vibrant pink and blue colors inspired by Dr. Seuss. Perfect for parties and nostalgic treats with creamy, smooth texture and natural food coloring.
- Prep Time: 10 minutes
- Cook Time: 10 minutes
- Total Time: 1 hour 20 minutes
- Yield: 6 servings 1x
- Category: Dessert
- Cuisine: American
Ingredients
- 3 cups (720 ml) whole milk or any milk of your choice (dairy or plant-based)
- 2 packages (about 3.4 oz or 96 g each) instant vanilla pudding mix
- 2 tablespoons powdered sugar
- A few drops natural pink food coloring (e.g., beet juice powder or natural pink gel coloring)
- A few drops natural blue food coloring (e.g., spirulina or butterfly pea powder-based coloring)
- 1 teaspoon vanilla extract
- Whipped cream (optional, for topping)
Instructions
- In a large bowl, whisk together 3 cups (720 ml) of cold milk, both packages (about 192 g total) of instant vanilla pudding mix, and 2 tablespoons powdered sugar until thickened, about 2 minutes. The pudding should be smooth and start to set but still pourable.
- Divide the prepared pudding evenly into two separate bowls, about 1.5 cups (360 ml) each.
- Add a few drops of natural pink food coloring to one bowl and whisk gently until fully blended and vibrant pink. Repeat with natural blue food coloring in the other bowl.
- Stir 1 teaspoon of vanilla extract into each bowl to add flavor.
- Using a spoon or small ladle, pour about 2 tablespoons of pink pudding into the bottom of each clear dessert cup, tilting the cup slightly to settle evenly.
- Carefully spoon 2 tablespoons of blue pudding on top of the pink layer, pouring gently to keep layers neat.
- Continue layering pink and blue pudding alternately until the cup is almost full (3-4 layers total), finishing with a blue layer.
- Place the layered cups in the refrigerator for at least 1 hour or until fully set and chilled.
- Just before serving, optionally add a dollop of whipped cream on top and sprinkle with edible confetti or colorful sprinkles.
Notes
Use natural powdered food coloring for smooth, streak-free layers. Whisk pudding until thick but still pourable for best layering. Pour layers slowly and close to the surface to avoid mixing colors. Chill pudding cups for at least 1 hour to set layers. For dairy-free, use plant-based milk and pudding mix. Store covered in refrigerator up to 3 days; do not freeze.
Nutrition
- Serving Size: About 1 cup (240 ml)
- Calories: 225
- Sugar: 28
- Sodium: 180
- Fat: 6
- Saturated Fat: 3.5
- Carbohydrates: 38
- Fiber: 1
- Protein: 5
Keywords: pudding cups, layered dessert, Dr. Seuss dessert, rainbow pudding, pink and blue pudding, kids party dessert, easy pudding recipe, natural food coloring dessert