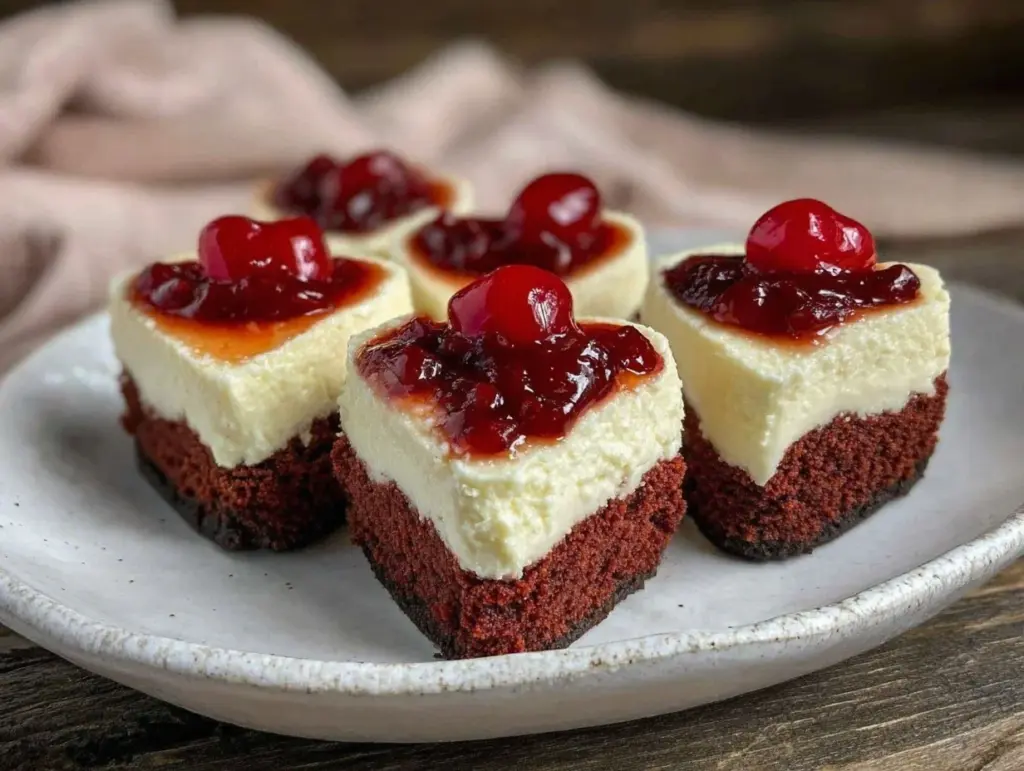
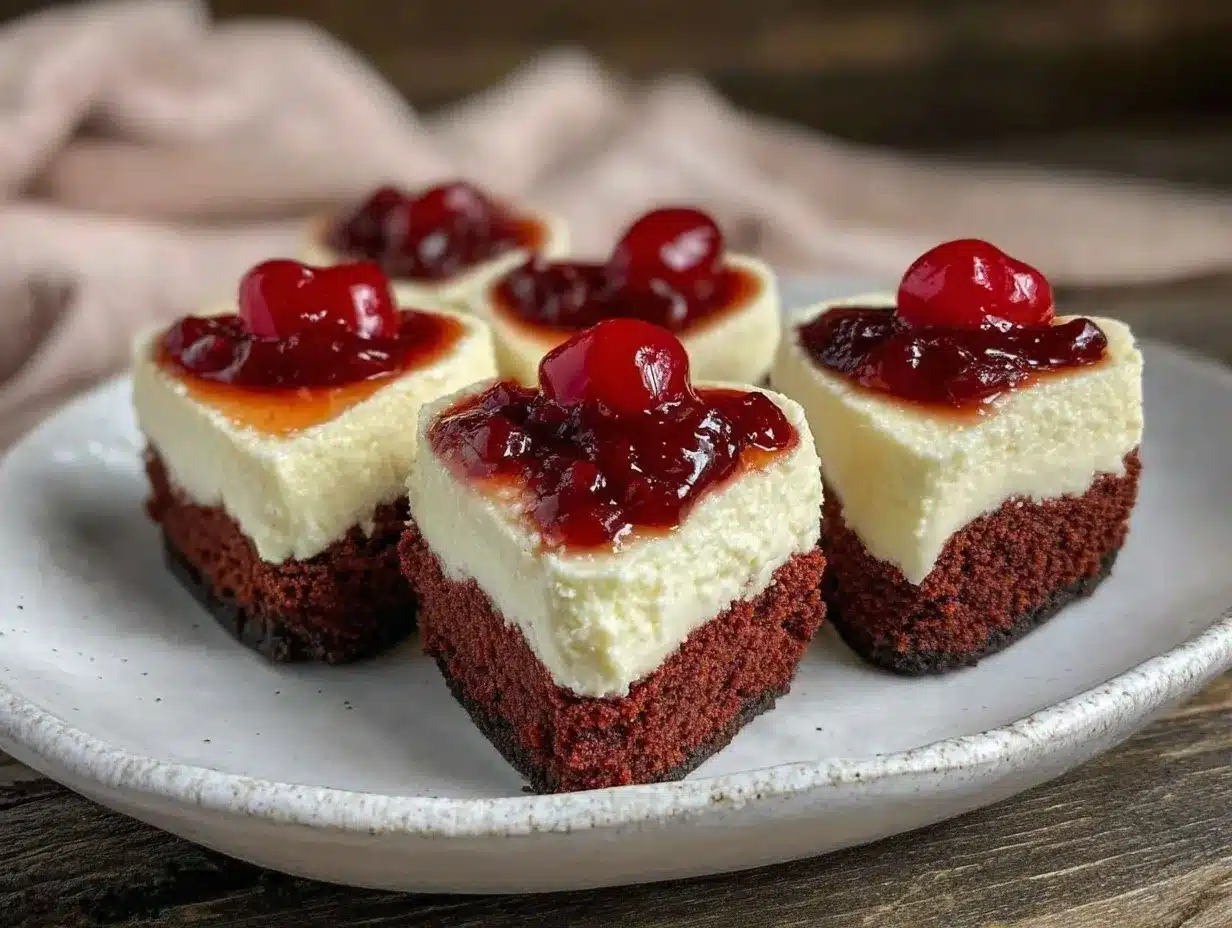
The smell of rich cocoa blended with sweet cherries and creamy cheesecake filling instantly brings a smile to my face. Honestly, the first time I baked these red velvet cherry cheesecake hearts, I was aiming for a festive Valentine’s Day treat – but they quickly became my go-to indulgence whenever I want a little something special. These little hearts aren’t just adorable; they’re packed with layers of luscious flavor and texture that feel fancy without the fuss. I’ve baked this recipe countless times, tweaking it here and there to get that perfect balance between the velvety cake and tangy cherry cheesecake filling.
What I love most about this red velvet cherry cheesecake hearts recipe is how it combines the classic red velvet cake’s moistness with the rich, creamy cheesecake and a burst of cherry goodness. It’s like a dessert party in a bite. Whether you’re making it for a cozy night in, a holiday gathering, or just because you deserve a treat, this recipe hits the mark. Plus, it’s surprisingly straightforward to make – no intimidating steps or rare ingredients, just pure, heart-shaped joy.
After testing this recipe several times and sharing it with friends and family, I can confidently say it’s a keeper. The texture is perfect, the cherry topping adds just the right zing, and the presentation? Absolutely charming. If you’ve been hunting for a unique dessert that feels both elegant and comforting, this red velvet cherry cheesecake hearts recipe will be your new favorite.
Why You’ll Love This Recipe
- Quick & Easy: Comes together in about 45 minutes plus baking time, perfect for last-minute celebrations or sweet cravings.
- Simple Ingredients: Most items are pantry staples or easy to find at any grocery store – no specialty shopping needed.
- Perfect for Special Occasions: Ideal for Valentine’s Day, anniversaries, bridal showers, or just to impress your sweetheart.
- Crowd-Pleaser: Kids, adults, and picky eaters alike rave about the creamy cheesecake center paired with classic red velvet flavor.
- Unbelievably Delicious: The moist, tender red velvet cake with a smooth cherry-infused cheesecake filling is comfort food with a fancy twist.
What really sets this recipe apart is the way the cheesecake filling melts into the red velvet batter, creating a marbled effect that looks as good as it tastes. Instead of just placing a layer of cheesecake on top, blending it into the batter gives every bite a luscious, creamy surprise. And the cherry topping? It’s not your average jam – I use fresh or frozen cherries cooked down with a touch of lemon juice and vanilla to add brightness that cuts through the richness.
This isn’t just another red velvet cheesecake; it’s my perfected version after many rounds of trial and error. I’ve adjusted the sweetness, balanced the cream cheese tang, and found the optimal baking time to get that soft, moist crumb without any cracking. Honestly, after making this recipe over a dozen times, I can say it’s my secret weapon for a dessert that looks fancy but is actually foolproof.
What Ingredients You Will Need
This recipe uses simple, wholesome ingredients to deliver a bold flavor and satisfying texture without the fuss. Most are pantry staples, and a few fresh ones bring it all together beautifully. Here’s what you’ll need to make these red velvet cherry cheesecake hearts:
- For the red velvet cake batter:
- All-purpose flour – 1 ½ cups (180g), sifted for lightness
- Cocoa powder, unsweetened – 2 tablespoons (15g), for that subtle chocolate depth
- Baking powder – 1 teaspoon (4g)
- Baking soda – ½ teaspoon (2g)
- Salt – ¼ teaspoon (1.5g)
- Granulated sugar – 1 cup (200g), for balanced sweetness
- Vegetable oil – ½ cup (120ml), keeps the cake moist
- Large eggs – 2, room temperature
- Buttermilk – ¾ cup (180ml), or milk with 1 tablespoon vinegar for tang
- Vanilla extract – 1 teaspoon (5ml), for aroma
- Red food coloring – 2 tablespoons (30ml), for that iconic red hue (I recommend gel food coloring for vibrant color without extra liquid)
- White vinegar – 1 teaspoon (5ml), reacts with baking soda to help rise
- For the cherry cheesecake filling:
- Cream cheese, full-fat – 8 oz (225g), softened for smooth texture (I like Philadelphia brand)
- Granulated sugar – ¼ cup (50g), just enough to sweeten
- Large egg – 1, room temperature
- Vanilla extract – 1 teaspoon (5ml), enhances flavor
- Fresh or frozen cherries – 1 cup (150g), pitted and roughly chopped
- Lemon juice – 1 teaspoon (5ml), brightens the cherry topping
If you want to switch it up, almond flour works well for a gluten-free version, and dairy-free cream cheese can be swapped in to make it vegan-friendly. For the cherries, frozen ones are great out of season and add a lovely tartness. Just thaw before using. The cream cheese should be at room temperature to avoid lumps and make mixing a breeze.
Equipment Needed
- Heart-shaped silicone or metal muffin pan – I prefer silicone because it’s non-stick and easy to pop out the cheesecake hearts cleanly.
- Mixing bowls – at least two, one for the cake batter and one for the cheesecake filling.
- Electric mixer or stand mixer – makes blending the cheesecake filling smooth and the batter light.
- Measuring cups and spoons – for accuracy in baking.
- Spatula – to fold ingredients gently without deflating the batter.
- Small saucepan – to cook down the cherries into a topping.
- Cooling rack – to let the cheesecake hearts cool evenly and prevent sogginess.
If you don’t have heart-shaped pans, mini muffin tins work fine; just expect round shapes instead of hearts. A hand mixer works just as well as a stand mixer, though the latter frees up your hands. Silicone pans are budget-friendly and last long with gentle care – just wash with warm soapy water and avoid sharp utensils.
Detailed Preparation Method
- Prepare the cherry topping: In a small saucepan over medium heat, combine the cherries, 2 tablespoons of sugar, and lemon juice. Cook, stirring occasionally, until the cherries soften and release their juices, about 8 minutes. Remove from heat and let cool while you prepare the batter.
- Preheat your oven to 350°F (175°C): Position the rack in the middle. Lightly grease your heart-shaped muffin pan or line with silicone molds.
- Mix the dry ingredients for the cake: In a medium bowl, whisk together the flour, cocoa powder, baking powder, baking soda, and salt. Set aside.
- Combine the wet ingredients: In a large bowl, beat the sugar and vegetable oil until well-blended. Add eggs one at a time, beating well after each addition. Stir in the vanilla extract, red food coloring, and white vinegar.
- Alternate adding dry ingredients and buttermilk: Add the dry mix in three parts, alternating with buttermilk in two parts. Start and end with dry ingredients. Fold everything together gently with a spatula until just combined – don’t overmix or the cake will be dense.
- Prepare the cheesecake filling: In a separate bowl, beat the softened cream cheese with sugar until smooth. Add the egg and vanilla extract, mixing until creamy.
- Assemble the cheesecake hearts: Spoon about one tablespoon of red velvet batter into each heart mold. Add a small dollop (about a teaspoon) of cheesecake filling on top of each. Then top with another tablespoon of red velvet batter. Use a toothpick or skewer to swirl the batter and filling gently to create a marbled effect. Finally, spoon a small amount of the cherry topping on each heart, swirling lightly.
- Bake: Place the pan in the oven and bake for 20-25 minutes. Check doneness by inserting a toothpick; it should come out mostly clean with a few moist crumbs – the cheesecake filling will stay soft.
- Cool: Let the cheesecake hearts cool in the pan for 10 minutes, then transfer to a wire rack to cool completely. Chill in the fridge at least 2 hours before serving for best texture.
Note: If the batter looks too thick, let your buttermilk come to room temperature before mixing. Swirling the cheesecake filling too vigorously can break it apart, so go easy with the toothpick. If your cherries are extra juicy, strain some juice off before cooking to avoid soggy hearts.
Cooking Tips & Techniques
From my experience, gently folding the dry ingredients into the wet prevents the red velvet from turning tough. You know that satisfying tender crumb? That’s the trick. Also, be sure your cream cheese is fully softened and mixed well to avoid lumps in the cheesecake filling.
One common mistake is overbaking – the cheesecake hearts can dry out quickly. Keep an eye on the timer and test early. The centers should still jiggle slightly when you take them out; they’ll firm up as they cool.
For cherry topping, cooking the fruit down concentrates flavor and helps avoid watery pockets. If you’re multitasking, prepare the cherry compote first since it needs cooling time, then move on to the batter and filling.
Swirling the batter and filling is an art – too little swirl and you won’t get the beautiful marbled look; too much and the flavors blend into an indistinct mess. A few gentle loops with a toothpick work perfectly.
Variations & Adaptations
- Chocolate Lover’s Twist: Add mini chocolate chips to the red velvet batter for extra chocolate bursts in every bite.
- Vegan Version: Use dairy-free cream cheese and substitute eggs with flax eggs (1 tablespoon flaxseed meal + 3 tablespoons water per egg). Swap buttermilk for almond or soy milk with 1 tablespoon apple cider vinegar.
- Berry Swap: Replace cherries with fresh or frozen raspberries or blueberries for a different fruity zing.
- Gluten-Free Option: Use a gluten-free all-purpose flour blend instead of regular flour. Be sure to check that your baking powder is gluten-free.
- Mini Cheesecake Bites: Instead of hearts, bake the batter and filling in mini muffin pans for bite-sized treats perfect for parties.
Personally, I once tried swirling in some cream cheese mixed with a hint of orange zest – it added a subtle citrus brightness that balanced the richness beautifully. Don’t hesitate to experiment with your favorite flavors.
Serving & Storage Suggestions
These red velvet cherry cheesecake hearts are best served chilled or at room temperature. For an extra touch, dust lightly with powdered sugar or drizzle with melted white chocolate just before serving.
They pair wonderfully with a cup of coffee or a glass of cold milk – the perfect combo for cozy afternoons or holiday brunches. For a grown-up twist, serve alongside a fruity red wine or cherry liqueur.
Store leftovers in an airtight container in the refrigerator for up to 4 days. They freeze well too – wrap individually in plastic wrap and place in a freezer-safe bag for up to 2 months. Thaw overnight in the fridge and refresh with a quick 10-minute warm-up in a 300°F (150°C) oven for that just-baked feel.
Flavors actually deepen after resting overnight, so if you can wait, the next day’s bites taste even better. Just remember to let them come back to room temperature before enjoying.
Nutritional Information & Benefits
Each red velvet cherry cheesecake heart contains approximately 220 calories, 12 grams of fat, 25 grams of carbohydrates, and 4 grams of protein, depending on exact portion sizes. The cream cheese provides a good dose of calcium and protein, while cherries contribute antioxidants and vitamin C.
This recipe can be adapted for gluten-free and dairy-free diets, making it accessible to many. While indulgent, the use of real ingredients and fresh fruit means you’re treating yourself to something satisfying and flavorful rather than overly processed.
From my perspective as someone who enjoys both baking and mindful eating, this recipe strikes a lovely balance – a dessert that feels indulgent but isn’t overloaded with artificial additives or excess sugar.
Conclusion
If you’re craving a dessert that’s both show-stopping and simple to make, this red velvet cherry cheesecake hearts recipe is a winner. It’s one of those treats that brings a smile every time – with its gorgeous look, delicious flavor combo, and the cozy feeling of homemade goodness.
Feel free to customize it with your favorite fruits or mix-ins, and don’t be shy about experimenting with different pan shapes or toppings. I love how versatile these hearts are, and I hope you’ll enjoy making them as much as I do.
Give this recipe a try, and let me know how your cheesecake hearts turn out! Share your photos, variations, or tips in the comments – I’d love to hear your thoughts and ideas. Happy baking, friends!
FAQs About Red Velvet Cherry Cheesecake Hearts
Can I make these cheesecake hearts ahead of time?
Yes! They actually taste better after chilling overnight. Store them in the fridge in an airtight container and serve within 4 days.
What if I don’t have heart-shaped pans?
No worries! You can use mini muffin pans or even a regular muffin tin. The shape won’t be hearts, but the flavor is just as amazing.
Can I use canned cherries instead of fresh or frozen?
Fresh or frozen cherries are best for texture and flavor. Canned cherries tend to be too sweet and watery, which can affect the cheesecake’s consistency.
Is it possible to make this recipe dairy-free?
Absolutely. Use dairy-free cream cheese and substitute milk and butter with plant-based alternatives. Just make sure your substitutes are suitable for baking.
How do I prevent the cheesecake filling from cracking?
Keep an eye on baking time and avoid overbaking. The cheesecake should still jiggle slightly when you take it out. Also, mixing the filling gently and using room temperature ingredients helps.
Pin This Recipe!
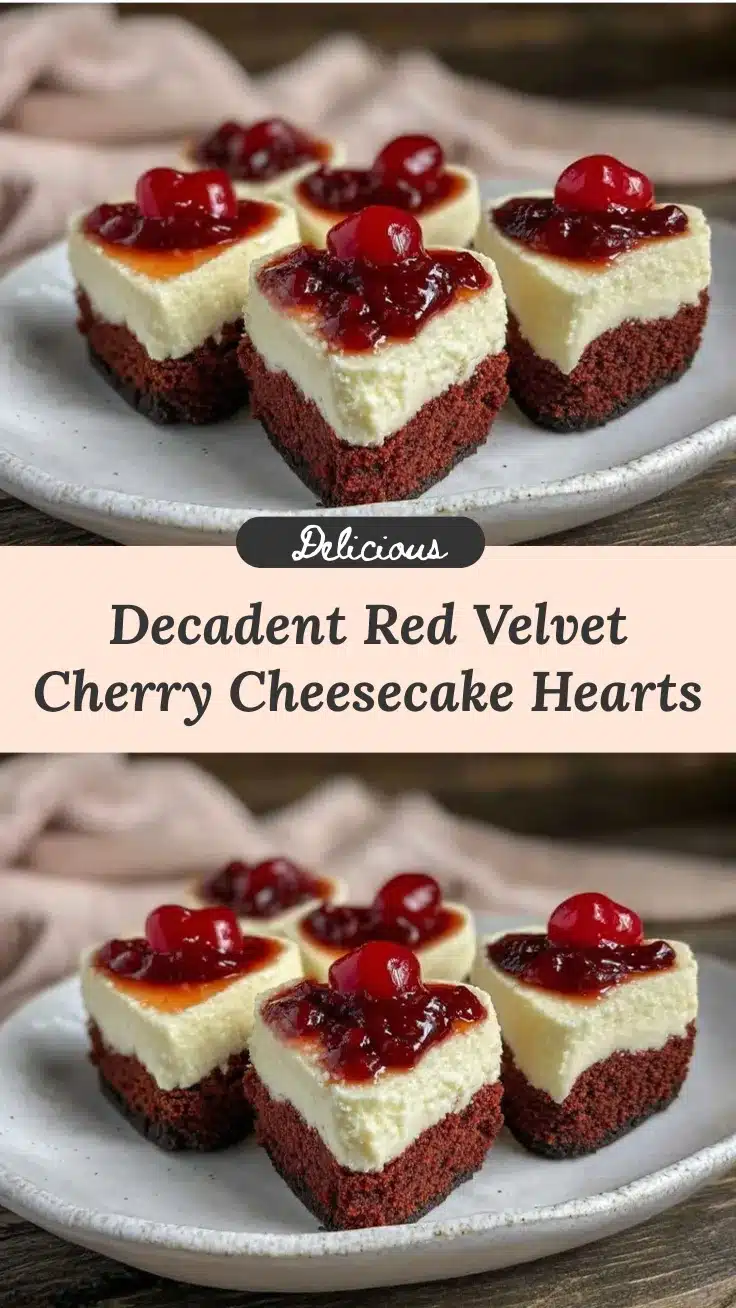
Decadent Red Velvet Cherry Cheesecake Hearts

These red velvet cherry cheesecake hearts combine moist red velvet cake with a creamy cherry-infused cheesecake filling, perfect for special occasions or indulgent treats.
- Prep Time: 20 minutes
- Cook Time: 25 minutes
- Total Time: 45 minutes
- Yield: 12 servings 1x
- Category: Dessert
- Cuisine: American
Ingredients
- 1 ½ cups (180g) all-purpose flour, sifted
- 2 tablespoons (15g) unsweetened cocoa powder
- 1 teaspoon (4g) baking powder
- ½ teaspoon (2g) baking soda
- ¼ teaspoon (1.5g) salt
- 1 cup (200g) granulated sugar
- ½ cup (120ml) vegetable oil
- 2 large eggs, room temperature
- ¾ cup (180ml) buttermilk or milk with 1 tablespoon vinegar
- 1 teaspoon (5ml) vanilla extract
- 2 tablespoons (30ml) red food coloring (gel recommended)
- 1 teaspoon (5ml) white vinegar
- 8 oz (225g) full-fat cream cheese, softened
- ¼ cup (50g) granulated sugar
- 1 large egg, room temperature
- 1 teaspoon (5ml) vanilla extract
- 1 cup (150g) fresh or frozen cherries, pitted and roughly chopped
- 1 teaspoon (5ml) lemon juice
- 2 tablespoons granulated sugar (for cherry topping)
Instructions
- Prepare the cherry topping: In a small saucepan over medium heat, combine cherries, 2 tablespoons sugar, and lemon juice. Cook, stirring occasionally, until cherries soften and release juices, about 8 minutes. Remove from heat and let cool.
- Preheat oven to 350°F (175°C). Position rack in the middle. Lightly grease heart-shaped muffin pan or line with silicone molds.
- Mix dry ingredients for cake: whisk together flour, cocoa powder, baking powder, baking soda, and salt in a medium bowl. Set aside.
- Combine wet ingredients: In a large bowl, beat sugar and vegetable oil until well blended. Add eggs one at a time, beating well after each. Stir in vanilla extract, red food coloring, and white vinegar.
- Alternate adding dry ingredients and buttermilk: Add dry mix in three parts, alternating with buttermilk in two parts, starting and ending with dry ingredients. Fold gently with spatula until just combined; do not overmix.
- Prepare cheesecake filling: Beat softened cream cheese with sugar until smooth. Add egg and vanilla extract, mixing until creamy.
- Assemble cheesecake hearts: Spoon about 1 tablespoon red velvet batter into each heart mold. Add about 1 teaspoon cheesecake filling on top. Top with another tablespoon of red velvet batter. Use toothpick or skewer to swirl batter and filling gently to create marbled effect. Spoon a small amount of cherry topping on each heart, swirling lightly.
- Bake for 20-25 minutes. Check doneness with toothpick; it should come out mostly clean with a few moist crumbs. Cheesecake filling will stay soft.
- Cool in pan for 10 minutes, then transfer to wire rack to cool completely. Chill in fridge at least 2 hours before serving.
Notes
Use gel food coloring for vibrant color without extra liquid. Let cream cheese soften fully to avoid lumps. Swirl batter gently to create marbled effect without blending flavors too much. Avoid overbaking to keep cheesecake centers soft. Frozen cherries can be used out of season; thaw before use. For gluten-free, substitute almond flour or gluten-free flour blend. For vegan, use dairy-free cream cheese and flax eggs.
Nutrition
- Serving Size: 1 heart-shaped chees
- Calories: 220
- Fat: 12
- Carbohydrates: 25
- Protein: 4
Keywords: red velvet, cheesecake, cherry, dessert, heart-shaped, Valentine’s Day, easy, festive, creamy, chocolate