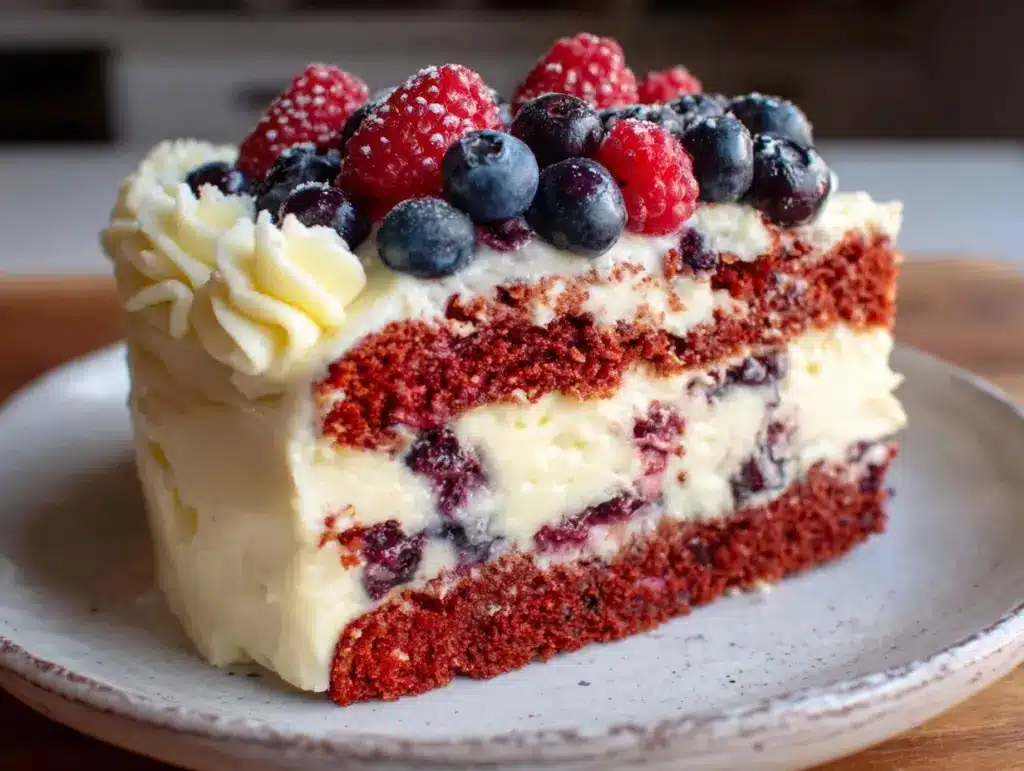
“You really think red, white, and blue can look delicious?” my friend teased over the phone as I described my plan. Honestly, I was skeptical myself. Patriotic cakes often end up looking a bit… well, gimmicky. But after a weekend of trial, error, and a kitchen dusted in red and blue food coloring, I found my sweet spot—a Perfect Red White and Blue Layer Cake that’s as tasty as it is festive. It’s the kind of dessert that makes you pause mid-bite, eyes closed, savoring that familiar hum of nostalgia mixed with a fresh twist.
This cake wasn’t born out of a grand plan but from a lazy Fourth of July afternoon when I realized my usual go-to desserts felt a bit tired. I wanted something that captured the holiday spirit without the fuss, something I could whip up in a few hours but that still looked like a showstopper on the table. The layers came together surprisingly fast, the frosting whipped up smooth and fluffy, and before I knew it, neighbors were texting me for the recipe. There’s a quiet pride in nailing a classic with a personal touch—no stress, just sweet, colorful joy.
What made this recipe stick with me is how it balances the familiar with a bit of fun. The red velvet layer isn’t just for show—it’s moist and tender, the white layer brings a light vanilla freshness, and the blueberry-infused blue layer adds a subtle tang that keeps things interesting. If you’ve ever felt like patriotic baking meant piling on artificial flavors or complicated steps, this cake gently proves otherwise. It’s a recipe grounded in simple ingredients, straightforward steps, and results that bring smiles every time.
Why You’ll Love This Recipe
Over the years, I’ve tested many layered cakes for celebrations, but this Perfect Red White and Blue Layer Cake stands out for several reasons. Having made it multiple times, I can say it’s truly a crowd-pleaser that feels just right for any patriotic occasion or summer party.
- Quick & Easy: The whole cake comes together in under 3 hours, including baking and cooling, so it’s perfect when you need a festive dessert without last-minute panic.
- Simple Ingredients: No need for specialty stores—basic pantry staples and fresh blueberries do the trick, making it an easy recipe to pull off even on a busy weekday.
- Perfect for Celebrations: Whether it’s the Fourth of July, Memorial Day, or just a summer barbecue, this cake’s vibrant layers and classic flavors fit the bill beautifully.
- Crowd-Pleaser: Kids and adults alike love this cake. The red velvet layer adds richness, the vanilla keeps things light, and the blueberry layer adds a little zing that surprises everyone.
- Unbelievably Delicious: The moist texture combined with creamy frosting and fresh fruit flavor makes every bite feel like a small celebration on its own.
What sets this cake apart? The balance of flavors and textures. Many patriotic cakes lean too heavily on color and forget about taste; not this one. The layering technique I use ensures each slice has a perfect ratio of cake to frosting. Plus, the blueberry layer isn’t just colored—it’s infused with fresh blueberry puree for a genuine burst of flavor. It’s a little twist I picked up from making fruit-forward summer treats, and honestly, it makes all the difference.
What Ingredients You Will Need
This recipe calls for straightforward, wholesome ingredients that work together to create layers bursting with flavor and color. Most are pantry staples, and a few fresh items give it that special touch.
- For the Cake Layers:
- All-purpose flour (2 ½ cups / 315 g) – the base for fluffy layers
- Baking powder (2 ½ tsp) and baking soda (1 tsp) – leavening agents for rise
- Salt (½ tsp) – balances sweetness
- Unsalted butter (1 cup / 227 g), softened – adds richness and tender crumb (I prefer Land O’Lakes for consistent results)
- Sugar (2 cups / 400 g) – sweetens the cake
- Large eggs (4), room temperature – provide structure and moisture
- Buttermilk (1 cup / 240 ml), room temperature – keeps the cake tender and adds subtle tang
- Vanilla extract (2 tsp) – flavor enhancer
- For the Red Layer:
- Red food coloring (1 ½ tbsp) – for that classic red velvet hue (gel-based works best to avoid thinning batter)
- Cocoa powder (2 tbsp) – adds subtle chocolate flavor and deepens red color
- For the Blue Layer:
- Fresh or frozen blueberries (1 cup / 150 g), pureed – infuses natural blue color and fruity tang
- Blue food coloring (1 tbsp), optional – boosts the vibrant blue tone if needed
- For the White Layer:
- Extra vanilla extract (1 tsp) – for a bright vanilla flavor
- For the Frosting:
- Cream cheese (8 oz / 227 g), softened – tangy and creamy base
- Unsalted butter (½ cup / 113 g), softened – adds smoothness
- Powdered sugar (4 cups / 480 g) – sweetens and thickens frosting
- Vanilla extract (2 tsp) – flavor enhancer
Feel free to substitute almond milk for buttermilk by adding 1 tbsp lemon juice to 1 cup milk if you don’t have buttermilk on hand. For a dairy-free frosting, swapping cream cheese with coconut cream works surprisingly well! When I’m in a pinch, that trick saves the day without sacrificing creaminess.
Equipment Needed
- Three 8-inch (20 cm) round cake pans – I use non-stick pans for easy release, but greasing and lining with parchment paper also works great.
- Electric mixer (stand or hand) – essential for whipping the batter and frosting to the right texture.
- Mixing bowls – at least two, to separate and color the batters.
- Food processor or blender – for pureeing blueberries smoothly (optional but helpful).
- Spatula and whisk – for folding and mixing ingredients without overworking the batter.
- Cooling racks – to cool cakes evenly and quickly.
- Offset spatula or butter knife – for smooth frosting application.
If you don’t have three cake pans, you can bake in batches using one or two pans and cool each layer before assembling. I’ve done this many times when hosting last-minute gatherings—it’s a little more time-consuming but totally doable. For blueberry puree, if you don’t want to fuss with a blender, mashing frozen blueberries with a fork works well too.
Preparation Method
- Preheat your oven to 350°F (175°C). Grease and line the three 8-inch cake pans with parchment paper to prevent sticking; set aside.
- In a medium bowl, whisk together the dry ingredients: 2 ½ cups flour, 2 ½ tsp baking powder, 1 tsp baking soda, ½ tsp salt, and cocoa powder for the red layer batter only. Set aside.
- In a large mixing bowl, cream the butter and sugar: Using an electric mixer, beat the 1 cup softened butter with 2 cups sugar until pale and fluffy (about 3-4 minutes). This step really sets the cake’s texture—don’t rush it.
- Add eggs one at a time, mixing well after each addition. Then stir in 2 tsp vanilla extract.
- Alternately add the dry ingredients and buttermilk: Begin and end with dry ingredients, mixing gently after each addition to keep the batter light. Divide batter evenly into three bowls.
- Prepare the red layer batter: To one bowl, add the red food coloring (1 ½ tbsp) and gently fold in until the color is uniform.
- Prepare the blue layer batter: Into the second bowl, fold in the pureed blueberries (1 cup). If you want a brighter blue, add 1 tbsp blue food coloring. The batter will be a bit wetter here; that’s expected.
- Prepare the white layer batter: Leave the third bowl as is but stir in an extra teaspoon of vanilla for a bright, clean flavor.
- Divide each batter evenly into the prepared pans. Smooth tops with a spatula for even layering.
- Bake for 25-30 minutes. Test doneness with a toothpick inserted in the center—if it comes out clean, the layers are ready. Cool cakes in pans for 10 minutes before transferring to wire racks to cool completely.
- While cakes cool, prepare the frosting: Beat 8 oz softened cream cheese with ½ cup softened butter until creamy. Gradually add 4 cups powdered sugar and 2 tsp vanilla extract. Beat until smooth and fluffy.
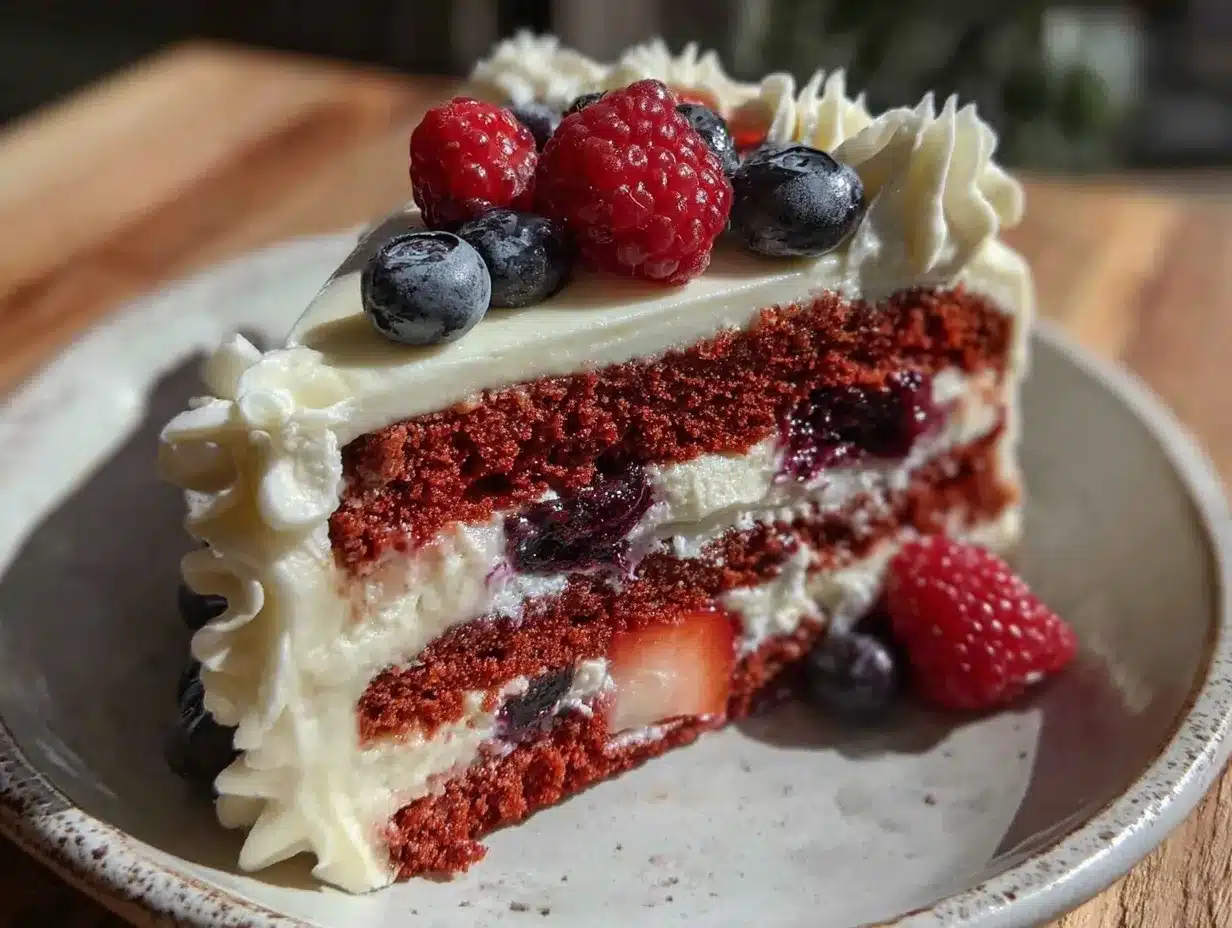
- Assemble the cake: Place the blue layer on your serving plate first. Spread a generous layer of frosting on top. Repeat with the white layer and more frosting, then finish with the red layer on top. Cover the entire cake with remaining frosting, smoothing sides and top with an offset spatula.
- Optional: Garnish with fresh blueberries, strawberries, or edible stars. Chill the cake for at least an hour to set before slicing.
Pro tip: If your frosting gets too soft, pop it in the fridge for 10 minutes before frosting—it makes spreading easier and cleaner. Also, when slicing the cake, use a sharp knife warmed under hot water for clean cuts.
Cooking Tips & Techniques
Making a layered cake can feel intimidating, but a few learned tricks make it a breeze. First, always measure your flour by spooning it lightly into the cup and leveling it off, or better yet, use a kitchen scale. Too much flour can dry out the layers.
When mixing the batter, avoid overmixing once you add the flour. Overworking gluten makes dense cakes, and trust me, no one wants a tough red, white, and blue cake! A quick fold to combine is all you need.
Cooling the cakes completely before frosting is crucial. I once frosted a warm cake and ended up with frosting sliding everywhere—it was a hot mess, literally. Patience here pays off.
For the blueberry puree, I learned that straining out seeds is optional but can make the frosting and cakes smoother. If you want texture, go for it! Also, gel food coloring works better than liquid—it keeps the batter’s consistency intact.
Multitasking tip: While the cakes bake, start making the frosting and puree the blueberries. This way, you’re not scrambling when it’s time to assemble.
Variations & Adaptations
This cake is flexible enough to suit different tastes and dietary needs. Here are some variations I’ve played around with:
- Gluten-Free: Swap all-purpose flour with a 1:1 gluten-free baking blend. I tried Bob’s Red Mill gluten-free flour, and the texture stayed wonderfully moist.
- Vegan: Use flax eggs (1 tbsp ground flaxseed + 3 tbsp water per egg) and replace butter and cream cheese with plant-based alternatives. Coconut cream frosting works well here.
- Flavor Twists: Add lemon zest to the white layer for a citrus pop, or fold in chopped strawberries into the blue layer batter for extra berry goodness.
- Alternate Berries: For a summer twist, swap blueberries with blackberries or raspberries. I once made this cake with fresh raspberries, and the tang was incredible.
- Different Frosting: Cream cheese frosting is classic, but a whipped vanilla buttercream or even a light mascarpone frosting can add a new dimension.
When baking at high altitudes or in humid climates, reducing baking powder slightly or increasing flour by a tablespoon can help the layers keep their shape.
Serving & Storage Suggestions
This cake is best served chilled or at room temperature. I like to take it out of the fridge about 30 minutes before guests arrive so the frosting softens just enough but still holds its shape.
Pair it with a cold glass of lemonade or a summery iced tea for a perfectly balanced celebration dessert. For a slightly lighter finish, fresh berries on the side brighten up each slice.
Store any leftovers wrapped tightly in plastic wrap in the refrigerator for up to 4 days. This cake also freezes well—wrap individual slices in foil and place them in a freezer bag for up to 2 months. Thaw overnight in the fridge before serving.
Reheating is not necessary, but if you prefer a softer texture, warm slices in a microwave for 10-15 seconds. The flavors, especially from the blueberry layer, tend to mellow and deepen after a day or two, making it surprisingly better the next day.
Nutritional Information & Benefits
Estimated per serving (1 slice, based on 12 slices): approximately 350 calories, 18g fat, 45g carbohydrates, and 3g protein. This cake offers a satisfying balance of indulgence and freshness.
Blueberries bring antioxidants and vitamins, adding a subtle health boost to this festive treat. The use of buttermilk not only tenderizes the cake but also provides calcium and probiotics.
While this cake isn’t low-calorie, it’s made with real ingredients and no artificial fillers. For those managing gluten, the gluten-free adaptation keeps the cake inclusive without compromising texture. Always be mindful of dairy and egg allergies and consider the vegan version when needed.
From a personal wellness perspective, I see this cake as a reminder that treats can be both joyful and thoughtfully made, fitting well into a balanced lifestyle.
Conclusion
This Perfect Red White and Blue Layer Cake has earned its spot in my recipe box for celebrations big and small. It’s the kind of dessert that brings people together—colorful, flavorful, and just the right amount of fuss. I love how easy it is to make yet impressive enough to feel special, a rare win in the world of festive baking.
Feel free to tweak the layers or frosting to suit your taste—after all, that’s part of the fun. Whether you stick to the classic or try a variation, this cake promises smiles, sweet moments, and maybe even a few “Wow, you made this?” comments.
If you give this recipe a try, I’d love to hear how it turns out or what creative twists you add. Sharing those stories keeps the kitchen magic alive and inspires others to celebrate with flavor.
FAQs About Perfect Red White and Blue Layer Cake
Can I make this cake ahead of time?
Absolutely! You can bake the layers up to two days ahead and keep them wrapped tightly in the fridge. Assemble and frost on the day you plan to serve for the freshest look and taste.
What’s the best way to get even layers?
Use a kitchen scale to divide your batter evenly among pans. If you don’t have one, eyeball it carefully and smooth the tops with a spatula. Baking strips around the pans can also help layers bake more evenly.
Can I use frozen blueberries for the blue layer?
Yes, frozen blueberries work well. Thaw and puree them before folding into the batter. You might want to strain the puree if you prefer a smoother texture.
How do I prevent the colors from bleeding into each other?
Chilling the layers before frosting helps. Also, apply a thin crumb coat of frosting first, chill the cake for 30 minutes, then add the final frosting layer. This seals in colors and keeps edges clean.
Can I substitute cream cheese frosting with buttercream?
Definitely! Vanilla buttercream pairs nicely and is a good option if you prefer a less tangy frosting. Just be sure to frost the cake once it’s fully cooled to avoid melting.
For a light, fresh dessert option on your celebration table, you might enjoy the creamy key lime pie bars or the rich million dollar pound cake – both perfect companions to your festive gatherings.
Pin This Recipe!
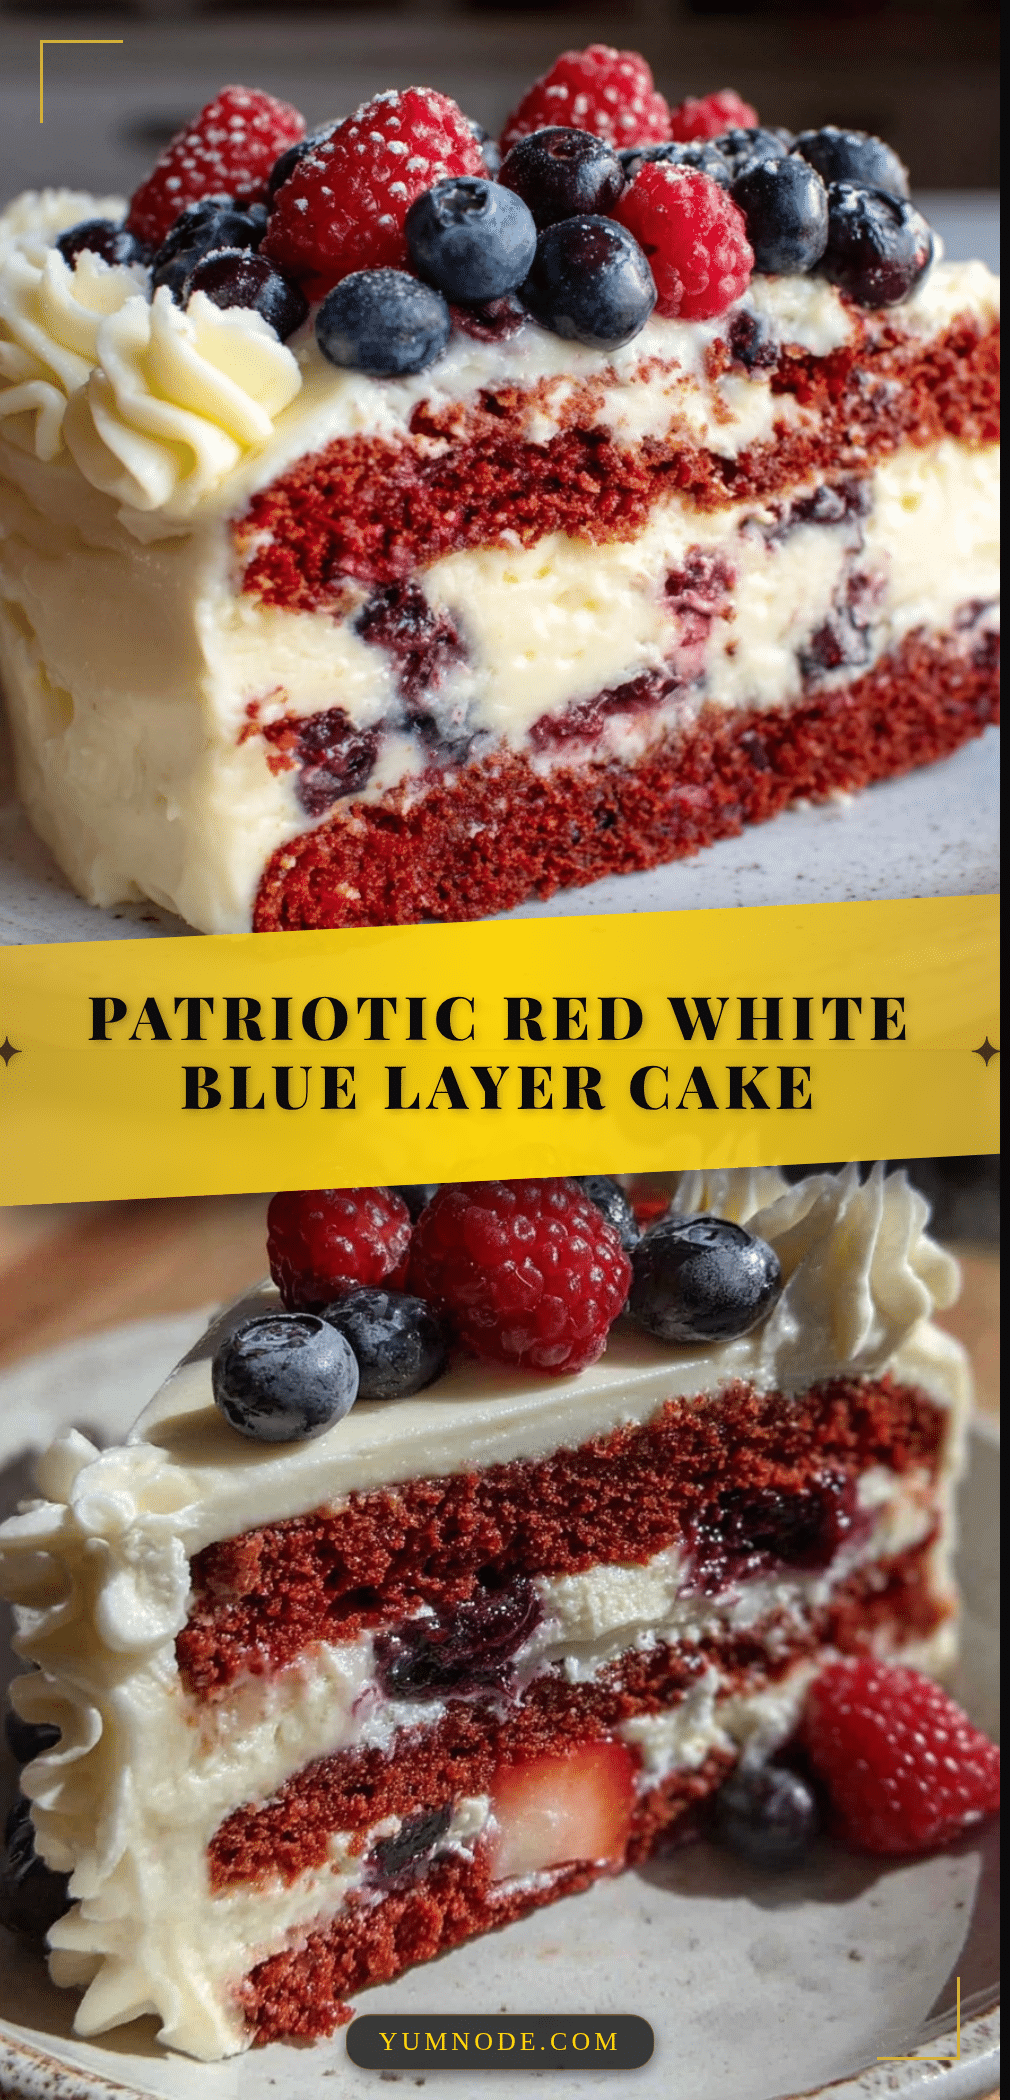
Perfect Red White and Blue Layer Cake

A festive and delicious layered cake featuring red velvet, vanilla, and blueberry layers, perfect for patriotic celebrations and summer parties.
- Prep Time: 30 minutes
- Cook Time: 30 minutes
- Total Time: 3 hours
- Yield: 12 servings 1x
- Category: Dessert
- Cuisine: American
Ingredients
- 2 ½ cups all-purpose flour (315 g)
- 2 ½ tsp baking powder
- 1 tsp baking soda
- ½ tsp salt
- 1 cup unsalted butter, softened (227 g)
- 2 cups sugar (400 g)
- 4 large eggs, room temperature
- 1 cup buttermilk, room temperature (240 ml)
- 2 tsp vanilla extract
- 1 ½ tbsp red food coloring (gel-based recommended)
- 2 tbsp cocoa powder
- 1 cup fresh or frozen blueberries, pureed (150 g)
- 1 tbsp blue food coloring (optional)
- 1 tsp extra vanilla extract (for white layer)
- 8 oz cream cheese, softened (227 g)
- ½ cup unsalted butter, softened (113 g)
- 4 cups powdered sugar (480 g)
- 2 tsp vanilla extract (for frosting)
Instructions
- Preheat oven to 350°F (175°C). Grease and line three 8-inch cake pans with parchment paper.
- In a medium bowl, whisk together flour, baking powder, baking soda, salt, and cocoa powder (for red layer only). Set aside.
- In a large bowl, cream butter and sugar with an electric mixer until pale and fluffy, about 3-4 minutes.
- Add eggs one at a time, mixing well after each addition. Stir in 2 tsp vanilla extract.
- Alternately add dry ingredients and buttermilk, beginning and ending with dry ingredients. Mix gently after each addition.
- Divide batter evenly into three bowls.
- To one bowl, add red food coloring and fold until uniform.
- To second bowl, fold in pureed blueberries and optional blue food coloring.
- To third bowl, stir in extra teaspoon vanilla extract.
- Divide each batter evenly into prepared pans and smooth tops.
- Bake for 25-30 minutes or until a toothpick inserted in the center comes out clean.
- Cool cakes in pans for 10 minutes, then transfer to wire racks to cool completely.
- For frosting, beat cream cheese and butter until creamy. Gradually add powdered sugar and vanilla extract, beating until smooth and fluffy.
- Assemble cake by placing blue layer on serving plate, spreading frosting on top, then white layer with frosting, and red layer on top.
- Cover entire cake with remaining frosting, smoothing sides and top.
- Optional: Garnish with fresh blueberries, strawberries, or edible stars.
- Chill cake for at least 1 hour before slicing.
Notes
Use gel-based food coloring to avoid thinning the batter. Cool cakes completely before frosting to prevent sliding. For dairy-free frosting, substitute cream cheese with coconut cream. Use a sharp knife warmed under hot water for clean slicing. Baking strips help even layers. Blueberry puree can be strained for smoother texture or left with seeds for more texture.
Nutrition
- Serving Size: 1 slice (1/12 of cak
- Calories: 350
- Fat: 18
- Carbohydrates: 45
- Protein: 3
Keywords: red white and blue cake, patriotic cake, layered cake, red velvet cake, blueberry cake, vanilla cake, Fourth of July dessert, summer party cake