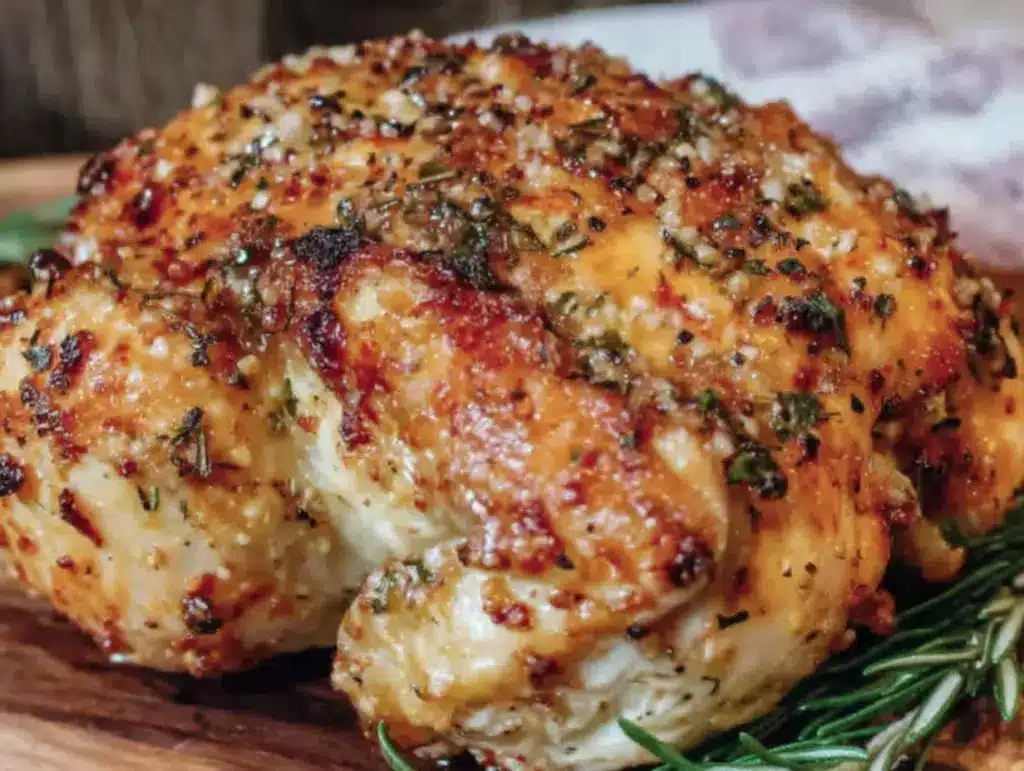
“You really have to try this,” my friend texted me one hectic evening, just as I was juggling dinner plans and a mountain of laundry. I was skeptical — rotisserie chicken seemed like something you grabbed from the store, not something you made at home in a Ninja Foodi. Honestly, I thought the whole idea was a bit of a fad, a gadget trick that couldn’t quite live up to the crispy, juicy promise. But curiosity got the better of me.
That night, with my kitchen barely cleaned and the clock ticking, I tossed a whole chicken into the Ninja Foodi, thinking, “Well, let’s see what happens.” The smell that filled the kitchen was unlike any roast chicken I’d made before — a savory, crispy aroma with hints of herbs and spices, promising comfort and satisfaction. When I finally sliced into it, the skin crackled perfectly, while the meat inside was tender and juicy, almost falling off the bone.
Since then, I can’t stop making this Crispy Juicy Ninja Foodi Whole Rotisserie Chicken. It’s become my go-to for those nights when I want something effortless yet impressive. There’s something quietly satisfying about pulling that golden bird out of the Foodi, knowing it’s going to feed the family with zero fuss and maximum flavor. No complicated prep, no messy oven cleanup — just pure, simple joy.
What really stuck with me is how this recipe became more than just dinner; it’s a little moment of calm at the end of a chaotic day — a reminder that even rushed nights can end on a delicious note.
Why You’ll Love This Recipe
After trying multiple techniques and tweaks, this Crispy Juicy Ninja Foodi Whole Rotisserie Chicken recipe stands out because it’s genuinely reliable and delicious every single time. You know those recipes you try once and never make again? This isn’t one of them.
- Quick & Easy: Ready in under 60 minutes, perfect for busy weeknights or last-minute dinner plans.
- Simple Ingredients: No need for fancy spices or hard-to-find items — just basics you probably have on hand.
- Perfect for Any Occasion: Whether it’s a casual family meal or a cozy Sunday dinner, it fits right in.
- Crowd-Pleaser: Kids and adults alike rave about the crispy skin and juicy meat — it’s a universal win.
- Unbelievably Delicious: The Ninja Foodi’s rotisserie function locks in moisture while crisping skin to perfection, something ovens often struggle with.
What sets this recipe apart is the balance of crispy skin without drying out the chicken, achieved by the Ninja Foodi’s unique air circulation and rotisserie features. Plus, I use a simple seasoning blend that feels familiar but has just enough kick to keep you interested bite after bite.
Honestly, this recipe is the kind that makes you pause mid-bite because it hits all the right notes — savory, juicy, and perfectly seasoned. It’s comfort food, but without the guilt or effort, and it pairs beautifully with quick sides like fresh salads or creamy scalloped potatoes. (If you want a side, I can’t recommend enough the creamy scalloped potatoes with ham — they’re pure magic alongside this chicken.)
What Ingredients You Will Need
This recipe uses straightforward, pantry-friendly ingredients to deliver that classic rotisserie flavor and moist texture. Nothing complicated, just good, honest components working together.
- Whole chicken (about 4 to 5 pounds / 1.8 to 2.3 kg) — fresh or thawed, ideally organic or free-range for better flavor
- Olive oil (2 tablespoons / 30 ml) — helps crisp the skin and carry the seasonings
- Salt (1 to 1.5 teaspoons / 5 to 7.5 g) — kosher salt is my go-to for even seasoning
- Black pepper (1 teaspoon / 2 g) — freshly ground for best flavor
- Garlic powder (1 teaspoon / 2 g) — adds depth without overpowering
- Onion powder (1 teaspoon / 2 g) — complements garlic with a subtle sweetness
- Paprika (1 teaspoon / 2 g) — for a smoky note and beautiful color; smoked paprika works well too
- Dried thyme (1/2 teaspoon / 1 g) — classic herb that pairs perfectly with chicken
- Lemon (1 small, halved) — optional but highly recommended for a fresh aroma inside the cavity
- Fresh rosemary or thyme sprigs (a few sprigs) — optional, to stuff inside the cavity for an herbal boost
For substitutions, if you don’t have olive oil, avocado oil works great and withstands heat well. You can swap dried herbs with fresh, but reduce quantities by half to avoid overpowering the chicken. For a gluten-free twist, this recipe is naturally free of gluten, which is always a bonus.
When choosing your chicken, I recommend checking for firm, plump birds with tight skin — it makes a difference in how well the skin crisps up. If you want to get fancy, brining the chicken for a few hours beforehand amps up juiciness, but it’s totally optional.
Equipment Needed
Using the Ninja Foodi is key for this recipe, but here’s a quick rundown of what you’ll need:
- Ninja Foodi with rotisserie function: This multipurpose cooker combines pressure cooking, air frying, and rotisserie all in one. If you don’t have a Foodi, any air fryer with rotisserie capability or a countertop rotisserie oven can work.
- Rotisserie spit and forks: Usually included with the Ninja Foodi; make sure they’re securely attached to hold the chicken in place.
- Tongs or heat-resistant gloves: For safely handling the hot chicken after cooking.
- Meat thermometer: Essential for checking doneness — aiming for an internal temp of 165°F (74°C) in the thickest part of the thigh.
- Kitchen twine (optional): To truss the chicken, helping it cook evenly and look neat.
I’ve tried this recipe with both fresh and frozen chickens (thawed, of course), and the Ninja Foodi handles both beautifully. Just be sure to clean your rotisserie spit after each use to keep it in good shape — a quick scrub with warm, soapy water usually does the trick.
For budget-friendly options, if you don’t own a Ninja Foodi, a regular oven rotisserie or even a well-ventilated air fryer can give you crispy skin, though you might miss out on the effortless one-pot magic.
Preparation Method
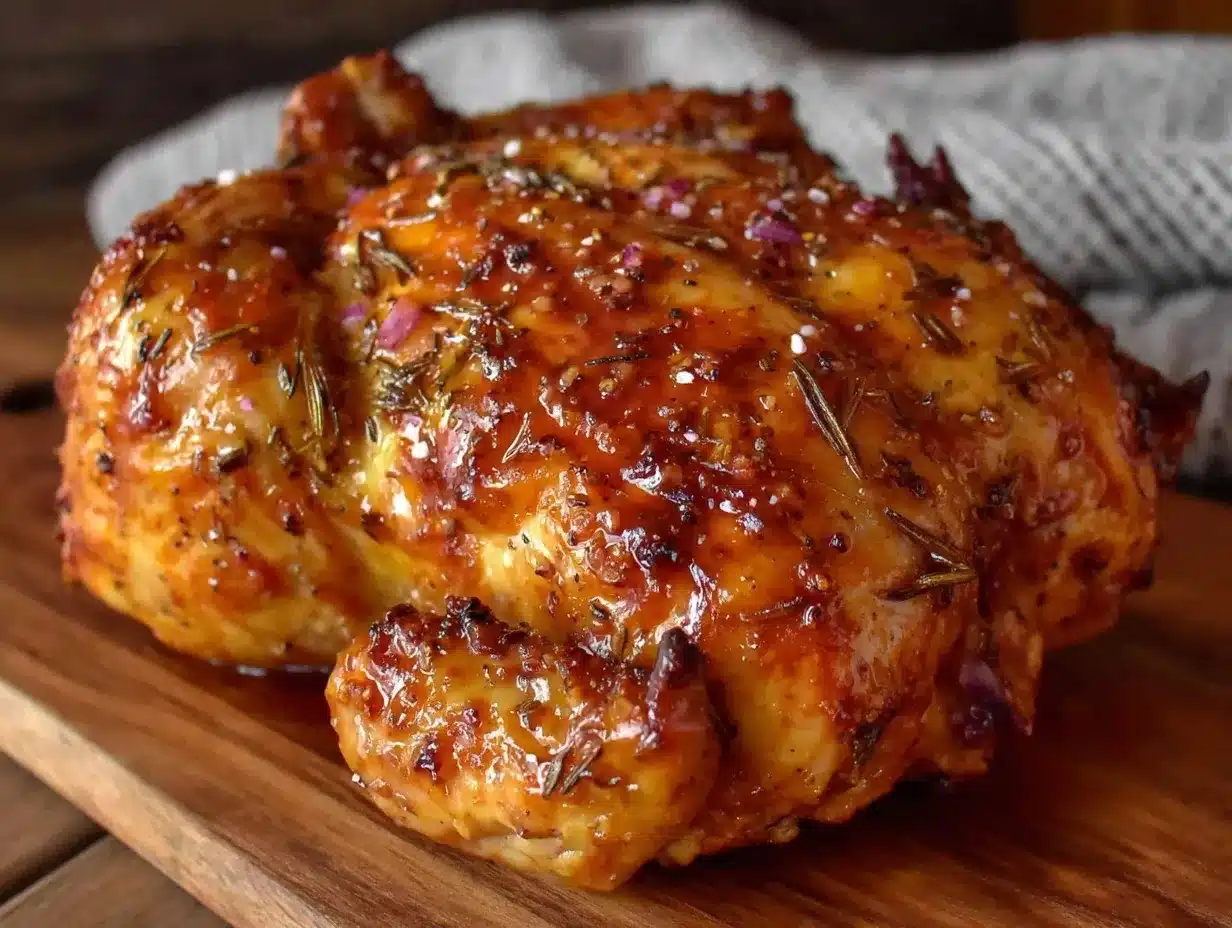
- Prep the chicken: Remove any giblets from the cavity and pat the chicken dry with paper towels — dryness is crucial for crispy skin. (5 minutes)
- Season the chicken: Rub olive oil all over the chicken, including under the skin if you can get your fingers there gently. Combine salt, pepper, garlic powder, onion powder, paprika, and dried thyme in a small bowl and sprinkle evenly over the chicken. Don’t be shy — this seasoning is what makes the flavor pop. (5 minutes)
- Stuff the cavity: Place the lemon halves and fresh herb sprigs inside the chicken’s cavity. This infuses the meat with subtle citrus and herbal notes during cooking. (2 minutes)
- Truss the chicken (optional): Using kitchen twine, tie the legs together and tuck the wings under the body for even cooking and a tidy appearance. I’ve skipped this step on rushed nights and still ended up with excellent results. (3 minutes)
- Set up the Ninja Foodi rotisserie: Insert the rotisserie spit through the chicken and secure it with the forks on both ends. Place the spit onto the rotisserie cradle inside the Foodi. (3 minutes)
- Cook: Close the lid and select the rotisserie function. Set the timer for 50 minutes. The Ninja Foodi will rotate the chicken continuously, crisping the skin evenly. (50 minutes)
- Check doneness: Insert a meat thermometer into the thickest part of the thigh. It should read 165°F (74°C). If not quite there, add 5 to 10 more minutes. (2 minutes)
- Rest the chicken: Carefully remove the spit (use tongs or gloves, it’s hot!). Let the chicken rest on a cutting board for 10 minutes before carving. This step lets juices redistribute, keeping every bite juicy and tender. (10 minutes)
Pro tip: If you notice the skin isn’t as crispy as you like after resting, you can pop the chicken back in the Foodi on air crisp mode for 3-5 minutes to finish it off.
From my experience, timing can vary slightly depending on the size of your chicken, so keep an eye but trust your thermometer above all else.
Cooking Tips & Techniques
One of the keys to nailing this recipe is keeping the chicken skin dry before seasoning — moisture is the enemy of crispiness. I usually pat the bird dry twice if I’m feeling particular.
Another trick is seasoning under the skin if you can gently separate it from the breast meat. This gives flavor deeper inside without drying out the surface.
Watch out for overcooking. The Ninja Foodi’s rotisserie cooks evenly, but every machine varies slightly. That’s why the meat thermometer is your best friend here.
When placing the chicken on the spit, make sure it’s balanced well so it rotates smoothly — a wobbling spit can cause uneven cooking or even damage the machine.
From my trials, letting the chicken rest after cooking is non-negotiable. I once carved into a freshly cooked bird and ended up with dry meat because the juices hadn’t settled. Patience pays off.
Multitasking tip: While the chicken roasts, you can prep a quick side salad or whip up some fresh strawberry spinach salad with creamy poppyseed dressing for a bright contrast.
Variations & Adaptations
This recipe is super flexible, so you can tweak it to suit what you have or want to try.
- Herb Variations: Swap dried thyme for rosemary, oregano, or a poultry seasoning blend for different flavor profiles.
- Spicy Kick: Add cayenne pepper or smoked chipotle powder to the seasoning mix for a smoky heat.
- Gluten-Free Option: This recipe is naturally gluten-free, but if you want to add a dry rub, double-check any spice blends for hidden gluten.
- Cooking Method Alternative: If you don’t own a Ninja Foodi, try this in a regular oven with a rotisserie attachment or air fryer basket, adjusting cooking times accordingly.
- Stuffing Ideas: Instead of lemon and herbs, try stuffing with garlic cloves, quartered onions, or even apple slices for a subtly sweet aroma.
One variation I love is brushing the chicken with a honey mustard glaze in the last 10 minutes of cooking — it adds a beautiful sticky-sweet finish that’s irresistible. It’s a nice twist if you’ve made this chicken a few times and want to shake things up.
Serving & Storage Suggestions
Serve this rotisserie chicken hot off the spit for the crispiest skin, but it’s equally good at room temperature. Slicing it thin for sandwiches or salads the next day is a great way to stretch the leftovers.
Pair it with simple sides like roasted vegetables, mashed potatoes, or a crisp green salad. For something a bit indulgent, creamy scalloped potatoes work wonders alongside, as in my recipe here.
Store leftover chicken in an airtight container in the fridge for up to 3-4 days. For longer storage, freeze in portions — it reheats well in the oven or microwave. I like to reheat slowly at 325°F (160°C) wrapped in foil to keep it moist while warming through.
Interestingly, the flavors deepen slightly after resting overnight, making next-day sandwiches or salads even tastier. It’s one of those meals that keeps giving.
Nutritional Information & Benefits
This whole rotisserie chicken provides a great source of lean protein, essential for muscle repair and overall energy. Skin-on cooking adds fat, but mostly unsaturated fats from the olive oil, which are heart-healthy.
A 4-ounce (113 g) serving of cooked chicken without skin has about 165 calories, 31 g protein, and minimal carbs. With skin, calories increase, so balance with your sides accordingly.
Seasonings used are low in sodium (unless you add more salt), and the use of fresh herbs adds antioxidants. This recipe is naturally gluten-free and low-carb, fitting well into many dietary plans.
From a wellness perspective, cooking at home like this means avoiding preservatives and excess sodium often found in store-bought rotisserie chickens, making it a wholesome choice for the whole family.
Conclusion
This Crispy Juicy Ninja Foodi Whole Rotisserie Chicken recipe has quietly become a staple in my kitchen because it blends ease and flavor so effortlessly. Whether you’re cooking for a busy weeknight or a relaxed weekend meal, it fits the bill without drama.
Feel free to customize the seasoning or stuffing to match your tastes — the recipe is forgiving and flexible, which is a relief when life’s busy. Honestly, there’s something satisfying about mastering a whole chicken that’s crispy on the outside and juicy inside without spending hours hovering over an oven.
If you try it, I’d love to hear how your version turns out or what twists you add. Sharing recipes and kitchen wins always makes the cooking journey more fun. Here’s to many delicious meals ahead!
Frequently Asked Questions
Can I use frozen chicken for this Ninja Foodi rotisserie recipe?
Yes, but make sure it’s fully thawed before cooking to ensure even cooking and safety.
How do I know when the chicken is done?
Use a meat thermometer inserted into the thickest part of the thigh — it should read 165°F (74°C).
Can I skip the trussing step?
Absolutely. Trussing helps with even cooking and presentation, but skipping it won’t ruin the dish.
What sides go well with rotisserie chicken?
Roasted vegetables, salads like fresh spinach with strawberries, or comforting sides like creamy scalloped potatoes pair beautifully.
Can I make this recipe without a Ninja Foodi?
Yes! Use an air fryer with rotisserie function or a countertop rotisserie oven. Cooking times may vary slightly.
Pin This Recipe!
Crispy Juicy Ninja Foodi Whole Rotisserie Chicken Recipe Easy and Perfect Every Time

A reliable and delicious whole rotisserie chicken cooked in the Ninja Foodi, featuring crispy skin and juicy meat with simple pantry ingredients and minimal fuss.
- Prep Time: 15 minutes
- Cook Time: 50 minutes
- Total Time: 1 hour 5 minutes
- Yield: 4 to 6 servings 1x
- Category: Main Course
- Cuisine: American
Ingredients
- 1 whole chicken (4 to 5 pounds / 1.8 to 2.3 kg), fresh or thawed, ideally organic or free-range
- 2 tablespoons olive oil (30 ml)
- 1 to 1.5 teaspoons kosher salt (5 to 7.5 g)
- 1 teaspoon freshly ground black pepper (2 g)
- 1 teaspoon garlic powder (2 g)
- 1 teaspoon onion powder (2 g)
- 1 teaspoon paprika (2 g), smoked paprika optional
- 1/2 teaspoon dried thyme (1 g)
- 1 small lemon, halved (optional)
- A few sprigs fresh rosemary or thyme (optional)
Instructions
- Remove any giblets from the chicken cavity and pat the chicken dry with paper towels (5 minutes).
- Rub olive oil all over the chicken, including under the skin if possible. Combine salt, pepper, garlic powder, onion powder, paprika, and dried thyme in a small bowl and sprinkle evenly over the chicken (5 minutes).
- Place lemon halves and fresh herb sprigs inside the chicken cavity (2 minutes).
- Optional: Truss the chicken by tying the legs together and tucking the wings under the body for even cooking and neat appearance (3 minutes).
- Insert the rotisserie spit through the chicken and secure it with the forks on both ends. Place the spit onto the rotisserie cradle inside the Ninja Foodi (3 minutes).
- Close the lid and select the rotisserie function. Set the timer for 50 minutes. The Ninja Foodi will rotate the chicken continuously, crisping the skin evenly (50 minutes).
- Check doneness by inserting a meat thermometer into the thickest part of the thigh; it should read 165°F (74°C). If not done, cook for an additional 5 to 10 minutes (2 minutes).
- Carefully remove the spit using tongs or heat-resistant gloves. Let the chicken rest on a cutting board for 10 minutes before carving to allow juices to redistribute (10 minutes).
Notes
Pat the chicken dry twice for extra crispy skin. Season under the skin for deeper flavor. Use a meat thermometer to ensure perfect doneness. Rest the chicken after cooking to keep it juicy. If skin is not crispy enough after resting, air crisp for 3-5 minutes. Trussing is optional but helps with even cooking and presentation.
Nutrition
- Serving Size: Approximately 4 ounc
- Calories: 250
- Sodium: 400
- Fat: 15
- Saturated Fat: 4
- Protein: 31
Keywords: rotisserie chicken, Ninja Foodi, whole chicken, crispy chicken, juicy chicken, easy dinner, air fryer chicken, gluten-free, quick chicken recipe



