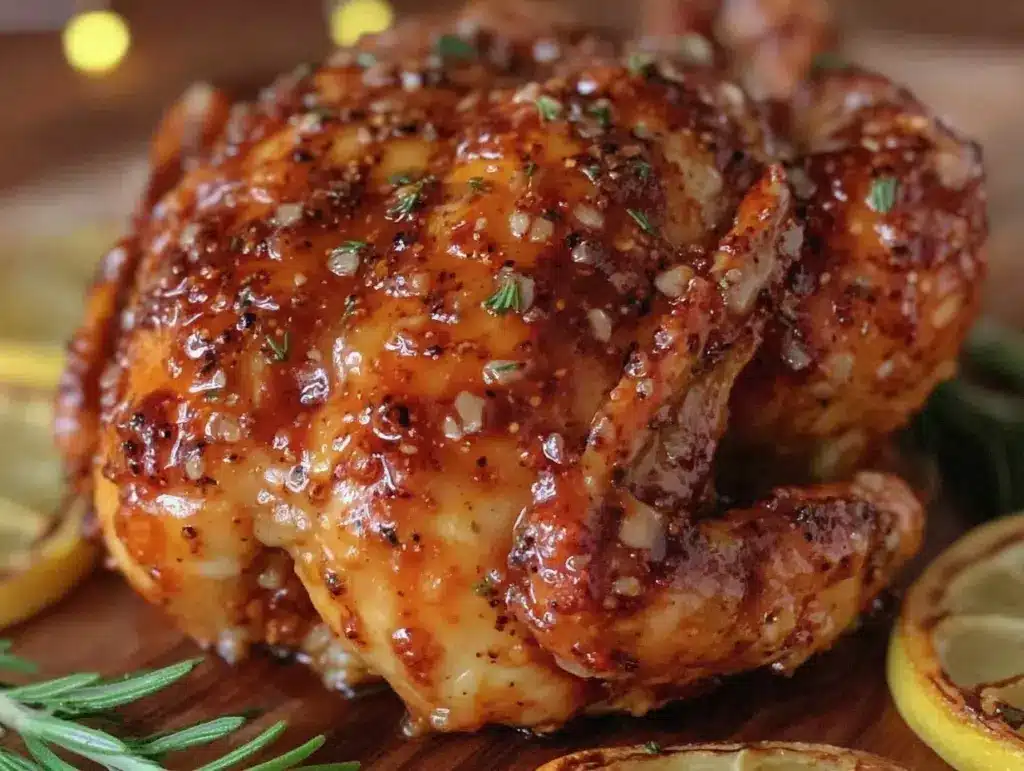
“You sure you want to stick that beer can in the chicken?” my cousin asked with a smirk. Honestly, I wasn’t all that sure either the first time I tried this crispy smoky beer can chicken recipe. But that night, after a long day juggling work and kid chaos, I just needed something straightforward that hit all the right notes without demanding too much brainpower. I grabbed a cold beer, slapped together a dry rub while the grill warmed up, and hoped for the best.
What happened next surprised me—the chicken came out with this incredible crispy skin, smoky aroma, and juicy, tender meat that made everyone at the table ask for seconds. The dry rub was the star, a simple blend of spices that brought out deep layers of flavor without overpowering the beer’s subtle sweetness. It wasn’t fancy, just honest cooking that felt like a little win in a hectic week.
The best part? This recipe stuck with me because it’s one of those dishes you can make on a whim, no complicated prep or rare ingredients, yet everyone’s impressed. I’ve since made it for casual hangouts and even paired it with my favorite crispy garlic chicken dish for a weekend feast. There’s something quietly satisfying about that perfect combo of crunchy skin and smoky flavor, especially when the kitchen smells like a backyard barbecue on a lazy Saturday afternoon.
So, if you’ve ever been curious about that beer can chicken thing but hesitated, this recipe might just change your mind. It’s straightforward, forgiving, and honestly, a bit addictive once you get the hang of the dry rub. Let’s get into it.
Why You’ll Love This Recipe
After testing this crispy smoky beer can chicken recipe multiple times, I can say it’s a keeper for good reasons. Here’s why it’s become a staple in my cooking routine:
- Quick & Easy: The prep takes about 15 minutes, and the chicken roasts in roughly an hour, making it perfect for busy weeknights or relaxed weekends.
- Simple Ingredients: Most of the spices in the dry rub are pantry staples—think paprika, garlic powder, and brown sugar—so you don’t need to make special trips to the store.
- Perfect for Casual Gatherings: Whether it’s a backyard barbecue or a family dinner, this chicken impresses without stress.
- Crowd-Pleaser: Kids, adults, picky eaters—everyone loves that crispy skin with a hint of smoky sweetness.
- Unbelievably Delicious: The dry rub locks in moisture while adding a flavor punch that’s balanced and comforting.
What makes this recipe stand out is the dry rub’s perfect harmony—it’s smoky but not overwhelming, sweet but with a savory edge. Plus, the beer can cooking method steams the chicken from the inside, keeping it juicy while the outside crisps up like a dream. It’s not just another roast chicken; it’s one that makes you pause and savor every bite.
Honestly, it’s the kind of recipe I return to when I want something that feels a little special but demands minimal babysitting. If you appreciate straightforward, flavorful meals that deliver reliably, this beer can chicken will become your new go-to.
What Ingredients You Will Need
This crispy smoky beer can chicken recipe keeps things straightforward with simple, wholesome ingredients that pack a punch. The dry rub is where the magic happens, building layers of smoky, sweet, and savory flavor.
- Whole Chicken: About 4 to 5 pounds (1.8 to 2.3 kg), preferably fresh or fully thawed for even cooking.
- Beer: One 12-ounce (355 ml) can—choose a lager or pale ale for mild flavor. I usually go with a local craft lager, but any cold beer works.
- Olive Oil: 2 tablespoons to help the dry rub stick and crisp up the skin.
For the Dry Rub:
- 2 tablespoons smoked paprika (adds smoky depth)
- 1 tablespoon brown sugar (for caramelized sweetness)
- 1 teaspoon garlic powder
- 1 teaspoon onion powder
- 1 teaspoon chili powder (adjust to taste)
- 1 teaspoon kosher salt
- 1/2 teaspoon black pepper
- 1/2 teaspoon cayenne pepper (optional, for heat)
Feel free to swap the brown sugar with coconut sugar or leave it out for a less sweet version. For a gluten-free option, make sure your chili powder blend is certified gluten-free. If you want to try something different, substituting smoked paprika with regular paprika plus a dash of liquid smoke can work in a pinch.
For best results, I recommend using a good quality smoked paprika like La Chinata—it really lifts the flavor. And when it comes to beer, lighter lagers are less likely to overpower the chicken, but if you’re feeling adventurous, a darker beer can add an intriguing richness.
Equipment Needed
- Grill or Oven: You can cook this chicken on a charcoal or gas grill, or even in the oven if weather is iffy. I’ve done it both ways with great results.
- Beer Can Chicken Roaster (Optional): This handy tool holds the chicken upright on the can for better stability. If you don’t have one, just use the beer can directly, but be cautious when removing it.
- Meat Thermometer: An instant-read thermometer is a lifesaver to avoid overcooking or undercooking.
- Mixing Bowl: For combining the dry rub spices.
- Basting Brush: Optional, for applying olive oil evenly.
If you’re on a budget, the bare minimum is a grill or oven and a meat thermometer. I’ve found that a good thermometer, like the ThermoPro, pays for itself in perfectly cooked chicken every time.
Preparation Method
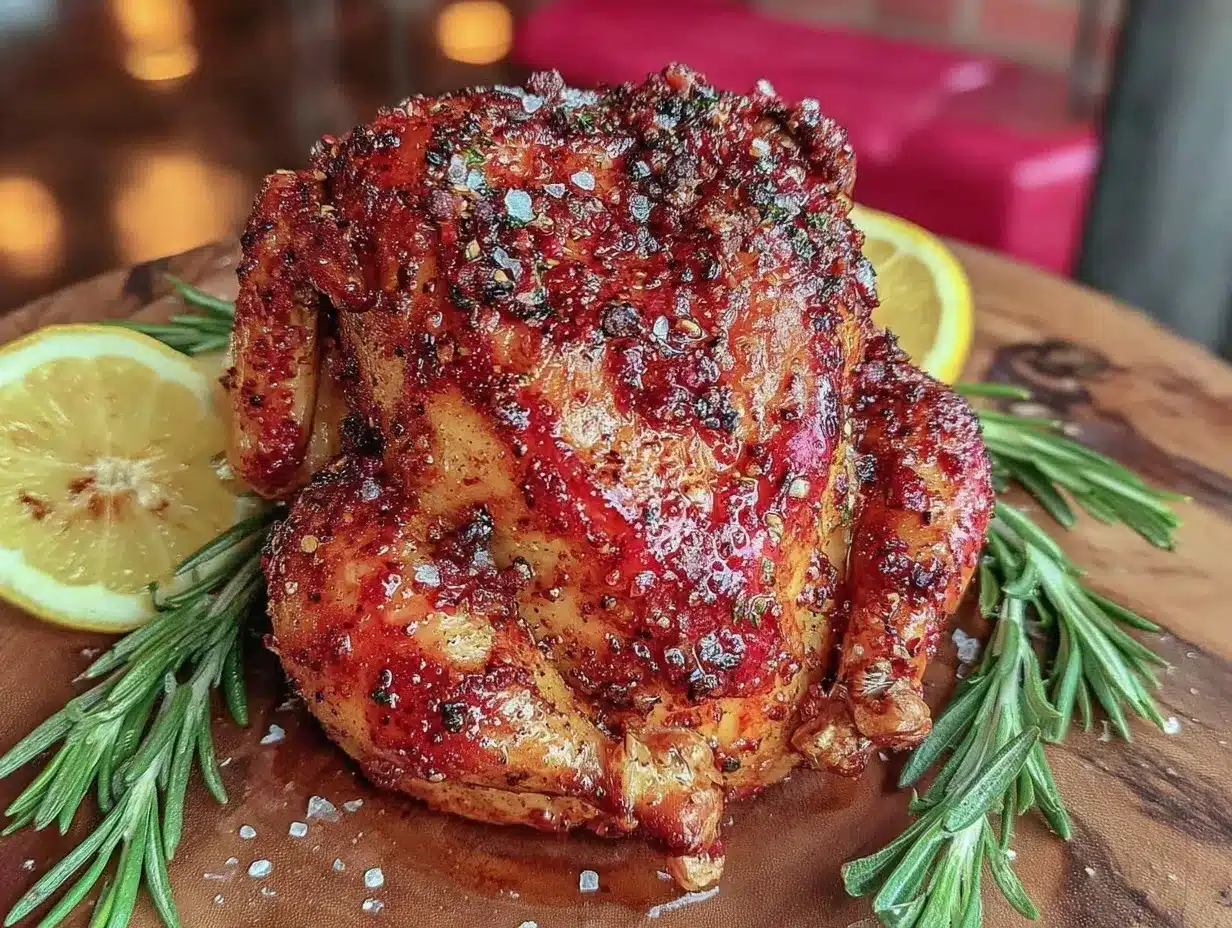
- Prep the Chicken: Remove giblets and pat the chicken dry inside and out with paper towels. This step is crucial for crispy skin. Let it rest at room temperature for about 20 minutes before seasoning.
- Make the Dry Rub: In a small bowl, combine smoked paprika, brown sugar, garlic powder, onion powder, chili powder, kosher salt, black pepper, and cayenne pepper. Mix thoroughly until evenly blended.
- Apply Olive Oil: Rub 2 tablespoons of olive oil all over the chicken, including under the skin where possible. This helps the dry rub stick and promotes browning.
- Rub the Chicken: Generously coat the entire chicken with the dry rub, massaging it into every nook and cranny. Don’t be shy here—this is where the flavor builds.
- Prepare the Beer Can: Open the beer and drink or pour out about half (or save it for the cook). Place the can on a sturdy surface, then carefully set the chicken upright onto the can so it sits securely. If using a beer can chicken roaster, follow the manufacturer’s instructions.
- Grill or Roast: Preheat your grill to medium heat (about 350°F/175°C) for indirect cooking. Place the chicken upright on the grill grates, away from direct flames. Cover and cook for 60 to 75 minutes, checking internal temperature with a meat thermometer.
- Check Temperature: The chicken is done when the thickest part of the thigh reaches 165°F (74°C). Avoid opening the grill too often to keep the heat stable.
- Rest the Chicken: Carefully remove the chicken from the grill, let it rest upright for 10 minutes before carving. This helps juices redistribute and keeps the meat moist.
Pro tip: If skin isn’t as crispy as you’d like, finish with a quick 5-minute blast over direct heat but watch closely to avoid burning.
Cooking Tips & Techniques
One thing I learned the hard way is that drying the chicken thoroughly before seasoning is non-negotiable for crispy skin. Even a little lingering moisture causes the skin to steam instead of crisping up. Also, don’t rush the resting period; it might feel counterintuitive, but letting the chicken rest after cooking locks in all that juicy goodness.
Using indirect heat on the grill is key. If you throw the chicken right over the flames, you risk burnt skin with undercooked meat inside. I usually set up my grill with coals pushed to one side or turn on one burner on a gas grill, placing the chicken on the cooler side.
Another trick that changed the game for me was testing different beers. A mild lager keeps the flavor balanced, but I sometimes experiment with a hoppy IPA for a subtle bitterness that contrasts nicely with the sweet rub.
And don’t forget the meat thermometer—my first few attempts were guesswork and, honestly, a little frustrating. Once I started checking temps, every batch came out perfect. If you want to multitask, prep a simple side like grilled asparagus or a fresh salad while the chicken cooks; it’s a great way to keep dinner balanced and easy.
Variations & Adaptations
This crispy smoky beer can chicken recipe is incredibly flexible, so feel free to play around:
- Spice It Up: Add cumin and coriander to the dry rub for a warm, earthy twist.
- Herb Infusion: Mix fresh chopped rosemary and thyme into the rub or inside the chicken cavity for a fragrant note.
- Gluten-Free: Ensure all your spices are certified gluten-free and use a gluten-free beer or substitute with soda water for a similar steaming effect.
- Oven Version: If you don’t have a grill, roast the chicken upright in a roasting pan at 375°F (190°C) for about 75 minutes. Insert a small oven-safe rack inside a deep pan to hold the beer can steady.
- Smoky Sweet: Brush the chicken with a honey or maple syrup glaze during the last 10 minutes for a sticky, caramelized finish.
One variation I love is adding a splash of bourbon to the beer can for a subtle smoky sweetness that deepens the flavor profile. It’s a fun twist when hosting friends who appreciate a little extra flair.
Serving & Storage Suggestions
This chicken is best served hot, right off the grill, with the skin still crisp and the aroma filling the room. Slice it up on a wooden board for a rustic presentation, maybe paired with grilled veggies or a tangy coleslaw to cut through the richness.
Leftovers reheat nicely in the oven at 350°F (175°C) for about 15 minutes—just keep it covered with foil to avoid drying out. You can also shred the cooled chicken for salads, sandwiches, or tacos the next day.
Store any leftover chicken in an airtight container in the fridge for up to 3 days. The flavors actually develop a bit overnight, making it even tastier the next day.
For a side, I often go with something light and fresh like the fresh strawberry spinach salad—it’s a nice contrast to the smoky richness of the chicken.
Nutritional Information & Benefits
Per serving, this crispy smoky beer can chicken provides approximately 350 calories, 25 grams of protein, 25 grams of fat, and minimal carbs. The high protein content makes it a satisfying meal option.
The smoked paprika in the dry rub is rich in antioxidants and adds anti-inflammatory benefits. Using olive oil instead of butter supports heart health, and cooking the chicken upright allows excess fat to drain off, making it a leaner preparation method.
This recipe is naturally gluten-free if you choose gluten-free spices and beer, and it fits well into low-carb or keto meal plans. Just be mindful of any spice sensitivities when customizing the dry rub.
Conclusion
This crispy smoky beer can chicken recipe has become one of those rare dishes that’s both simple and impressive. It’s the kind of meal that brings people together without a fuss and leaves a lasting impression thanks to that perfectly crisp skin and juicy interior.
Feel free to tweak the dry rub or try different beers until you find your favorite combo. I love coming back to this recipe because it’s reliable, forgiving, and downright delicious every time. Plus, it’s a great reason to fire up the grill or even just bring some smoky warmth indoors on a chilly evening.
If you give this recipe a try, I’d love to hear how you make it your own—drop a comment or share your twists. And for a sweet finish after your smoky feast, you might enjoy the creamy key lime pie bars I often serve alongside.
Here’s to crispy skin, smoky flavors, and relaxed, joyful cooking.
Frequently Asked Questions
What type of beer works best for beer can chicken?
A mild lager or pale ale usually works best because it adds subtle flavor without overpowering the chicken. Avoid overly bitter or strong-flavored beers unless you want a bold twist.
Can I use soda or non-alcoholic beer instead of regular beer?
Yes, soda water or non-alcoholic beer can be used as a substitute to keep the steaming effect and moisture without alcohol.
How do I know when the chicken is fully cooked?
Use an instant-read thermometer—when the internal temperature at the thickest part of the thigh reaches 165°F (74°C), the chicken is done and safe to eat.
Is it safe to cook chicken on a beer can?
Yes, as long as you use a clean, unopened can and handle it carefully when hot. Using a beer can chicken roaster adds stability and safety.
Can I make the dry rub ahead of time?
Absolutely! The dry rub keeps well in an airtight container for weeks, so you can prepare it ahead and have it ready for whenever you want to make this crispy smoky chicken.
Pin This Recipe!
Crispy Smoky Beer Can Chicken

A straightforward and flavorful beer can chicken recipe featuring a smoky, sweet dry rub that delivers crispy skin and juicy meat. Perfect for casual gatherings and easy weeknight meals.
- Prep Time: 15 minutes
- Cook Time: 60 to 75 minutes
- Total Time: 1 hour 15 minutes
- Yield: 4 to 6 servings 1x
- Category: Main Course
- Cuisine: American
Ingredients
- 1 whole chicken (4 to 5 pounds)
- 1 (12-ounce) can of beer (lager or pale ale recommended)
- 2 tablespoons olive oil
- 2 tablespoons smoked paprika
- 1 tablespoon brown sugar
- 1 teaspoon garlic powder
- 1 teaspoon onion powder
- 1 teaspoon chili powder
- 1 teaspoon kosher salt
- 1/2 teaspoon black pepper
- 1/2 teaspoon cayenne pepper (optional)
Instructions
- Remove giblets and pat the chicken dry inside and out with paper towels. Let it rest at room temperature for about 20 minutes.
- In a small bowl, combine smoked paprika, brown sugar, garlic powder, onion powder, chili powder, kosher salt, black pepper, and cayenne pepper. Mix thoroughly.
- Rub 2 tablespoons of olive oil all over the chicken, including under the skin where possible.
- Generously coat the entire chicken with the dry rub, massaging it into every nook and cranny.
- Open the beer and drink or pour out about half. Place the can on a sturdy surface, then carefully set the chicken upright onto the can so it sits securely.
- Preheat grill to medium heat (about 350°F/175°C) for indirect cooking. Place the chicken upright on the grill grates away from direct flames. Cover and cook for 60 to 75 minutes.
- Check the internal temperature with a meat thermometer; the chicken is done when the thickest part of the thigh reaches 165°F (74°C).
- Carefully remove the chicken from the grill and let it rest upright for 10 minutes before carving.
- Optional: For crispier skin, finish with a quick 5-minute blast over direct heat, watching closely to avoid burning.
Notes
Dry the chicken thoroughly before seasoning for crispy skin. Use indirect heat on the grill to avoid burnt skin and undercooked meat. Let the chicken rest after cooking to lock in juices. A meat thermometer is essential for perfect doneness. For oven cooking, roast upright at 375°F (190°C) for about 75 minutes.
Nutrition
- Serving Size: 1 serving (approxima
- Calories: 350
- Sugar: 1
- Fat: 25
- Carbohydrates: 2
- Protein: 25
Keywords: beer can chicken, crispy chicken, smoky chicken, dry rub chicken, grilled chicken, backyard barbecue, easy chicken recipe



