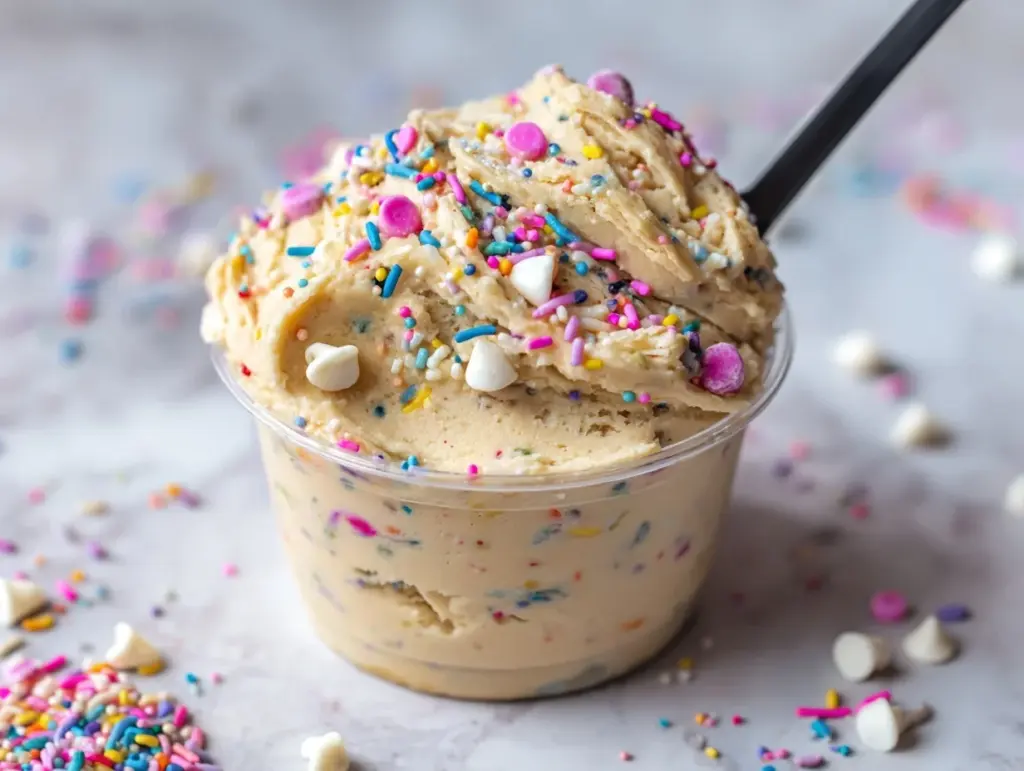
There’s a certain kind of happiness that bursts out when you bite into a Birthday Cake Protein Cookie Dough Cup—like eating straight from the mixing bowl, but with zero guilt. The first time I made these, I was actually prepping a batch of boring rice cakes for the week ahead (yawn, right?). Halfway through, I realized what I was really craving was something fun—something that tastes like a celebration, but fits my healthy routine. That’s how these birthday cake protein cookie dough cups were born: a treat that’s equal parts nostalgia and nutrition, with colors and flavors that make you feel like it’s your birthday every day.
I’ve tweaked this recipe more times than I can count—sometimes experimenting with different protein powders, sometimes swapping out sweeteners—and each batch gets a little better. Whether you’re someone who loves sneaking spoonfuls of dough before the cookies bake, or you just want a snack that feels like a party, you’re going to love these. The best part? They’re so easy, you can whip up a batch in under 30 minutes (and, honestly, they disappear even faster). As a certified nutrition coach and an eternal birthday cake lover, I promise this recipe hits all the right notes: it’s sweet, protein-packed, and actually leaves you feeling good.
If you’re a busy parent, a meal-prep enthusiast, or just a snack lover who wants something fun and a little bit wholesome, these birthday cake protein cookie dough cups are about to become your new go-to. They’re perfect for lunchboxes, after-dinner treats, post-workout snacks, or just when you want to feel a little special on a Monday afternoon. Plus, they’ve passed the “kid test” in my house more times than I can count—sprinkles and all!
Why You’ll Love These Birthday Cake Protein Cookie Dough Cups
- Quick & Easy: Ready in about 30 minutes—seriously! No oven required, so you can get your snack fix fast.
- Simple Ingredients: Nothing fancy or hard to pronounce. Most of these items are probably sitting in your pantry right now.
- Perfect for Any Occasion: Obviously, they’re a hit at birthday parties, but honestly, they’re just as good for post-workout fuel, lunchbox treats, or movie-night munchies.
- Crowd-Pleaser: Kids and adults both light up when they see the sprinkles. I’ve taken these to potlucks and watched them vanish in minutes.
- Unbelievably Delicious: That classic birthday cake flavor with a soft, doughy bite—plus a chocolate shell that cracks when you bite it. Total bliss!
What sets these birthday cake protein cookie dough cups apart is the combo of creamy, protein-rich dough and the playful crunch of a chocolate coating. I blend the protein powder right into the dough for smoothness, and use just enough almond flour to keep everything soft but not sticky. The protein boost isn’t just for show—it means you get a snack that’s actually satisfying. I’ve tried other versions that tasted chalky or had that weird aftertaste, but this one? It’s like eating birthday cake and cookie dough at the same time, minus the sugar crash.
These treats are also super customizable. Want to make them vegan? Easy. Need them gluten free? No problem. And yes, you can double the sprinkles (I always do). There’s something magical about a recipe that’s both feel-good and fun, and that’s exactly what you get here. You know that smile you get when you eat something that tastes like pure joy? That’s what these cups deliver. Trust me, this isn’t just another protein snack—it’s a little bit of happiness, wrapped in a chocolate shell.
What Ingredients You Will Need
This recipe comes together with simple, wholesome ingredients that deliver classic birthday cake flavor and a satisfying, doughy texture. Most are pantry staples, and you can easily swap a few things to fit your diet or what you have on hand.
- For the Cookie Dough:
- Almond flour (fine blanched almond flour works best for a soft dough—my favorite is Bob’s Red Mill)
- Vanilla protein powder (whey or plant-based, use your favorite brand—I love Orgain for vegan, Optimum Nutrition for whey)
- Coconut flour (just a touch for extra cake-like texture; if you don’t have it, add a little more almond flour)
- Coconut oil, melted (refined or unrefined, both work—if you want less coconut flavor, go with refined)
- Maple syrup or honey (for natural sweetness; agave works too if that’s what you have)
- Almond milk, unsweetened (any milk works—oat, soy, or dairy if you’re not avoiding it)
- Pure vanilla extract (don’t skip this—it’s what makes the “birthday cake” flavor pop)
- Pinch of salt (balances the sweetness and brings out all the flavors)
- Rainbow sprinkles (the classic kind for that funfetti look; use naturally colored or allergy-friendly if needed)
- For the Chocolate Shell:
- White chocolate chips or white melting wafers (Ghirardelli or Enjoy Life for dairy-free)
- Coconut oil (helps the chocolate set up with a nice snap)
- Extra sprinkles (for topping—because you can never have too many!)
Ingredient Tips:
If you’re gluten-free, make sure your sprinkles and protein powder are certified. For vegan cups, use dairy-free white chocolate and maple syrup. I’ve also tried swapping almond flour for oat flour (just grind rolled oats in a blender)—it works, though the texture is a touch heartier. You can use any milk you like; the dough is pretty forgiving. And if you’re feeling adventurous, a splash of almond or cake batter extract makes the “birthday cake” flavor even more nostalgic.
Equipment Needed
- Muffin tin or silicone mini muffin pan (I love the silicone ones—no sticking, no paper liners needed)
- Mixing bowls (one medium for the dough, one small for the chocolate shell)
- Microwave-safe bowl or double boiler (for melting the chocolate—microwave works fine, just go slow)
- Measuring cups and spoons (accuracy matters for the right dough texture)
- Rubber spatula or wooden spoon (for mixing—get every last bit from the bowl!)
- Cookie scoop or tablespoon (to portion the dough evenly)
- Refrigerator or freezer (for setting the cups—they firm up much faster in the freezer)
If you don’t have a mini muffin tin, you can make these in a regular muffin pan—just use more dough and chocolate per cup. Or, line a small baking dish with parchment and make bars instead! I’ve even made these in silicone ice cube molds for bite-sized treats. If you’re using metal pans, a quick spray of coconut oil or some paper liners helps with easy removal. And, a quick note: keep your bowls and utensils dry when working with melted chocolate; a drop of water can make it seize up (trust me, I’ve learned this the hard way).
How to Make Birthday Cake Protein Cookie Dough Cups
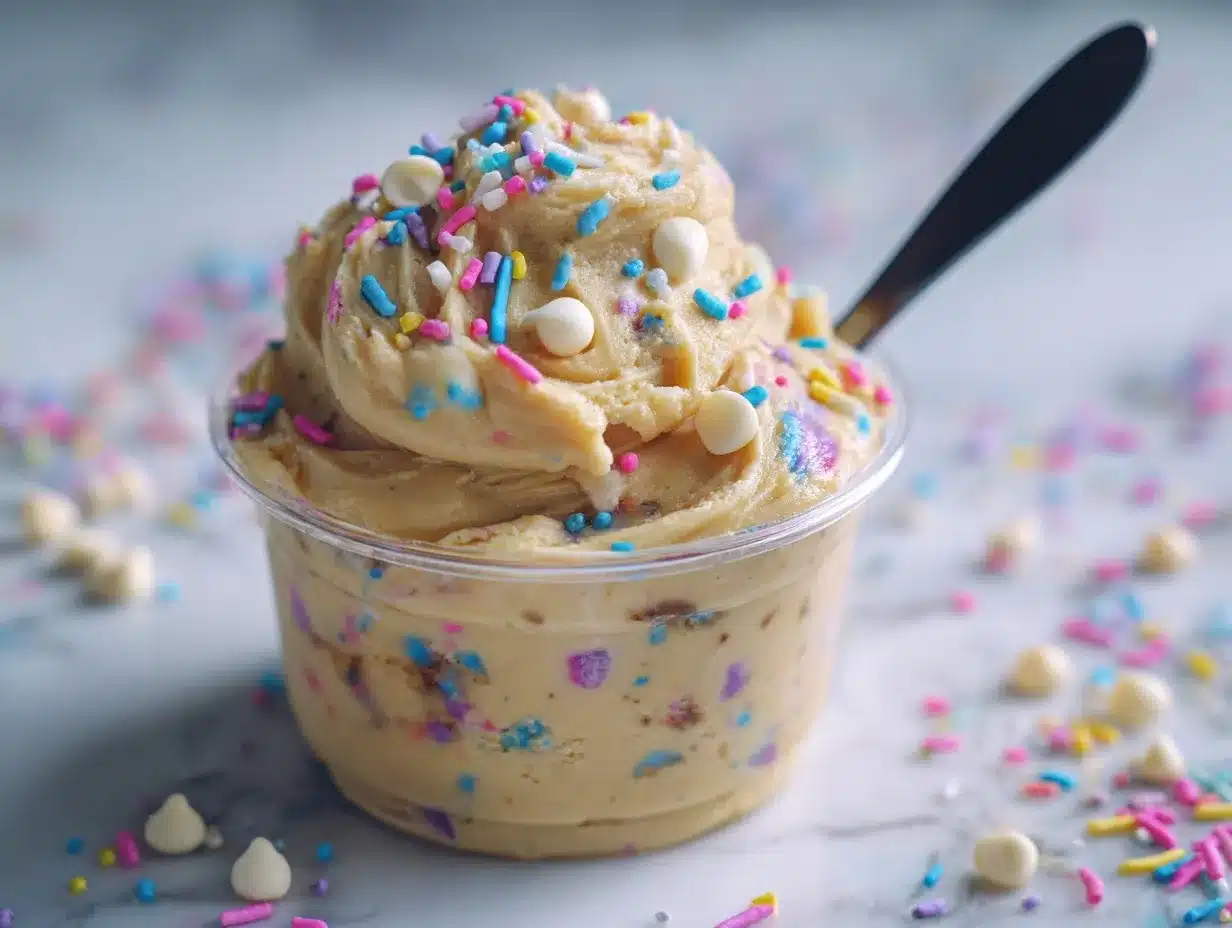
-
Make the Dough:
In a medium mixing bowl, combine 1 cup (112g) almond flour, 1/2 cup (40g) vanilla protein powder, and 2 tablespoons (14g) coconut flour. Stir together with a fork to break up any lumps.
Add 3 tablespoons (45ml) melted coconut oil, 1/4 cup (60ml) maple syrup, 2 tablespoons (30ml) almond milk, 2 teaspoons (10ml) vanilla extract, and a pinch of salt. Mix until a thick, slightly sticky dough forms—if it’s too dry, add another splash of milk.
Gently fold in 2-3 tablespoons (25g) rainbow sprinkles. Don’t overmix or the colors will bleed!
Prep time: about 10 minutes. -
Portion the Dough:
Using a small cookie scoop or tablespoon, divide the dough into 12 even portions. Roll each into a ball, then flatten slightly to fit the bottom of a mini muffin cup. Press gently to spread the dough to the edges.
If you’re making bars, press the dough evenly into a parchment-lined baking dish.
Sensory cue: Dough should be soft but not sticky—like playdough. If it sticks to your hands, chill for 5 minutes.
Time: 5 minutes. -
Chill:
Place the pan in the freezer for 10-15 minutes to firm up the dough. This makes it easier to coat with chocolate.
Troubleshooting: If the dough is too soft to handle, chill longer. -
Make the Chocolate Shell:
In a microwave-safe bowl, combine 1/2 cup (85g) white chocolate chips and 1 tablespoon (15ml) coconut oil. Microwave in 15-second bursts, stirring in between, until smooth and glossy. (Or melt gently in a double boiler.)
Warning: Chocolate burns fast—go slow and stir often.
Sensory cue: Chocolate should be pourable, not thick.
Time: About 2 minutes. -
Coat the Cups:
Remove the dough cups from the freezer. Spoon about 2 teaspoons (10g) of melted chocolate over each cup, tilting the tray to cover evenly. Sprinkle extra rainbow sprinkles on top before the chocolate sets.
Tip: Tap the pan gently on the counter to smooth out the chocolate.
Time: 5 minutes. -
Set and Serve:
Return the pan to the freezer for 10-15 minutes, or until the chocolate shell is firm. Pop the cups out and enjoy!
Sensory cue: The chocolate should crack when you bite in, with a soft, doughy center.
Total time: About 30 minutes, including chilling.
Personal tip: If you’re impatient like I am, these are best eaten straight from the fridge or freezer. The texture is just perfect—soft, chewy, and a little bit cool, like cookie dough ice cream but protein-packed.
Cooking Tips & Techniques
- Protein Powder Matters: If your dough feels dry, it’s probably the protein powder—it’s amazing how much they vary! Start with less and add more almond milk as needed.
- Don’t Overmix the Sprinkles: Trust me, if you stir too much, you’ll end up with a weird gray color (been there)—just fold them in gently.
- Chocolate Shell Consistency: I’ve accidentally overheated the chocolate and ended up with a clumpy mess. If this happens, stir in a tiny splash of milk or coconut oil to smooth it out.
- Chill for Easy Removal: Silicone pans make it a breeze, but if you’re using metal, let the cups sit out for 5 minutes before popping out—they’ll release cleanly.
- Batch Prep: Make a double batch and freeze half. They keep for weeks and are perfect for those “I need something sweet now” moments.
One common mistake is adding too much milk at first—start slow! You can always add more, but you can’t take it out. If you’re multitasking (I always am), it helps to have all your ingredients pre-measured before you start. And here’s a fun trick: if you want perfectly even chocolate shells, pour a little chocolate in the bottom of each muffin cup, freeze for 5 minutes, then add the dough and top with more chocolate. It’s a little more work, but you get that true “cup” look.
Variations & Adaptations
- Vegan: Use plant-based protein powder, maple syrup, and dairy-free white chocolate chips (like Enjoy Life).
- Gluten-Free: Double-check that your protein powder and sprinkles are certified gluten-free. Almond and coconut flours are naturally gluten-free.
- Chocolate Lovers: Swap white chocolate for dark or semi-sweet chocolate chips. Add mini chocolate chips to the dough for double chocolate!
- Nut-Free: Substitute sunflower seed butter for the coconut oil, and use oat flour for almond flour. The taste will be a bit earthier but still delicious.
- Seasonal Fun: Change up the sprinkle colors for holidays—red and green for Christmas, pastels for Easter, orange and black for Halloween. I’ve even done red, white, and blue for July 4th.
One of my favorite twists was using a few drops of almond extract along with the vanilla. It gave the dough a true bakery birthday cake vibe! You can also swirl in a bit of raspberry or strawberry jam for a fruity surprise in the center. If you have nut allergies in the house, oat flour works, but the dough is a bit softer—chill it longer before shaping. Honestly, this recipe is so flexible; don’t be afraid to experiment a bit!
Serving & Storage Suggestions
These birthday cake protein cookie dough cups are best served chilled—straight from the fridge or freezer. The chocolate shell gets that perfect snap, and the dough stays soft and chewy. If you’re packing them for a lunchbox or snack, wrap each cup in a little parchment paper to keep them from sticking together.
Pair these with a cup of cold almond milk or your favorite protein shake for an extra boost. They also go great with coffee, or as a fun party treat alongside fresh fruit. For storing, keep in an airtight container in the fridge for up to a week. For longer storage, freeze in a single layer, then transfer to a freezer bag; they’ll keep for a month (honestly, they never last that long in my house).
To reheat (if you want a melty center), just let them sit at room temp for 10-15 minutes. But, for the best texture and flavor, eat them cold. The flavors meld over time, so if you can wait a day, they taste even more like cake batter—totally worth the patience!
Nutritional Information & Benefits
Each birthday cake protein cookie dough cup has about 120 calories, 5g protein, 10g carbs, and 7g healthy fats (numbers will vary based on exact ingredients). Thanks to almond flour and coconut oil, you get a dose of vitamin E and healthy monounsaturated fats. The protein powder helps keep you full and supports muscle recovery—perfect post-workout or for curbing afternoon cravings.
This recipe is gluten-free and can easily be made dairy-free and vegan. Watch out for possible allergens in the protein powder and sprinkles if you have sensitivities. From a wellness perspective, these cups are a great alternative to traditional cookie dough or candy bars—fun, satisfying, and not loaded with refined sugar. I love knowing I can treat myself and still feel good after!
Conclusion
If you’re searching for a snack that feels like a celebration but fits your healthy lifestyle, these birthday cake protein cookie dough cups are your answer. They’re playful, easy, and packed with the sweet, nostalgic flavor everyone loves. Plus, you can make them your own—swap out ingredients, double the sprinkles, or sneak in a little jam surprise.
I love this recipe because it brings smiles to everyone who tries it (and, let’s be honest, makes me feel like a kid again). Give them a try, and let me know your favorite twists! Drop a comment below if you made them, share your photos, or tag me on Pinterest—I can’t wait to see your creations. Happy snacking, and here’s to treating yourself to a little birthday magic, any day you need it!
Frequently Asked Questions
Are birthday cake protein cookie dough cups safe to eat raw?
Yes! There are no eggs or raw wheat flour in this recipe, so they’re totally safe to enjoy straight from the fridge or freezer.
Can I use a different protein powder?
Absolutely. Any vanilla-flavored protein powder will work, whether it’s whey, plant-based, or even collagen. Some absorb more liquid, so adjust the almond milk as needed.
How do I make these nut-free?
Swap almond flour for oat flour and use sunflower seed butter instead of coconut oil. Make sure your sprinkles and protein powder are nut-free, too.
Can I make these ahead for meal prep?
Yes! These cups store beautifully in the fridge for up to a week or in the freezer for a month. They’re great for grab-and-go snacks.
What if I don’t have a mini muffin pan?
No worries—use a regular muffin pan for bigger cups, or line a baking dish and make bars. You can even use silicone ice cube molds for mini bites!
PrintBirthday Cake Protein Cookie Dough Cups

These Birthday Cake Protein Cookie Dough Cups are a fun, healthy, no-bake snack that tastes like a celebration in every bite. Packed with protein and nostalgic birthday cake flavor, they’re perfect for lunchboxes, post-workout treats, or anytime you want a guilt-free indulgence.
- Prep Time: 10 minutes
- Cook Time: 0 minutes
- Total Time: 30 minutes
- Yield: 12 cups 1x
- Category: Snack
- Cuisine: American
Ingredients
- 1 cup (112g) almond flour (fine blanched)
- 1/2 cup (40g) vanilla protein powder (whey or plant-based)
- 2 tablespoons (14g) coconut flour
- 3 tablespoons (45ml) coconut oil, melted
- 1/4 cup (60ml) maple syrup or honey (or agave)
- 2 tablespoons (30ml) unsweetened almond milk (or any milk)
- 2 teaspoons (10ml) pure vanilla extract
- Pinch of salt
- 2–3 tablespoons (25g) rainbow sprinkles
- 1/2 cup (85g) white chocolate chips or white melting wafers
- 1 tablespoon (15ml) coconut oil (for chocolate shell)
- Extra rainbow sprinkles (for topping)
Instructions
- In a medium mixing bowl, combine almond flour, vanilla protein powder, and coconut flour. Stir together with a fork to break up any lumps.
- Add melted coconut oil, maple syrup, almond milk, vanilla extract, and a pinch of salt. Mix until a thick, slightly sticky dough forms. If too dry, add a splash more milk.
- Gently fold in rainbow sprinkles. Do not overmix to prevent color bleeding.
- Using a small cookie scoop or tablespoon, divide the dough into 12 even portions. Roll each into a ball, then flatten slightly to fit the bottom of a mini muffin cup. Press gently to spread the dough to the edges.
- Place the pan in the freezer for 10-15 minutes to firm up the dough.
- In a microwave-safe bowl, combine white chocolate chips and coconut oil. Microwave in 15-second bursts, stirring in between, until smooth and glossy. (Or melt gently in a double boiler.)
- Remove the dough cups from the freezer. Spoon about 2 teaspoons of melted chocolate over each cup, tilting the tray to cover evenly. Sprinkle extra rainbow sprinkles on top before the chocolate sets.
- Return the pan to the freezer for 10-15 minutes, or until the chocolate shell is firm.
- Pop the cups out and enjoy! Store in the fridge or freezer.
Notes
For vegan cups, use plant-based protein powder, maple syrup, and dairy-free white chocolate. For nut-free, substitute oat flour for almond flour and sunflower seed butter for coconut oil. Dough texture may vary depending on protein powder; add milk as needed. Store in an airtight container in the fridge for up to a week or freeze for up to a month. Best served chilled for optimal texture.
Nutrition
- Serving Size: 1 cup
- Calories: 120
- Sugar: 6
- Sodium: 40
- Fat: 7
- Saturated Fat: 4
- Carbohydrates: 10
- Fiber: 2
- Protein: 5
Keywords: birthday cake, protein, cookie dough, healthy snack, no-bake, gluten-free, dairy-free, vegan option, funfetti, meal prep, post-workout, easy dessert



