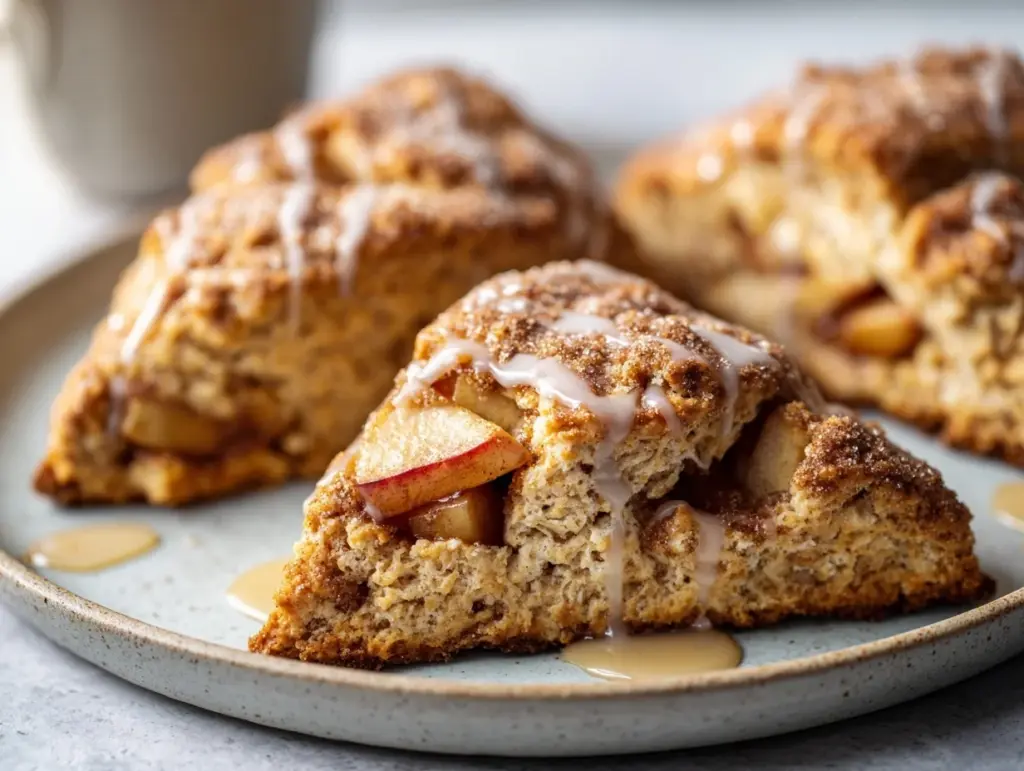
The sweet, buttery scent of caramel apple pie scones wafting through my kitchen is pretty much the definition of cozy fall mornings. Honestly, these scones are my autumn love language—warm, crumbly, and packed with all the apple pie flavors I grew up craving every October. If you’re anything like me, you probably crave that perfect balance of crisp apples, gooey caramel, and a hint of cinnamon spice the moment leaves start to crunch underfoot. Well, these caramel apple pie scones with maple vanilla glaze are exactly that, but in a breakfast treat you can whip up at home.
I stumbled onto this recipe during a chilly apple-picking weekend with my family. We had way too many apples (classic me, always overestimating), and after a few pies and a batch of applesauce, I wanted something different. That’s when I started experimenting with scones—and wow, did it pay off. The tender crumb, chunks of juicy apple, and pools of gooey caramel bits remind me of a bakery treat but with the nostalgia of homemade apple pie. Oh, and that maple vanilla glaze? It’s like a cozy sweater for your scone—it just ties everything together and makes you want to curl up with a mug of something warm.
Whether you’re baking for a fall brunch, looking to impress guests (or, let’s face it, yourself), or just need a sweet pick-me-up with your morning coffee, this caramel apple pie scones recipe fits the bill. I’ve tested this recipe more times than I can count—tweaked the flour, adjusted the spice, and even tried it with gluten-free flour for my best friend. It’s always a hit, never lasts long, and I bet you’ll fall in love at first bite.
Why You’ll Love This Caramel Apple Pie Scones Recipe
- Quick & Easy: You can have these scones ready in under an hour, making them perfect for impromptu weekend breakfasts or when you want to treat yourself with minimal fuss.
- Simple Ingredients: No need for any fancy specialty products—just grab some crisp apples, caramel candies or chips, and the usual baking staples. Most of these are probably in your pantry already.
- Ultimate Fall Flavor: Every bite is packed with apple pie goodness—think fresh apples, cinnamon, brown sugar, and a dreamy maple vanilla glaze that tastes like autumn in dessert form.
- Crowd-Pleaser: These scones disappear fast at brunches, bake sales, or family get-togethers. Even picky eaters (I have a couple in my house) always come back for seconds.
- Bakery-Style Results at Home: The texture is perfectly tender and crumbly, with golden brown edges and gooey caramel pockets—no dry, dense scones here!
Honestly, what sets my caramel apple pie scones recipe apart is the way the apples are folded in for maximum juiciness, and the use of real caramel bits (not just caramel flavoring). I also lightly chill the dough before baking, which gives those high, flaky layers you see in bakery scones. And that maple vanilla glaze—well, let’s just say I sometimes double it because it’s just that good.
This recipe isn’t just a breakfast treat, it’s a little slice of comfort. I love how it brings people together—my kids help chop the apples, my partner sneaks extra caramel, and the house fills with the kind of smell that makes everyone pause what they’re doing and wander into the kitchen. If you’re looking for a new fall tradition or something special to serve guests without a ton of stress, I promise you’ll reach for this recipe again and again.
What Ingredients You Will Need
This caramel apple pie scones recipe relies on a handful of simple, wholesome ingredients to deliver bakery-worthy flavor and texture. Most are pantry staples, and a few can be easily swapped if you’re missing something or need to adjust for dietary needs. Here’s what you’ll gather:
- For the Scones:
- 2 cups (250g) all-purpose flour (for tender, crumbly texture; use a 1:1 gluten-free blend if desired)
- 1/4 cup (50g) light brown sugar (adds a caramel-like depth)
- 2 tsp baking powder (ensures lift and flakiness)
- 1/2 tsp baking soda (aids rise and tenderness)
- 1/2 tsp fine sea salt (balances sweetness)
- 1 tsp ground cinnamon (classic apple pie spice)
- 1/4 tsp ground nutmeg (optional, but adds warmth)
- 6 tbsp (85g) unsalted butter, very cold and cubed (I prefer Kerrygold for richness)
- 1 large egg, cold
- 1/2 cup (120ml) heavy cream (plus extra for brushing tops; can sub full-fat coconut milk for dairy-free)
- 1 tsp pure vanilla extract
- 1 cup (120g) peeled, diced apple (Granny Smith or Honeycrisp are my go-tos for tartness and structure)
- 1/2 cup (90g) caramel baking bits or soft caramel candies, chopped (I use Kraft caramels if I can’t find the bits)
- For the Maple Vanilla Glaze:
- 3/4 cup (90g) powdered sugar
- 2 tbsp (30ml) pure maple syrup (spring for the real stuff—trust me!)
- 1/2 tsp vanilla extract
- 1-2 tbsp (15-30ml) milk or cream (just enough to reach drizzling consistency; dairy-free milk works fine)
- Pinch salt
Ingredient Tips: If you’re out of heavy cream, half-and-half can pinch-hit. For a nutty twist, toss in a small handful of chopped pecans or walnuts. Want extra spice? Up the cinnamon or add a dash of cardamom. And if you find yourself with extra apples, go wild—just don’t overload the dough or it’ll get heavy.
Equipment Needed
- Large mixing bowl: For combining dry and wet ingredients. A big bowl gives you space to work the dough without flour flying everywhere.
- Pastry cutter or two forks: Essential for cutting cold butter into the flour. If you don’t have a cutter, two forks (or even your fingers) work just fine. I’ve used a cheese grater in a pinch—just grate frozen butter right into the mix.
- Measuring cups and spoons: For accuracy. Baking is a little more precise than cooking, so don’t eyeball these measurements.
- Baking sheet: Line it with parchment paper or a silicone mat for easy cleanup and even browning.
- Sharp knife or bench scraper: For cutting the scone dough into wedges.
- Small bowl & whisk: To mix up that dreamy maple vanilla glaze.
- Pastry brush (optional): For brushing the tops with cream before baking. Fingers work in a pinch.
If you’re new to scone-making, don’t worry—no fancy stand mixer needed here. Over the years, I’ve learned that keeping things simple (and not overmixing) is the real trick to great scones. Just make sure your butter and cream are super cold for the best results. If you’re baking on a budget, dollar store tools do the job just fine—just keep them clean and dry so they last.
How to Make Caramel Apple Pie Scones with Maple Vanilla Glaze
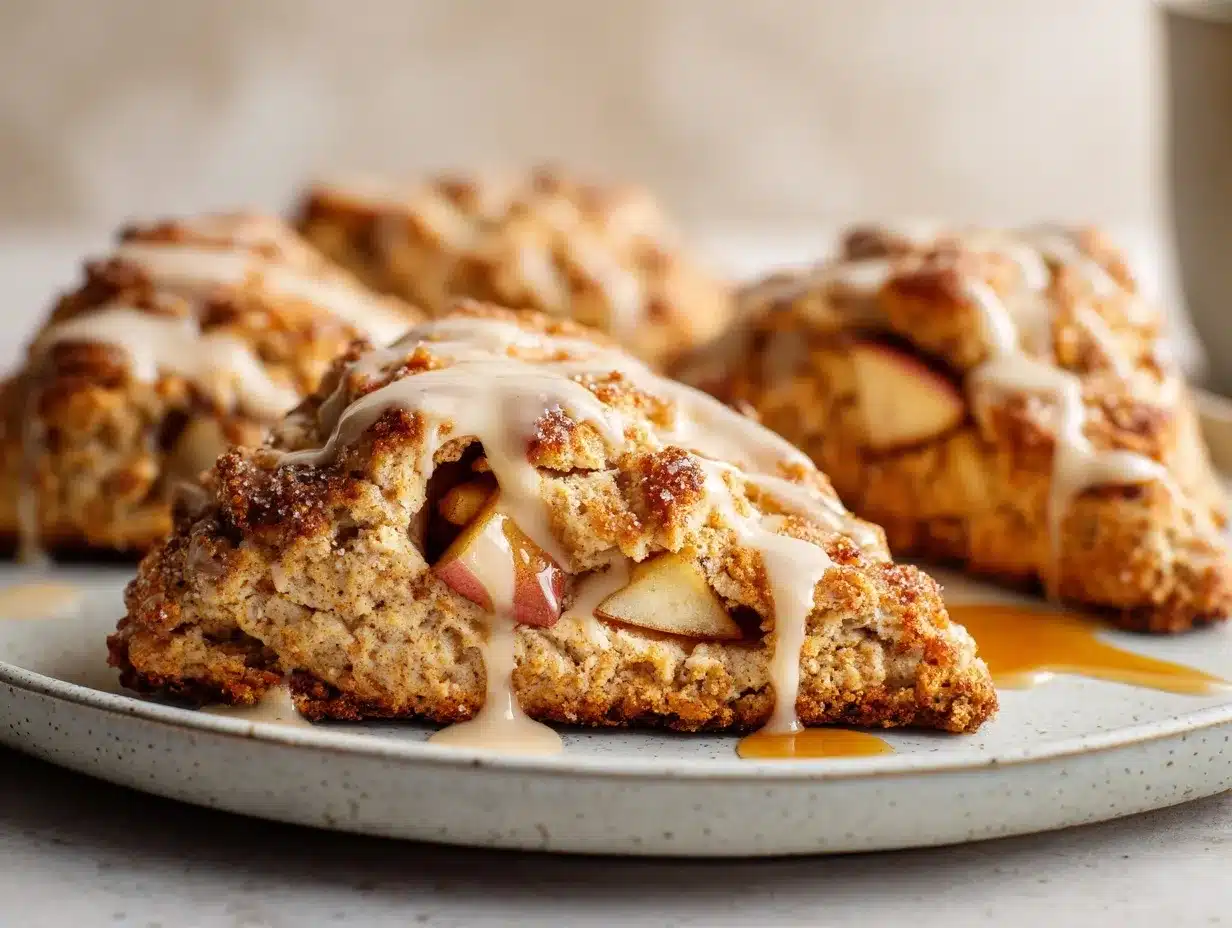
- Prep Ingredients (5 minutes): Peel and dice your apple into small, even cubes (about 1/4-inch). If using caramel candies, chop them into small bits. Measure out all other ingredients and set aside. Cold ingredients make a big difference in scone texture, so keep your butter, egg, and cream in the fridge until you’re ready.
- Mix Dry Ingredients (2 minutes): In a large mixing bowl, whisk together 2 cups (250g) all-purpose flour, 1/4 cup (50g) light brown sugar, 2 tsp baking powder, 1/2 tsp baking soda, 1/2 tsp salt, 1 tsp cinnamon, and 1/4 tsp nutmeg. You want everything evenly dispersed.
- Cut in Butter (3-4 minutes): Add 6 tbsp (85g) cold, cubed unsalted butter to the bowl. Use a pastry cutter, two forks, or your fingertips to work the butter into the flour until the mixture looks like coarse crumbs with some pea-sized bits. If the butter starts to melt, pop the bowl in the fridge for a few minutes.
- Mix Wet Ingredients (2 minutes): In a separate small bowl, whisk together 1 large cold egg, 1/2 cup (120ml) heavy cream, and 1 tsp vanilla extract.
- Combine & Fold (2-3 minutes): Pour the wet mixture over the dry ingredients. Use a fork or spatula to gently mix until just combined—don’t overwork! The dough will look a bit shaggy. Gently fold in 1 cup diced apple and 1/2 cup caramel bits until evenly distributed. If the dough feels too sticky, add a sprinkle of flour.
- Shape the Dough (3 minutes): Turn the dough onto a lightly floured surface. Pat it into a 7-8 inch (18-20cm) round disc, about 1 inch (2.5cm) thick. If it’s warm or sticky, chill for 10 minutes. Using a sharp knife or bench scraper, cut the disc into 8 wedges like a pizza.
- Arrange & Chill (5 minutes): Place the wedges on a parchment-lined baking sheet, about 2 inches apart. For flakier scones, pop the tray in the freezer for 10-15 minutes while your oven preheats to 400°F (200°C).
- Bake (18-22 minutes): Brush the tops of the scones with a little extra cream for shine and color. Bake for 18-22 minutes, or until golden brown at the edges and the centers are set. Your kitchen will smell like a caramel apple wonderland! If caramel melts out during baking, just tuck it back in with a spatula while still warm.
- Cool (15 minutes): Let the scones cool on the baking sheet for 10 minutes, then transfer to a wire rack. Don’t rush the cooling—this helps set the crumb and keeps the glaze from melting right off.
- Make the Glaze (2 minutes): In a small bowl, whisk together 3/4 cup (90g) powdered sugar, 2 tbsp (30ml) pure maple syrup, 1/2 tsp vanilla extract, 1-2 tbsp (15-30ml) milk or cream, and a pinch of salt until smooth and pourable. If it’s too thick, add a bit more milk; too thin, add more sugar.
- Drizzle & Serve (2 minutes): Once scones are mostly cool, drizzle generously with the maple vanilla glaze. The glaze will set after a few minutes, but I usually sneak a scone before it’s fully set—no regrets!
Note: If your scones are spreading too much, it’s likely the butter got too warm. Chill the shaped scones before baking for the best results. And if your caramel is sticking, line your pan well and use a thin spatula to lift them once cool.
Pro Tips & Scone Techniques
- Keep Everything Cold: Cold butter and cream are the secrets to flaky, tall scones. Sometimes I even chill my flour for 10 minutes—sounds silly, but it works!
- Don’t Overmix: Stir until the dough just comes together, then stop. Overmixing makes scones tough and dense. The dough should look a little messy—embrace it!
- Use Fresh Baking Powder: Old leavening agents can lead to flat scones. I learned this the hard way—always check the date before baking.
- Chill Before Baking: If your kitchen is warm, shaped scones benefit from a quick chill. It helps the butter stay solid until it hits the oven, creating those irresistible flaky layers.
- Slice Cleanly: Use a sharp knife or a bench scraper dusted with flour to cut your dough into wedges. A jagged cut can mess with the rise.
- Troubleshooting: If your scones are dry, try adding an extra tablespoon of cream. If they’re too wet, dust with a bit more flour. Sticky dough is normal, but it shouldn’t be unworkable.
- Multi-tasking: While the scones chill or bake, prep your maple vanilla glaze to save time. I always use this window to tidy up or pour myself a second cup of coffee.
I’ve made every scone mistake in the book—forgotten baking powder, overworked the dough, even baked on a too-hot tray. But every batch taught me something, and with these tips, you’re set up for scone success!
Variations & Adaptations
- Gluten-Free: Swap the all-purpose flour for a 1:1 gluten-free blend (like Bob’s Red Mill or King Arthur Measure for Measure). The texture stays surprisingly close to the original!
- Vegan: Use cold coconut oil or plant-based butter in place of regular butter, and substitute the egg with a flax egg (1 tbsp ground flax + 2.5 tbsp water, let sit 5 minutes). Use coconut cream and non-dairy milk for the glaze.
- Nutty Apple Scones: Stir in a handful of chopped toasted pecans or walnuts for crunch. I sometimes add pecans when making these for my dad—he loves the extra texture.
- Spice It Up: Add a pinch of ground ginger or allspice for a deeper, spicier flavor profile. Perfect for those who love big autumn spice blends.
- Different Apples: Try Pink Lady for a sweeter scone, or toss in a mix of apple varieties for complexity.
- Caramel-Free: If you’re out of caramel bits, these scones are still fabulous without. Just up the apple and glaze for more natural sweetness.
My personal favorite twist? Swapping half the apple for diced pear and using a brown butter glaze instead of maple—insanely good for early winter brunches! Feel free to riff on these scones to match your own cravings or dietary needs.
Serving & Storage Suggestions
These caramel apple pie scones are best enjoyed warm, fresh from the oven, with the glaze just barely set—absolute fall magic. For a pretty presentation, arrange scones on a rustic wooden board and drizzle the glaze in a zigzag pattern. Sprinkle with a little extra cinnamon or a few apple slices for that “wow” factor at brunch or on your Pinterest feed.
Pair these scones with hot apple cider, a bold cup of coffee, or even a chai latte. They’re also lovely alongside scrambled eggs and crispy bacon for a hearty breakfast spread.
To store, let scones cool completely, then place in an airtight container at room temperature for up to 2 days. For longer keeping, refrigerate for up to 5 days or freeze (unglazed) for up to 2 months—just thaw overnight and reheat in a 300°F (150°C) oven for 8-10 minutes. Glaze after reheating for the freshest taste. The flavors deepen overnight, so day-two scones are even more apple-pie-like!
Nutritional Information & Benefits
Each caramel apple pie scone (with glaze) contains roughly 320 calories, 5g protein, 14g fat, and 48g carbs. The apples provide fiber, vitamin C, and a dose of antioxidants, while using real maple syrup adds trace minerals and a deeper flavor than corn syrup-based glazes. If you swap in whole wheat or gluten-free flour, you’ll get a little extra fiber!
These scones are vegetarian and can be made nut-free (just leave out the nuts). Allergens include dairy, gluten, and eggs, but the recipe adapts easily for most dietary needs. I love that these scones offer the comfort of apple pie with less sugar and more wholesome ingredients—perfect for a cozy treat that doesn’t feel like a total splurge.
Conclusion
If you’re craving all the flavors of a classic caramel apple pie but want something easy enough for a weekday breakfast (or a lazy Sunday brunch), these caramel apple pie scones are your new go-to. They’re tender, packed with juicy apples and gooey caramel, and that maple vanilla glaze is honestly the cherry on top.
Don’t be afraid to make these your own—swap in your favorite apples, add a handful of nuts, or go wild with the spices. That’s the beauty of homemade scones: you get bakery-level results, but totally on your terms. I keep coming back to this recipe every fall, and it’s become a family tradition that I look forward to all year. I hope it brings as much joy (and mouthwatering aroma) to your home as it does to mine!
If you try this recipe, leave a comment below—let me know your favorite variations or how your batch turned out. Share it on Pinterest or tag me on Instagram so I can see your gorgeous scones! Happy baking, and may your kitchen always smell like caramel apples and cinnamon.
Frequently Asked Questions
How do I stop my scones from getting dry?
Be sure not to overmix the dough and keep your butter and cream cold. If your dough seems too crumbly, add an extra splash of cream. Also, don’t overbake—pull them out when the edges are golden and centers are just set.
Can I make caramel apple pie scones ahead of time?
Yes! You can freeze unbaked, cut scone dough for up to 2 months. Bake straight from frozen, adding 2-3 extra minutes to the baking time. Baked scones also keep for several days and can be reheated.
What kind of apples work best in this recipe?
I love Granny Smith for their tartness and ability to hold shape, but Honeycrisp, Pink Lady, or Fuji apples all work well. Use what you have—just avoid mealy apples like Red Delicious.
Can I use store-bought caramel sauce instead of caramel bits?
Caramel bits or chopped soft caramels hold their shape better, but in a pinch, you can swirl a few dollops of thick caramel sauce into the dough. Just be gentle to prevent the dough from getting too wet.
Is the maple vanilla glaze necessary?
It takes these scones to the next level, but they’re still delicious without it! For a lighter option, dust with powdered sugar or serve plain with a slather of butter.
PrintCaramel Apple Pie Scones

These tender, bakery-style scones are packed with juicy apples, gooey caramel bits, and warm cinnamon spice, then finished with a luscious maple vanilla glaze. Perfect for cozy fall breakfasts or brunches, they deliver all the flavors of caramel apple pie in an easy homemade treat.
- Prep Time: 15 minutes
- Cook Time: 18-22 minutes
- Total Time: 40-45 minutes
- Yield: 8 scones 1x
- Category: Breakfast
- Cuisine: American
Ingredients
- 2 cups (250g) all-purpose flour (or 1:1 gluten-free blend)
- 1/4 cup (50g) light brown sugar
- 2 tsp baking powder
- 1/2 tsp baking soda
- 1/2 tsp fine sea salt
- 1 tsp ground cinnamon
- 1/4 tsp ground nutmeg (optional)
- 6 tbsp (85g) unsalted butter, very cold and cubed
- 1 large egg, cold
- 1/2 cup (120ml) heavy cream (plus extra for brushing tops; or full-fat coconut milk for dairy-free)
- 1 tsp pure vanilla extract
- 1 cup (120g) peeled, diced apple (Granny Smith or Honeycrisp recommended)
- 1/2 cup (90g) caramel baking bits or soft caramel candies, chopped
- 3/4 cup (90g) powdered sugar (for glaze)
- 2 tbsp (30ml) pure maple syrup (for glaze)
- 1/2 tsp vanilla extract (for glaze)
- 1–2 tbsp (15-30ml) milk or cream (for glaze; dairy-free milk works)
- Pinch salt (for glaze)
Instructions
- Peel and dice the apple into small 1/4-inch cubes. Chop caramel candies if using. Keep butter, egg, and cream cold until ready.
- In a large mixing bowl, whisk together flour, brown sugar, baking powder, baking soda, salt, cinnamon, and nutmeg.
- Add cold, cubed butter. Use a pastry cutter, two forks, or your fingers to cut butter into the flour until the mixture resembles coarse crumbs with some pea-sized bits.
- In a small bowl, whisk together the egg, heavy cream, and vanilla extract.
- Pour wet ingredients over dry ingredients. Gently mix until just combined. Fold in diced apple and caramel bits. If dough is too sticky, add a sprinkle of flour.
- Turn dough onto a lightly floured surface. Pat into a 7-8 inch round disc, about 1 inch thick. Chill for 10 minutes if sticky.
- Cut the disc into 8 wedges. Place wedges on a parchment-lined baking sheet, 2 inches apart.
- Chill scones in the freezer for 10-15 minutes while preheating oven to 400°F (200°C).
- Brush tops with extra cream. Bake for 18-22 minutes, until golden brown at the edges and centers are set.
- Cool scones on the baking sheet for 10 minutes, then transfer to a wire rack.
- For the glaze: In a small bowl, whisk together powdered sugar, maple syrup, vanilla, milk or cream, and a pinch of salt until smooth and pourable.
- Drizzle glaze over mostly cooled scones. Let set for a few minutes before serving.
Notes
Keep all ingredients cold for best results. Do not overmix the dough—stop as soon as it comes together. Chill shaped scones before baking for flakier texture. Scones can be made gluten-free or vegan with appropriate substitutions. Store in an airtight container at room temperature for 2 days, or freeze unglazed scones for up to 2 months.
Nutrition
- Serving Size: 1 scone
- Calories: 320
- Sugar: 19
- Sodium: 310
- Fat: 14
- Saturated Fat: 8
- Carbohydrates: 48
- Fiber: 2
- Protein: 5
Keywords: caramel apple scones, apple pie scones, fall breakfast, maple glaze, easy scones, homemade scones, apple scones, caramel scones, autumn brunch, bakery scones