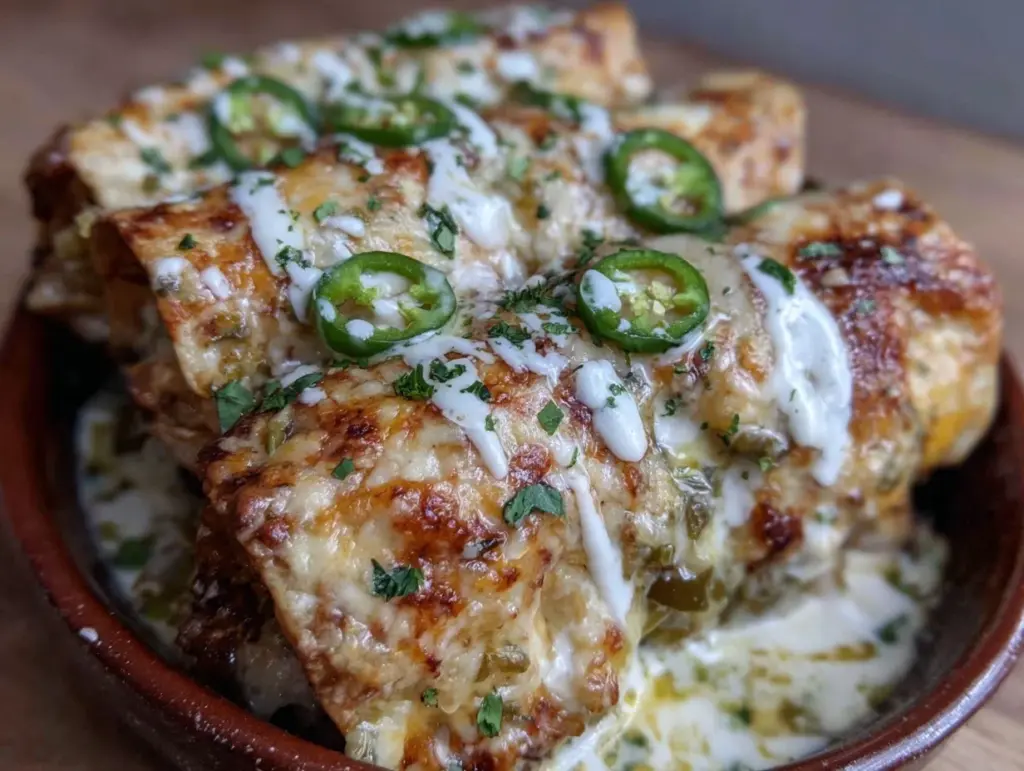
I figured green chile enchiladas would be spicy, messy, and a bit of a fuss in the kitchen. It took about one bite for that to fall apart completely—turns out creamy green Hatch chile cheese enchiladas with sour cream sauce are the kind of dinner that sneaks up on you with comfort and a gentle kick, not chaos. The first time I made these, I was halfway through roasting the Hatch chiles, expecting the kitchen to smell like a fire drill. Instead, a warm, smoky aroma filled the room, paired with a hint of tangy cheese melting into the sauce. Honestly, I thought the sour cream sauce would be bland or too heavy, but it ended up bright and silky, perfectly balancing the subtle heat of the roasted chiles.
What surprised me most was how the layers of flavors came together without any fancy tricks or complicated steps. This recipe demands nothing more than a willingness to roast some chiles, blend a few ingredients, and roll some tortillas. But don’t underestimate it—the result feels like something you’d wait hours for at a restaurant, not whip up in under an hour. The cheese pulls, the creaminess, the slightly charred edge of the Hatch chiles—it’s all there in one satisfying bite.
It stuck with me because it’s the kind of dish you want to make again and again, not just for the taste, but for the ritual of putting it together. It’s a reminder that sometimes the simplest ingredients, like fresh Hatch chiles, can transform a classic cheese enchilada into something deeply personal and utterly delicious. If you’ve ever wrestled with soggy enchiladas or dry cheese fillings, this recipe will quietly reassure you that creamy and green can be a perfect match—without any fuss, just the right amount of comfort and flavor.
Why You’ll Love This Recipe
Making creamy green Hatch chile cheese enchiladas with sour cream sauce is a treat, and here’s why I keep coming back to this version:
- Quick & Easy: You can roast the chiles and have these enchiladas ready in about 50 minutes, perfect for busy weeknights or when you want a comforting meal with minimal stress.
- Simple Ingredients: No weird or hard-to-find items here—just Hatch chiles, cheese, tortillas, and a handful of pantry staples. I usually keep mild cheddar or Monterey Jack on hand for the best melt.
- Perfect for Any Occasion: Casual family dinners, weekend gatherings, or even a special brunch—these enchiladas fit right in without stealing the spotlight but never feeling boring.
- Crowd-Pleaser: Kids love the cheesy goodness, and adults appreciate the subtle smoky heat from the Hatch chiles. It’s a rare recipe that satisfies both ends of the spice spectrum.
- Unbelievably Delicious: The creamy sour cream sauce is the real MVP here, giving these enchiladas a luscious texture and tang that cuts through the richness.
What sets this recipe apart? It’s the way the Hatch chiles get roasted just right to bring out their natural sweetness and mild heat, then blended into a sauce that’s creamy but not heavy. The cheese filling is straightforward but thoughtfully balanced, and the sour cream sauce keeps everything moist without drowning the flavors. This isn’t just another cheese enchilada recipe—it’s the kind you close your eyes for when the first bite melts on your tongue.
If you’ve tried other enchiladas and felt like something was missing, this recipe fills that gap with a perfect harmony of smoky, creamy, and cheesy notes that feel like a hug from the inside. It’s comfort food that doesn’t feel like a cheat, and honestly, that’s rare enough to make it a kitchen staple.
What Ingredients You Will Need
This recipe uses simple, wholesome ingredients to deliver bold flavor and satisfying texture without the fuss. Most are pantry staples or easy to find at your local market, with the Hatch chiles bringing the star power.
- For the Roasted Hatch Chile Sauce:
- 6-8 fresh Hatch green chiles, roasted, peeled, and seeded (if you can’t find Hatch, Anaheim or poblano chiles are fine substitutes)
- 1 cup chicken broth (or vegetable broth for vegetarian option)
- 1/2 cup sour cream (full-fat for best creaminess)
- 2 cloves garlic, minced
- 1 small onion, finely chopped
- 1 tablespoon olive oil
- Salt and freshly ground black pepper to taste
- For the Cheese Filling:
- 2 cups shredded Monterey Jack cheese (or a mild cheddar blend)
- 1 cup shredded mozzarella cheese
- 1/2 cup cream cheese, softened (adds richness and creaminess)
- 1/4 cup chopped fresh cilantro (optional but recommended for brightness)
- Salt to taste
- Other Ingredients:
- 12 corn tortillas (soft, fresh if possible)
- 1 tablespoon vegetable oil (for warming tortillas)
- Extra shredded cheese for topping (about 1 cup)
- Sour cream for garnish
- Fresh lime wedges (optional, for serving)
Ingredient Tips: I recommend Hatch chiles from Frontera if you want a canned option, but fresh roasted is unbeatable for flavor. When roasting, char the skins until blackened, then steam in a bowl covered with a towel for easy peeling. For cheese, I tend to use a mix of Monterey Jack and mozzarella for melty stretchiness, but feel free to use your favorite Mexican cheese blend. If you prefer a dairy-free version, swap sour cream with coconut yogurt and cream cheese with a plant-based alternative.
Equipment Needed
- Cast iron skillet or grill pan (for roasting chiles and warming tortillas)
- Blender or food processor (to blend the green chile sauce until silky)
- Large mixing bowl (for combining cheese filling)
- 8×8 or 9×13 inch baking dish (to assemble and bake enchiladas)
- Sharp knife and cutting board (for prepping chiles and onions)
- Measuring cups and spoons
If you don’t have a blender, a hand immersion blender works fine for the sauce, just be sure to chop the chiles fine before blending. For roasting chiles, a gas stove flame is ideal, but a grill or broiler works well too. I’ve found a nonstick skillet helpful for warming tortillas without tearing them. Budget-wise, you don’t need fancy gadgets here—just the basics you likely have already.
Preparation Method
- Roast the Hatch Chiles: Place fresh Hatch chiles directly on a gas stove burner or under a broiler. Turn occasionally until the skin is charred and blistered all over, about 8-10 minutes. Transfer chiles to a bowl and cover with plastic wrap or a kitchen towel. Let steam for 10 minutes to loosen skins.
- Peel and Seed: Once cooled, peel off the skins using your fingers or a paper towel (don’t rinse or you’ll wash away flavor). Slice open each chile and remove seeds and membranes for mild heat, or leave a few seeds if you like it spicier. Roughly chop the peeled chiles.
- Make the Sour Cream Sauce: Heat olive oil in a small skillet over medium heat. Add chopped onion and garlic; sauté until softened, about 3-4 minutes. Transfer onion and garlic to a blender along with roasted chiles, chicken broth, and sour cream. Blend until smooth and creamy. Taste and season with salt and pepper. Set aside.
- Prepare Cheese Filling: In a large bowl, combine shredded Monterey Jack, mozzarella, cream cheese, chopped cilantro, and a pinch of salt. Mix well until evenly combined and creamy.
- Warm the Tortillas: Heat a skillet over medium heat. Lightly brush each tortilla with vegetable oil and warm for about 20 seconds per side until pliable but not crispy. This prevents cracking when rolling.
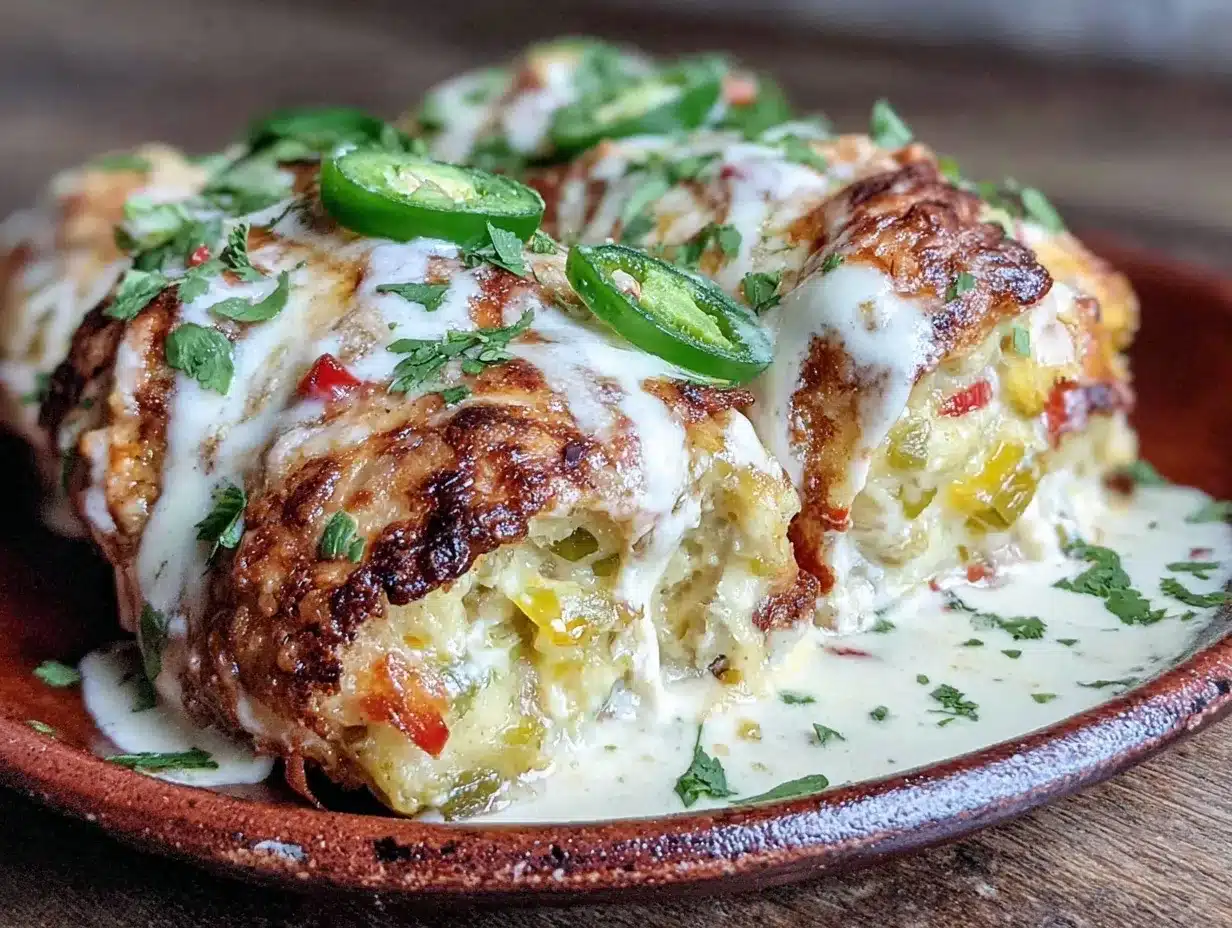
- Assemble the Enchiladas: Preheat oven to 375°F (190°C). Pour a thin layer of green chile sauce on the bottom of your baking dish to prevent sticking. Spoon about 3 tablespoons of cheese filling onto the center of each tortilla, roll it up tightly, and place seam side down in the dish. Repeat with remaining tortillas.
- Pour Sauce and Top: Pour remaining green chile sour cream sauce evenly over the rolled enchiladas. Sprinkle an extra cup of shredded cheese on top for bubbling goodness.
- Bake: Bake uncovered for 20-25 minutes, until cheese is melted and bubbly and sauce is slightly golden around edges. Let rest for 5 minutes before serving.
Pro Tip: If your sauce seems too thick before baking, stir in a splash more broth or sour cream to loosen it. The sauce should coat the enchiladas but not drown them. Also, avoid overfilling tortillas to prevent tearing while rolling.
Cooking Tips & Techniques
There’s a handful of things I learned the hard way making creamy green Hatch chile cheese enchiladas:
- Roasting chiles: Don’t rush this step. The charred skin adds smoky depth that canned peppers just can’t mimic. Use tongs to turn them so your fingers don’t get burned (learned that the painful way!).
- Peeling without rinsing: Resist the urge to wash the chiles after peeling. The black bits add flavor and color to your sauce.
- Warming tortillas: This is key for rolling enchiladas that don’t crack or fall apart. I warm mine just until soft and supple but not crispy.
- Cheese blending: Mixing cream cheese into shredded cheese gives the filling body and smoothness without sogginess. Tried it without cream cheese once and ended up with dry, crumbly enchiladas—lesson learned!
- Sauce consistency: The sauce should be pourable but not watery. If too thin, it’ll make the tortillas soggy; too thick, and it won’t spread well. Adjust with broth or sour cream as needed.
- Baking uncovered: Let that cheese bubble and brown slightly for a toasty finish. Covering traps steam and can make the enchiladas mushy.
Timing-wise, multitask by roasting chiles while prepping cheese filling and warming tortillas. This keeps you moving without feeling overwhelmed. And don’t forget to let those enchiladas rest after baking—flavors settle and the cheese firms up just right.
Variations & Adaptations
This recipe is surprisingly flexible, so you can adapt it for different tastes and dietary needs:
- Vegetarian Version: Use vegetable broth in the sauce and skip any meat add-ins. The Hatch chiles and cheese combo keeps it hearty enough to satisfy.
- Spicy Kick: Leave some of the chile seeds in or add a pinch of cayenne pepper to the sauce for extra heat. I tried this once for a game-day party and it vanished fast!
- Gluten-Free: Ensure corn tortillas are 100% corn and free from cross-contamination. This recipe naturally fits a gluten-free diet.
- Protein Boost: Add shredded cooked chicken or black beans to the cheese filling for a more filling meal. Just mix well before rolling.
- Dairy-Free: Swap sour cream with coconut or cashew-based cream, and use vegan cheese alternatives. The sauce might be a bit different but still creamy and satisfying.
For an alternate cooking method, you can assemble enchiladas in a slow cooker with sauce and cheese, cooking on low for 2-3 hours. Just skip the baking step and warm tortillas carefully to avoid breaking.
Serving & Storage Suggestions
These creamy green Hatch chile cheese enchiladas are best served hot, straight from the oven, with a dollop of sour cream and a sprinkle of fresh cilantro on top. A squeeze of lime adds a lovely brightness and cuts through the richness.
Pair with simple sides like Mexican rice, refried beans, or a crisp green salad to balance the meal. For drinks, a chilled margarita or a light Mexican lager complements the smoky flavors nicely.
To store leftovers, cover tightly and refrigerate for up to 3 days. Reheat gently in the oven at 350°F (175°C) for 10-15 minutes to maintain the sauce’s creaminess and avoid drying out. You can also freeze individual portions wrapped well in foil and plastic wrap for up to 2 months. Thaw overnight in the fridge before reheating.
Flavors tend to deepen after a day, so if you have the patience, leftovers might taste even better the next day. Just reheat slowly to keep that signature creamy texture intact.
Nutritional Information & Benefits
Each serving (about 2 enchiladas) offers roughly 400-450 calories, with 22-25g of fat, 30g of carbohydrates, and 18-20g of protein. The Hatch chiles bring vitamin C and antioxidants, while the cheese provides calcium and protein for muscle repair.
This dish is naturally gluten-free and can be adapted to be vegetarian or dairy-free. The sour cream sauce adds probiotics and tang without overwhelming richness when using full-fat sour cream in moderation.
From a wellness perspective, I appreciate how this recipe balances indulgence with wholesome ingredients like fresh chiles and minimal processed components. It’s a satisfying meal that doesn’t leave you feeling weighed down.
Conclusion
These creamy green Hatch chile cheese enchiladas with sour cream sauce are a perfect example of how a few simple ingredients can come together to create something genuinely comforting and flavorful. The recipe invites you to enjoy the process—roasting chiles, blending a smooth sauce, and rolling cheesy tortillas—without any stress or fancy techniques.
Customize it to your taste, whether you like it mild or spicy, vegetarian or with an added protein punch. This is the kind of recipe that feels like a hug on a plate, the kind you’ll want to make again for family dinners or casual get-togethers.
Personally, I love coming back to this dish on chilly evenings when I want something both satisfying and a little bit special. If you make it, I’d love to hear how you tweak it or what sides you pair it with—sharing kitchen wins is the best part of cooking, don’t you think?
Frequently Asked Questions
Can I use canned green chiles instead of fresh Hatch chiles?
Yes, canned green chiles are a convenient substitute, but fresh roasted Hatch chiles have a deeper smoky flavor and sweetness that really makes the sauce stand out.
How do I prevent tortillas from tearing when rolling?
Warm tortillas briefly in a skillet with a little oil until soft and pliable. Avoid overfilling with cheese, and roll gently but firmly.
Can I make this recipe ahead of time?
Absolutely! Assemble the enchiladas, cover, and refrigerate for up to 24 hours before baking. You might need to add a few extra minutes to the baking time if chilled.
Is this recipe suitable for vegetarians?
Yes, it’s naturally vegetarian if you use vegetable broth in the sauce. You can also add beans or veggies to the cheese filling for more substance.
What can I serve with these enchiladas?
Classic sides like Mexican rice, refried beans, or a fresh salad pair wonderfully. A squeeze of lime and fresh cilantro garnish add brightness to the rich dish.
For more creamy, comforting recipes with a twist, you might enjoy the creamy key lime pie bars or the creamy scalloped potatoes with ham—both bring that homemade richness to the table in their own unique ways.
Pin This Recipe!

Creamy Green Hatch Chile Cheese Enchiladas with Easy Homemade Sour Cream Sauce

These creamy green Hatch chile cheese enchiladas feature a luscious sour cream sauce and a melty cheese filling, delivering a comforting meal with a gentle smoky kick. Perfect for quick weeknight dinners or casual gatherings.
- Prep Time: 20 minutes
- Cook Time: 30 minutes
- Total Time: 50 minutes
- Yield: 6 servings 1x
- Category: Main Course
- Cuisine: Mexican
Ingredients
- 6–8 fresh Hatch green chiles, roasted, peeled, and seeded (or Anaheim or poblano chiles as substitutes)
- 1 cup chicken broth (or vegetable broth for vegetarian option)
- 1/2 cup sour cream (full-fat for best creaminess)
- 2 cloves garlic, minced
- 1 small onion, finely chopped
- 1 tablespoon olive oil
- Salt and freshly ground black pepper to taste
- 2 cups shredded Monterey Jack cheese (or mild cheddar blend)
- 1 cup shredded mozzarella cheese
- 1/2 cup cream cheese, softened
- 1/4 cup chopped fresh cilantro (optional)
- Salt to taste
- 12 corn tortillas (soft, fresh if possible)
- 1 tablespoon vegetable oil (for warming tortillas)
- Extra shredded cheese for topping (about 1 cup)
- Sour cream for garnish
- Fresh lime wedges (optional, for serving)
Instructions
- Roast the Hatch chiles directly on a gas stove burner or under a broiler, turning occasionally until skin is charred and blistered, about 8-10 minutes. Transfer to a bowl and cover with plastic wrap or kitchen towel; let steam for 10 minutes.
- Peel off skins without rinsing, slice open each chile, remove seeds and membranes for mild heat or leave some seeds for spicier flavor. Roughly chop the peeled chiles.
- Heat olive oil in a small skillet over medium heat. Add chopped onion and garlic; sauté until softened, about 3-4 minutes.
- Transfer onion, garlic, roasted chiles, chicken broth, and sour cream to a blender. Blend until smooth and creamy. Season with salt and pepper to taste. Set aside.
- In a large bowl, combine shredded Monterey Jack, mozzarella, cream cheese, chopped cilantro, and a pinch of salt. Mix until evenly combined and creamy.
- Heat a skillet over medium heat. Lightly brush each tortilla with vegetable oil and warm about 20 seconds per side until pliable but not crispy.
- Preheat oven to 375°F (190°C). Pour a thin layer of green chile sauce on the bottom of a baking dish to prevent sticking.
- Spoon about 3 tablespoons of cheese filling onto the center of each tortilla, roll tightly, and place seam side down in the dish. Repeat with remaining tortillas.
- Pour remaining green chile sour cream sauce evenly over the rolled enchiladas. Sprinkle about 1 cup of extra shredded cheese on top.
- Bake uncovered for 20-25 minutes until cheese is melted, bubbly, and sauce is slightly golden around edges. Let rest for 5 minutes before serving.
Notes
Do not rinse chiles after peeling to retain smoky flavor. Warm tortillas just until pliable to prevent tearing. Adjust sauce thickness with broth or sour cream as needed. Bake uncovered for a toasty finish. Leftovers store well refrigerated for 3 days or frozen for up to 2 months.
Nutrition
- Serving Size: About 2 enchiladas p
- Calories: 425
- Sugar: 4
- Sodium: 550
- Fat: 24
- Saturated Fat: 14
- Carbohydrates: 30
- Fiber: 4
- Protein: 19
Keywords: green chile enchiladas, Hatch chiles, cheese enchiladas, sour cream sauce, Mexican comfort food, easy enchiladas, vegetarian enchiladas, gluten-free enchiladas



