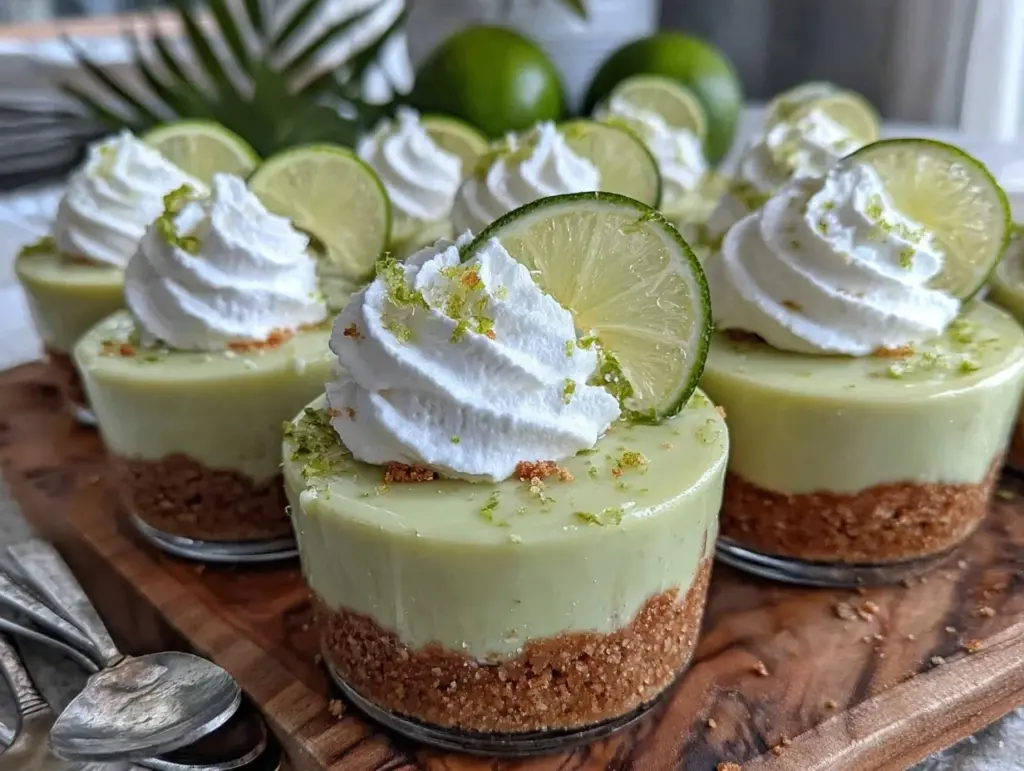
“Wait, you made this without turning on the oven?” my friend asked, eyebrows raised as she eyed the little cups of bright, tangy goodness sitting on my kitchen counter. Honestly, that moment was a bit of a revelation. It started on a day when the last thing I wanted was to wrestle with a hot oven or fuss over complicated steps. The summer sun was blazing, and the thought of baking anything felt like a bad idea. I rummaged through my fridge and pantry, eyeing a can of sweetened condensed milk, some limes, and a bag of graham cracker crumbs. A quick search later, and I was whipping up these creamy no-bake key lime pie cups that turned out to be an absolute crowd-pleaser.
What surprised me most was how effortlessly they came together — no baking, no waiting around, just a simple, zesty treat that felt like sunshine in a cup. Every spoonful hit that perfect balance of tart lime and sweet creaminess, with a buttery crumb base that gave just the right crunch. It was like a mini vacation on a spoon, and honestly, I found myself making these several times in a week (shh, don’t tell anyone).
These cups stuck around in my recipe box because they bring a kind of refreshment that’s hard to put into words. They’re light, yet satisfyingly rich; simple enough for a quick dessert but special enough to impress guests. I realized they’re the kind of treat you come back to when you want something bright and soothing after a long day, or when you want to surprise friends with something fresh and homemade without the usual fuss.
So yeah, this recipe isn’t just another pie — it’s a little moment of joy that’s ready whenever you are.
Why You’ll Love This Recipe
Having tested this recipe multiple times (and shared it with plenty of friends who keep asking for it), I can vouch for why these creamy no-bake key lime pie cups are a keeper:
- Quick & Easy: They come together in under 20 minutes, no oven required — perfect for those hot days or last-minute dessert emergencies.
- Simple Ingredients: No exotic stuff here. You likely have graham crackers, limes, and sweetened condensed milk waiting in your pantry and fridge.
- Perfect for Summer Gatherings: Whether it’s a backyard barbecue or a casual brunch, these cups bring a refreshing zing that everyone loves.
- Crowd-Pleaser: Kids, adults, picky eaters — they all seem to gobble these up without complaint.
- Unbelievably Delicious: The silky texture paired with the bright citrus flavor is like a little slice of summer happiness.
What sets this recipe apart is the no-bake, layered approach that keeps things fuss-free but still impressive. Unlike traditional key lime pies that can be heavy or tricky, these cups have a whipped cream element that lightens the texture beautifully. Plus, I use fresh key lime juice for that authentic punch (but regular limes work just fine if you’re in a pinch). It’s not just a dessert; it’s that go-to refreshing treat that makes you pause and smile after the first bite.
Honestly, if you’re a fan of bright, creamy desserts but hate the idea of baking or complicated steps, this is your new best friend in the kitchen.
What Ingredients You Will Need
This recipe uses simple, wholesome ingredients to deliver bold flavor and satisfying texture without any fuss. Most are pantry staples, and if you need substitutions, I’ve got you covered below.
- Graham cracker crumbs (about 1 ½ cups / 150g) – for a buttery, crunchy base (I love using Honey Maid brand for the perfect texture)
- Unsalted butter (6 tablespoons / 85g), melted – binds the crust together and adds richness
- Sweetened condensed milk (1 can, 14 oz / 396g) – the creamy, sweet backbone of the filling
- Fresh key lime juice (½ cup / 120ml) – the star of the show, providing that signature tart zing (regular lime juice works if needed)
- Heavy whipping cream (1 cup / 240ml), chilled – to whip into fluffy topping that lightens the filling
- Powdered sugar (2 tablespoons / 15g) – sweetens the whipped cream topping gently
- Vanilla extract (1 teaspoon) – adds a subtle warmth to the whipped cream
- Key lime zest (optional, 1 teaspoon) – for extra citrus aroma and garnish
- Fresh berries or mint leaves (optional) – for a pretty, fresh finishing touch
Substitution tips: Use coconut oil instead of butter for a dairy-free crust, almond flour for a gluten-free crust option, or coconut cream whipped instead of heavy cream for a vegan twist. The key lime juice can be swapped for Meyer lemon juice for a different but equally bright flavor.
Equipment Needed
- Mixing bowls: One large bowl for the crust and another for the filling and whipped cream.
- Electric mixer or whisk: An electric hand mixer is great for whipping the cream quickly, but a sturdy balloon whisk works with a bit more elbow grease.
- Measuring cups and spoons: Precision matters here, especially with the lime juice and sugar.
- Spoons or spatulas: For mixing and folding the cream into the filling.
- Serving cups or ramekins: Small glass or plastic cups work beautifully for individual servings.
If you don’t have an electric mixer, don’t sweat it — whipping cream by hand takes a little patience but totally doable (just keep the cream super cold and a steady wrist). For a budget-friendly option, basic kitchen tools are all you need, so no fancy gadgets are required here.
Preparation Method
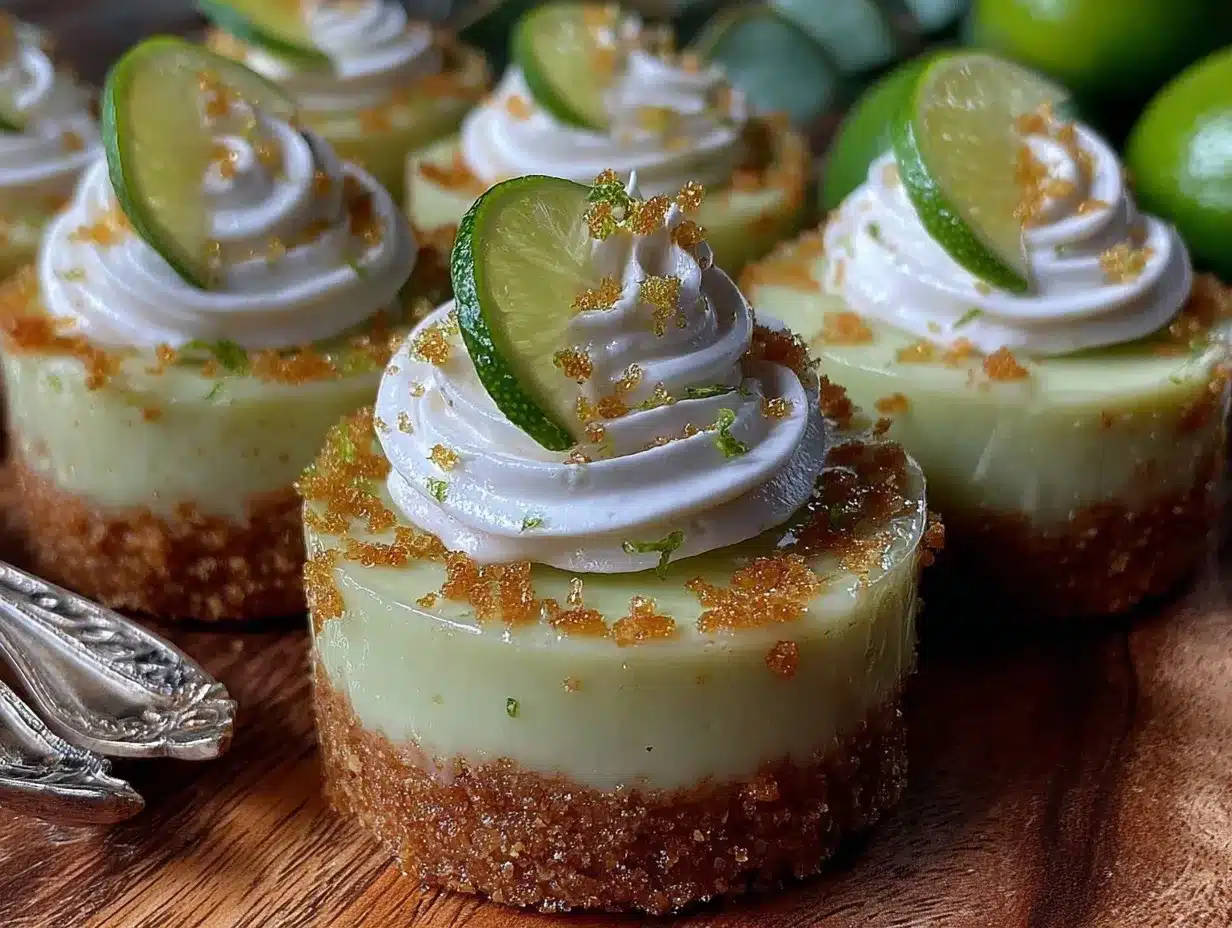
- Make the crust: In a medium bowl, combine 1 ½ cups (150g) graham cracker crumbs with 6 tablespoons (85g) melted unsalted butter. Stir until the mixture resembles wet sand and holds together when pressed. This should take about 3 minutes.
- Press the crust: Spoon the crust mixture evenly into 6 small cups or ramekins (about ¼ cup or 40g per cup). Use the back of a spoon or your fingers to firmly press the crumbs down, creating a compact base. Place the cups in the fridge to chill while you prepare the filling (about 10 minutes). This keeps the crust firm and ready to support the creamy topping.
- Whip the cream: In a chilled bowl, pour 1 cup (240ml) heavy whipping cream. Add 2 tablespoons (15g) powdered sugar and 1 teaspoon vanilla extract. Using an electric mixer or whisk, beat on medium-high speed until soft peaks form — this usually takes 3-5 minutes. Watch closely; you want fluffy cream, not butter.
- Mix the filling: In a separate bowl, combine 1 can (14 oz / 396g) sweetened condensed milk with ½ cup (120ml) fresh key lime juice. Stir until smooth and slightly thickened, about 1-2 minutes. You’ll notice it starts to set as the acid in the lime juice reacts with the milk.
- Fold cream into filling: Gently fold about half of the whipped cream into the lime-condensed milk mixture to lighten it. Then fold in the remaining whipped cream until just combined and velvety smooth. This step is key — fold gently so you keep that airy texture.
- Assemble the cups: Remove the crust cups from the fridge. Spoon the creamy filling evenly over the chilled crust layers, filling each cup nearly to the top. Smooth the surface with the back of a spoon or small spatula.
- Chill and set: Refrigerate the assembled cups for at least 2 hours, or overnight if possible. This lets the flavors meld and the filling firm up to the perfect creamy consistency.
- Garnish and serve: Just before serving, sprinkle with a little key lime zest, fresh berries, or mint leaves for a pop of color and extra freshness.
Pro tip: If your whipped cream starts to deflate during folding, pop the bowl back in the fridge for a few minutes to chill before continuing. It helps keep the texture light and fluffy.
Cooking Tips & Techniques
Making these creamy no-bake key lime pie cups is pretty straightforward, but a few tips can really make your results shine every time.
- Use fresh key lime juice: This makes a big difference. Bottled juice just doesn’t have the same bright, tart flavor. If you can’t find key limes, regular limes will do, but fresh is always best.
- Whip cream properly: Chill your bowl and beaters before whipping. It helps the cream thicken faster and hold its shape better. Stop whipping at soft peaks to avoid turning it into butter.
- Fold gently: When combining whipped cream with the lime mixture, folding slowly keeps the airy texture intact. I’ve learned the hard way that stirring vigorously deflates the cream, resulting in a denser filling.
- Don’t skip chilling: Setting the crust and filling in the fridge is crucial. It helps the crust bind and the filling firm up without baking.
- Crust texture matters: If you like a crunchier crust, press it less tightly; for a firmer base, press more firmly. I like mine somewhere in-between — just enough crunch to contrast with the creamy filling.
Once, I rushed the chilling step and ended up with a slightly runny filling — lesson learned! Patience really pays off here. Also, multitasking helps: whip the cream while the crust chills to save time and keep things moving smoothly.
Variations & Adaptations
These key lime pie cups are pretty flexible, and you can switch things up easily depending on your mood or dietary needs.
- Berry twist: Add a spoonful of fresh raspberries or blueberries between the crust and filling layers for a fruity surprise. I sometimes top with a few berries for a colorful finish.
- Chocolate crust: Swap graham cracker crumbs for chocolate cookie crumbs (like Oreos) for a rich, indulgent base. It adds a nice depth of flavor and pairs surprisingly well with lime.
- Dairy-free option: Use coconut cream whipped instead of heavy cream, and a dairy-free butter substitute for the crust. It’s just as satisfying and creamy without dairy.
- Mini tartlets: Instead of cups, press the crust into mini tart pans and fill with the lime mixture for a more elegant presentation. These look great at parties and are easy to serve.
One of my favorite tweaks was using a splash of lime zest in the whipped cream for an extra citrus punch — it’s subtle but really lifts the flavor profile. Feel free to experiment with these small changes to make the recipe your own.
Serving & Storage Suggestions
Serve these creamy no-bake key lime pie cups chilled, straight from the fridge. The cool temperature intensifies the refreshing lime flavor and keeps the texture silky smooth.
Presentation-wise, clear glass cups show off the pretty layers beautifully. Garnish with a little lime zest or a sprig of fresh mint for a pop of color. They pair wonderfully with light summer drinks or even a cold iced tea for a laid-back afternoon treat.
To store, cover the cups tightly with plastic wrap or lids and keep refrigerated for up to 3 days. The crust might soften slightly over time, but the flavor actually deepens after a day, making leftovers a delight. If you want to store longer, these can be frozen for up to a month — just thaw in the fridge overnight before serving.
Reheat? Nope, these aren’t meant to be warmed up. They’re best enjoyed cold and creamy every time.
Nutritional Information & Benefits
Each serving of these creamy no-bake key lime pie cups contains approximately 250-300 calories, depending on portion size and toppings. The recipe provides a good balance of fats from the cream and butter, a moderate amount of sugar, and a refreshing dose of vitamin C from the fresh lime juice.
Key limes are rich in antioxidants and can support digestion, while the whipped cream and condensed milk offer calcium and some protein. This dessert is not low-calorie, but it’s a lighter alternative to heavier baked pies, especially since it skips the crust-heavy base and baking fats.
For those monitoring gluten, swapping graham cracker crumbs for gluten-free options makes this recipe accessible. The natural citrus flavor also makes it appealing for anyone looking for a bright, less sugary dessert option.
Conclusion
Creamy no-bake key lime pie cups are a refreshing, easy treat that fits perfectly into busy summer days or last-minute entertaining plans. Their simple ingredients and fuss-free method make them approachable for cooks of any skill level, yet the flavor is anything but basic. I love how these cups bring a little brightness and joy without the usual oven hassle.
Feel free to customize with your favorite crusts, toppings, or dairy alternatives — it’s fun to make this recipe truly yours. If you’ve enjoyed recipes like my creamy key lime pie bars, you’ll find these cups hit that same satisfying spot but in a quicker, no-bake format.
Give them a try next time you want a zesty, creamy treat that’s as refreshing as a summer breeze. I’d love to hear how you make them your own!
FAQs About Creamy No-Bake Key Lime Pie Cups
Can I use regular limes instead of key limes?
Yes, regular limes work perfectly fine. Key limes have a slightly more intense flavor, but fresh regular lime juice still gives a nice tartness.
How long do these pie cups last in the fridge?
Stored well, they keep for up to 3 days refrigerated. The flavors actually taste better after a day or so!
Can I make these ahead of time?
Absolutely! Make them a day ahead to let the filling set fully and the flavors meld. Just keep them covered in the fridge.
Is there a gluten-free option for the crust?
Yes, simply swap the graham cracker crumbs for gluten-free cookie crumbs or almond flour for a tasty gluten-free crust.
What if I don’t have an electric mixer to whip the cream?
You can whip cream by hand with a balloon whisk. It takes a bit more time and muscle but works if the cream and bowl are well chilled.
Pin This Recipe!
Creamy No-Bake Key Lime Pie Cups

A quick and easy no-bake dessert featuring a buttery graham cracker crust and a creamy, tangy key lime filling topped with whipped cream. Perfect for a refreshing summer treat.
- Prep Time: 15 minutes
- Cook Time: 0 minutes
- Total Time: 2 hours 15 minutes
- Yield: 6 servings 1x
- Category: Dessert
- Cuisine: American
Ingredients
- 1 ½ cups (150g) graham cracker crumbs
- 6 tablespoons (85g) unsalted butter, melted
- 1 can (14 oz / 396g) sweetened condensed milk
- ½ cup (120ml) fresh key lime juice (regular lime juice can be used)
- 1 cup (240ml) heavy whipping cream, chilled
- 2 tablespoons (15g) powdered sugar
- 1 teaspoon vanilla extract
- 1 teaspoon key lime zest (optional)
- Fresh berries or mint leaves for garnish (optional)
Instructions
- Make the crust: In a medium bowl, combine graham cracker crumbs with melted unsalted butter. Stir until the mixture resembles wet sand and holds together when pressed, about 3 minutes.
- Press the crust: Spoon the crust mixture evenly into 6 small cups or ramekins (about ¼ cup or 40g per cup). Firmly press the crumbs down to create a compact base. Chill in the fridge for about 10 minutes.
- Whip the cream: In a chilled bowl, beat heavy whipping cream with powdered sugar and vanilla extract using an electric mixer or whisk until soft peaks form, about 3-5 minutes.
- Mix the filling: In a separate bowl, combine sweetened condensed milk with fresh key lime juice. Stir until smooth and slightly thickened, about 1-2 minutes.
- Fold cream into filling: Gently fold half of the whipped cream into the lime-condensed milk mixture, then fold in the remaining whipped cream until just combined and smooth.
- Assemble the cups: Remove crust cups from fridge and spoon the creamy filling evenly over the crust layers. Smooth the surface.
- Chill and set: Refrigerate the assembled cups for at least 2 hours or overnight to let flavors meld and filling firm up.
- Garnish and serve: Just before serving, sprinkle with key lime zest, fresh berries, or mint leaves.
Notes
Use fresh key lime juice for best flavor. Chill bowl and beaters before whipping cream. Fold whipped cream gently to keep airy texture. Chill crust and filling properly to set. For dairy-free, use coconut oil and coconut cream. For gluten-free, substitute graham crackers with almond flour or gluten-free crumbs.
Nutrition
- Serving Size: 1 cup (about 1/6 of
- Calories: 275
- Sugar: 26
- Sodium: 120
- Fat: 15
- Saturated Fat: 9
- Carbohydrates: 32
- Fiber: 1
- Protein: 4
Keywords: key lime pie, no-bake dessert, creamy pie cups, summer dessert, easy recipe, lime dessert, quick dessert



