It was one of those blistering summer afternoons when the oven felt more like a furnace than a kitchen appliance. Honestly, the last thing I wanted was to turn it on and bake anything, but that unmistakable craving for something rich and indulgent wouldn’t quit. I remembered a casual text from a friend raving about a peanut butter chocolate dessert she whipped up without any baking involved. Skeptical at first—because, you know, no bake and chocolate? Could it really be that good?—I decided to give it a shot. Turns out, the Creamy No-Bake Peanut Butter Chocolate Lasagna Dessert was exactly what the day called for: cool, luscious, and satisfying without heating up the whole house. Each creamy layer felt like a little reward, and the blend of peanut butter with chocolate? Honestly, it was like the dessert had a secret handshake with my taste buds.
Since that first attempt, I found myself making this dessert multiple times a week, switching up little bits here and there, but always coming back to that silky, no-fuss creaminess that makes it so special. It’s one of those recipes that sneaks up on you—not just a quick fix, but something that turns an ordinary afternoon into a cozy, indulgent moment. And trust me, when the summer heat is relentless, having a no-bake dessert this creamy and rich is pure magic.
Why You’ll Love This Recipe
After testing and retesting this recipe, it’s clear why the Creamy No-Bake Peanut Butter Chocolate Lasagna Dessert wins hearts every time. Here’s what makes it stand out:
- Quick & Easy: This dessert comes together in about 20 minutes, no oven required, making it perfect for those busy summer days or unexpected guests.
- Simple Ingredients: You don’t need any fancy or hard-to-find items—just pantry staples like peanut butter, cream cheese, and chocolate chips.
- Perfect for Summer: Since it’s chilled, this dessert is wonderfully refreshing on hot days when you want something sweet but not heavy.
- Crowd-Pleaser: Kids and adults alike can’t get enough of the creamy peanut butter and chocolate combo layered to perfection.
- Unbelievably Delicious: The silky, layered texture paired with the rich, balanced flavor is a comforting treat that feels both indulgent and light.
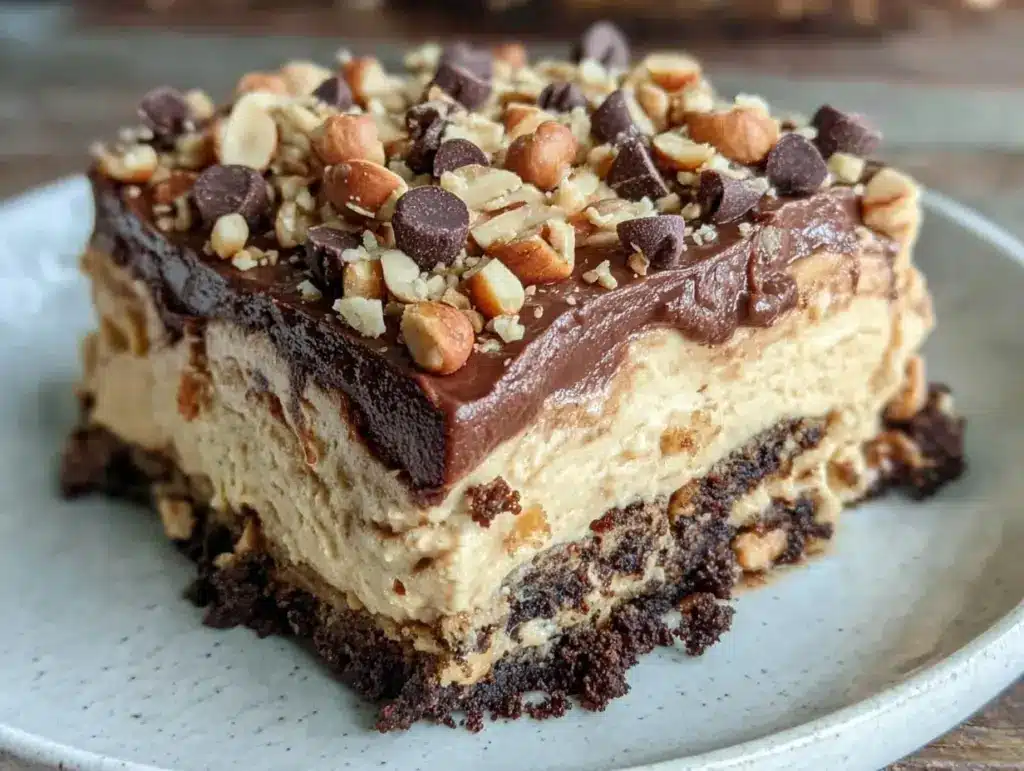
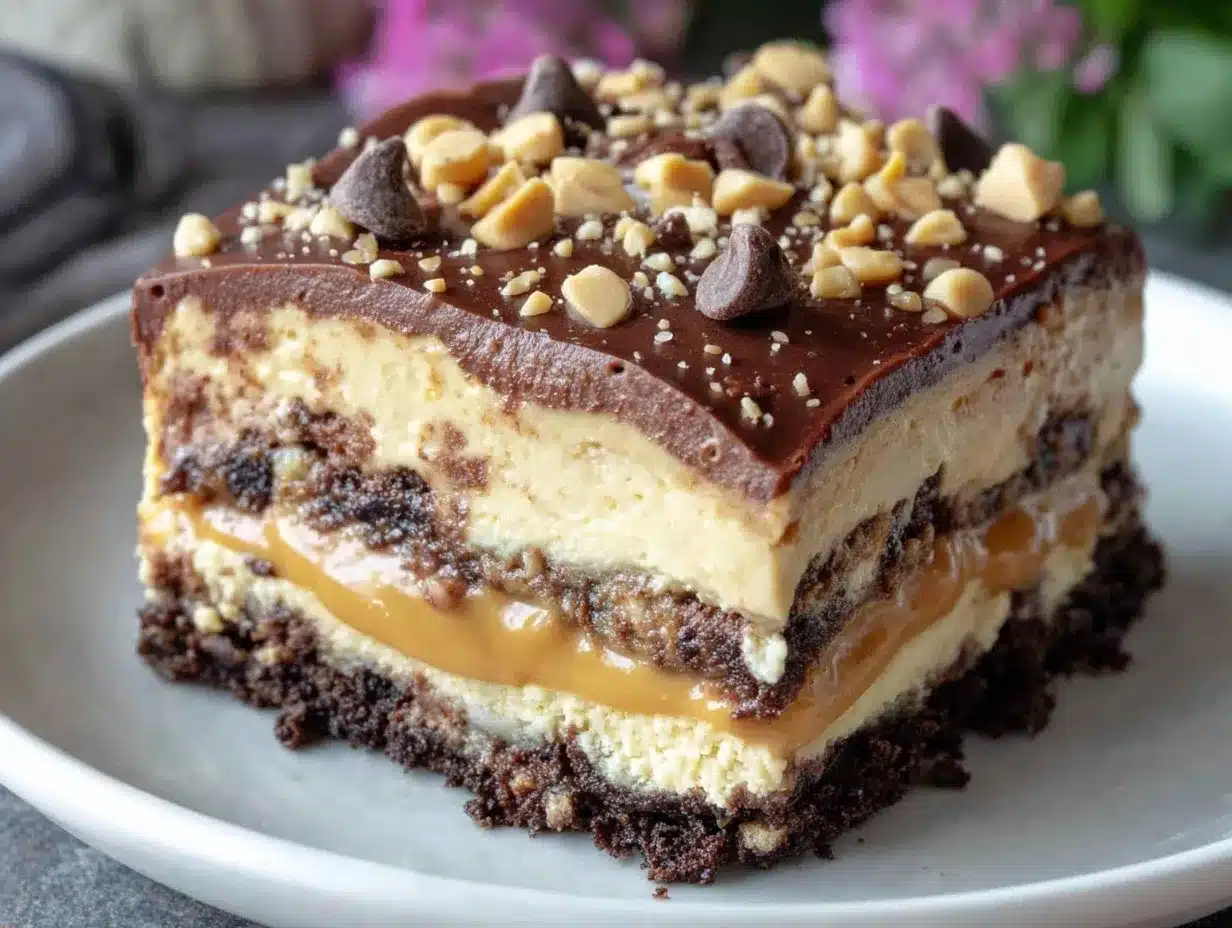
What really sets this recipe apart is the layering technique: a smooth peanut butter cream base, a rich chocolate pudding layer, and a whipped topping that’s neither too sweet nor too heavy. I like to say it’s comfort food reimagined for those who want flavor without fuss. Honestly, this isn’t just a dessert; it’s a little moment of joy that’s easy to make and even easier to love.
What Ingredients You Will Need
This recipe relies on straightforward, wholesome ingredients that come together to create a bold flavor and satisfyingly smooth texture without complicating things. Most of these are pantry staples, so you might already have them on hand.
- For the Crust:
- 1 ½ cups chocolate sandwich cookies (like Oreos), crushed (about 20 cookies)
- 6 tablespoons unsalted butter, melted (adds richness and helps hold the crust together)
- For the Peanut Butter Layer:
- 8 ounces cream cheese, softened (I prefer Philadelphia brand for smoothness)
- 1 cup creamy peanut butter (natural or classic, depending on your preference)
- 2 cups powdered sugar (for that perfect sweetness and smooth texture)
- 1 cup heavy cream, cold (helps whip the layer light and airy)
- For the Chocolate Pudding Layer:
- 2 packets (about 6 ounces) instant chocolate pudding mix
- 3 cups cold milk (whole milk works best for the creamiest results)
- For the Whipped Topping:
- 1 cup heavy whipping cream, cold
- 2 tablespoons powdered sugar
- 1 teaspoon vanilla extract (adds depth to the whipped cream)
If you want to make this gluten-free, swap the cookie crust for gluten-free chocolate cookies or use crushed graham crackers. For dairy-free options, coconut cream and dairy-free chocolate pudding mixes work well, though texture will vary slightly. In summer, I sometimes add a sprinkle of chopped peanuts or a drizzle of melted chocolate for extra crunch and flair.
Equipment Needed
- 9×13 inch (23×33 cm) rectangular baking dish – essential for layering and chilling the dessert.
- Mixing bowls – at least three, for the crust, peanut butter layer, and pudding.
- Electric hand mixer or stand mixer – highly recommended for whipping cream and blending layers smoothly.
- Measuring cups and spoons – accuracy matters, especially for the pudding mix and powdered sugar.
- Spatula or large spoon – for folding ingredients gently.
- Food processor or plastic bag and rolling pin – for crushing cookies finely.
If you don’t have a food processor, placing the cookies in a sealed plastic bag and gently crushing them with a rolling pin works just fine. For whipping cream, a chilled metal bowl helps keep the cream cold and whips faster. I keep a budget-friendly hand mixer around, which does the job perfectly without taking up too much space.
Preparation Method
- Prepare the crust: Crush about 20 chocolate sandwich cookies into fine crumbs using a food processor or rolling pin. Transfer crumbs to a bowl, then stir in 6 tablespoons of melted unsalted butter until the mixture resembles wet sand. Press this evenly into the bottom of your 9×13 inch dish. Use the back of a spoon or a flat-bottom glass to compact it firmly. Chill in the fridge for 10 minutes while you prepare the peanut butter layer.
- Make the peanut butter layer: In a large bowl, beat 8 ounces softened cream cheese until smooth. Add 1 cup creamy peanut butter and mix until fully combined. Gradually add 2 cups powdered sugar and beat until silky. In a separate chilled bowl, whip 1 cup cold heavy cream to stiff peaks using an electric mixer. Gently fold the whipped cream into the peanut butter mixture until no streaks remain. Spread this creamy layer evenly over the chilled cookie crust. Return to the fridge to set for 15 minutes.
- Prepare the chocolate pudding: Whisk together 2 packets of instant chocolate pudding mix with 3 cups cold milk in a medium bowl. Let it thicken for about 5 minutes. Pour the pudding layer over the peanut butter layer and spread gently with a spatula to avoid mixing layers. Chill again for at least 15 minutes.
- Finish with whipped topping: In a clean, chilled bowl, whip 1 cup heavy cream with 2 tablespoons powdered sugar and 1 teaspoon vanilla extract until soft peaks form. Spread this fluffy whipped topping evenly over the pudding layer. For a final touch, sprinkle crushed peanuts or small chocolate chips on top if you like.
- Chill before serving: Cover the dish loosely with plastic wrap and refrigerate the dessert for at least 4 hours, or overnight if possible. This resting time lets the layers set and flavors meld beautifully.
When serving, use a sharp knife to cut clean layers, wiping the blade between slices if needed. Each bite should reveal distinct layers of creamy peanut butter, rich chocolate, and airy whipped topping. If you notice the peanut butter layer a bit stiff after chilling, let it sit at room temperature for 10 minutes before slicing.
Cooking Tips & Techniques
One trick I learned early on is to make sure all dairy ingredients are cold before whipping—this keeps the whipped cream stable and light. Also, when folding the whipped cream into the peanut butter mixture, be gentle; you want to keep that fluffy texture instead of deflating it.
Be cautious with the powdered sugar: adding it gradually and tasting as you go helps avoid an overly sweet peanut butter layer. If you find the instant pudding layer too thick, whisk in a tablespoon of milk at a time to loosen it slightly.
Crushing the cookies finely is key for a firm crust that holds together without crumbling all over. I usually pulse them in a food processor rather than smashing with a rolling pin—it’s quicker and more consistent.
Lastly, chilling times make a huge difference. Don’t rush the refrigeration steps; the dessert needs time to firm up so the layers slice cleanly. If you’re short on time, pop the dish in the freezer for 30 minutes, but watch it carefully to prevent freezing solid.
Variations & Adaptations
Here are some ways I’ve tweaked this dessert to keep it interesting or fit different dietary needs:
- Nut-Free Version: Swap the peanut butter for sunflower seed butter and use nut-free cookies for the crust. The flavor changes but it’s still incredibly creamy.
- Seasonal Twist: Add fresh sliced bananas or strawberries between the peanut butter and pudding layers for a fruity surprise that brightens the dessert.
- Vegan Adaptation: Use dairy-free cream cheese, coconut whipped cream, and dairy-free chocolate pudding mix. The texture is slightly different but still deliciously indulgent.
- Extra Crunch: Fold chopped roasted peanuts or crushed pretzels into the peanut butter layer for a salty contrast.
- Chocolate Swap: Use white chocolate instant pudding for a lighter chocolate flavor paired with peanut butter.
Personally, I once tried swapping the cookie crust for a layer of graham crackers mixed with melted butter and a pinch of cinnamon. It added a subtle warmth that was surprisingly good with the peanut butter cream. Feel free to experiment and find your own favorite version!
Serving & Storage Suggestions
This dessert is best served chilled, straight from the fridge. The layers hold their shape nicely and the cool temperature enhances the creamy texture. I like to present it in clear glass dishes or pans so the layered effect is visible—it’s almost too pretty to eat!
It pairs beautifully with a simple cup of black coffee or a cold glass of milk, balancing the sweetness and richness. For a summer party, try serving it alongside fresh fruit or a light salad to contrast the indulgence.
Store leftovers tightly covered in the refrigerator for up to 4 days. The flavors actually deepen with time, making it taste even better on day two. If you want to keep it longer, you can freeze individual slices wrapped well in plastic wrap and foil for up to 2 months. Thaw overnight in the fridge before serving.
When reheating, avoid microwaving as it melts the layers unevenly. Instead, let it come to room temperature on the counter for 15-20 minutes for the best texture.
Nutritional Information & Benefits
While this dessert is definitely an indulgence, it does offer some nutritional perks thanks to its ingredients. Peanut butter provides a good dose of protein and healthy fats, which help keep you satisfied. Using cream cheese and heavy cream adds richness but also calcium and vitamin A.
Estimated per serving (based on 12 servings): approximately 350 calories, 25g fat, 25g carbohydrates, and 6g protein. It’s gluten-free if you use gluten-free cookies.
This recipe contains common allergens like dairy, peanuts, and gluten (unless substituted). Always check ingredient labels to suit your dietary needs.
From a wellness perspective, this dessert is a treat to be enjoyed mindfully—perfect for those moments when you want to indulge without fuss or guilt. The no-bake method means fewer processed ingredients than many store-bought desserts, making it a better choice when you crave something homemade and comforting.
Conclusion
All in all, the Creamy No-Bake Peanut Butter Chocolate Lasagna Dessert is the kind of recipe that sticks with you—not just because it tastes amazing, but because it’s easy, versatile, and perfectly suited for warm weather. Whether you’re making it for a casual family night or a summer gathering, it brings that effortless wow factor without the hassle.
Feel free to tweak the layers, swap ingredients, or add your own twist. I love how this dessert invites creativity but never loses its comforting core. It’s become a go-to in my kitchen for when I want something sweet, creamy, and no-fuss.
Give it a try, and I’d love to hear how you make it your own—drop a comment or share your version. Here’s to sweet, simple moments that remind us why dessert is worth every bite.
Frequently Asked Questions
Can I make this dessert ahead of time?
Absolutely! It actually tastes better after chilling overnight, which helps the layers set and flavors meld.
What if I don’t have heavy cream?
You can substitute with chilled whipping cream or even full-fat coconut cream for a dairy-free option, but the texture may vary slightly.
Is it possible to make this dessert gluten-free?
Yes, just use gluten-free chocolate sandwich cookies or substitute the crust with gluten-free graham crackers.
Can I use crunchy peanut butter instead of creamy?
Yes, but keep in mind the texture will be a bit different, and the crunchy bits might affect the smoothness of the peanut butter layer.
How should I store leftovers?
Keep the dessert covered in the fridge for up to 4 days or freeze individual slices wrapped tightly for up to 2 months.
Pin This Recipe!
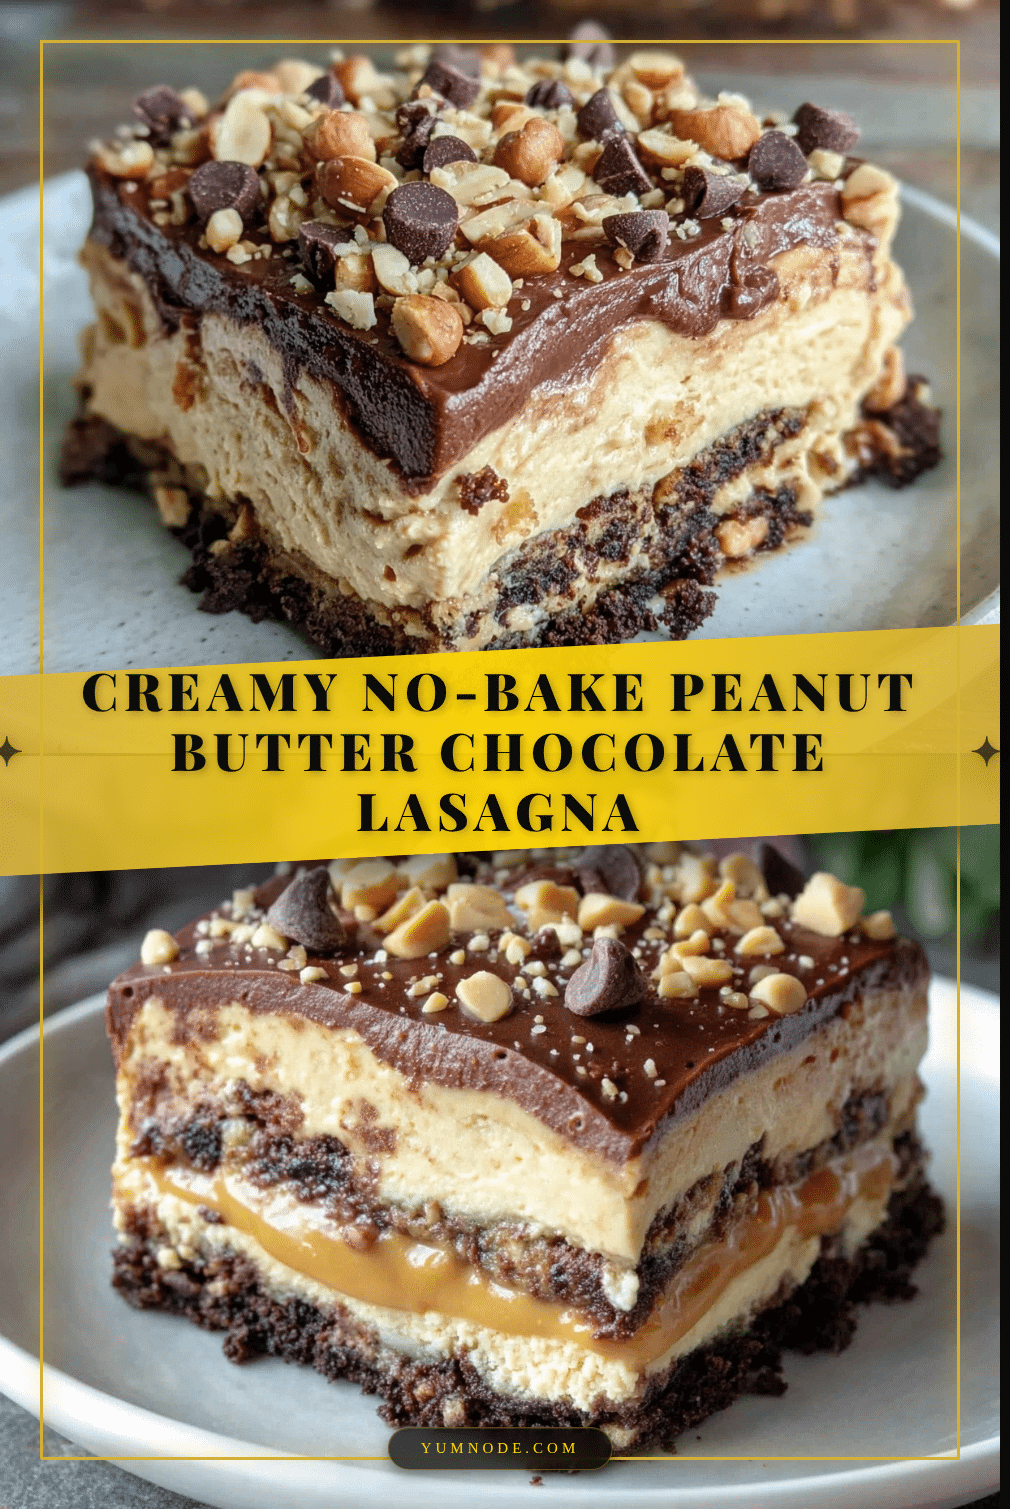
Creamy No-Bake Peanut Butter Chocolate Lasagna Dessert

A rich, creamy, and indulgent no-bake dessert combining layers of peanut butter cream, chocolate pudding, and whipped topping. Perfect for summer, this chilled dessert is easy to make and a crowd-pleaser.
- Prep Time: 20 minutes
- Cook Time: 0 minutes
- Total Time: 4 hours 20 minutes
- Yield: 12 servings 1x
- Category: Dessert
- Cuisine: American
Ingredients
- 1 ½ cups chocolate sandwich cookies (like Oreos), crushed (about 20 cookies)
- 6 tablespoons unsalted butter, melted
- 8 ounces cream cheese, softened
- 1 cup creamy peanut butter
- 2 cups powdered sugar
- 1 cup heavy cream, cold
- 2 packets (about 6 ounces) instant chocolate pudding mix
- 3 cups cold milk
- 1 cup heavy whipping cream, cold
- 2 tablespoons powdered sugar
- 1 teaspoon vanilla extract
Instructions
- Crush about 20 chocolate sandwich cookies into fine crumbs using a food processor or rolling pin. Transfer crumbs to a bowl, then stir in 6 tablespoons of melted unsalted butter until the mixture resembles wet sand. Press this evenly into the bottom of a 9×13 inch dish. Compact firmly and chill in the fridge for 10 minutes.
- In a large bowl, beat 8 ounces softened cream cheese until smooth. Add 1 cup creamy peanut butter and mix until fully combined. Gradually add 2 cups powdered sugar and beat until silky. In a separate chilled bowl, whip 1 cup cold heavy cream to stiff peaks using an electric mixer. Gently fold the whipped cream into the peanut butter mixture until no streaks remain. Spread this layer evenly over the chilled cookie crust. Return to the fridge to set for 15 minutes.
- Whisk together 2 packets of instant chocolate pudding mix with 3 cups cold milk in a medium bowl. Let it thicken for about 5 minutes. Pour the pudding layer over the peanut butter layer and spread gently with a spatula. Chill again for at least 15 minutes.
- In a clean, chilled bowl, whip 1 cup heavy cream with 2 tablespoons powdered sugar and 1 teaspoon vanilla extract until soft peaks form. Spread this whipped topping evenly over the pudding layer. Optionally, sprinkle crushed peanuts or small chocolate chips on top.
- Cover the dish loosely with plastic wrap and refrigerate for at least 4 hours or overnight to let the layers set and flavors meld.
- When serving, use a sharp knife to cut clean layers, wiping the blade between slices if needed. If the peanut butter layer is stiff, let it sit at room temperature for 10 minutes before slicing.
Notes
Use gluten-free cookies or graham crackers for a gluten-free version. For dairy-free, substitute coconut cream and dairy-free pudding mix. Chill all dairy ingredients before whipping for best results. Be gentle when folding whipped cream to keep fluffy texture. Crushed cookies should be fine for a firm crust. Chilling time is important for clean slicing; if short on time, freeze for 30 minutes but watch carefully.
Nutrition
- Serving Size: 1 slice (1/12th of t
- Calories: 350
- Fat: 25
- Carbohydrates: 25
- Protein: 6
Keywords: no-bake dessert, peanut butter dessert, chocolate dessert, summer dessert, easy dessert, layered dessert, creamy dessert