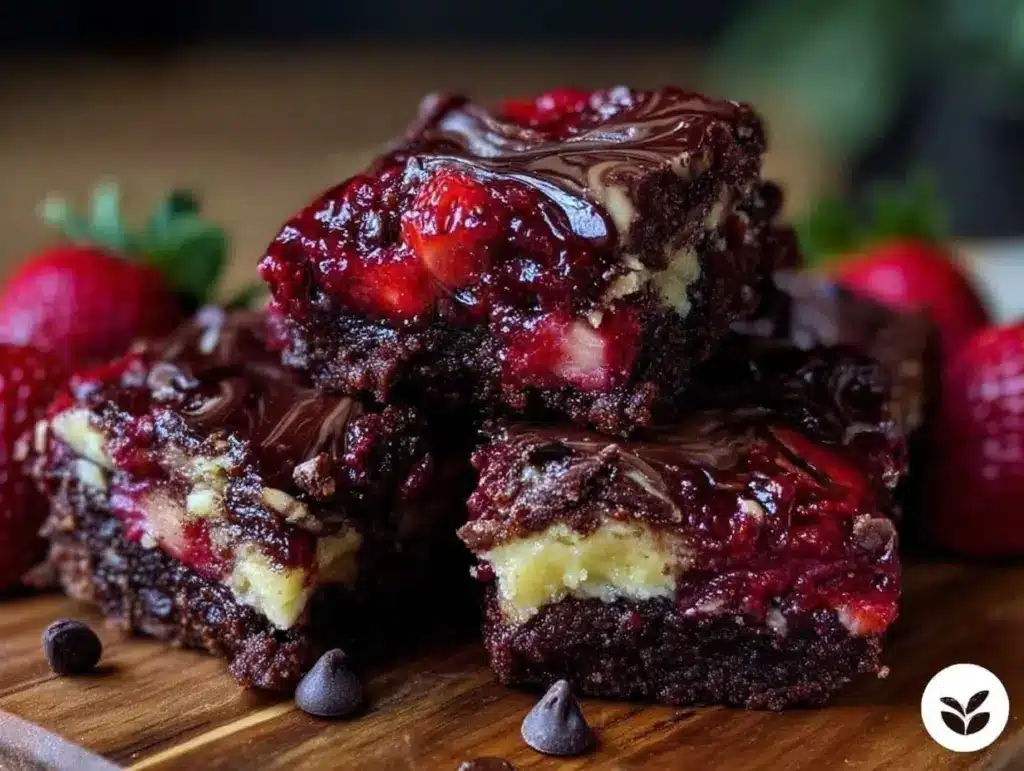
The smell of rich chocolate mingling with sweet strawberries always sends me right back to cozy Valentine’s evenings spent baking with my family. Honestly, there’s something magical about those moments when the kitchen fills with that heavenly aroma, and you know something special is coming out of the oven. These Decadent Valentine’s Strawberry Chocolate Swirl Bars quickly became my go-to treat whenever I want to impress loved ones without spending hours in the kitchen. I first whipped up this recipe last Valentine’s Day when I craved something both fruity and chocolatey but didn’t want a complicated dessert.
Let me tell you, these bars are the perfect marriage of luscious strawberry sweetness and deep, velvety chocolate, all swirled together in a buttery, tender base. Over the past few months, I’ve made them over and over—tweaking the swirl pattern, testing different strawberry preserves, and even sneaking in a little espresso powder to amp up the chocolate flavor. As someone who’s baked countless chocolate treats, I can say these bars hold their own in both looks and taste.
If you’re hunting for a Valentine’s dessert that’s easy to pull off yet looks like you spent hours crafting it, this strawberry chocolate swirl recipe is for you. Plus, it’s great for anyone who loves that classic combo but wants a fresh take beyond just cake or cupcakes. Whether you’re baking for a special someone, a family gathering, or a cozy night in, these bars will hit the spot—promise.
Why You’ll Love This Recipe
- Quick & Easy: Ready in under 45 minutes, this recipe fits perfectly into busy schedules or last-minute dessert plans.
- Simple Ingredients: No fancy or hard-to-find items—everything’s probably already sitting in your pantry or fridge.
- Perfect for Valentine’s Day: A romantic, indulgent treat that’s ideal for date nights, parties, or just spoiling yourself.
- Crowd-Pleaser: Kids, adults, chocoholics, and fruit lovers all rave about the balance of flavors and textures.
- Unbelievably Delicious: The silky chocolate swirls paired with bright strawberry bursts make every bite feel like a celebration.
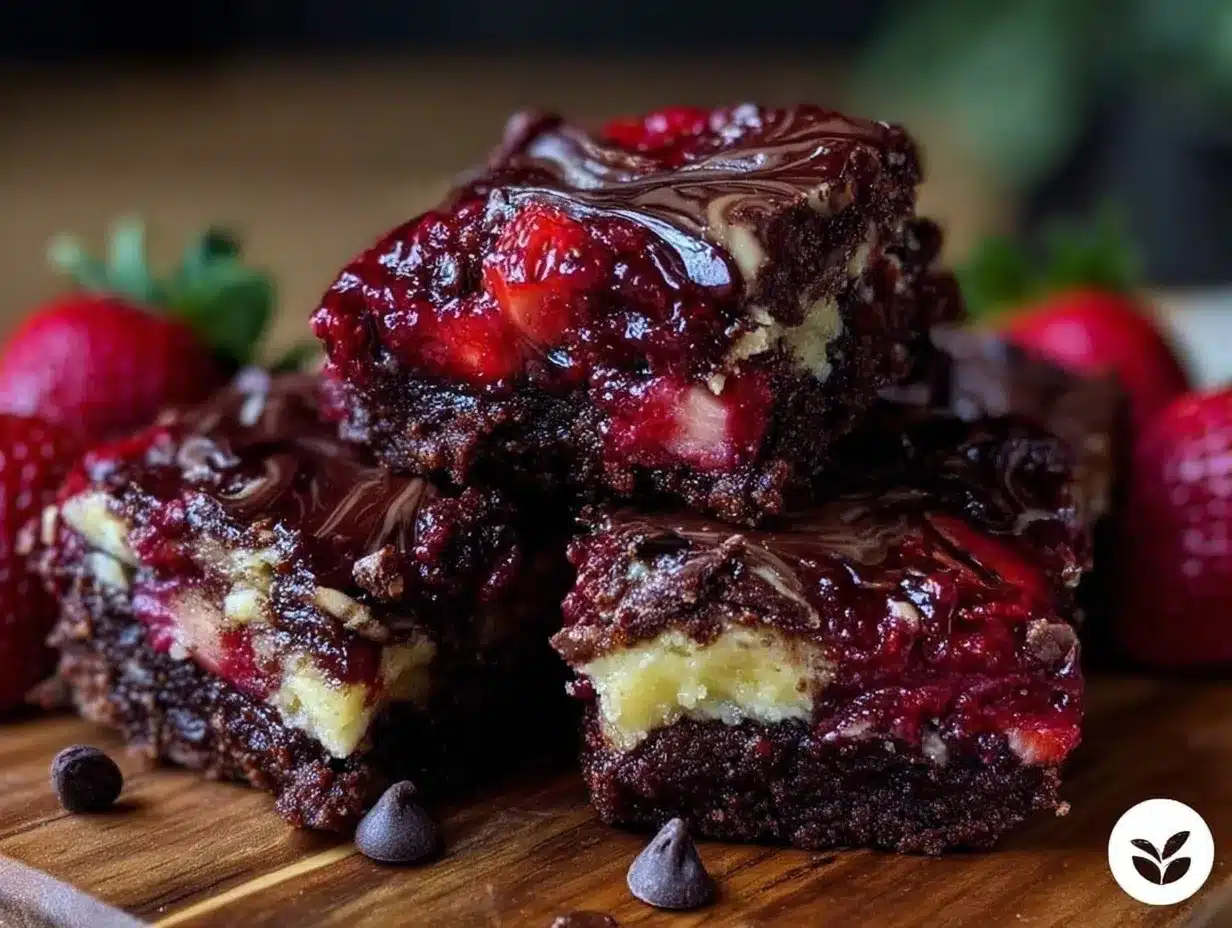
This isn’t just your average berry-chocolate bar. I love how the technique of swirling the strawberry jam into the chocolate batter creates a marbled effect that looks stunning and tastes divine. Plus, the crust is buttery without being too dense, giving the bars a melt-in-your-mouth quality. It’s that perfect sweet spot between decadent and fresh.
After multiple kitchen tests, I’ve nailed down the best balance of preserve thickness and chocolate richness so the flavors pop but don’t overpower each other. These bars feel fancy—but they’re truly beginner-friendly, which is a win-win if you ask me.
What Ingredients You Will Need
This recipe uses simple, wholesome ingredients to deliver bold flavor and satisfying texture without the fuss. Most are pantry staples or easy to find in any grocery store, so you can whip this up anytime the craving strikes.
- Unsalted butter, softened (adds richness and helps create a tender base)
- Granulated sugar (for sweetness and structure)
- Brown sugar, packed (adds moisture and a hint of caramel flavor)
- Large eggs, room temperature (binds the bars and adds moisture)
- Vanilla extract (for warmth and depth)
- All-purpose flour (provides structure—use a trusted brand like King Arthur for best results)
- Cocoa powder, unsweetened (for that deep chocolate flavor; I prefer Dutch-processed)
- Salt (balances sweetness and enhances flavors)
- Baking powder (helps the bars rise just enough for a soft texture)
- Strawberry preserves or jam (choose a high-quality, thicker preserve for better swirl definition; homemade or store-bought both work)
- Chocolate chips or chunks, semi-sweet (optional, adds extra chocolate bursts)
If you want to customize, you can swap all-purpose flour with a gluten-free blend to keep these bars accessible. For a dairy-free version, substitute butter with coconut oil or vegan margarine, though the texture will vary slightly. And if fresh strawberries are in season, you can lightly mash them into the preserves for extra natural fruit flavor.
Equipment Needed
- 8×8-inch baking pan: Ideal size for these bars. I use a non-stick metal pan for even baking and easy release.
- Mixing bowls: At least two—one for wet ingredients, one for dry.
- Electric mixer or hand whisk: For creaming butter and sugar smoothly.
- Rubber spatula: Perfect for folding in ingredients and swirling preserves without overmixing.
- Spoon or skewer: To create the beautiful swirl effect in the batter.
- Measuring cups and spoons: Accurate measurements make all the difference in baking.
If you don’t have a mixer, no worries! A sturdy whisk and some elbow grease will do just fine. For the swirl, I’ve found a toothpick or butter knife works great too if you don’t have a skewer. Investing in a quality baking pan really helps with even cooking, but a glass dish can also work—just adjust baking time slightly.
Detailed Preparation Method
- Preheat your oven to 350°F (175°C). Grease your 8×8-inch baking pan with butter or line it with parchment paper for easy removal. This step saves you from sticky situations later!
- Cream together ½ cup (115g) softened unsalted butter, ¾ cup (150g) granulated sugar, and ¼ cup (50g) packed brown sugar in a large bowl. Use an electric mixer on medium speed for about 3-4 minutes until the mixture is light and fluffy. This fluffy base is key for tender bars.
- Add in 2 large eggs, one at a time, beating well after each addition. Then stir in 1 teaspoon vanilla extract. The eggs help bind everything, so don’t skip this step!
- In a separate bowl, whisk together 1 cup (125g) all-purpose flour, ¼ cup (25g) unsweetened cocoa powder, ½ teaspoon baking powder, and ¼ teaspoon salt. Make sure to sift the cocoa powder to avoid lumps. This dry mix is your chocolatey foundation.
- Gradually add the dry ingredients into the wet mixture, folding gently with a spatula until just combined. Do not overmix—overworking the batter can make the bars dense rather than tender.
- Optional: Fold in ½ cup (90g) semi-sweet chocolate chips or chunks for extra melty pockets of chocolate.
- Pour half of the batter into your prepared pan, spreading it evenly with the spatula. Then dollop ½ cup (160g) strawberry preserves over the batter in small spoonfuls.
- Spread the remaining batter over the preserves carefully—it doesn’t have to be perfect, just cover the jam.
- Use a skewer or toothpick to swirl the strawberry preserves and chocolate batter together. Drag the tool through the batter in a figure-eight pattern or gentle loops. This creates the signature marbled look—don’t overdo it or the swirl will disappear!
- Bake in the preheated oven for 30-35 minutes or until a toothpick inserted near the center comes out with just a few moist crumbs. The bars should look set but still soft in the middle.
- Let the bars cool completely in the pan on a wire rack before cutting into squares. Cooling helps them firm up and makes slicing cleaner.
Pro tip: If your preserves seem too runny, heat them gently on the stove to reduce the liquid before swirling. Also, don’t rush the cooling process—warm bars will crumble when sliced.
Cooking Tips & Techniques
One thing I learned early on is that the swirling technique really makes a difference. Using a gentle hand and a thin skewer keeps the beautiful marbled effect intact. It’s tempting to over-swirl, but that just blends the flavors too much and you lose the contrast.
Make sure your butter is softened but not melted. Melted butter can make the batter too loose, resulting in flat or greasy bars. I usually leave it out at room temp for at least 30 minutes before starting.
When measuring flour, spoon it into your cup and level it off instead of scooping directly—this avoids packing too much flour, which can dry out your bars.
Timing is everything here. Keep a close eye on the bars starting at 28 minutes, since ovens vary. Overbaking will dry them out, and underbaking leaves them gooey and unstable.
For multitasking, prep your dry ingredients first so you can add them quickly once the wet ingredients are ready. This small trick keeps the batter from sitting too long and losing its lift.
Variations & Adaptations
- Dietary swap: Replace all-purpose flour with almond or oat flour for gluten-free bars. The texture will be a bit different but still delicious.
- Flavor twist: Try raspberry or cherry preserves instead of strawberry for a tart surprise. You can also add a teaspoon of instant espresso powder to the batter to boost the chocolate flavor.
- Cooking method: These bars can be baked in a muffin tin for individual servings—bake about 20-25 minutes and watch closely.
- Nutty addition: Sprinkle chopped toasted almonds or pecans on top before baking for crunch and extra flavor.
- Personal favorite: I once swirled in a bit of cream cheese with the preserves to add a tangy layer that balanced the sweet and rich flavors perfectly.
Serving & Storage Suggestions
Serve these strawberry chocolate swirl bars at room temperature to fully enjoy their tender texture and burst of flavors. They’re perfect on their own or paired with a scoop of vanilla ice cream or a dollop of whipped cream for extra indulgence.
For a festive touch, dust them lightly with powdered sugar or drizzle with melted white chocolate before serving. They make a stunning Valentine’s Day centerpiece on a dessert platter.
Store leftovers in an airtight container at room temperature for up to 3 days. If you want to keep them longer, they freeze beautifully—wrap bars tightly in plastic wrap and place in a freezer bag for up to 2 months. Thaw at room temperature before enjoying.
Reheating gently in a warm oven (about 300°F/150°C for 5-7 minutes) brings back that freshly baked softness without drying them out. Interestingly, the flavors meld and deepen the next day, making these bars even better after a little rest.
Nutritional Information & Benefits
Per serving (1 bar, based on 16 bars from the recipe): approximately 200 calories, 10g fat, 27g carbohydrates, 2g protein. These bars offer a bit of energy boost from natural sugars and fats—great for a sweet pick-me-up.
Strawberry preserves bring antioxidants and vitamin C, while dark cocoa powder is a source of flavonoids that support heart health. Using real butter gives you a dose of fat-soluble vitamins, and eggs add protein to keep you satisfied.
If you’re mindful of allergens, note that this recipe contains gluten, dairy, and eggs. But with simple substitutions, it can be adapted for several dietary needs.
Conclusion
These Decadent Valentine’s Strawberry Chocolate Swirl Bars are a delightful treat that’s as easy to make as it is to love. With a perfect balance of rich chocolate and fresh strawberry, they bring a special touch to any occasion—especially Valentine’s Day. I truly enjoy how this recipe feels fancy but stays approachable, making it a winner for both beginner and seasoned bakers.
Don’t hesitate to play around with the flavors and toppings to make these bars uniquely yours. And if you give them a try, I’d love to hear how you customized your batch! Drop a comment below, share your favorite tweaks, or tell me about your first bite experience.
Happy baking, and here’s to many delicious moments made sweeter with these strawberry chocolate bars!
FAQs About Decadent Valentine’s Strawberry Chocolate Swirl Bars
Can I use fresh strawberries instead of preserves?
Fresh strawberries can work if cooked down into a thick jam-like consistency first. Raw berries will be too watery and may affect the texture and swirl definition.
How do I prevent the bars from sticking to the pan?
Grease the pan well or line it with parchment paper that overhangs the sides for easy removal. Letting the bars cool completely before slicing also helps.
Can I make these bars ahead of time?
Absolutely! They keep well for a few days at room temp and freeze nicely for longer storage. Just thaw or warm gently before serving.
What’s the best way to get a clear swirl pattern?
Use thicker preserves and a gentle swirling motion with a toothpick or skewer. Avoid overmixing or the colors will blend too much.
Are these bars suitable for kids?
Definitely! They’re sweet but not overly rich, and the fruity strawberry adds a nice balance that kids tend to love.
Pin This Recipe!
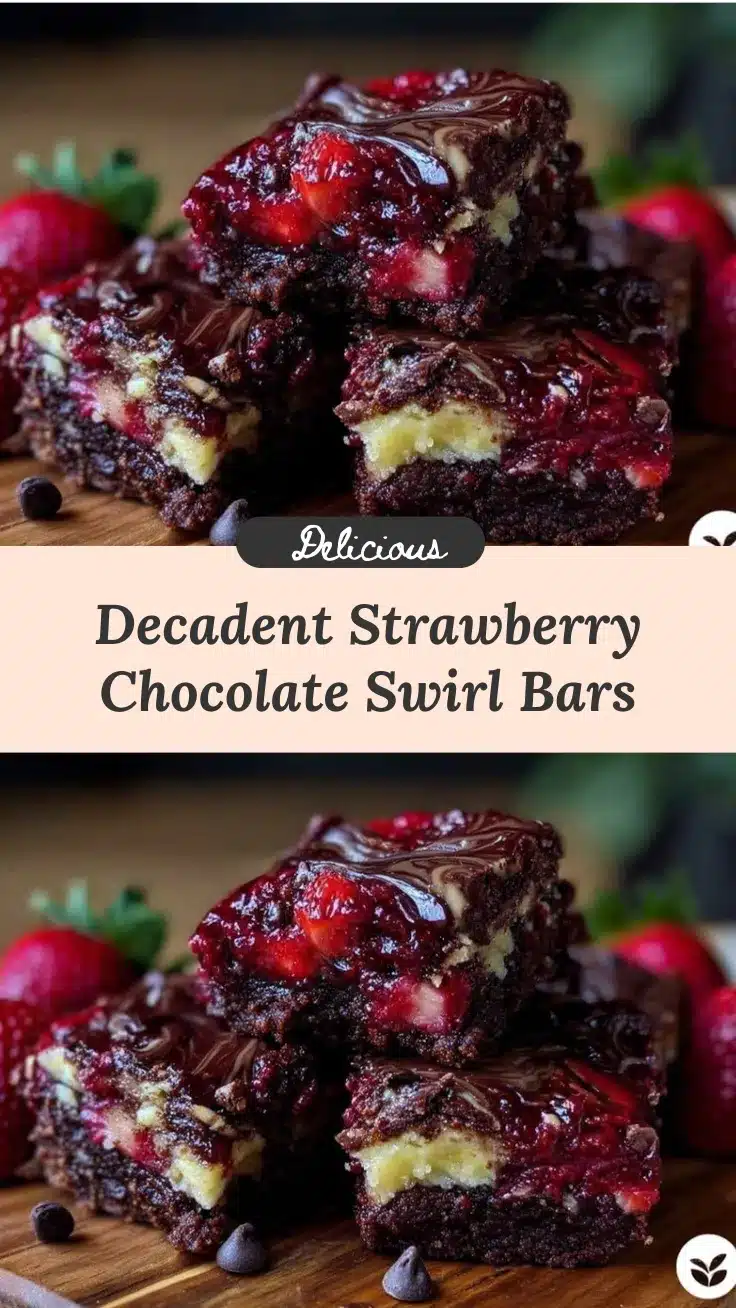
Decadent Valentine’s Strawberry Chocolate Swirl Bars

These bars combine luscious strawberry sweetness with deep, velvety chocolate swirls in a buttery, tender base. Perfect for Valentine’s Day or any occasion, they are quick, easy, and crowd-pleasing.
- Prep Time: 15 minutes
- Cook Time: 30-35 minutes
- Total Time: 45 minutes
- Yield: 16 bars 1x
- Category: Dessert
- Cuisine: American
Ingredients
- ½ cup (115g) unsalted butter, softened
- ¾ cup (150g) granulated sugar
- ¼ cup (50g) packed brown sugar
- 2 large eggs, room temperature
- 1 teaspoon vanilla extract
- 1 cup (125g) all-purpose flour
- ¼ cup (25g) unsweetened cocoa powder (preferably Dutch-processed)
- ½ teaspoon baking powder
- ¼ teaspoon salt
- ½ cup (160g) strawberry preserves or jam
- ½ cup (90g) semi-sweet chocolate chips or chunks (optional)
Instructions
- Preheat your oven to 350°F (175°C). Grease an 8×8-inch baking pan with butter or line it with parchment paper.
- Cream together the softened butter, granulated sugar, and brown sugar in a large bowl using an electric mixer on medium speed for 3-4 minutes until light and fluffy.
- Add eggs one at a time, beating well after each addition, then stir in vanilla extract.
- In a separate bowl, whisk together the flour, cocoa powder (sifted), baking powder, and salt.
- Gradually fold the dry ingredients into the wet mixture with a spatula until just combined. Do not overmix.
- Optional: Fold in the semi-sweet chocolate chips or chunks.
- Pour half of the batter into the prepared pan and spread evenly.
- Dollop the strawberry preserves over the batter in small spoonfuls.
- Spread the remaining batter over the preserves carefully to cover them.
- Use a skewer or toothpick to swirl the strawberry preserves and chocolate batter together in a figure-eight or gentle loops pattern.
- Bake for 30-35 minutes or until a toothpick inserted near the center comes out with a few moist crumbs.
- Let the bars cool completely in the pan on a wire rack before cutting into squares.
Notes
Use thicker strawberry preserves for better swirl definition. Avoid overmixing the batter to keep bars tender. Let bars cool completely before slicing to prevent crumbling. Butter should be softened but not melted. If preserves are too runny, gently heat to reduce liquid before swirling. Watch baking time closely to avoid overbaking.
Nutrition
- Serving Size: 1 bar
- Calories: 200
- Fat: 10
- Carbohydrates: 27
- Protein: 2
Keywords: Valentine's Day dessert, strawberry chocolate bars, chocolate swirl bars, easy homemade dessert, strawberry preserves, chocolate bars