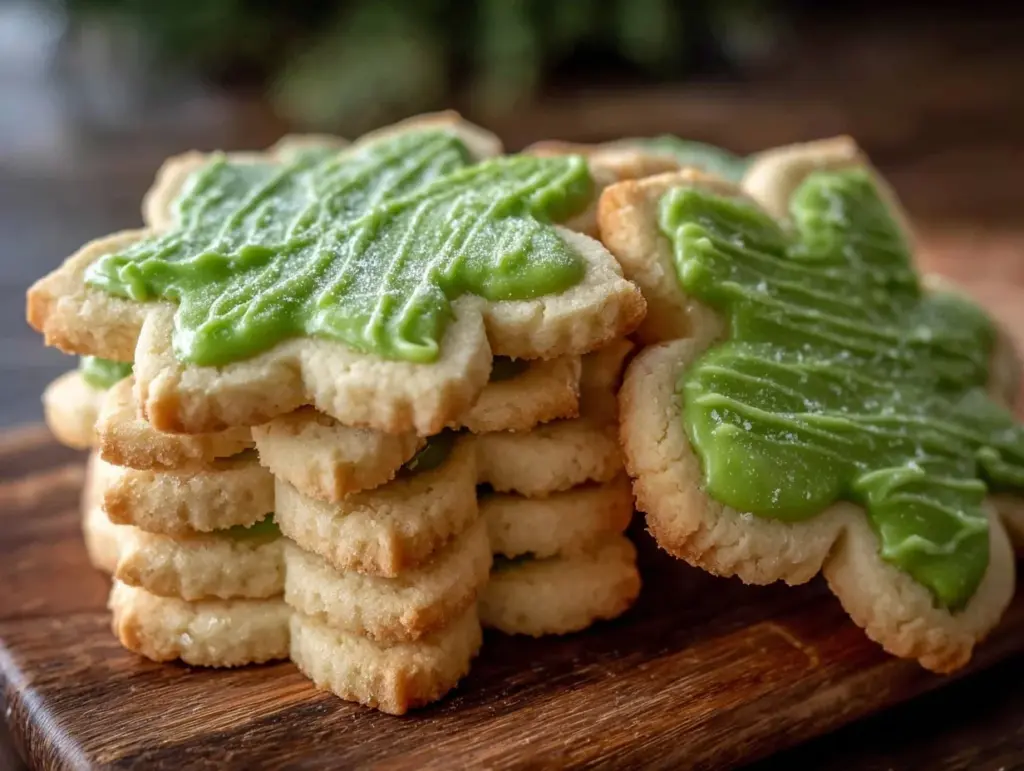
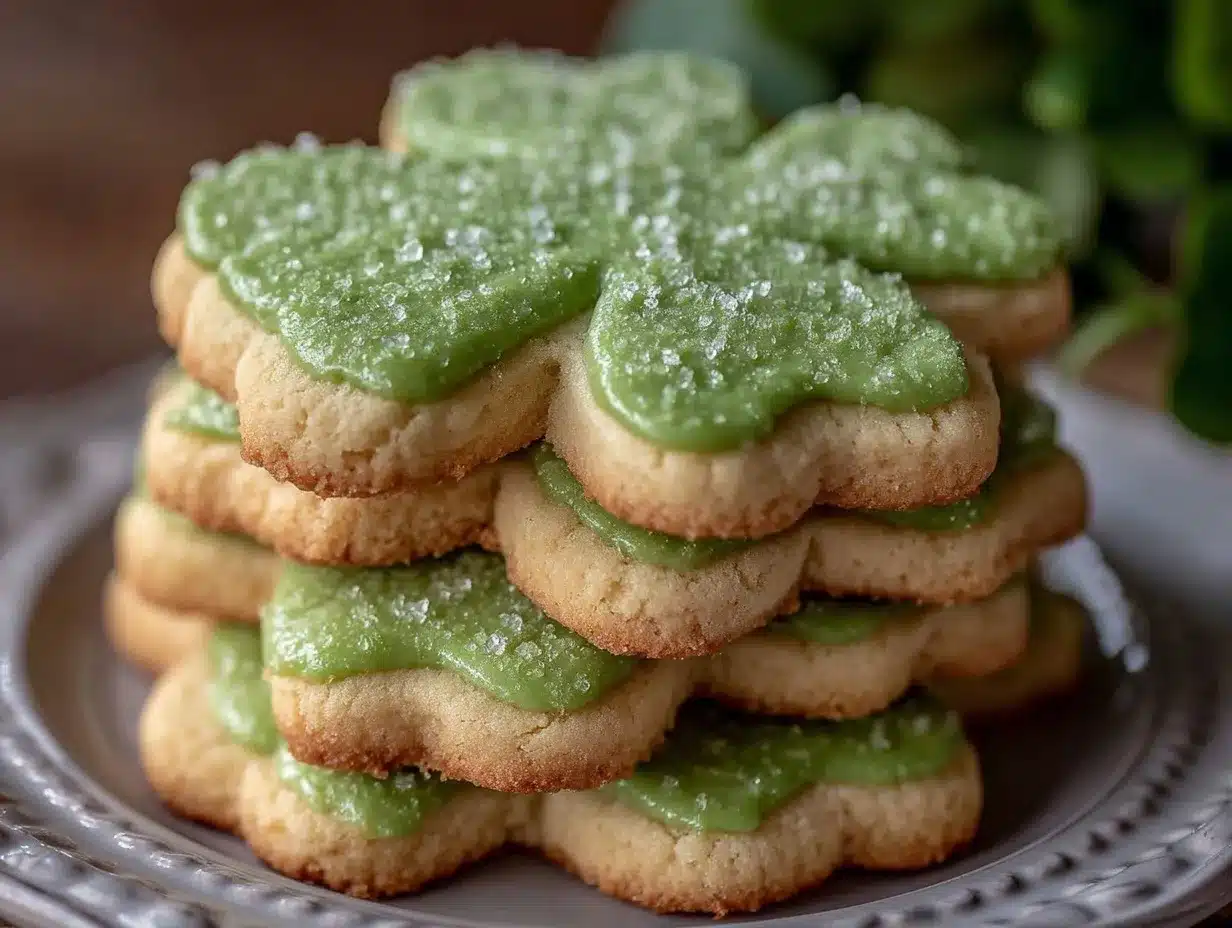
“You’re making those tiny shamrock cookies again?” my nephew called out from the living room, eyes twinkling with that mix of skepticism and excitement only kids have. Honestly, I wasn’t sure if the green royal icing would turn out right this time — last year’s batch had a few too many cracks, and the color was more swamp than shamrock. But as I rolled out that dough and punched out the little clovers, the familiar scent of buttery sugar cookies filled the kitchen, wrapping around me like a cozy blanket on a chilly March afternoon.
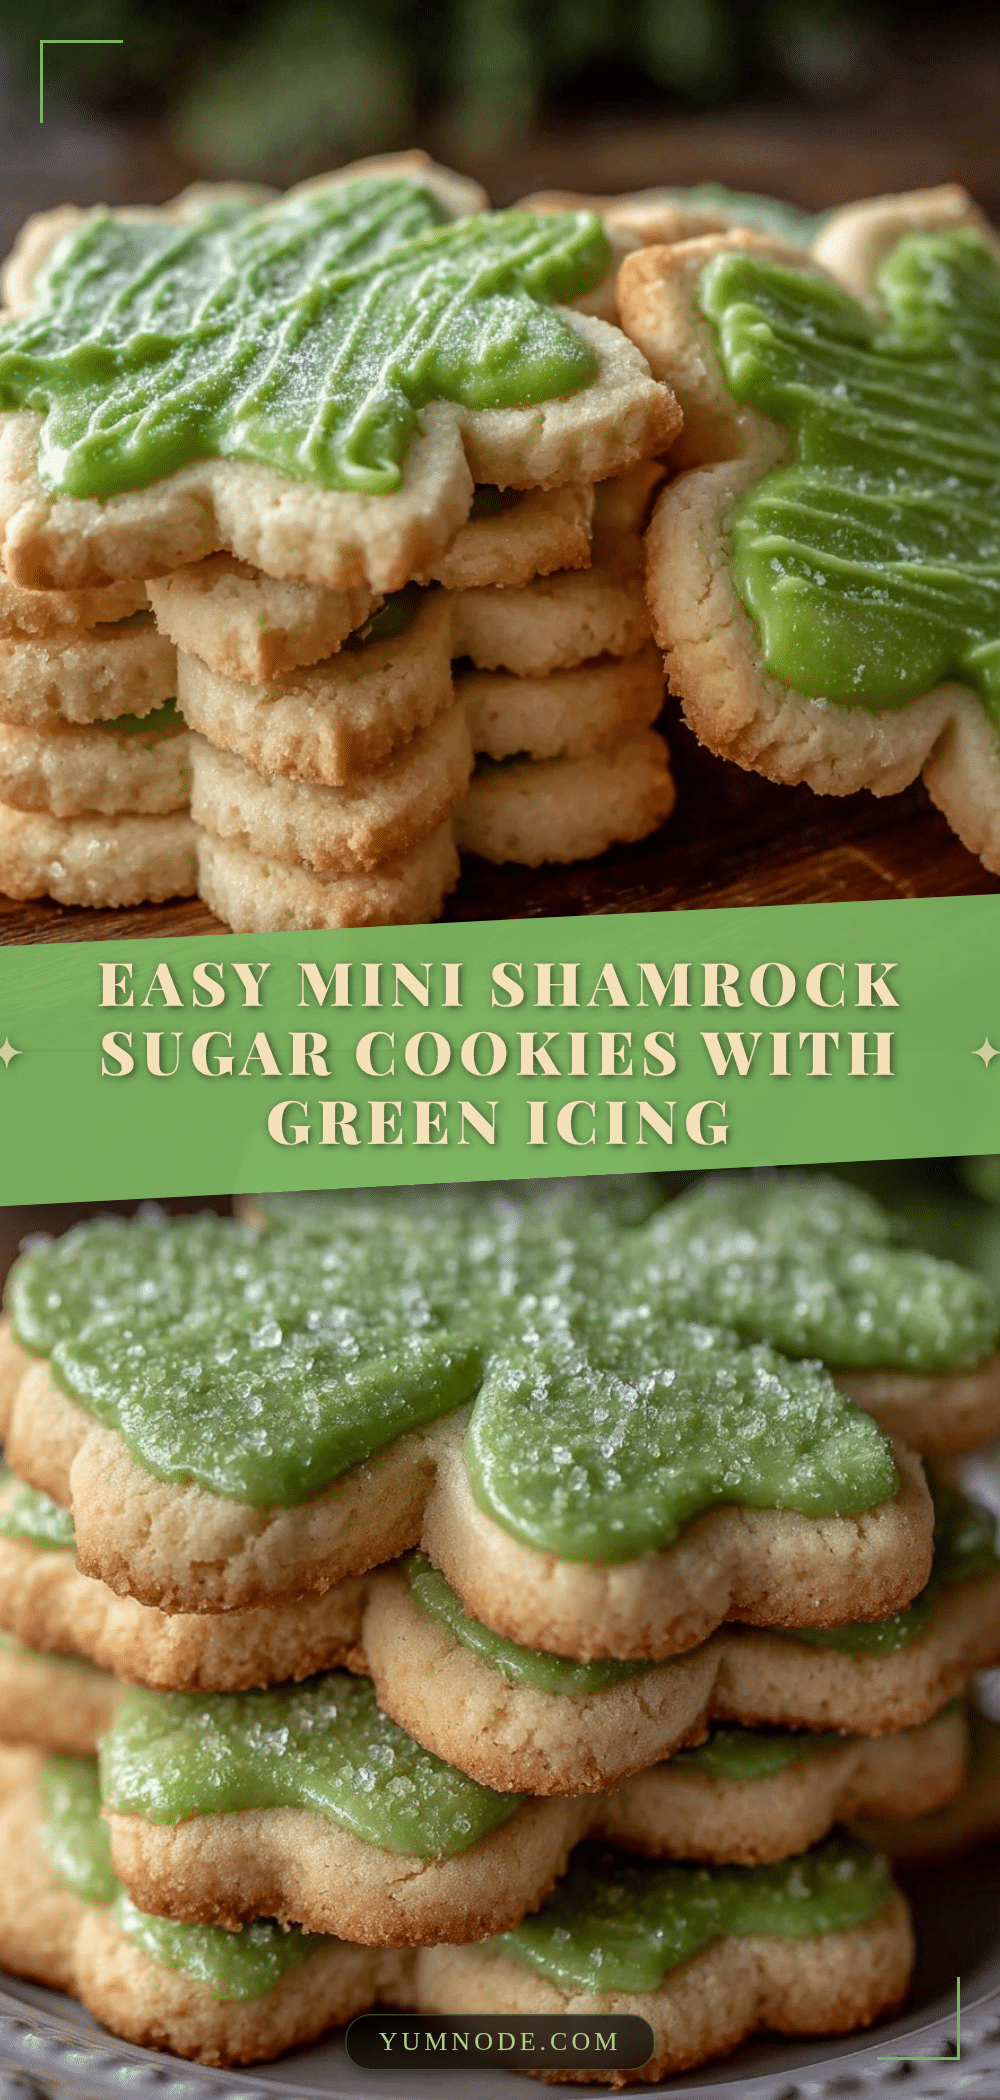
These easy mini shamrock sugar cookies weren’t planned—they kind of happened when I needed a quick festive treat for a last-minute St. Patrick’s Day get-together. I grabbed my trusty cookie cutters and a batch of royal icing that I whipped up while chatting on the phone with a friend. The green shade came from a tiny drop of gel food coloring, just enough to make the cookies pop without overwhelming that sweet vanilla flavor. The joy was in the simplicity, you know? No fuss, just a handful of perfect, bite-sized cookies that disappeared faster than I expected.
What really sticks with me about these cookies isn’t just the taste or the festive look—it’s the way they bring a little pause, a moment to share something homemade and lighthearted. They’ve become my go-to, especially when I’m pressed for time but want to show a bit of love through baking. And honestly, seeing those tiny shamrocks decorated with glossy green icing never fails to bring a quiet smile to my face.
Why You’ll Love This Easy Mini Shamrock Sugar Cookies Recipe with Green Royal Icing
This recipe has been my trusty companion for St. Patrick’s Day celebrations, and here’s why it deserves a spot in your baking rotation:
- Quick & Easy: The dough comes together super fast, and you can have decorated cookies ready in under an hour—perfect if you’re juggling a busy day or need a last-minute festive treat.
- Simple Ingredients: You won’t need to hunt for anything fancy. Basic pantry staples like flour, sugar, butter, and eggs do the trick, plus a few essentials for the royal icing.
- Perfect for St. Patrick’s Day: The mini shamrock shapes and vibrant green icing bring that festive cheer without overwhelming your kitchen.
- Crowd-Pleaser: These cookies get rave reviews from kids and adults, especially when the icing is just the right balance of sweet and smooth.
- Unbelievably Delicious: The buttery crumb of the sugar cookie paired with the slightly crisp royal icing creates a delightful texture combo that’s honestly addictive.
What makes this recipe stand out is the royal icing technique. I’ve tested different consistencies to nail that perfect glossy finish that hardens just enough to hold shape but still melts in your mouth. Plus, I tweak the green color to avoid that artificial look, making these cookies feel both homemade and special. It’s not just a cookie—it’s a little celebration on your plate that feels thoughtful, easy, and honestly, a bit magical.
What Ingredients You Will Need
This recipe uses simple, wholesome ingredients to deliver bold flavor and satisfying texture without the stress. Most of these are probably already in your pantry or fridge, making it a breeze to whip up a batch anytime the craving strikes.
- For the Sugar Cookies:
- All-purpose flour – 2 ½ cups (310 g)
- Baking powder – 1 teaspoon
- Salt – ½ teaspoon
- Unsalted butter, softened – 1 cup (227 g) (I like using Land O Lakes for consistent creaminess)
- Granulated sugar – ¾ cup (150 g)
- Large egg – 1, room temperature
- Pure vanilla extract – 1 teaspoon
- For the Green Royal Icing:
- Powdered sugar (confectioners’) – 3 cups (360 g), sifted
- Egg whites (or meringue powder) – 2 large egg whites or 3 tablespoons meringue powder with ¼ cup water
- Lemon juice – 1 tablespoon (adds brightness)
- Gel food coloring, green – a few drops (adjust to preferred shade)
Ingredient Tips: For a dairy-free option, swap butter with vegan margarine or coconut oil, but keep in mind texture might vary slightly. I recommend AmeriColor gel food coloring for vibrant, natural-looking green without that odd taste. If you want to swap out all-purpose flour, try a gluten-free blend with xanthan gum for best results.
Equipment Needed
- Mixing bowls – preferably one large and one medium
- Electric hand mixer or stand mixer – makes creaming butter and sugar a breeze
- Measuring cups and spoons – precise measurements are key here
- Rolling pin – a small one works perfectly for mini cookies
- Mini shamrock cookie cutter – about 2 inches (5 cm) wide
- Baking sheets lined with parchment paper or silicone mats – to prevent sticking and promote even baking
- Cooling rack – for letting cookies cool completely before icing
- Small piping bags or zip-top bags – for applying the royal icing
- Toothpicks or scribe tools – handy for smoothing icing or fixing little drips
If you don’t have a stand mixer, a good-quality hand mixer will do just fine. I’ve even used a sturdy wooden spoon when in a pinch, though it takes a bit more elbow grease. For piping, zip-top bags with a tiny corner snipped work just as well as fancy pastry bags, especially if you’re just starting out or want a quick clean-up. Also, keep your cookie cutters dry and clean, as damp cutters can make the dough stick and lose those crisp shamrock edges.
Preparation Method
- Mix Dry Ingredients: In a medium bowl, whisk together 2 ½ cups all-purpose flour, 1 teaspoon baking powder, and ½ teaspoon salt. Set aside.
- Cream Butter and Sugar: Using a stand or hand mixer, beat 1 cup softened unsalted butter with ¾ cup granulated sugar on medium speed until light and fluffy—about 3 to 5 minutes. This step is crucial for tender cookies.
- Add Egg and Vanilla: Beat in 1 large egg and 1 teaspoon vanilla extract until fully combined. The mixture might look slightly curdled but that’s okay.
- Combine Wet and Dry: Gradually add the flour mixture in batches, mixing on low speed until just combined. Avoid overmixing or the cookies will turn tough.
- Chill the Dough: Shape the dough into a flat disk, wrap in plastic wrap, and refrigerate for at least 1 hour. This helps prevent spreading and makes rolling easier.
- Preheat Oven & Prep Pans: Preheat your oven to 350°F (175°C). Line baking sheets with parchment paper or silicone mats.
- Roll and Cut: On a lightly floured surface, roll chilled dough to about ¼ inch (6 mm) thickness. Use your mini shamrock cutter to press out shapes, transferring cookies carefully to the baking sheet.
- Bake: Bake for 8 to 10 minutes or until edges are just beginning to turn golden. The centers will look soft but will firm up as they cool.
- Cool: Let cookies rest on the baking sheet for 5 minutes, then transfer to a wire rack to cool completely before decorating.
- Prepare Royal Icing: In a clean bowl, beat 3 cups sifted powdered sugar with 2 egg whites (or meringue powder mixture) and 1 tablespoon lemon juice until thick and glossy. Add green gel food coloring a drop at a time until you reach your desired shade.
- Decorate: Fill piping bags or zip bags with the green royal icing. Outline the cookies and then flood the centers, using a toothpick to smooth out the icing and pop air bubbles.
- Dry: Allow the icing to dry at room temperature for at least 2 hours, preferably overnight, to harden fully.
Pro Tip: If your royal icing feels too stiff, add a few drops of water to loosen it. Too runny? Add a bit more powdered sugar. Also, keep an eye on your oven’s temperature since cookie size and thickness affect baking time—smaller cookies bake faster, so start checking early.
Cooking Tips & Techniques
Getting those mini shamrock sugar cookies just right is a bit of an art, but I’ve learned a few tricks over the years. First, chilling the dough isn’t just a suggestion—it’s a must. It helps the cookies keep their cute shapes instead of spreading into sad green blobs. Plus, cold dough is easier to roll thin without sticking.
When it comes to royal icing, consistency is king. I usually prepare a thick outline icing first, then thin it slightly with water to flood the cookie centers. This two-step approach keeps edges neat and gives that smooth, shiny finish we all love. Don’t rush the drying process—trust me, impatient icing can crack or get sticky.
One mistake I made early on was using liquid food coloring, which thinned the icing and dulled the color. Switching to gel coloring made a world of difference in vibrancy and texture.
Timing-wise, try to bake and decorate in batches. While cookies cool, whip up your icing, and pipe steadily rather than rushing all at once. If you multitask well, you’ll keep your workspace tidy and your cookies flawless. Also, keep a damp cloth nearby to wipe your hands and tools frequently—the last thing you want is green smudges everywhere before the icing sets!
Variations & Adaptations
These mini shamrock sugar cookies are flexible and fun to tweak, depending on your preferences or dietary needs.
- Flavor Twists: Add a teaspoon of almond or peppermint extract to the dough for a subtle but delightful change. I once swapped vanilla for lemon zest and it was surprisingly fresh and festive.
- Color Variations: Instead of classic green, try pastel shades for a softer look or even gold accents using edible glitter for a little extra sparkle.
- Dietary Swaps: Use gluten-free flour blends for a gluten-free option and substitute butter with vegan margarine for dairy-free cookies. For the royal icing, meringue powder is a great egg-white alternative.
- Shape Alternatives: If you don’t have a shamrock cutter, heart or flower shapes work well and keep the festive spirit alive.
- Cooking Methods: While baking is best, you could try no-bake cookie dough balls with similar flavors for a quick snack, though they won’t have the same crisp texture.
One time, I tried piping tiny white dots on the green icing to mimic clover dew drops—turned out adorable and added a nice texture contrast. Feel free to get creative!
Serving & Storage Suggestions
These mini shamrock sugar cookies are best served at room temperature, allowing that delicate crispness and smooth icing to shine. They’re perfect on a festive platter alongside a pot of tea or a cold glass of milk. For St. Patrick’s Day brunch, they pair wonderfully with a light fruit salad or even alongside some zesty key lime pie bars if you’re going all out.
To store, place the cookies in an airtight container with parchment paper layers between to prevent sticking. They keep well at room temperature for up to 5 days. If you want to save them longer, freeze undecorated cookies for up to 3 months and decorate after thawing. Decorated cookies can be frozen too but might lose some icing gloss.
When reheating, just let frozen cookies thaw fully at room temperature—avoid microwaving as it can soften the icing and cookies. Over time, the flavors meld together, and the texture softens slightly, which some folks actually prefer.
Nutritional Information & Benefits
Each mini shamrock sugar cookie (about 1.5 inches/4 cm wide) contains roughly 70-90 calories, depending on icing thickness. The recipe is rich in simple carbs and fats from butter and sugar, so it’s definitely a treat rather than an everyday snack.
The key ingredients like butter and eggs provide some protein and essential fatty acids, while the lemon juice in the royal icing adds a subtle vitamin C boost. This recipe is naturally gluten-containing unless you swap flour blends, and contains egg whites, so watch out for allergies.
From my experience, these cookies fit nicely into a balanced indulgence mindset—enjoy them mindfully during a festive occasion like St. Patrick’s Day when you want a bit of homemade charm without overdoing it.
Conclusion
Easy mini shamrock sugar cookies with green royal icing are a charming, simple way to bring a little festive spirit to your kitchen without fuss or fancy ingredients. They’re quick to make, fun to decorate, and always bring smiles—whether you’re baking solo or with family. I love how this recipe lets me celebrate a holiday in bite-sized sweetness that feels special yet totally doable.
Feel free to tweak the colors, flavors, or shapes to suit your style and share the joy of baking with those around you. If you’ve enjoyed making these cookies, I’d love to hear how you personalized them or what festive treats you pair them with. There’s something so rewarding about creating and sharing simple, homemade goodness!
So next time you want an easy crowd-pleaser, remember these little shamrocks—and maybe pair them with a cozy slice of pumpkin spice bread with cream cheese swirl for a sweet start to your day.
FAQs About Easy Mini Shamrock Sugar Cookies with Green Royal Icing
How long do these cookies stay fresh?
Stored in an airtight container at room temperature, they stay fresh for about 4-5 days. For longer storage, freeze undecorated dough or baked cookies.
Can I use store-bought royal icing instead of making my own?
Yes, but homemade royal icing provides better control over consistency and color, plus it tastes fresher and less sweet than many store-bought options.
What if I don’t have a shamrock cookie cutter?
No worries! Heart, flower, or simple round cutters work well too and keep the festive vibe going.
Is it safe to use raw egg whites in royal icing?
If you’re concerned, use pasteurized egg whites or meringue powder. Both options work great and reduce any risk associated with raw eggs.
How can I prevent the royal icing from cracking?
Make sure to keep the icing at the right consistency—not too thick or thin—and let it dry slowly at room temperature without moving the cookies. Avoid refrigerating while drying, as humidity can cause cracks.
Pin This Recipe!
Easy Mini Shamrock Sugar Cookies Recipe with Green Royal Icing for St Patricks Day

These easy mini shamrock sugar cookies are a quick and festive treat perfect for St. Patrick’s Day, featuring buttery sugar cookies decorated with vibrant green royal icing.
- Prep Time: 15 minutes
- Cook Time: 10 minutes
- Total Time: 1 hour 30 minutes
- Yield: About 36 mini cookies
- Category: Dessert
- Cuisine: American
Ingredients
- All-purpose flour – 2 ½ cups (310 g)
- Baking powder – 1 teaspoon
- Salt – ½ teaspoon
- Unsalted butter, softened – 1 cup (227 g)
- Granulated sugar – ¾ cup (150 g)
- Large egg – 1, room temperature
- Pure vanilla extract – 1 teaspoon
- Powdered sugar (confectioners’) – 3 cups (360 g), sifted
- Egg whites – 2 large (or 3 tablespoons meringue powder with ¼ cup water)
- Lemon juice – 1 tablespoon
- Gel food coloring, green – a few drops
Instructions
- Mix Dry Ingredients: In a medium bowl, whisk together 2 ½ cups all-purpose flour, 1 teaspoon baking powder, and ½ teaspoon salt. Set aside.
- Cream Butter and Sugar: Using a stand or hand mixer, beat 1 cup softened unsalted butter with ¾ cup granulated sugar on medium speed until light and fluffy—about 3 to 5 minutes.
- Add Egg and Vanilla: Beat in 1 large egg and 1 teaspoon vanilla extract until fully combined.
- Combine Wet and Dry: Gradually add the flour mixture in batches, mixing on low speed until just combined. Avoid overmixing.
- Chill the Dough: Shape the dough into a flat disk, wrap in plastic wrap, and refrigerate for at least 1 hour.
- Preheat Oven & Prep Pans: Preheat oven to 350°F (175°C). Line baking sheets with parchment paper or silicone mats.
- Roll and Cut: On a lightly floured surface, roll chilled dough to about ¼ inch (6 mm) thickness. Use mini shamrock cutter to press out shapes and transfer to baking sheet.
- Bake: Bake for 8 to 10 minutes or until edges begin to turn golden.
- Cool: Let cookies rest on baking sheet for 5 minutes, then transfer to wire rack to cool completely.
- Prepare Royal Icing: Beat 3 cups sifted powdered sugar with 2 egg whites (or meringue powder mixture) and 1 tablespoon lemon juice until thick and glossy. Add green gel food coloring a drop at a time until desired shade is reached.
- Decorate: Fill piping bags or zip bags with green royal icing. Outline cookies and flood centers, smoothing icing with a toothpick.
- Dry: Allow icing to dry at room temperature for at least 2 hours, preferably overnight.
Notes
Chill dough for at least 1 hour to prevent spreading and make rolling easier. Use gel food coloring for vibrant green without thinning icing. For royal icing, prepare thick outline first, then thin for flooding. Let icing dry slowly at room temperature to avoid cracks. Store cookies in airtight container with parchment layers; freeze undecorated dough or cookies for longer storage.
Nutrition
- Serving Size: 1 mini cookie (about
- Calories: 7090
- Sugar: 7
- Sodium: 50
- Fat: 3.5
- Saturated Fat: 2
- Carbohydrates: 11
- Protein: 1
Keywords: mini shamrock sugar cookies, St. Patrick's Day cookies, green royal icing, festive cookies, easy sugar cookies, holiday baking