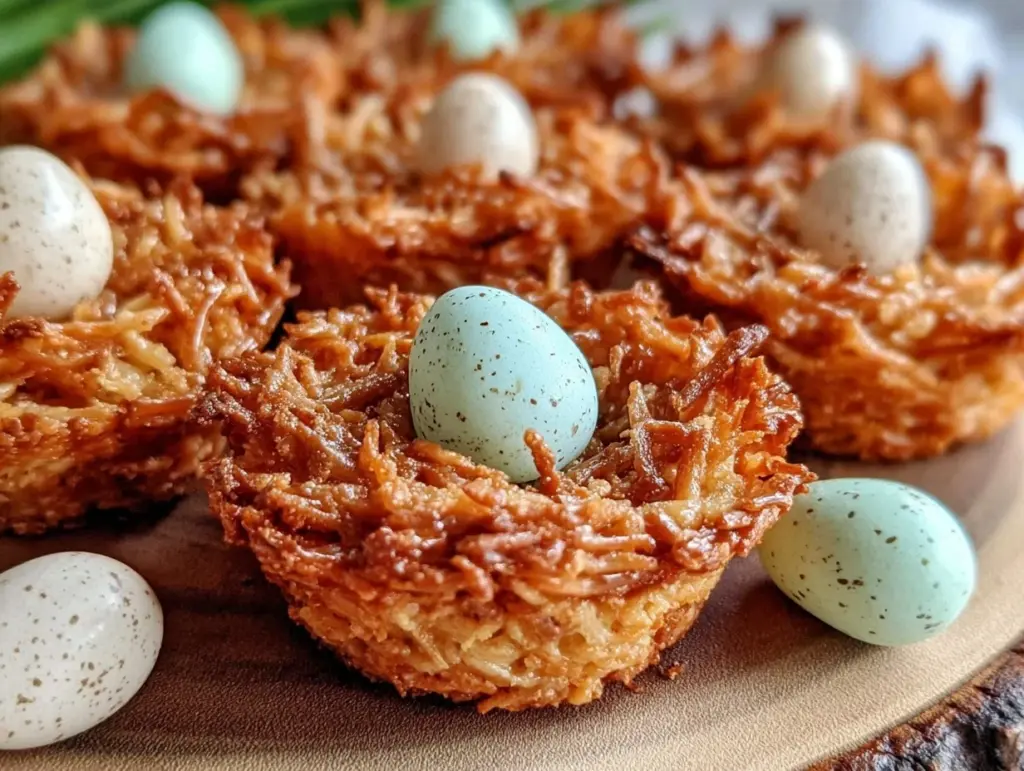
“You’ve got to try making these robin egg nest cookies — they’re so simple, yet they look like you spent hours on them,” my neighbor said last spring, nudging a plate toward me during an impromptu afternoon coffee break. Honestly, I was skeptical. No-bake cookies? Nest shapes? It sounded a bit fussy for a quick sweet fix, but I couldn’t resist the charm of pastel candy eggs nestled perfectly atop a crunchy, chocolatey base.
That afternoon, with the kitchen windows open to a gentle spring breeze and the faint scent of blooming lilacs wafting in, I gave it a go. The first batch came together in under 20 minutes — and, well, they vanished faster than I expected. The texture was a satisfying crunch paired with a hint of peanut butter and chocolate, and those robin egg candies? They brought a nostalgic pop of color and whimsy. It’s funny how a simple recipe like this, born from a casual chat, became my go-to spring treat for years.
These easy no-bake robin egg nest cookies aren’t just about looks — they’re about a quick, joyful kitchen moment that turns into a little celebration. Whether you’re making them with kids or need a last-minute dessert for a sunny brunch, they hold up as both playful and delicious. After a couple of spring seasons making these, I realized it’s the kind of recipe that quietly sneaks into your rotation because it’s just that good.
Plus, they pair surprisingly well with a creamy coffee or a refreshing iced tea — a combo that’s become a staple on my back porch. So yeah, these cookies? They stick around in your memory the way a perfect spring afternoon does, subtle but sweet.
Why You’ll Love This Recipe
Honestly, I’ve made plenty of no-bake cookies, but this robin egg nest version is something else. It’s like the best parts of spring wrapped up in a bite-sized treat, and here’s why it’s worth your time:
- Quick & Easy: You can whip up a batch in about 15-20 minutes — no oven, no fuss. Perfect for those days when you want something festive but fast.
- Simple Ingredients: Most of the ingredients are pantry staples or easy to find, and honestly, you probably already have peanut butter and chocolate on hand.
- Perfect for Spring Gatherings: Whether it’s an Easter brunch, a potluck, or just a sunny afternoon snack, these cookies bring a cheerful vibe to the table.
- Crowd-Pleaser: Kids love picking off the candy eggs, and adults appreciate the nostalgic chocolate-peanut butter combo — it’s a win-win.
- Unbelievably Delicious: The crunchy chow mein noodles give a unique texture that contrasts beautifully with the smoothness of the peanut butter and melted chocolate.
What sets this recipe apart is the magic of the nest shape combined with the crunch from chow mein noodles, which isn’t typical in no-bake cookies. Instead of the usual oats or rice cereal, these give a delicate crispness that’s honestly addictive. Plus, topping each cookie with those robin eggs adds a festive touch that feels special without any extra effort.
This isn’t just another no-bake cookie — it’s a recipe that brings a bit of spring whimsy to your kitchen table, and trust me, it’s one you’ll find yourself making over and over again.
What Ingredients You Will Need
This recipe calls for straightforward ingredients that come together to create a crunchy, chocolatey nest perfect for springtime.
- Chocolate chips (semi-sweet or milk chocolate): About 2 cups (340g) — I usually go with Ghirardelli for a smooth melt and rich flavor.
- Peanut butter (creamy preferred): 1/2 cup (125g) — adds the perfect nutty richness; natural or regular works fine.
- Unsalted butter: 1/4 cup (56g), softened — helps bind and adds smoothness.
- Powdered sugar: 1 cup (120g) — for a touch of sweetness and to thicken the mixture slightly.
- Vanilla extract: 1 teaspoon — for that subtle warmth and flavor depth.
- Chow mein noodles: 3 cups (about 75g) — these give the cookie their signature crunch and nest-like texture. They’re usually found near the Asian foods aisle.
- Mini robin egg candies: About 1 cup (150g) — these pastel candy-coated chocolate eggs are what make the nests so festive. You can also use mini malted milk eggs or even jelly beans if preferred.
If you’re allergic to peanuts, try swapping the peanut butter for almond or sunflower seed butter — the flavor shifts, but the texture stays great. For a dairy-free version, use a plant-based butter alternative and check your chocolate chips for dairy content.
One tip from experience: using softened butter instead of melted keeps the mixture from becoming too runny, which helps the nests hold their shape better. Also, if you can, pick mini robin eggs that aren’t too big — the smaller size fits perfectly in the nest without overwhelming the cookie.
Equipment Needed
- Mixing bowls: Medium and large bowls for combining ingredients.
- Microwave-safe bowl or double boiler: For melting the chocolate and butter mixture smoothly.
- Spoon or spatula: For stirring and folding the ingredients together.
- Baking sheet or tray: To set the nests on while they firm up.
- Parchment paper or silicone baking mat: Essential to prevent sticking and make cleanup a breeze.
- Measuring cups and spoons: For accurate ingredient portions.
If you don’t have a double boiler, a microwave works just fine — just heat the chocolate and butter in short bursts, stirring often to avoid burning. I’ve tried both methods, and honestly, the microwave is my go-to for speed. For shaping the nests, I usually just use my hands or a spoon to mound the mixture — no special molds needed.
Preparation Method
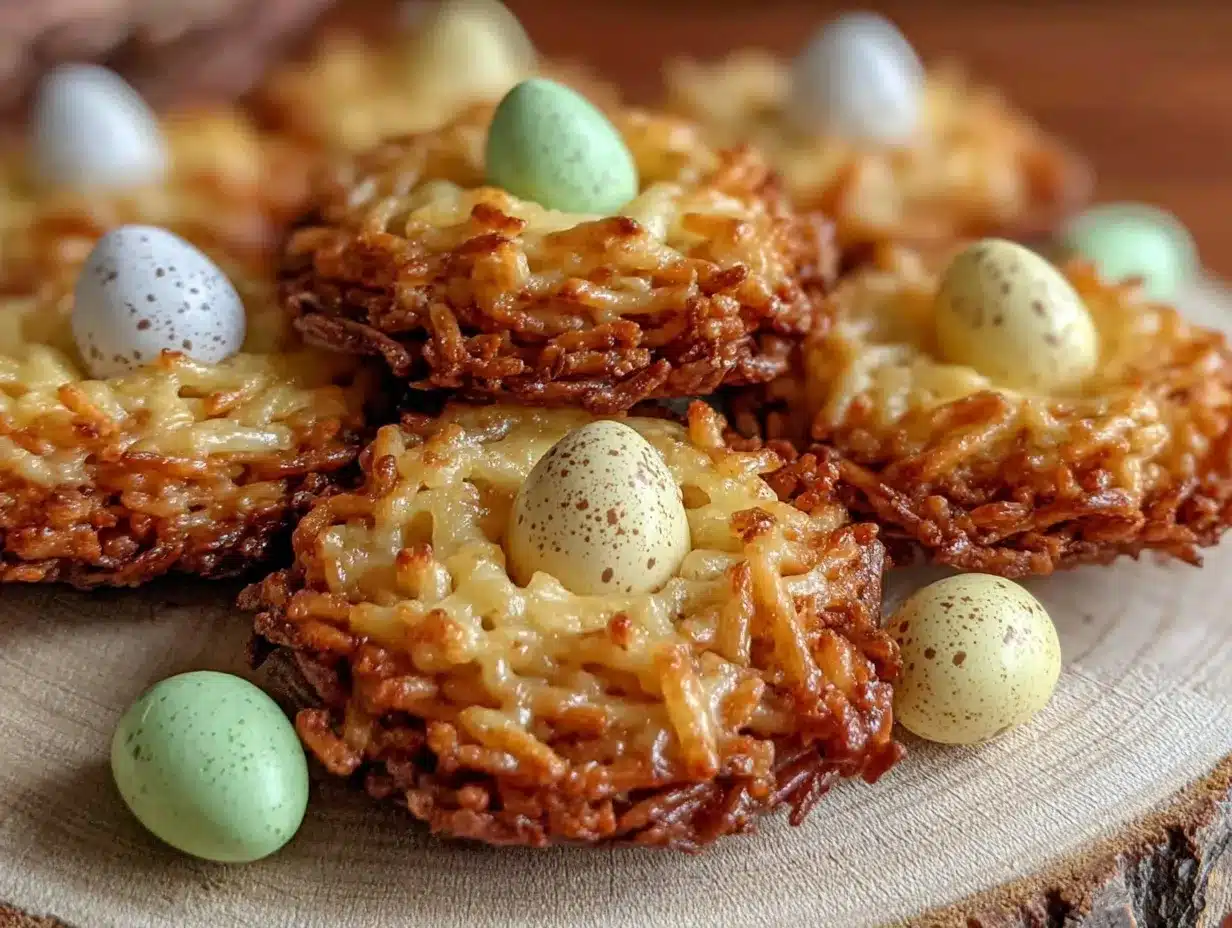
- Melt the chocolate, butter, and peanut butter: Combine 2 cups of chocolate chips, 1/4 cup softened unsalted butter, and 1/2 cup creamy peanut butter in a microwave-safe bowl. Heat in 30-second intervals, stirring well each time, until smooth and fully melted. This should take about 2-3 minutes total. Be careful not to overheat — the chocolate can seize if it gets too hot.
- Mix in powdered sugar and vanilla: Stir in 1 cup powdered sugar and 1 teaspoon vanilla extract until fully combined. The mixture will thicken slightly, which is what you want for holding the nests together.
- Add chow mein noodles: Gently fold in 3 cups of chow mein noodles. Use a spatula to coat all the noodles evenly with the chocolate-peanut butter mixture. The noodles should be glossy and well covered but not overly mushy.
- Form the nests: Line a baking sheet with parchment paper or a silicone mat. Using a spoon or your hands, scoop out small portions (about 1 tablespoon each) and place them on the sheet. Press a small well into the center of each mound to create the nest shape. This step takes a bit of patience, but the nests hold well if you press gently.
- Top with robin eggs: Press 3-4 mini robin egg candies into the center indentation of each nest. They’ll stick nicely as the chocolate sets.
- Chill to set: Place the baking sheet in the fridge for at least 30 minutes, or until the nests are firm to the touch. This helps the chocolate harden and keeps everything together.
- Serve and enjoy: Once chilled, transfer the nests to a serving plate. They’re best enjoyed within a couple of days but can be stored in an airtight container in the fridge for up to a week.
Quick tip: If the mixture feels too stiff to form nests, warm it slightly for 10 seconds in the microwave and stir to loosen. If too runny, pop it back in the fridge for a few minutes before shaping.
Cooking Tips & Techniques
Making no-bake treats like these robin egg nest cookies is pretty forgiving, but a few pointers can save you some frustration:
- Use room temperature ingredients: Softened butter and peanut butter blend more smoothly with melted chocolate, avoiding graininess.
- Don’t overheat chocolate: Chocolate can seize if microwaved too long or at too high power. Stir every 30 seconds to keep it smooth.
- Gently fold in chow mein noodles: Vigorous stirring can break the noodles into tiny bits, losing the nest texture.
- Shape nests while mixture is still pliable: If it cools too much, it becomes brittle and harder to mold.
- Chill enough time: Giving the nests a full 30 minutes in the fridge really helps them hold together when you pick them up.
- Multitask while chilling: Use the chilling time to prep drinks or set the table — it’s a nice little breather in the kitchen routine.
One time, I forgot to chill them long enough, and the nests fell apart when I tried moving them. Lesson learned: patience is key. Also, if you want to make the process easier, try using a small cookie scoop to portion the nests evenly.
Variations & Adaptations
These no-bake robin egg nest cookies are quite adaptable — here are some ways to switch things up:
- Nut-Free Version: Use sunbutter or soy nut butter instead of peanut butter for those with allergies.
- Chocolate Variety: Try dark chocolate chips for a richer flavor or white chocolate for a sweeter twist. Mixing half milk and half white chocolate can be fun, too.
- Seasonal Candy Toppings: Swap robin eggs for mini jelly beans at Easter, or red and green candies for Christmas nests.
- Gluten-Free Option: Confirm your chow mein noodles are gluten-free or substitute with puffed quinoa or rice cereal for a similar crunch.
- Extra Crunch: Add chopped toasted nuts or coconut flakes to the mix before chilling for some added texture.
Personally, I tried adding a pinch of cinnamon and a splash of orange zest once — it gave the nests a subtle warmth and zing that was a nice surprise. For a fun twist, you could even drizzle melted white chocolate over the nests after chilling for a pretty finish.
Serving & Storage Suggestions
These little nests are best served chilled or at room temperature. They’re perfect finger food for brunch tables or spring parties, and their festive look means you can set them right out without fuss.
Pair them with a creamy coffee, a refreshing iced tea, or even a light sparkling lemonade to balance the sweetness. They also make a charming addition to any dessert spread that includes lighter fruity treats like the creamy key lime pie bars or the easy no-bake strawberry pretzel salad.
To store, place nests in a single layer in an airtight container. They keep well in the fridge for up to a week. If you want to freeze them, wrap them individually in plastic wrap and place in a freezer-safe container — thaw at room temperature before serving.
Reheating isn’t necessary, but if you like your chocolate a bit melty, a few seconds in a warm room or near a sunny window works nicely. Over time, the flavors meld and the nests become even more satisfying — a classic example of simple ingredients coming together beautifully.
Nutritional Information & Benefits
Each cookie contains approximately 120-140 calories, depending on the size and exact ingredients used. The main source of energy comes from the peanut butter and chocolate, which provide protein and healthy fats, making these treats a more balanced indulgence compared to sugary snacks alone.
Peanut butter offers heart-healthy monounsaturated fats and vitamin E, while the dark chocolate option adds antioxidants. The powdered sugar gives sweetness without adding bulk, keeping the texture light. If you’re mindful of allergens, swapping peanut butter for sunflower seed butter or almond butter can help avoid reactions.
While these cookies are a treat, they fit nicely into a balanced diet when enjoyed in moderation. Plus, the quick prep and no-bake nature mean less time fussing with the oven and more time enjoying the season.
Conclusion
These easy no-bake robin egg nest cookies are a delightful spring treat that brings a touch of whimsy and nostalgia to any occasion. They’re quick to make, fun to assemble, and perfect for sharing with family and friends. What I love most is how they manage to feel festive without a lot of effort — and the crunch from chow mein noodles adds a little surprise that makes them stand out.
Whether you stick to the classic recipe or try one of the variations, these nests offer a sweet way to celebrate the season. I hope you find as much joy in making (and eating) them as I do — they’ve become a small but special part of my springtime traditions.
If you give this recipe a try, I’d love to hear how you customize your nests or what memories they bring up. Sharing food stories is part of the fun, after all!
Frequently Asked Questions
Can I use a different type of candy for the nest topping?
Absolutely! Mini malted milk eggs, jelly beans, or even small chocolate chips work well. Just pick candies that are small enough to nestle comfortably.
Do I have to use chow mein noodles, or can I substitute something else?
You can swap chow mein noodles with puffed rice cereal or quinoa for a gluten-free crunch, but the texture will vary slightly.
How long do these cookies last?
Stored in an airtight container in the fridge, they stay fresh for up to a week. You can freeze them for longer storage (up to 2 months).
Is it possible to make these cookies vegan?
Yes! Use dairy-free chocolate chips, a plant-based butter substitute, and a nut or seed butter that fits your diet.
Can I make these nests ahead of time for a party?
Definitely. They hold up well when made a day or two in advance and chilled. Just keep them covered in the fridge until serving.
Pin This Recipe!

Easy No-Bake Robin Egg Nest Cookies Recipe for Perfect Spring Treats

These easy no-bake robin egg nest cookies are a quick, joyful spring treat featuring a crunchy chocolate-peanut butter base topped with pastel candy eggs. Perfect for festive gatherings and made in under 20 minutes without an oven.
- Prep Time: 15 minutes
- Cook Time: 0 minutes
- Total Time: 45 minutes
- Yield: 24 cookies 1x
- Category: Dessert
- Cuisine: American
Ingredients
- 2 cups (340g) semi-sweet or milk chocolate chips
- 1/2 cup (125g) creamy peanut butter
- 1/4 cup (56g) unsalted butter, softened
- 1 cup (120g) powdered sugar
- 1 teaspoon vanilla extract
- 3 cups (about 75g) chow mein noodles
- 1 cup (150g) mini robin egg candies
Instructions
- Melt the chocolate chips, softened unsalted butter, and creamy peanut butter in a microwave-safe bowl in 30-second intervals, stirring well each time until smooth and fully melted (about 2-3 minutes).
- Stir in powdered sugar and vanilla extract until fully combined and mixture thickens slightly.
- Gently fold in chow mein noodles, coating them evenly with the chocolate-peanut butter mixture.
- Line a baking sheet with parchment paper or a silicone mat. Scoop out small portions (about 1 tablespoon each) and place on the sheet. Press a small well into the center of each mound to form the nest shape.
- Press 3-4 mini robin egg candies into the center indentation of each nest.
- Chill the baking sheet in the refrigerator for at least 30 minutes until nests are firm to the touch.
- Once chilled, transfer nests to a serving plate and enjoy. Store leftovers in an airtight container in the fridge for up to one week.
Notes
Use softened butter instead of melted to avoid runny mixture and help nests hold shape better. If mixture is too stiff, warm slightly in microwave for 10 seconds. If too runny, chill a few minutes before shaping. Use mini robin eggs that are small enough to fit comfortably in nests. For nut allergies, substitute peanut butter with almond or sunflower seed butter. For dairy-free, use plant-based butter and dairy-free chocolate chips.
Nutrition
- Serving Size: 1 cookie
- Calories: 130
- Sugar: 12
- Sodium: 70
- Fat: 8
- Saturated Fat: 3
- Carbohydrates: 15
- Fiber: 1
- Protein: 3
Keywords: no-bake cookies, robin egg nest cookies, spring treats, peanut butter cookies, chocolate cookies, easy dessert, no oven dessert, holiday cookies, Easter cookies



