Let me tell you, the smell of seasoned ground beef mingling with melted cheese and fresh toppings spilling out of crunchy chip bags is the kind of thing that stops you in your tracks. The first time I assembled these flavorful walking tacos in chip bags, I was instantly hooked—it was the kind of moment where you pause, take a deep breath, and just smile because you know you’re onto something truly special. Years ago, when I was knee-high to a grasshopper, family gatherings always meant big bowls of taco fixings, but no one ever thought to serve them in individual chip bags like this. Honestly, it’s a game changer.
You know what’s great? My family couldn’t stop sneaking them off the prep table (and I can’t really blame them). These walking tacos are dangerously easy to put together, perfect for potlucks, backyard barbecues, or a quick weeknight dinner that feels like a treat. They bring pure, nostalgic comfort with a fresh, fun twist—no plates needed, just grab and go. You’re going to want to bookmark this one for your next gathering because once you try this flavorful walking tacos recipe, it becomes a staple for family get-togethers and casual hangouts.
Why You’ll Love This Recipe
After testing this flavorful walking tacos recipe multiple times (in the name of research, of course), I’m confident it’s one of the easiest, most crowd-pleasing meals you can make. Here’s why it’s a winner:
- Quick & Easy: Comes together in under 30 minutes, perfect for busy weeknights or last-minute cravings.
- Simple Ingredients: No fancy grocery trips needed; you probably have everything in your pantry and fridge.
- Perfect for Any Occasion: Whether it’s a casual family dinner, a potluck, or a game day snack, these walking tacos fit right in.
- Crowd-Pleaser: Kids and adults alike love the interactive, customizable nature of eating straight from the chip bag.
- Unbelievably Delicious: The combination of crispy chips, savory seasoned meat, melty cheese, and fresh toppings is pure comfort food magic.
What sets this recipe apart is the way the flavors meld inside the chip bag itself. Instead of a messy taco shell, the chips act as a crunchy, flavorful vessel that soaks up all those tasty juices. I also add a touch of seasoning to the meat that you won’t find in your average taco mix. It’s not just another taco recipe—it’s the one that makes you close your eyes and savor every bite. Plus, it’s a fun, no-fuss meal that impresses guests without any stress.
What Ingredients You Will Need
This flavorful walking tacos recipe uses simple, wholesome ingredients to deliver bold flavor and a satisfying texture without any fuss. Most of these are pantry staples or easy to find at the store.
- Chips: Individual bags of Fritos, Doritos, or your favorite corn chips (the classic Fritos work best for that perfect salty crunch).
- Ground Beef: 1 pound (450g) of lean ground beef, seasoned to perfection.
- Taco Seasoning: Homemade or store-bought taco seasoning mix (I recommend a blend with chili powder, cumin, garlic powder, and paprika).
- Cheese: 1 cup (100g) shredded sharp cheddar or Mexican blend cheese (adds melty richness).
- Fresh Toppings: Diced tomatoes, shredded lettuce, chopped onions, and sliced jalapeños for crunch and zest.
- Sour Cream: Optional, for a cool, creamy finish.
- Salsa or Pico de Gallo: Fresh or jarred, to add brightness and a touch of acidity.
- Olives: Sliced black olives for an extra flavor pop (optional).
- Fresh Cilantro: Chopped, to sprinkle on top for a fresh finish.
Feel free to swap ground beef with ground turkey or a plant-based alternative if you want a lighter or vegetarian option. If you’re watching carbs, grab your favorite low-carb chip or even crunchy lettuce cups instead. In summer, fresh corn or avocado chunks make excellent add-ons. For dairy-free, use vegan cheese and skip the sour cream or replace it with a coconut-based alternative.
Equipment Needed
- Large Skillet: For browning the ground beef evenly (a non-stick skillet works wonders here).
- Spoon or Spatula: To stir and break up the meat as it cooks.
- Measuring Spoons: For precise seasoning amounts.
- Mixing Bowls: To prep and hold your toppings separately.
- Cheese Grater: If you’re shredding fresh cheese.
- Knife and Cutting Board: For chopping veggies and herbs.
If you don’t have a non-stick skillet, just be sure to stir frequently to avoid sticking or burning. A cast iron skillet also works well and adds a nice sear to the meat. For a budget-friendly option, any sturdy pan will do, just keep an eye on the cooking temperature. No fancy gadgets needed, which is why this recipe is so accessible and easy to make anytime.
Preparation Method
- Brown the Meat: Heat a large skillet over medium-high heat. Add 1 pound (450g) lean ground beef and cook for about 5-7 minutes, breaking it apart with a spatula, until browned and no longer pink. Drain any excess fat.
- Add Taco Seasoning: Sprinkle 2 tablespoons of your taco seasoning mix over the cooked beef. Stir well to coat evenly. Add 1/4 cup (60ml) water and simmer for 3-5 minutes until the mixture thickens slightly. You want that rich, flavorful sauce clinging to the meat.
- Prep Toppings: While the meat simmers, dice 1 medium tomato, shred 1 cup (50g) lettuce, chop 1/4 cup (40g) onions, slice a few jalapeños (remove seeds if you want less heat), and slice black olives if using. Set aside.
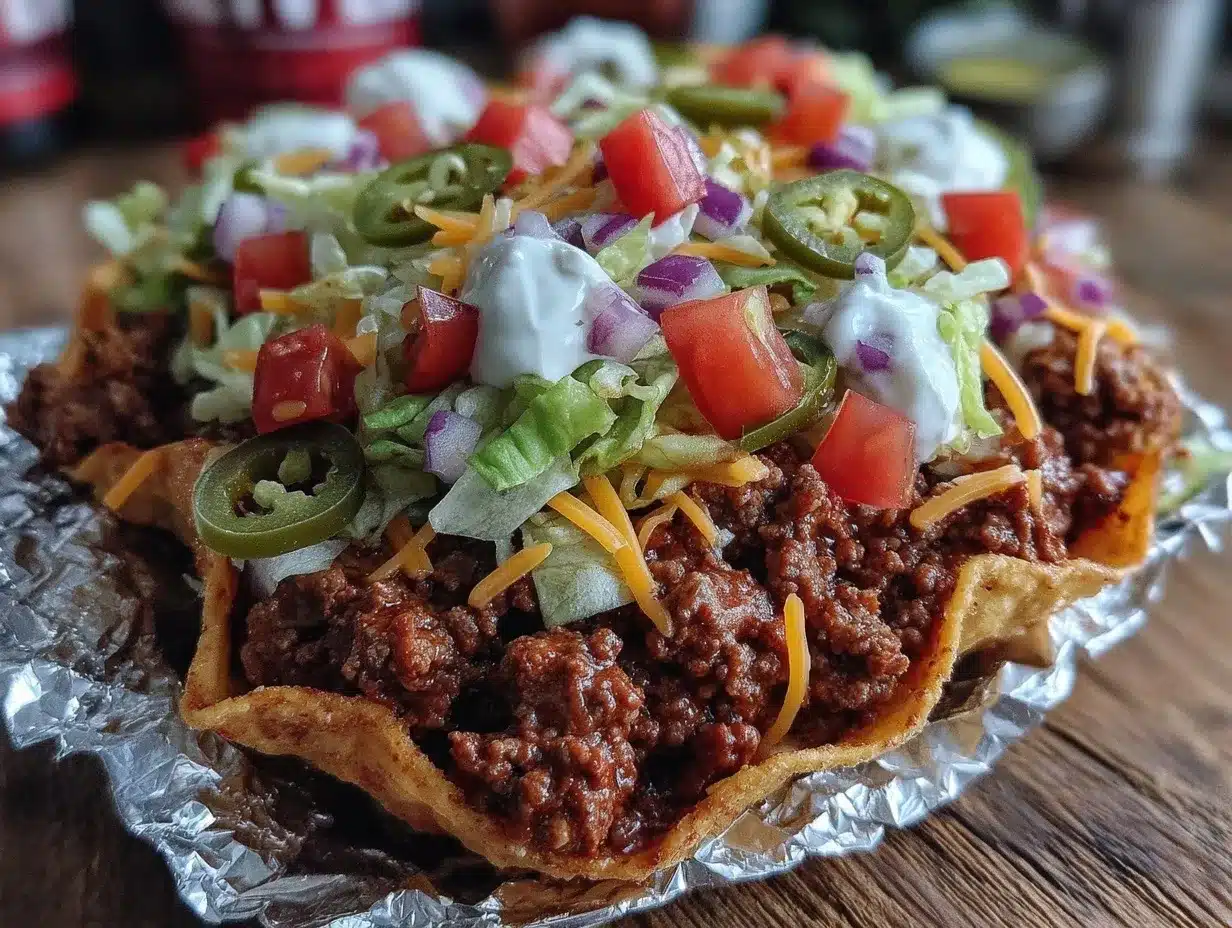
- Prepare Chip Bags: Carefully open each individual chip bag (about 2.5 ounces or 70g) without tearing it too much—you want it to hold the filling. Add a small handful of chips to the bottom of each bag, then fold down the top edge to create a bowl shape.
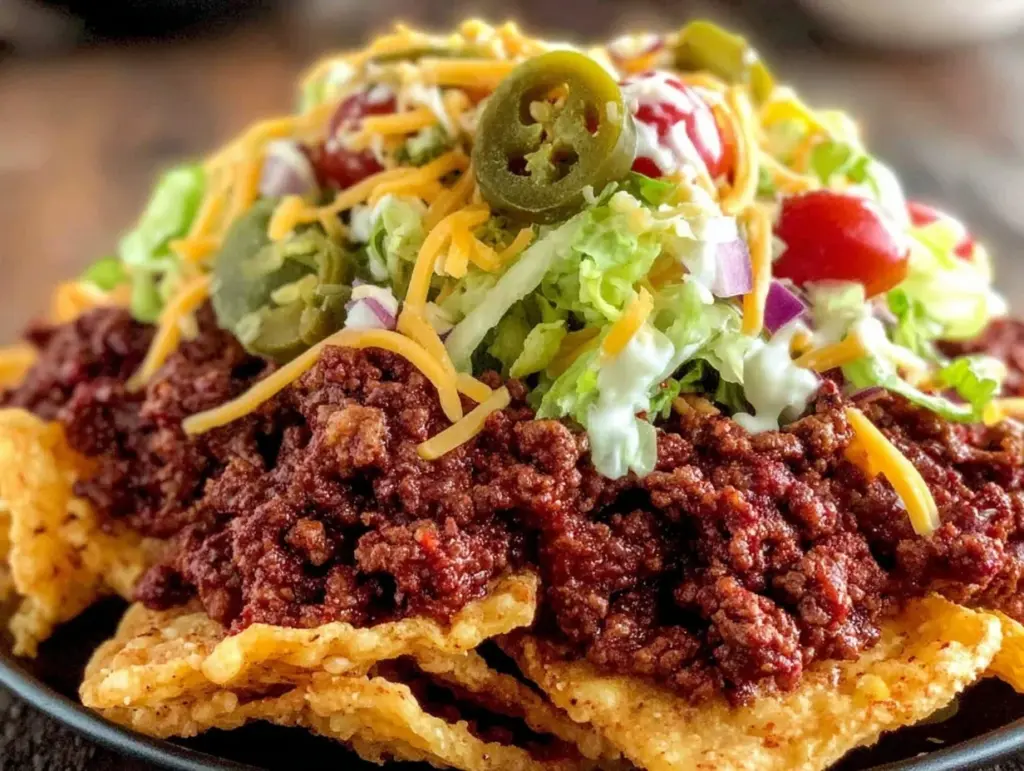
- Assemble Walking Tacos: Spoon about 1/3 cup (75g) of the seasoned beef into each chip bag over the chips. Sprinkle 1/4 cup (25g) shredded cheese on top to melt slightly from the warm meat. Add your fresh toppings as desired, finishing with a dollop of sour cream and a spoonful of salsa or pico de gallo.
- Garnish and Serve: Sprinkle chopped cilantro over the top for a fresh pop of flavor. Hand out the walking tacos with a fork or encourage eating straight from the bag—the fun is in the casual, mess-free eating experience.
Pro tip: If you want the cheese extra melty, pop the assembled bags in a warm oven (about 300°F / 150°C) for 3-4 minutes before serving. Keep an eye on the bags so they don’t get soggy or burn. Also, don’t overload the bags with meat or toppings—you want every bite to have a nice balance of crunchy chips and flavorful filling.
Cooking Tips & Techniques
Getting these flavorful walking tacos just right isn’t rocket science, but a few tips from my kitchen will save you some headaches. First, don’t rush browning the meat. Let it sit a bit in the pan before stirring so it picks up a nice caramelized flavor—this little crust makes all the difference. Also, draining excess fat keeps the tacos from becoming greasy but keep some for flavor.
When adding the taco seasoning, always taste and adjust. Sometimes store-bought mixes can be salty, so start with less and add more if needed. If you’re making your own seasoning, balance the chili powder with a pinch of sugar or smoked paprika for a deeper flavor.
Here’s a lesson I learned the hard way: opening chip bags too wide or overfilling makes them tear or get soggy fast. Fold the top for stability and don’t double-bag unless you want to carry a mini-burrito. Also, keep the chips out of the fridge—they lose their crunch fast. Assemble just before eating for the best texture.
Timing is key if you’re serving a crowd. Cook the meat ahead and keep warm in a slow cooker or covered pan. Chop toppings in advance and set up a mini taco bar for easy assembly. This way, everyone can customize their own walking tacos without the stress.
Variations & Adaptations
Walking tacos are wonderfully versatile, and I’ve tried several variations that you might like:
- Vegetarian Option: Swap ground beef for seasoned black beans or sautéed mushrooms. Add extra veggies like corn or bell peppers for texture.
- Seasonal Twist: In the fall, add roasted butternut squash cubes or pumpkin spice taco seasoning for a cozy vibe.
- Different Proteins: Use shredded chicken, ground turkey, or chorizo for a flavor boost. I once tried spicy shrimp with avocado, and it was a hit!
- Low-Carb Version: Replace chips with crunchy jicama sticks or lettuce wraps to keep it light and fresh.
- Spicy Kick: Add pickled jalapeños, hot sauce, or a chipotle crema drizzle for those who like it fiery.
Personally, I love mixing up the cheese—sometimes a smoky pepper jack or crumbled queso fresco adds a nice touch. Feel free to play around with your favorite flavors and textures. The beauty of walking tacos is in the customization!
Serving & Storage Suggestions
Walking tacos are best served fresh and warm. The melty cheese and seasoned beef taste incredible when everything is still a little warm, but honestly, they hold up well at room temperature too—perfect for outdoor events or picnics. Serve them with a side of fresh lime wedges and extra salsa for added zing.
If you have leftovers (which is rare), store the seasoned meat separately in an airtight container in the fridge for up to 3 days. Chips should be kept sealed in their original bags to stay crisp. When ready to eat, reheat the meat gently on the stove or microwave, then assemble fresh walking tacos to keep that crunch.
Freezing isn’t ideal for the assembled tacos, but you can freeze cooked, seasoned meat for up to 3 months. Thaw overnight in the fridge and reheat thoroughly before serving.
Flavors often deepen if you make the meat a few hours ahead, but chips will lose crispness if topped too early. So, assemble just before serving to keep that satisfying crunch you crave.
Nutritional Information & Benefits
Each serving of these flavorful walking tacos (one chip bag with toppings) provides approximately 350-400 calories, depending on chip choice and toppings. They offer a good balance of protein from the beef and cheese, carbohydrates from the chips, and fiber from fresh veggies.
Key benefits include the use of lean ground beef for essential iron and vitamin B12, plus fresh vegetables that add vitamins A and C. Using homemade seasoning reduces sodium compared to many pre-packaged mixes, making it a bit friendlier for your heart.
This recipe can easily be adapted for gluten-free diets by choosing certified gluten-free chips and seasonings. For dairy-free, swap the cheese and sour cream with plant-based alternatives. Just keep an eye on allergens like corn in chips for those sensitive.
From a wellness perspective, this meal feels indulgent but with some simple swaps, it can fit nicely into a balanced diet. It’s a perfect example of comfort food that doesn’t have to be complicated or heavy.
Conclusion
This flavorful walking tacos recipe is honestly one of those dishes that makes weeknight dinners feel like a celebration. It’s easy, fun, and totally customizable, so you can make it your own every time. Whether you’re feeding a crowd or just craving something quick with tons of flavor, these chip bag tacos hit the spot.
I love how it brings people together—no plates, no fuss, just good food and good vibes. Give it a try, tweak the toppings to your liking, and let me know how you make it your own. Don’t forget to share your variations and favorite combos in the comments—I’m always excited to hear your twists!
Go ahead, grab those chip bags, and get ready for a deliciously easy meal that’s as fun to eat as it is to make.
FAQs
What chips work best for walking tacos?
Classic Fritos corn chips are the best choice because they hold up well and offer a perfect salty crunch. Doritos or other sturdy corn chips also work great. Avoid thin or overly fragile chips that might get soggy quickly.
Can I make walking tacos vegetarian?
Absolutely! Swap the ground beef for seasoned beans, lentils, or sautéed mushrooms. Add extra veggies like corn, bell peppers, or avocado to keep the texture interesting.
How do I keep the chips from getting soggy?
Assemble walking tacos just before serving. Don’t overfill the chip bags, and fold the bag top down to keep the chips contained and crunchy. Avoid prepping too far in advance.
Can I prepare the meat ahead of time?
Yes! The seasoned meat can be cooked a day ahead and stored in the fridge. Reheat gently before assembling your walking tacos for the best flavor and texture.
Are walking tacos gluten-free?
They can be, as long as you choose gluten-free chip brands and taco seasoning. Always double-check labels, especially if cooking for someone with gluten intolerance or celiac disease.
Pin This Recipe!
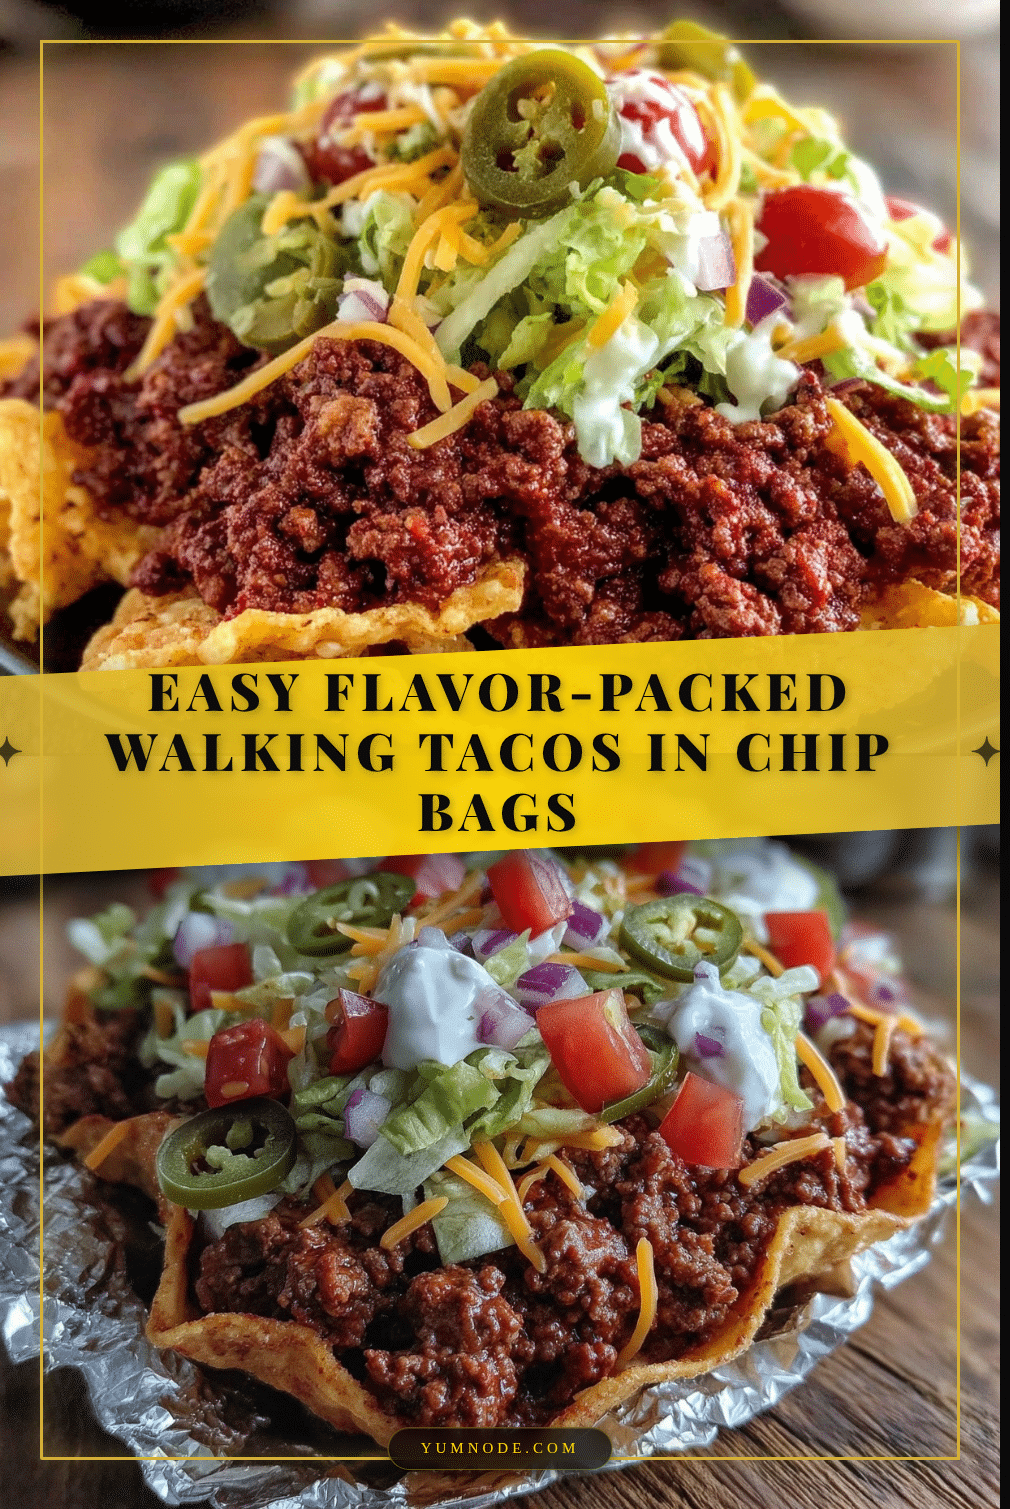
Flavorful Walking Tacos Recipe Easy Crowd-Pleasing Chip Bag Meals

A quick and easy walking tacos recipe served in individual chip bags, perfect for crowd-pleasing meals at family gatherings, potlucks, or casual dinners. This recipe combines seasoned ground beef, melty cheese, and fresh toppings for a fun, no-fuss eating experience.
- Prep Time: 10 minutes
- Cook Time: 15 minutes
- Total Time: 25 minutes
- Yield: 6 servings 1x
- Category: Main Course
- Cuisine: Mexican
Ingredients
- Individual bags of Fritos, Doritos, or your favorite corn chips (about 2.5 ounces or 70g each)
- 1 pound (450g) lean ground beef
- 2 tablespoons taco seasoning mix (homemade or store-bought)
- 1/4 cup (60ml) water
- 1 cup (100g) shredded sharp cheddar or Mexican blend cheese
- 1 medium tomato, diced
- 1 cup (50g) shredded lettuce
- 1/4 cup (40g) chopped onions
- Sliced jalapeños (to taste, seeds removed for less heat)
- Sliced black olives (optional)
- Sour cream (optional)
- Salsa or pico de gallo (fresh or jarred)
- Chopped fresh cilantro for garnish
Instructions
- Heat a large skillet over medium-high heat. Add 1 pound lean ground beef and cook for 5-7 minutes, breaking it apart with a spatula, until browned and no longer pink. Drain any excess fat.
- Sprinkle 2 tablespoons of taco seasoning mix over the cooked beef. Stir well to coat evenly. Add 1/4 cup water and simmer for 3-5 minutes until the mixture thickens slightly.
- While the meat simmers, prepare toppings: dice the tomato, shred the lettuce, chop the onions, slice jalapeños, and slice black olives if using. Set aside.
- Carefully open each individual chip bag without tearing it too much. Add a small handful of chips to the bottom of each bag, then fold down the top edge to create a bowl shape.
- Spoon about 1/3 cup (75g) of the seasoned beef into each chip bag over the chips. Sprinkle 1/4 cup (25g) shredded cheese on top to melt slightly from the warm meat.
- Add fresh toppings as desired, finishing with a dollop of sour cream and a spoonful of salsa or pico de gallo.
- Sprinkle chopped cilantro over the top for a fresh flavor pop. Serve immediately, encouraging eating straight from the bag or with a fork.
Notes
For extra melty cheese, warm assembled bags in a 300°F (150°C) oven for 3-4 minutes before serving. Avoid overfilling chip bags to prevent tearing or sogginess. Assemble just before eating to keep chips crunchy. Ground beef can be cooked ahead and kept warm. Substitute proteins or chips to suit dietary preferences.
Nutrition
- Serving Size: One chip bag with to
- Calories: 375
- Sugar: 3
- Sodium: 550
- Fat: 20
- Saturated Fat: 8
- Carbohydrates: 30
- Fiber: 3
- Protein: 20
Keywords: walking tacos, chip bag meals, easy tacos, crowd-pleaser, ground beef tacos, quick dinner, potluck recipe