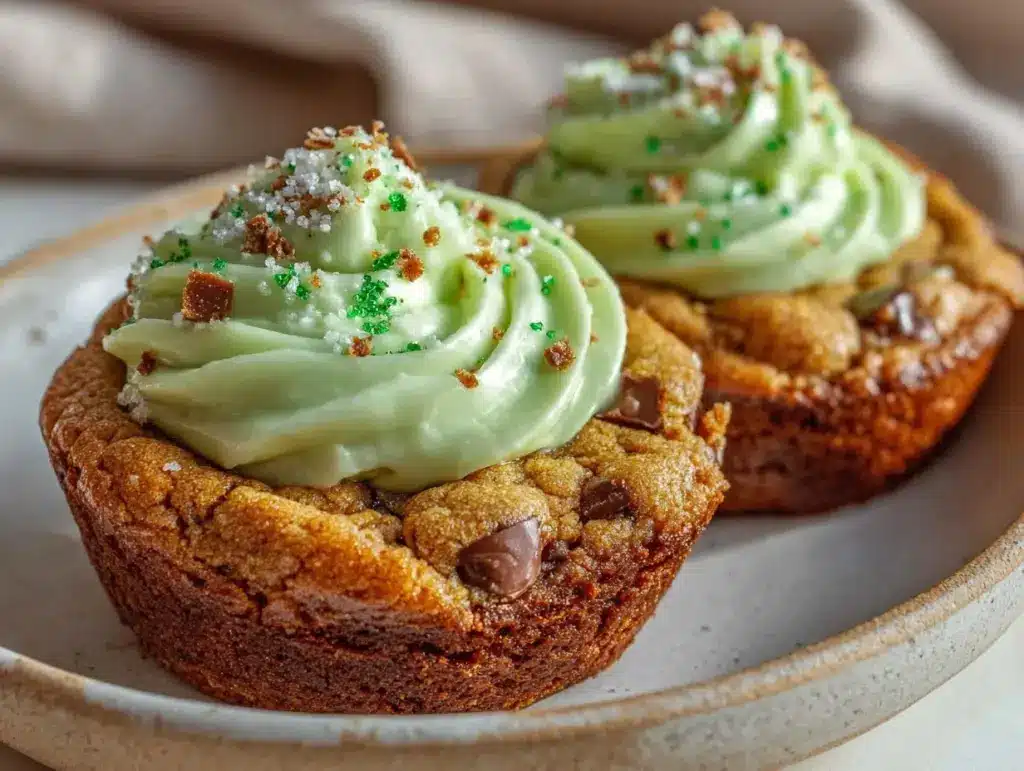
The smell of warm chocolate cookies mingled with a fresh hint of mint is honestly one of those little joys that instantly transports me to cozy kitchens and festive gatherings. I first whipped up these St. Patrick’s Mint Chocolate Frosted Cookie Cups a few years back when I wanted a fun, bite-sized treat that captured the spirit of the holiday without fuss. Let me tell you, these cookie cups quickly became my go-to for sharing with family and friends because they’re just that good.
What’s really great about this recipe is how it combines the rich, fudgy texture of chocolate cookies with a cool, creamy mint frosting—perfectly balanced to keep you coming back for more. Plus, they’re bite-sized, so you can enjoy a little indulgence without overdoing it. I’ve baked these dozens of times, tweaking and testing to get the frosting just right and the cookie cups perfectly soft but sturdy enough to hold the frosting without crumbling.
If you’re looking for a festive treat that’s as fun to make as it is to eat, these mint chocolate frosted cookie cups are all that and then some. Whether you’re celebrating St. Patrick’s Day or just craving a minty chocolate delight, this recipe is a keeper. It’s easy, crowd-pleasing, and honestly, a little bit magical on the taste buds.
Why You’ll Love This Recipe
After baking these cookie cups countless times, I can confidently say they’re a winner for many reasons. Here’s why you’ll adore making and sharing this recipe:
- Quick & Easy: From mixing to frosting, the whole process takes under an hour, making it perfect for last-minute celebrations or sweet cravings.
- Simple Ingredients: No hunting for fancy stuff here—most of these are pantry staples like cocoa powder, butter, sugar, and peppermint extract.
- Perfect for St. Patrick’s Day: The mint chocolate combo fits the holiday vibe perfectly, and the green frosting adds that festive pop.
- Crowd-Pleaser: Kids, adults, and even picky eaters love these—there’s something about the cool mint frosting that balances the rich cookie base so well.
- Unbelievably Delicious: The cookie cups are soft and chewy with just the right amount of chocolate punch, while the frosting is light, creamy, and minty without being overpowering.
What sets this recipe apart is the way the cookie cups hold their shape but still feel tender with a slightly crisp edge. Plus, frosting each cup by hand gives you that homemade charm that’s hard to beat. Honestly, after the first bite, you’ll understand why this recipe has become a favorite in my kitchen and hopefully yours too.
What Ingredients You Will Need
This recipe uses simple, wholesome ingredients to deliver bold flavor and satisfying texture without the fuss. Most of these you’ll likely have on hand, and a few special touches make all the difference.
- For the Cookie Cups:
- All-purpose flour – 1 ½ cups (190 g), sifted for lightness
- Unsweetened cocoa powder – ¼ cup (25 g), I prefer Valrhona for richness
- Baking soda – ½ teaspoon
- Salt – ¼ teaspoon, to balance the sweetness
- Unsalted butter – ½ cup (113 g), softened to room temperature (adds richness)
- Granulated sugar – ½ cup (100 g)
- Light brown sugar – ¼ cup (50 g), packed for moisture
- Large egg – 1, room temperature
- Pure vanilla extract – 1 teaspoon
- For the Mint Chocolate Frosting:
- Unsalted butter – ½ cup (113 g), softened
- Powdered sugar – 2 cups (240 g), sifted to avoid lumps
- Heavy cream – 2 tablespoons (30 ml), adjust for consistency
- Pure peppermint extract – ½ to ¾ teaspoon (start small, mint extract is strong!)
- Green food coloring – a few drops (optional, for that festive St. Patrick’s Day look)
- Mini chocolate chips or chocolate shavings – for garnish (adds a nice crunch)
Tip: For a dairy-free version, swap butter with vegan margarine and use coconut cream instead of heavy cream. Also, if you prefer a gluten-free option, almond flour can be used but expect a slightly different texture.
Equipment Needed
- Muffin tin or mini muffin tin (for smaller cookie cups) – I love using a non-stick one to help with easy release.
- Mixing bowls – one for dry ingredients, one for wet.
- Electric mixer or stand mixer – makes creaming butter and sugar a breeze, but a sturdy whisk works too.
- Measuring cups and spoons – for precise ingredient amounts.
- Rubber spatula – perfect for folding and scraping every last bit of batter.
- Cooling rack – helps cookies cool evenly and prevents sogginess.
- Pastry bag with a star tip or a small zip-top bag (for frosting) – makes frosting the cookie cups neat and pretty, but a simple knife works if you don’t have one.
Honestly, you don’t need fancy tools here. When I first started making these, I used a basic muffin pan and a spoon to dollop frosting—it worked just fine! For budget-friendly options, look for silicone muffin molds; they’re flexible and easy to clean.
Detailed Preparation Method
- Preheat your oven to 350°F (175°C). Lightly grease your muffin tin or line it with paper liners to prevent sticking. This helps the cookie cups release easily after baking.
- Combine dry ingredients: In a medium bowl, whisk together 1 ½ cups flour, ¼ cup cocoa powder, ½ teaspoon baking soda, and ¼ teaspoon salt. Set aside.
- Cream butter and sugars: In a large bowl, use an electric mixer to beat ½ cup softened butter, ½ cup granulated sugar, and ¼ cup packed light brown sugar until light and fluffy—about 3 minutes. This step is key for that tender texture.
- Add egg and vanilla: Beat in 1 large egg, then 1 teaspoon vanilla extract until fully combined. The batter should look smooth and glossy.
- Mix dry into wet: Gradually add the dry ingredients into the wet, mixing on low speed just until combined. Don’t overmix—you want the batter thick but not tough.
- Fill muffin cups: Using a spoon or cookie scoop, evenly divide the dough into the muffin cups, filling each about 2/3 full. This allows room for the cookie to rise without spilling over.
- Shape the cups: Press the center of each dough mound gently with your thumb or the back of a small spoon to create a shallow well. This is where the frosting will go later.
- Bake: Place the muffin tin in the preheated oven and bake for 12-14 minutes. The edges should be set but centers still slightly soft. A toothpick inserted near the edge should come out with a few moist crumbs.
- Cool: Let the cookie cups cool in the pan for 5 minutes, then transfer to a wire rack to cool completely. This prevents sogginess and keeps the cups sturdy.
- Prepare the frosting: In a bowl, beat ½ cup softened butter until creamy. Gradually add 2 cups powdered sugar, beating well after each addition. Mix in 2 tablespoons heavy cream, ½ teaspoon peppermint extract, and a few drops of green food coloring until smooth and fluffy. Adjust cream for desired spreadability.
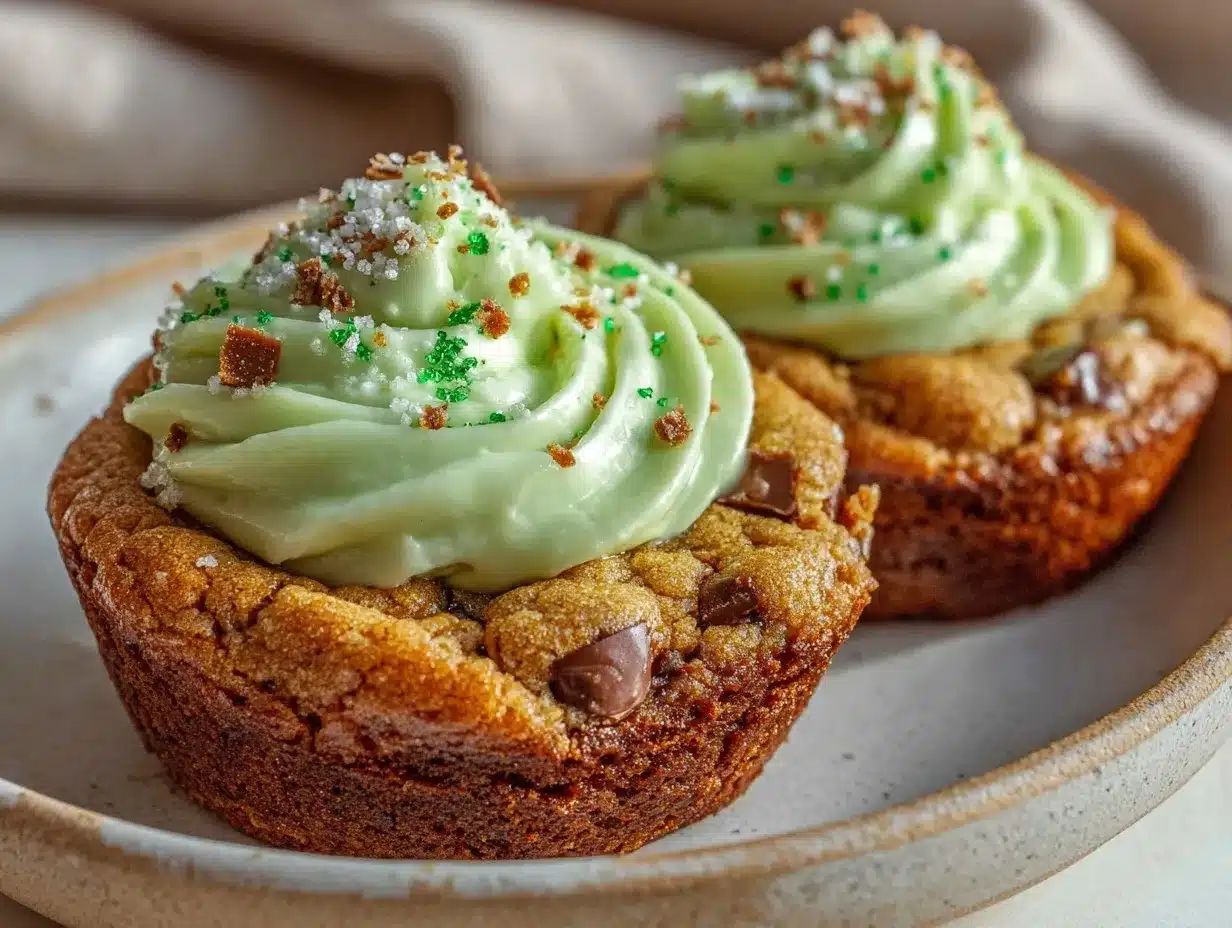
- Frost the cookie cups: Once the cups are fully cooled, pipe or spread the mint frosting into each well. Garnish with mini chocolate chips or shavings for an extra festive touch.
- Serve or chill: The cookie cups can be served immediately or chilled for 15-20 minutes to firm up the frosting. Store leftovers in an airtight container at room temperature or refrigerated.
Pro tip: If your cookie cups spread too much during baking, chill the dough before scooping next time. It helps keep the shape better. Also, don’t skip creating the indentation—trust me, it holds all that delicious frosting in place like a dream.
Cooking Tips & Techniques
Getting these mint chocolate frosted cookie cups just right took a few tries, so here’s what I’ve learned to help you nail it first go:
- Butter temperature matters: Make sure your butter is softened but not melted. Too soft and your cookie dough will be too loose, causing the cups to flatten out.
- Don’t overmix: When combining dry and wet ingredients, mix until just combined. Overmixing develops gluten, making cookies tough instead of tender.
- Indentation trick: Pressing the center before baking creates that perfect little cup for frosting. Do this gently so you don’t press the dough all the way down.
- Watch baking time closely: Cookies continue to cook as they cool. Pull them out when edges are set but centers still soft for that chewy texture.
- Frosting consistency: If frosting feels too thick, add a splash more cream. Too runny? Add a bit more powdered sugar. You want it creamy but stable enough to hold shape.
- Mint extract caution: Peppermint extract packs a punch. Start with less and add more to taste to avoid overpowering the chocolate.
- Multitasking: While cookies bake, whip up your frosting so you’re ready to frost as soon as they cool.
One time I accidentally used salt instead of sugar in the frosting—don’t ask how, but it was a lesson in tasting at every step! Thankfully, the cookie base saved the day. Just remember: patience and tasting as you go are your best friends here.
Variations & Adaptations
Feel like switching things up? These cookie cups are pretty adaptable, and here are some ideas I’ve tried or recommend:
- Dairy-Free Version: Use vegan butter and coconut cream for the frosting. The texture is slightly different but just as tasty.
- Seasonal Twist: Swap the mint extract for orange or almond extract for a different flavor profile. Adding crushed candy canes instead of chocolate chips gives a fun peppermint crunch.
- Gluten-Free Option: Replace all-purpose flour with a gluten-free blend or almond flour. The cookie cups will be a bit more crumbly but still delicious.
- Alternative Frostings: Try cream cheese frosting with a hint of lime zest for a tangy twist. Or use a dark chocolate ganache instead of mint frosting for a richer dessert.
- Size Variations: Use a mini muffin tin for bite-size treats perfect for parties, or a standard muffin tin for larger, shareable cookie cups.
Personally, I love swapping out peppermint for a splash of coffee extract sometimes—it adds a grown-up mocha vibe that’s unexpectedly delightful. Don’t be afraid to experiment to find your favorite version!
Serving & Storage Suggestions
These cookie cups are best served at room temperature so the frosting feels soft and creamy. They look adorable arranged on a festive platter—perfect for holiday parties or afternoon tea. Pair them with a glass of cold milk or a hot cup of coffee or tea to balance the sweetness.
To store, keep the cookie cups in an airtight container at room temperature for up to 3 days. If you live in a warm climate or want to keep them longer, refrigerate for up to a week. Just let them come back to room temperature before serving to soften the frosting.
For freezing, place the cookie cups on a baking sheet and freeze until firm, then transfer to a freezer-safe container. They keep well for up to 2 months. Thaw overnight in the fridge and bring to room temperature before enjoying.
Fun fact: I find the flavors actually deepen a bit after a day or two, with the mint and chocolate melding beautifully. So if you can resist, letting them rest for a day will reward you with an even tastier treat.
Nutritional Information & Benefits
Each cookie cup has roughly 150-180 calories depending on size and exact ingredient brands. They provide a moderate amount of fat from butter balanced with sugar for energy. The cocoa powder adds antioxidants that are a nice bonus.
This treat isn’t low-calorie by any means, but it’s a delightful indulgence that can fit into a balanced diet when enjoyed in moderation. Using real butter and fresh ingredients means you’re avoiding preservatives and artificial flavors common in store-bought sweets.
The peppermint extract not only adds flavor but can help with digestion and freshen breath—a little bonus from nature! Just be mindful if you have allergies to dairy or gluten, but substitutions can easily adapt this recipe to your needs.
Conclusion
So there you have it—St. Patrick’s Mint Chocolate Frosted Cookie Cups that are as fun to make as they are to eat. They strike that perfect balance of rich chocolate and refreshing mint, all in a cute, handheld package. I love how this recipe brings a bit of festive spirit into my kitchen without complicated steps or weird ingredients.
Feel free to play around with the flavors and sizes to make it your own—whether you stick to the classic mint or try a twist, these cookie cups are bound to impress. I can’t wait to hear how you put your spin on them, so please drop a comment or share your photos!
Happy baking, and may your St. Patrick’s Day be filled with sweet moments and plenty of minty chocolate goodness!
FAQs
Can I make these cookie cups ahead of time?
Absolutely! You can bake the cookie cups a day or two in advance and store them in an airtight container. Frost them just before serving for the freshest look and taste.
What if I don’t have peppermint extract?
You can substitute with spearmint extract or even a few drops of peppermint oil (use sparingly). Alternatively, try vanilla extract for a more neutral flavor.
How do I prevent the cookie cups from spreading too much?
Chill the cookie dough for 30 minutes before scooping and pressing into the muffin tin. Also, make sure your butter is softened, not melted.
Can I make these gluten-free?
Yes! Swap the all-purpose flour with a gluten-free flour blend or almond flour. Just note the texture might be slightly different but still delicious.
What’s the best way to store leftover cookie cups?
Store them in an airtight container at room temperature for up to 3 days or refrigerate for up to a week. For longer storage, freeze them and thaw before serving.
Pin This Recipe!

Irresistible St. Patrick’s Mint Chocolate Frosted Cookie Cups

These bite-sized cookie cups combine rich, fudgy chocolate cookies with a cool, creamy mint frosting, perfect for St. Patrick’s Day or any festive occasion. Easy to make and crowd-pleasing, they offer a delightful balance of flavors and textures.
- Prep Time: 15 minutes
- Cook Time: 14 minutes
- Total Time: 45 minutes
- Yield: 12 servings 1x
- Category: Dessert
- Cuisine: American
Ingredients
- 1 ½ cups all-purpose flour (190 g), sifted
- ¼ cup unsweetened cocoa powder (25 g)
- ½ teaspoon baking soda
- ¼ teaspoon salt
- ½ cup unsalted butter (113 g), softened
- ½ cup granulated sugar (100 g)
- ¼ cup light brown sugar (50 g), packed
- 1 large egg, room temperature
- 1 teaspoon pure vanilla extract
- ½ cup unsalted butter (113 g), softened (for frosting)
- 2 cups powdered sugar (240 g), sifted
- 2 tablespoons heavy cream (30 ml)
- ½ to ¾ teaspoon pure peppermint extract
- A few drops green food coloring (optional)
- Mini chocolate chips or chocolate shavings (for garnish)
Instructions
- Preheat oven to 350°F (175°C). Lightly grease muffin tin or line with paper liners.
- In a medium bowl, whisk together flour, cocoa powder, baking soda, and salt.
- In a large bowl, beat softened butter, granulated sugar, and brown sugar until light and fluffy, about 3 minutes.
- Beat in egg and vanilla extract until smooth and glossy.
- Gradually add dry ingredients to wet ingredients, mixing on low speed just until combined. Do not overmix.
- Spoon or scoop dough evenly into muffin cups, filling each about 2/3 full.
- Press the center of each dough mound gently to create a shallow well.
- Bake for 12-14 minutes until edges are set but centers are slightly soft. A toothpick near the edge should come out with a few moist crumbs.
- Cool cookie cups in pan for 5 minutes, then transfer to wire rack to cool completely.
- For frosting, beat softened butter until creamy. Gradually add powdered sugar, beating well after each addition.
- Mix in heavy cream, peppermint extract, and green food coloring until smooth and fluffy. Adjust cream for desired consistency.
- Frost cooled cookie cups by piping or spreading mint frosting into each well.
- Garnish with mini chocolate chips or chocolate shavings.
- Serve immediately or chill for 15-20 minutes to firm up frosting. Store leftovers in airtight container at room temperature or refrigerated.
Notes
Use softened but not melted butter to prevent dough from spreading too much. Chill dough before scooping if needed. Press center gently to create indentation for frosting. Adjust peppermint extract carefully as it is strong. Frosting consistency can be adjusted with heavy cream or powdered sugar. For dairy-free, use vegan margarine and coconut cream. For gluten-free, substitute flour with almond or gluten-free blend.
Nutrition
- Serving Size: 1 cookie cup
- Calories: 165
- Sugar: 16
- Sodium: 90
- Fat: 9
- Saturated Fat: 5
- Carbohydrates: 22
- Fiber: 1
- Protein: 2
Keywords: St. Patrick's Day, mint chocolate, cookie cups, frosted cookies, festive dessert, easy cookie recipe, bite-sized treats