Introduction
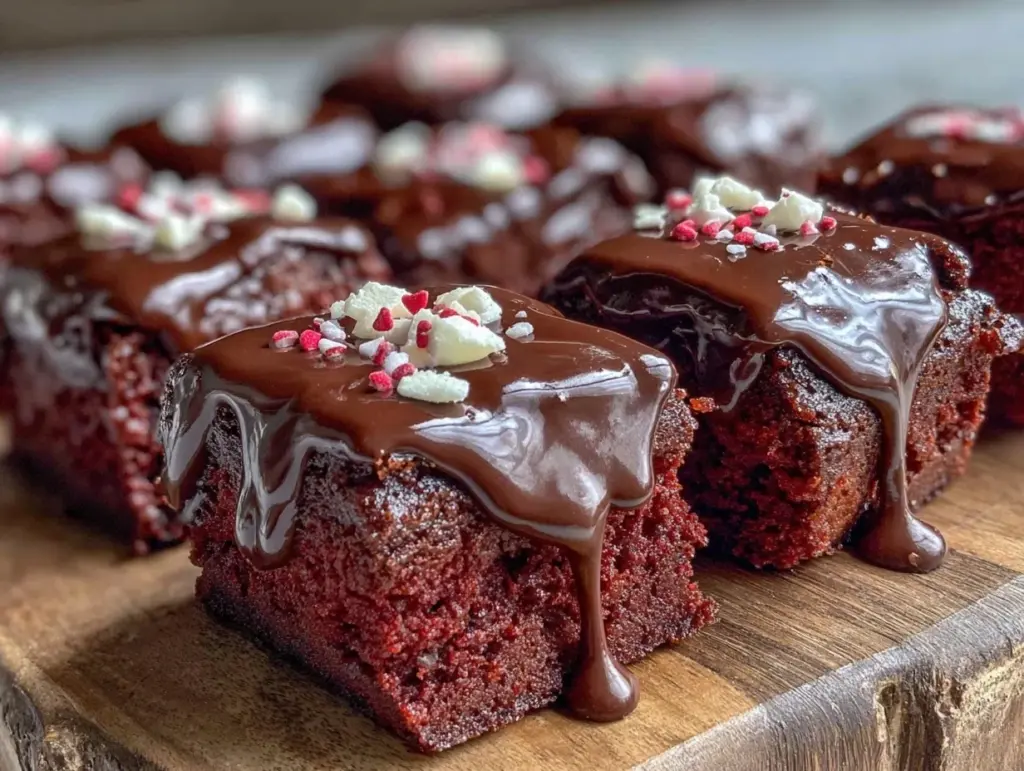
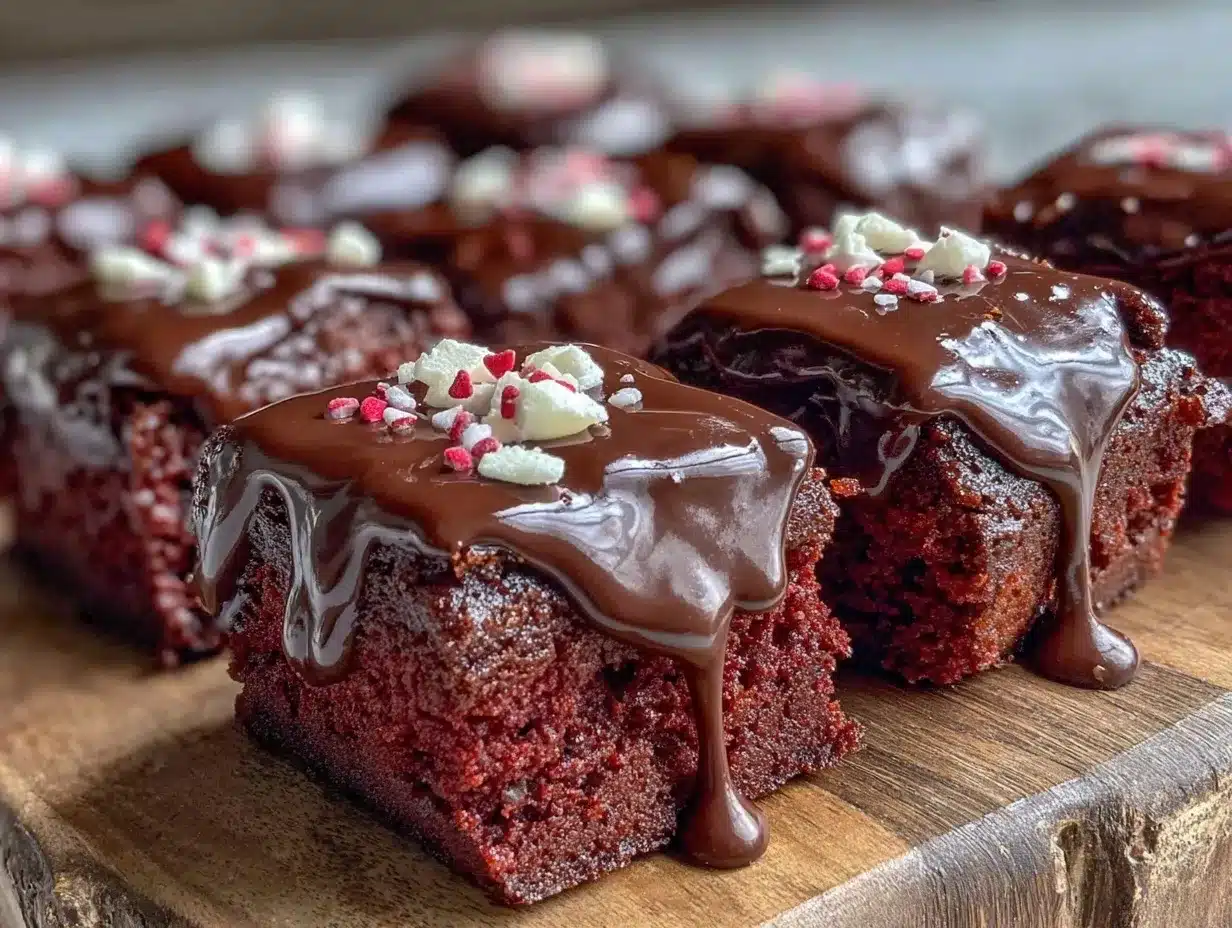
The rich red hue of these Valentine’s Red Velvet Chocolate Drip Bars instantly catches your eye, promising a sweet treat that’s as delightful to look at as it is to eat. I first whipped these up one chilly February evening when I wanted a dessert that screamed romance without the fuss of a fancy cake. Honestly, the moment I sliced into that moist, velvety bar and saw the glossy chocolate drip, I was hooked.
This recipe has since become my go-to for romantic occasions, quick dessert fixes, and even when friends drop by unexpectedly. The balance between the tender red velvet base and the luscious chocolate drip feels like a little love letter baked into every bite. Plus, it’s surprisingly simple—no elaborate piping or tempering required.
If you’ve been hunting for a Valentine’s dessert that’s show-stopping but doesn’t take hours, this recipe fits the bill perfectly. Whether you’re surprising someone special or just treating yourself (because hey, self-love counts too), these Red Velvet Chocolate Drip Bars are sure to impress and satisfy. After testing this recipe multiple times, tweaking the chocolate drip for that perfect glossy finish, I’m confident you’ll find it just as addictive as I do!
Why You’ll Love This Recipe
- Quick & Easy: Comes together in under 45 minutes, perfect when you want a homemade touch without the stress.
- Simple Ingredients: No need for exotic items; you probably have everything in your pantry right now.
- Perfect for Romantic Occasions: Whether it’s Valentine’s Day, an anniversary, or just a sweet surprise, these bars set the mood.
- Crowd-Pleaser: Kids and adults alike rave about the soft texture combined with the silky chocolate drip.
- Unbelievably Delicious: The moist red velvet flavor blends flawlessly with the bittersweet chocolate, making comfort food that feels fancy.
What really sets these bars apart is the chocolate drip technique I perfected after many trials—no cracked glaze or dull finish here. The drip is glossy, smooth, and just thick enough to hold its shape while melting perfectly on your tongue. Plus, the texture of the bars is dreamy: moist but firm, with a hint of tang from the buttermilk that balances all that sweetness.
Honestly, this isn’t just another red velvet dessert; it’s a love story in every bite. I love how easy it is to whip up yet looks like you spent hours in the kitchen. If you want to impress your Valentine without breaking a sweat, these bars have your back.
What Ingredients You Will Need
This recipe uses simple, wholesome ingredients to deliver bold flavor and satisfying texture without the fuss. Most items are pantry staples, with a few fresh touches for that authentic red velvet profile.
- For the Red Velvet Bars Batter:
- All-purpose flour, 1 ½ cups (190 g) – for a tender crumb
- Granulated sugar, 1 cup (200 g) – adds sweetness and structure
- Unsweetened cocoa powder, 2 tbsp (15 g) – for that subtle chocolate note
- Baking powder, 1 tsp – helps the bars rise just right
- Baking soda, ½ tsp – works with buttermilk for lift
- Salt, ¼ tsp – balances sweetness
- Buttermilk, ½ cup (120 ml), room temperature – adds tang and moisture (I prefer local dairies for freshness)
- Vegetable oil, ½ cup (120 ml) – keeps bars moist
- Large eggs, 2, room temperature – for binding and richness
- Vanilla extract, 1 tsp – deepens flavor
- Red food coloring gel, 1 tbsp – the star that gives that iconic red velvet color (gel works best for vibrancy)
- For the Chocolate Drip:
- Semi-sweet chocolate chips, 1 cup (180 g) – choose a quality brand like Ghirardelli for smooth melting
- Heavy cream, ½ cup (120 ml) – creates that glossy, luscious drip
- Unsalted butter, 1 tbsp (14 g), softened – adds shine and silky texture
- Vanilla extract, ½ tsp – optional, for extra depth
Substitution tips: Use dairy-free milk and coconut cream instead of buttermilk and heavy cream for a vegan twist. Almond or oat flour can replace all-purpose flour for gluten-free adaptations, though texture will change slightly.
Equipment Needed
- 9×9 inch (23×23 cm) baking pan – I like using a glass pan for even baking, but metal works fine too
- Mixing bowls – at least two, one for dry and one for wet ingredients
- Electric hand mixer or stand mixer – makes blending smooth and quick
- Rubber spatula – great for folding and scraping batter without waste
- Measuring cups and spoons – accurate measurements help avoid baking mishaps
- Small saucepan – for heating cream to make chocolate drip
- Wire rack – for cooling the bars before adding the drip
If you don’t have a mixer, a sturdy whisk and some elbow grease will do just fine. For the chocolate drip, a microwave-safe bowl can replace the saucepan method, but watch carefully to avoid burning. Budget-wise, these are all basic kitchen tools you probably already own or can grab inexpensively.
Detailed Preparation Method
- Preheat your oven to 350°F (175°C). Grease your 9×9 inch (23×23 cm) baking pan or line it with parchment paper for easy removal.
- Mix dry ingredients: In a large bowl, sift together 1 ½ cups (190 g) all-purpose flour, 2 tbsp (15 g) cocoa powder, 1 tsp baking powder, ½ tsp baking soda, and ¼ tsp salt. Set aside.
- Blend wet ingredients: In another bowl, whisk 1 cup (200 g) sugar and ½ cup (120 ml) vegetable oil until combined. Add 2 large eggs one at a time, beating well after each addition. Stir in 1 tsp vanilla extract and 1 tbsp red food coloring gel until the mixture is smooth and vibrant.
- Combine buttermilk: Slowly add ½ cup (120 ml) buttermilk to the wet mix, stirring gently. The batter will look glossy and red.
- Incorporate dry ingredients: Gradually fold the dry ingredients into the wet, mixing just until no streaks remain. Be careful not to overmix—this keeps the bars tender.
- Pour batter into pan: Spread evenly with a rubber spatula, smoothing the top. Tap the pan lightly on the counter to release any air bubbles.
- Bake: Place in the oven and bake for 25-30 minutes, or until a toothpick inserted in the center comes out with just a few moist crumbs. Overbaking dries out the bars, so start checking at 25 minutes.
- Cool: Remove from oven and let the bars cool completely in the pan on a wire rack. This step is crucial before adding the chocolate drip or it will melt and slide off.
- Prepare the chocolate drip: Heat ½ cup (120 ml) heavy cream in a small saucepan over medium heat until just simmering (small bubbles form around the edges). Remove from heat and pour over 1 cup (180 g) semi-sweet chocolate chips. Let sit 2 minutes, then stir gently until smooth. Stir in 1 tbsp (14 g) softened butter and ½ tsp vanilla extract for extra shine.
- Drip the chocolate: Using a spoon or spatula, drizzle the chocolate ganache over the cooled bars, letting it drip naturally down the sides. For a cleaner look, work quickly before the chocolate firms up.
- Chill to set: Place the bars in the refrigerator for at least 30 minutes to let the chocolate drip firm up before slicing.
- Serve: Cut into squares with a sharp knife warmed under hot water to get clean edges.
Pro tip: If your chocolate drip is too thick, gently reheat in short bursts or add a splash more cream to loosen it. For a more dramatic drip, use a piping bag or squeeze bottle, but I love the rustic charm of a spoon drizzle.
Cooking Tips & Techniques
One trick I learned the hard way is to never skip cooling the bars fully before adding the chocolate drip. I once poured ganache onto warm bars and ended up with a sad, melted mess. Patience is key here.
Using gel food coloring is a game-changer—it gives that deep, vibrant red without watering down the batter. Liquid color just doesn’t hold up as well.
When folding dry ingredients into wet, think gentle and slow. Overmixing develops gluten and makes your bars tough, which is the last thing you want in a tender red velvet treat.
For chocolate drip success, make sure your cream is hot but not boiling. Too hot can scorch the chocolate, causing graininess. Stirring gently and letting the mixture rest before stirring helps achieve that silky smooth texture.
Multitasking tip: While the bars bake, prep your chocolate drip ingredients so you can move straight to that step without waiting. It saves time and keeps the process smooth.
Variations & Adaptations
- White Chocolate Drip: Swap semi-sweet chocolate for white chocolate chips. Add a drop of pink food coloring to the ganache for an extra Valentine’s touch.
- Nutty Twist: Sprinkle chopped toasted pecans or walnuts on top of the chocolate drip before it sets. Adds crunch and a lovely nutty aroma.
- Vegan Version: Use almond or oat milk-based buttermilk (mix plant milk with a splash of apple cider vinegar), dairy-free chocolate, and coconut cream for the drip. I’ve tested this variation and it’s surprisingly good!
- Berry Infusion: Fold ½ cup fresh raspberries into the batter for a fruity surprise that complements the chocolate beautifully.
- Spicy Kick: Add ¼ tsp cayenne pepper to the chocolate drip for a subtle heat that’s unexpected but delightful.
Feel free to adjust sweetness or intensity by tweaking sugar or chocolate types. I love experimenting with different toppings—sometimes a dusting of powdered sugar after the chocolate sets adds a snowy effect perfect for winter Valentine’s celebrations.
Serving & Storage Suggestions
Serve these bars slightly chilled or at room temperature for the best texture contrast—cool chocolate drip meets soft, tender red velvet. Presentation-wise, arrange on a pretty plate or a wooden board with fresh strawberries or edible rose petals for that wow factor.
They pair wonderfully with a cup of coffee, a glass of red wine, or even champagne if you’re feeling fancy. For a cozy vibe, hot cocoa or chai tea works just as well.
Store leftover bars in an airtight container in the refrigerator for up to 4 days. The chocolate drip firms up nicely and the bars keep their moisture. For longer storage, freeze them wrapped tightly in plastic wrap and foil for up to 3 months. Thaw overnight in the fridge before serving.
Reheat briefly in a warm oven (about 300°F / 150°C for 5-7 minutes) if you like your bars a bit softer and the chocolate drip slightly melty again. Keep in mind the chocolate will soften but shouldn’t fully melt back.
Interestingly, the flavors mellow and deepen a bit over a day or two, making these bars even more indulgent if you can wait that long!
Nutritional Information & Benefits
Per serving (based on 12 bars): approximately 250 calories, 12g fat, 32g carbohydrates, 2g fiber, 3g protein.
This recipe brings in some nutritional perks thanks to buttermilk, which adds calcium and vitamin B12, and cocoa powder, a source of antioxidants. Using vegetable oil keeps it moist without dairy’s saturated fats, and eggs contribute valuable protein.
Note: Contains gluten, dairy, and eggs. Vegan and gluten-free variations are possible with ingredient swaps.
From a personal wellness angle, I appreciate this dessert because it strikes a nice balance—rich and satisfying but made with real ingredients and no artificial fillers. It feels like a treat that honors both indulgence and mindful eating.
Conclusion
These Valentine’s Red Velvet Chocolate Drip Bars are a perfect blend of simple ingredients and show-stopping results. They’re easy enough for a weekday treat, yet special enough to celebrate love in style. I love how this recipe lets me bring that romantic vibe to the table without hours of fussing around.
Remember, feel free to tweak the colors, toppings, and flavors to make these bars truly your own. Baking is about joy, not perfection, and these bars deliver plenty of it.
If you try this recipe, I’d love to hear how it goes—drop a comment or share your unique twists! Happy baking and here’s to sweet moments filled with chocolate and love.
FAQs
Can I make these bars ahead of time?
Absolutely! They keep well refrigerated for up to 4 days and can be frozen for longer storage. Just thaw in the fridge before serving.
What if I don’t have buttermilk?
You can make a quick substitute by adding 1 tbsp of lemon juice or white vinegar to ½ cup of milk. Let it sit for 5 minutes before using.
How do I get the chocolate drip to be shiny and smooth?
Heat the cream just until simmering before pouring over chocolate. Stir gently and add a bit of butter for that glossy finish.
Can I use dark chocolate instead of semi-sweet?
Yes, dark chocolate works well and offers a richer, less sweet flavor. Adjust sugar in the batter if you prefer less sweetness.
What’s the best way to cut the bars cleanly?
Use a sharp knife warmed under hot water and wiped dry before slicing. This helps prevent crumbly edges and messy cuts.
Pin This Recipe!
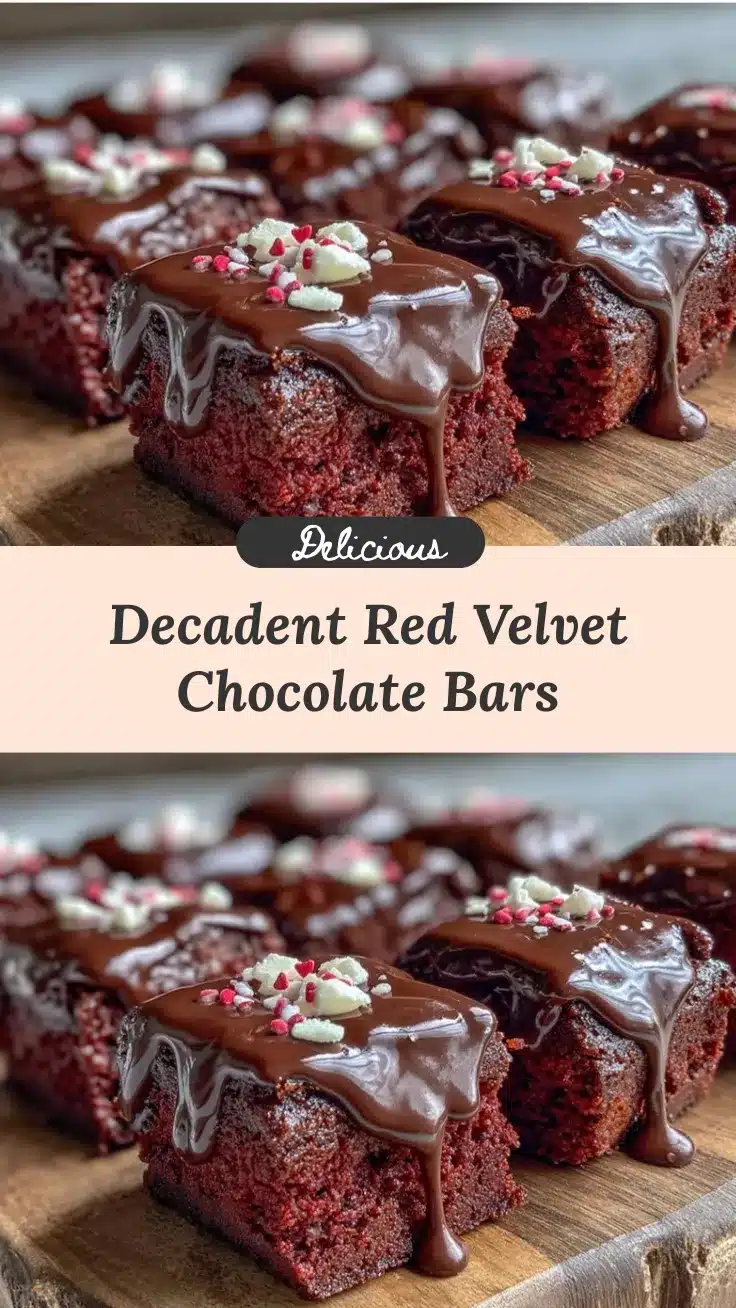
Irresistible Valentines Red Velvet Chocolate Drip Bars

These Valentine’s Red Velvet Chocolate Drip Bars feature a moist, tender red velvet base topped with a glossy, luscious chocolate drip, perfect for romantic occasions and quick dessert fixes.
- Prep Time: 15 minutes
- Cook Time: 30 minutes
- Total Time: 45 minutes
- Yield: 12 servings 1x
- Category: Dessert
- Cuisine: American
Ingredients
- 1 ½ cups (190 g) all-purpose flour
- 1 cup (200 g) granulated sugar
- 2 tbsp (15 g) unsweetened cocoa powder
- 1 tsp baking powder
- ½ tsp baking soda
- ¼ tsp salt
- ½ cup (120 ml) buttermilk, room temperature
- ½ cup (120 ml) vegetable oil
- 2 large eggs, room temperature
- 1 tsp vanilla extract
- 1 tbsp red food coloring gel
- 1 cup (180 g) semi-sweet chocolate chips
- ½ cup (120 ml) heavy cream
- 1 tbsp (14 g) unsalted butter, softened
- ½ tsp vanilla extract (optional)
Instructions
- Preheat your oven to 350°F (175°C). Grease a 9×9 inch (23×23 cm) baking pan or line it with parchment paper.
- In a large bowl, sift together the flour, cocoa powder, baking powder, baking soda, and salt. Set aside.
- In another bowl, whisk sugar and vegetable oil until combined. Add eggs one at a time, beating well after each addition.
- Stir in vanilla extract and red food coloring gel until smooth and vibrant.
- Slowly add buttermilk to the wet mixture, stirring gently until glossy and red.
- Gradually fold the dry ingredients into the wet mixture just until no streaks remain; avoid overmixing.
- Pour batter into the prepared pan and spread evenly. Tap the pan lightly to release air bubbles.
- Bake for 25-30 minutes or until a toothpick inserted in the center comes out with a few moist crumbs.
- Cool the bars completely in the pan on a wire rack before adding the chocolate drip.
- Heat heavy cream in a small saucepan over medium heat until just simmering. Remove from heat and pour over chocolate chips. Let sit for 2 minutes, then stir gently until smooth.
- Stir in softened butter and vanilla extract for extra shine.
- Drizzle the chocolate ganache over the cooled bars, letting it drip naturally down the sides.
- Chill the bars in the refrigerator for at least 30 minutes to set the chocolate drip.
- Cut into squares with a sharp knife warmed under hot water for clean edges.
Notes
Cool bars completely before adding chocolate drip to prevent melting. Use gel food coloring for vibrant red color. Avoid overmixing batter to keep bars tender. Heat cream just until simmering to avoid grainy chocolate drip. Reheat chocolate drip gently if too thick.
Nutrition
- Serving Size: 1 bar (1/12th of rec
- Calories: 250
- Fat: 12
- Carbohydrates: 32
- Fiber: 2
- Protein: 3
Keywords: red velvet, chocolate drip, Valentine's dessert, romantic dessert, easy bars, chocolate ganache, quick dessert