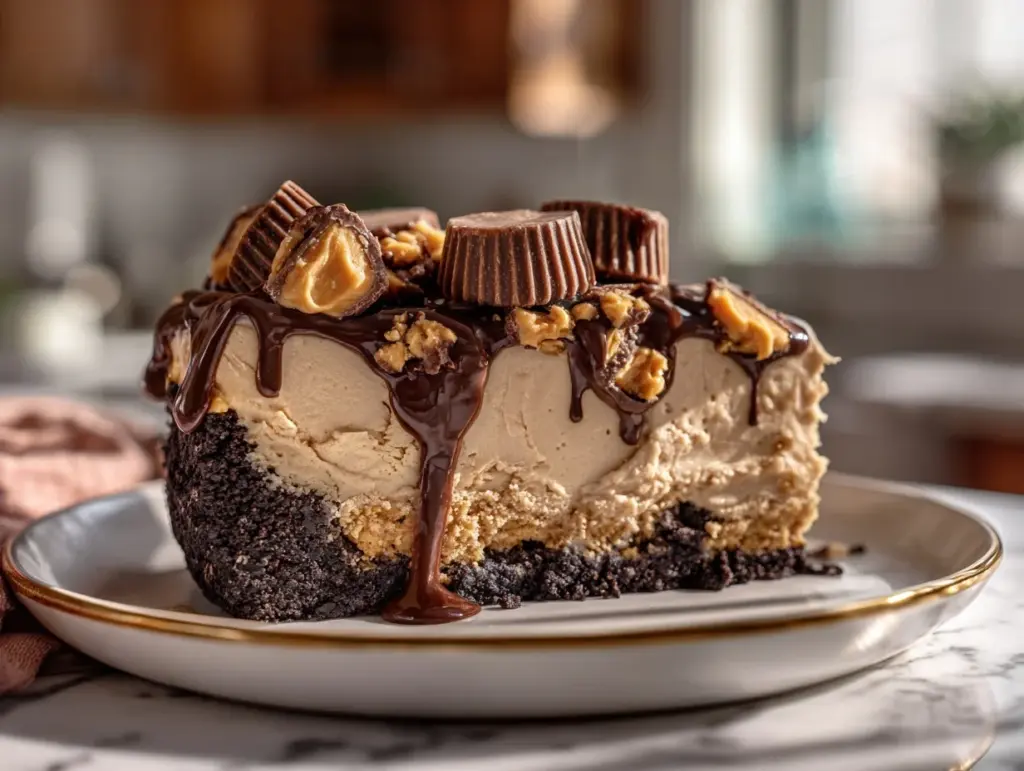
The first time I whipped up this no-bake Reese’s Peanut Butter Cup cheesecake, my kitchen smelled like pure heaven—think rich chocolate, creamy peanut butter, and that unmistakable sweet tang of cheesecake. I couldn’t resist sneaking a spoonful straight from the bowl (you know, for quality control). This recipe quickly became a family favorite, and honestly, it’s the kind of dessert you make “just because” and then find yourself making again for every single potluck, birthday, and Friday night treat. There’s something magical about the way those chopped Reese’s cups melt into the velvety peanut butter filling, all on top of a buttery cookie crust. It’s got wow factor, but it’s also so forgiving—even if you’re not a pro baker, you’ll nail it. Plus, no oven required! If you’re a peanut butter lover, or just in desperate need of an easy showstopper, this no-bake Reese’s Peanut Butter Cup cheesecake is going to be your new go-to. I’ve made it for crowds, picky kids, and even gluten-free friends (with a simple swap), and it never disappoints. After testing this recipe at least a dozen times, I’ve picked up a few tricks to make it foolproof. Trust me—when you serve this, you’ll feel like a dessert genius, even if you whipped it up in your pajamas. Whether you’re craving a chilled summer treat or just want the ultimate peanut butter and chocolate fix, this one’s for you.
Why You’ll Love This No-Bake Reese’s Peanut Butter Cup Cheesecake
- Super Quick & Easy: No oven, no water baths, no stress—this cheesecake is ready for the fridge in about 20 minutes. Perfect for busy nights or last-second events.
- Simple Ingredients: You probably have most of these on hand already. No fancy chocolate or obscure peanut butter brands—just straightforward, delicious stuff.
- Perfect for Parties & Holidays: This is the kind of recipe that looks fancy but is secretly effortless. It’s always a hit at birthdays, BBQs, and yes, even Thanksgiving dessert tables (trust me, it’s been there at mine!).
- Crowd-Pleaser: I have yet to meet someone who doesn’t go back for a second slice. Kids, adults, even “I don’t like cheesecake” people—everyone loves it.
- Unbelievably Delicious: The combo of creamy peanut butter cheesecake filling, a crunchy cookie crust, and chunks of Reese’s cups is pure comfort in every bite.
What sets my version apart? For one, I use plenty of real chopped Reese’s cups mixed right into the batter and on top—no skimping. The cookie crust gets just the right touch of saltiness, and I always blend the peanut butter until it’s super smooth for that dreamy texture. After making countless cheesecakes, I’ve learned that chilling overnight really brings the flavors together (but if you’re impatient, a few hours will do!). This isn’t just another sweet treat; it’s the kind of dessert that makes people pause mid-bite and ask for the recipe. No-bake Reese’s Peanut Butter Cup cheesecake is comfort food that doubles as an instant special occasion. It’s the ultimate “I can’t believe you made this!” dessert, minus the stress and fuss.
What Ingredients You Will Need
This recipe is all about keeping things simple while still delivering that over-the-top, decadent flavor. Most of the ingredients are probably already in your pantry or just a quick grocery run away. Here’s what you’ll need:
- For the Crust:
- Chocolate sandwich cookies (like Oreos), crushed (about 24 cookies or 250g)
- Unsalted butter, melted (6 tablespoons or 85g – adds richness and helps the crust set)
- Pinch of salt (balances the sweetness and brings out the chocolate flavor)
- For the Filling:
- Cream cheese, full-fat, softened (16 oz or 450g – I like Philadelphia for consistency)
- Creamy peanut butter (not natural – 1 cup or 240g; Jif or Skippy works great)
- Powdered sugar (1 cup or 120g – gives a smooth, melt-in-your-mouth finish)
- Heavy whipping cream (1 cup or 240ml – whipped for a light, airy texture)
- Vanilla extract (1 teaspoon or 5ml – adds warmth and depth)
- Reese’s Peanut Butter Cups, chopped (about 12 regular-size cups or 240g, divided – some go in the filling, some on top)
- Optional Toppings:
- Mini Reese’s cups, halved (for extra pizzazz, if you’re feeling fancy)
- Chocolate sauce or hot fudge (for drizzling)
- Chopped roasted peanuts (for crunch and a salty finish)
Ingredient Tips: I always recommend using block cream cheese (not the whipped tub stuff) for best results. For peanut butter, avoid the natural kind with oil on top—it can make the filling runny and unpredictable. If you want a gluten-free crust, swap the sandwich cookies for gluten-free chocolate cookies (I’ve used Kinnikinnick and enjoyed it). Don’t stress if you’re short a Reese’s cup or two—the cheesecake is super forgiving. And if you want to switch things up, try a mix of milk chocolate and dark chocolate peanut butter cups for a twist!
Equipment Needed
- 9-inch (23cm) Springform Pan: Essential for easy cheesecake removal—if you don’t have one, a deep-dish pie pan works, but serving gets a bit messy.
- Mixing Bowls: At least two—one for the crust, one for the filling. Glass or metal bowls are best.
- Electric Mixer: A stand mixer or handheld mixer works. Whipping by hand is possible, but your arm will get a serious workout!
- Spatula: For scraping the bowl and smoothing the top—flexible silicone spatulas are my favorite for getting every last bit.
- Measuring Cups & Spoons: Accurate measuring means a perfect cheesecake every time.
- Plastic Wrap or Foil: To cover the cheesecake while it chills.
- Food Processor or Zip-Top Bag & Rolling Pin: For crushing cookies. I’ve used both methods—food processor is faster, but a rolling pin is great for getting out some stress!
If you don’t have a springform pan, line a regular cake pan with parchment, leaving overhang for lifting the cheesecake out. For mixers, even a budget hand mixer will do. I’ve had the same $15 hand mixer for years—it’s a trooper. For crusts, don’t worry if you don’t have a food processor; just crush the cookies in a bag. Keep your mixer clean by washing the beaters between crust and filling (trust me, you don’t want buttery crumbs in your creamy filling).
How to Make No-Bake Reese’s Peanut Butter Cup Cheesecake
-
Prepare the Crust:
- Crush 24 chocolate sandwich cookies (about 250g) into fine crumbs using a food processor or by pounding in a zip-top bag with a rolling pin—get them as fine as you can for a sturdy crust.
- Pour in 6 tablespoons (85g) melted unsalted butter and a pinch of salt. Stir until all the crumbs are evenly moistened; it should look like damp sand and hold together when pressed.
- Press the mixture firmly into the bottom of a 9-inch (23cm) springform pan. I use the bottom of a measuring cup to get it super compact and even—don’t forget the edges!
- Pop the crust in the freezer to firm up while you make the filling (about 10 minutes).
-
Mix the Filling:
- In a large bowl, beat 16 oz (450g) softened full-fat cream cheese with an electric mixer until smooth—no lumps! Add 1 cup (240g) creamy peanut butter and 1 cup (120g) powdered sugar. Beat on medium until fully blended and fluffy, about 2-3 minutes.
- Scrape down the sides, add 1 teaspoon (5ml) vanilla extract, and mix again.
- In a separate bowl, whip 1 cup (240ml) heavy cream to stiff peaks. Don’t rush—undermixed cream makes the filling too loose. Peaks should stand up when you lift the beaters.
- Fold the whipped cream gently into the peanut butter mixture. Be patient—fold, don’t stir, to keep it airy.
- Stir in half (about 6) of the chopped Reese’s Peanut Butter Cups. Reserve the rest for topping.
-
Assemble:
- Remove the crust from the freezer. Spoon the filling over the crust and smooth the top with a spatula. Tap the pan gently on the counter to pop air bubbles.
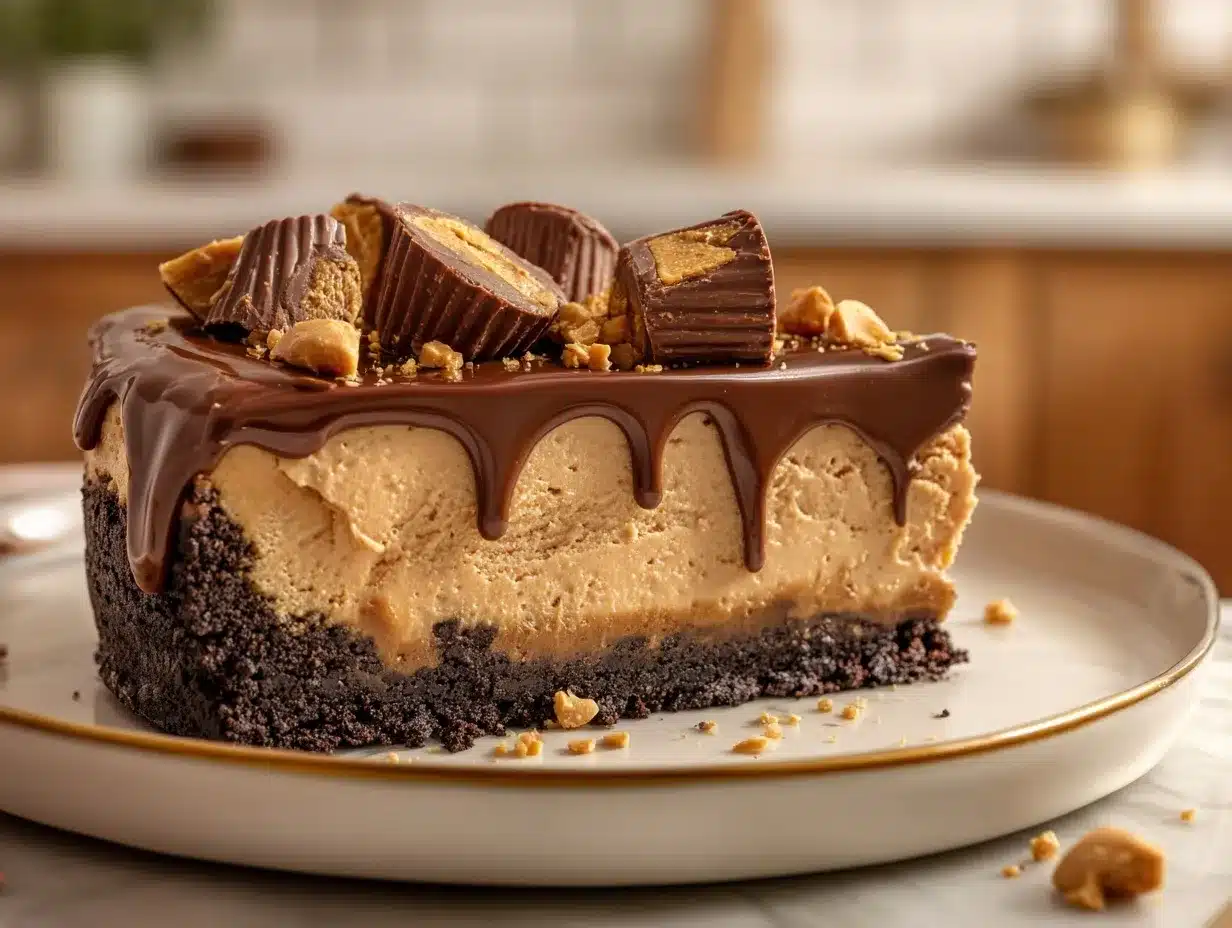
- Scatter the remaining chopped Reese’s cups over the top. For extra wow, add mini Reese’s cups or a drizzle of chocolate sauce.
-
Chill:
- Cover the cheesecake with plastic wrap or foil and refrigerate for at least 6 hours, preferably overnight. This step is crucial—the longer it chills, the easier it is to slice cleanly and the better the flavors meld.
- If you’re in a pinch, 3-4 hours can work, but the texture will be softer.
-
Serve:
- Run a thin knife around the edge of the springform pan before releasing the sides. Slice with a hot, dry knife for neat pieces—wipe between cuts.
- Add extra toppings if desired: more chopped Reese’s, chocolate drizzle, or even a sprinkle of chopped roasted peanuts.
Troubleshooting Tips: If your filling seems too soft, double-check your measurements and make sure you whipped the cream to stiff peaks. If it’s too firm, let the cheesecake sit at room temp for 10 minutes before slicing. And don’t panic if the crust crumbles a little—just call it “rustic.”
Cooking Tips & Techniques for Success
- Whip That Cream: Don’t skimp on whipping the cream to stiff peaks. If it’s too soft, your filling won’t set properly. You should be able to hold the bowl upside down without the cream sliding out (I’ve learned the hard way—runny cheesecakes make for messy slices!).
- Room Temperature Cream Cheese: Always use softened, room-temp cream cheese—it blends smoother and avoids lumps. If you’re in a hurry, cut it into cubes and zap it in the microwave for 10-15 seconds.
- Peanut Butter Consistency: Go for classic, creamy peanut butter. Natural styles with oil separation can cause the filling to split. I once tried with natural PB, and the filling never set—lesson learned!
- Crust Compaction: Don’t be shy about pressing down the crust. If it’s too loose, it’ll fall apart when you slice. Use a flat-bottomed cup for even pressure.
- Chill Time: Patience pays off. Overnight chilling makes cutting easier and the flavor richer. If you cut too soon, the cheesecake may not hold its shape.
- Clean Slices: For photo-worthy slices, run your knife under hot water and dry it between each cut. It makes a huge difference, especially when you want those layers to shine on Pinterest.
- Topping Placement: Add toppings just before serving if you want them to stay crisp and fresh. If you drizzle chocolate sauce too early, it can seep into the filling.
- Multitasking: While the crust chills, chop Reese’s cups and whip the cream. It keeps the process efficient (and gets you to dessert faster!).
Honestly, the biggest game-changer for me was learning to whip the cream just right and not overmixing it into the filling. That’s what makes this no-bake Reese’s Peanut Butter Cup cheesecake genuinely light and fluffy—not dense or gummy. If you ever get nervous about no-bake desserts, remember: chilling is your friend, and a little patience goes a long way!
Variations & Adaptations
- Gluten-Free: Swap regular chocolate sandwich cookies for a gluten-free brand (like Kinnikinnick or Glutino). The rest of the ingredients are naturally gluten-free—just double check your labels!
- Vegan/Dairy-Free: Use dairy-free cream cheese (like Kite Hill or Tofutti), coconut whipped cream, and vegan butter. Make sure your peanut butter is vegan. Reese’s cups aren’t vegan, but Justin’s Dark Chocolate Peanut Butter Cups are a good alternative.
- Chocolate Lovers’ Dream: Add 1/2 cup (90g) mini chocolate chips to the filling and drizzle the top with extra chocolate ganache before chilling. I do this for my brother’s birthday every year—he insists it’s the best version!
- Seasonal Twist: In autumn, try adding a swirl of caramel sauce to the top, or sprinkle chopped pretzels for a salty crunch. In summer, serve with fresh strawberries or raspberries for a little tartness.
- Nut Allergies: Swap out the peanut butter for sunflower seed butter and use peanut-free chocolate cups (like No Whey! Sun Cups). The flavor is a little different, but still delicious and safe for nut-free families.
I’ve personally tried the chocolate chip version—let’s just say there were zero leftovers. Don’t hesitate to make this no-bake Reese’s Peanut Butter Cup cheesecake your own. Whether you’re adapting for allergies or just switching up the flavor, it’s super flexible!
Serving & Storage Suggestions
This no-bake Reese’s Peanut Butter Cup cheesecake is best served chilled, straight from the fridge. I love to plate it on a cake stand with extra chopped Reese’s cups and a drizzle of chocolate sauce for that “wow, you made this?” look. It’s perfect with a glass of cold milk, a hot coffee, or even a scoop of vanilla ice cream for extra indulgence.
Store leftovers in the fridge, covered tightly with plastic wrap or in an airtight container, for up to 5 days. The flavors actually deepen after a day or two, so it’s a great make-ahead dessert. If you want to freeze the cheesecake, slice it first and wrap each piece individually—thaw slices in the fridge overnight or at room temperature for about 30 minutes. The crust stays crisp, and the filling remains creamy, even after freezing.
If you’re serving at a party, keep the cheesecake chilled until just before serving for the cleanest slices. For outdoor events, place the serving dish on a tray of ice to keep it set. Honestly, this cheesecake is just as good a day or two after making, so don’t be afraid to prep ahead!
Nutritional Information & Benefits
Each slice of no-bake Reese’s Peanut Butter Cup cheesecake (based on 12 servings) is estimated to have around 430 calories, 28g fat, 38g carbohydrates, and 8g protein. This dessert is definitely an occasional treat, but it’s rich in flavor, so a small slice is satisfying! Key ingredients like peanut butter provide healthy fats and protein, while cream cheese adds calcium. If you go with a gluten-free or dairy-free version, the nutritional profile shifts, so always check your labels if you have specific dietary needs. This recipe does contain peanuts, dairy, and gluten (unless adapted as above). Personally, I love how a little tastes like a lot—one slice and you’re in dessert bliss.
Conclusion
If you’re looking for a dessert that’s as easy as it is impressive, this no-bake Reese’s Peanut Butter Cup cheesecake is the answer. It’s the kind of recipe people beg for after the first bite, and you don’t need any fancy equipment or baking skills to pull it off. I love how flexible it is for adapting to different diets or flavor cravings, and it’s just plain fun to make (and eat!). So go ahead—treat yourself, surprise your family, or wow your friends at the next get-together. Don’t forget to let me know how it turns out, or if you toss in any twists of your own! Leave a comment below, share on Pinterest, or tag me if you post your masterpiece. Happy chilling—and happy eating!
FAQs About No-Bake Reese’s Peanut Butter Cup Cheesecake
Can I make this cheesecake ahead of time?
Absolutely! In fact, it tastes even better after a night in the fridge. You can make it up to two days in advance—just keep it covered until you’re ready to serve.
Do I have to use a springform pan?
Nope! A deep-dish pie pan or regular cake pan lined with parchment works too. It’s just a little trickier to slice, but still delicious.
Can I use crunchy peanut butter instead of creamy?
You can, but the filling will have bits of peanut in it. If you like texture, go for it! For the classic smooth cheesecake, stick with creamy peanut butter.
How do I keep the crust from falling apart?
Make sure the crust is firmly pressed into the pan and chill it well before adding the filling. The melted butter helps bind it together—don’t skip it!
Can I freeze this cheesecake?
Yes! Slice it first, wrap each slice well, and freeze for up to 2 months. Thaw in the fridge or at room temperature before serving. It’s a lifesaver for last-minute dessert emergencies!
PrintNo-Bake Reese’s Peanut Butter Cup Cheesecake

This no-bake Reese’s Peanut Butter Cup cheesecake is a decadent, crowd-pleasing dessert featuring a chocolate cookie crust, creamy peanut butter cheesecake filling, and plenty of chopped Reese’s cups. It’s easy to make, requires no oven, and is perfect for parties, holidays, or any time you need a showstopping treat.
- Prep Time: 20 minutes
- Cook Time: 0 minutes
- Total Time: 6 hours 20 minutes (includes chilling time)
- Yield: 12 servings 1x
- Category: Dessert
- Cuisine: American
Ingredients
- 24 chocolate sandwich cookies (like Oreos), crushed (about 250g)
- 6 tablespoons unsalted butter, melted (85g)
- Pinch of salt
- 16 oz full-fat cream cheese, softened (450g)
- 1 cup creamy peanut butter (not natural, 240g)
- 1 cup powdered sugar (120g)
- 1 cup heavy whipping cream (240ml)
- 1 teaspoon vanilla extract (5ml)
- 12 regular-size Reese’s Peanut Butter Cups, chopped (about 240g, divided)
- Optional: Mini Reese’s cups, halved
- Optional: Chocolate sauce or hot fudge
- Optional: Chopped roasted peanuts
Instructions
- Crush 24 chocolate sandwich cookies into fine crumbs using a food processor or by pounding in a zip-top bag with a rolling pin.
- Pour in 6 tablespoons melted unsalted butter and a pinch of salt. Stir until all crumbs are evenly moistened.
- Press the mixture firmly into the bottom of a 9-inch springform pan. Use the bottom of a measuring cup to compact and even out the crust, including the edges.
- Freeze the crust for about 10 minutes to firm up while you make the filling.
- In a large bowl, beat softened cream cheese with an electric mixer until smooth. Add creamy peanut butter and powdered sugar. Beat on medium until fully blended and fluffy, about 2-3 minutes.
- Scrape down the sides, add vanilla extract, and mix again.
- In a separate bowl, whip heavy cream to stiff peaks.
- Gently fold the whipped cream into the peanut butter mixture until combined and airy.
- Stir in half (about 6) of the chopped Reese’s Peanut Butter Cups. Reserve the rest for topping.
- Remove the crust from the freezer. Spoon the filling over the crust and smooth the top with a spatula. Tap the pan gently to remove air bubbles.
- Scatter the remaining chopped Reese’s cups over the top. Add mini Reese’s cups or a drizzle of chocolate sauce if desired.
- Cover the cheesecake with plastic wrap or foil and refrigerate for at least 6 hours, preferably overnight.
- To serve, run a thin knife around the edge of the pan before releasing the sides. Slice with a hot, dry knife for neat pieces, wiping between cuts.
- Add extra toppings if desired: more chopped Reese’s, chocolate drizzle, or chopped roasted peanuts.
Notes
For best results, use block cream cheese and classic creamy peanut butter (not natural). Chill the cheesecake overnight for the best texture and flavor. For gluten-free, use gluten-free chocolate sandwich cookies. Add toppings just before serving for freshness. If freezing, slice first and wrap each piece individually.
Nutrition
- Serving Size: 1 slice (1/12 of cheesecake)
- Calories: 430
- Sugar: 28
- Sodium: 320
- Fat: 28
- Saturated Fat: 14
- Carbohydrates: 38
- Fiber: 2
- Protein: 8
Keywords: no-bake cheesecake, peanut butter cheesecake, Reese’s dessert, easy cheesecake, chocolate peanut butter, potluck dessert, party dessert, kid-friendly dessert, summer dessert, gluten-free option



