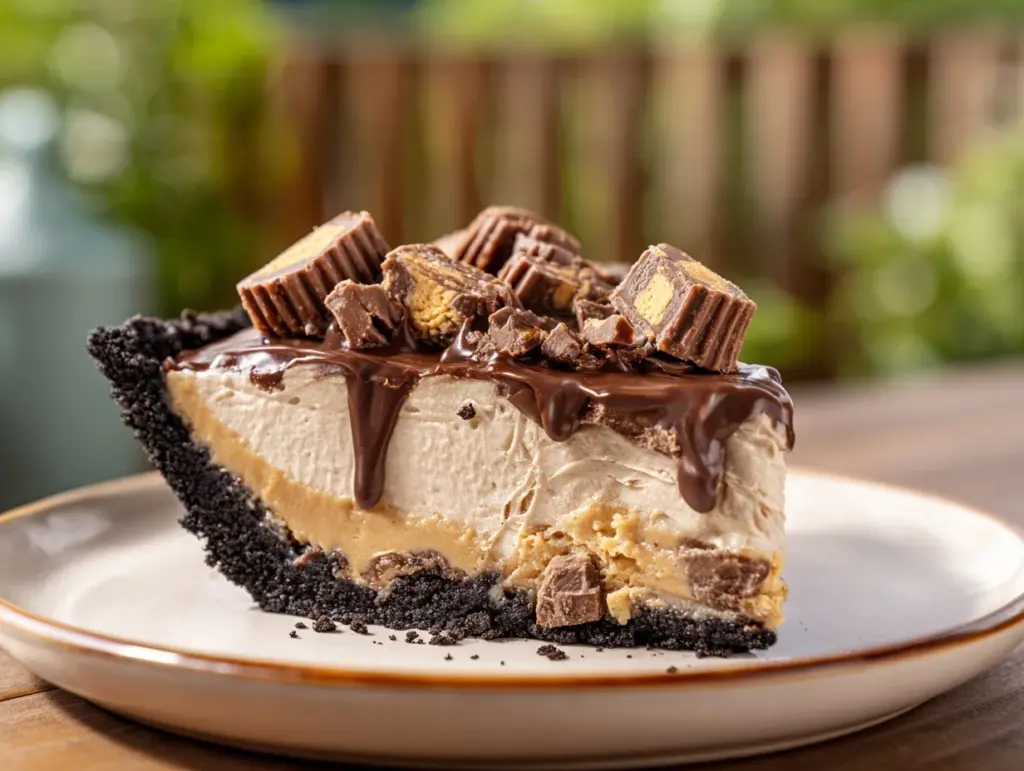
The moment you slice into this Reese’s Peanut Butter Cup Pie, you’ll know you’re in for something spectacular—the scent of creamy peanut butter and rich chocolate is absolutely unreal. I still remember the first time I made this pie for a family game night; the pan was scraped clean before the first round of Monopoly ended! If you’re a chocolate lover (or live with one), this easy no bake dessert will probably become your new obsession. It has that wow factor you want for special occasions, but it’s so simple, even a beginner can pull it off. Trust me, this Reese’s Peanut Butter Cup Pie recipe is pure magic—no oven required, just a fridge and a craving for something sweet.
Honestly, I’ve baked a lot of desserts in my day, but nothing gets my friends more excited than when I walk in holding this pie. The combination of silky peanut butter filling, crunchy chocolate crust, and a crown of chopped Reese’s cups is like a dream come true for anyone who loves that classic chocolate-peanut butter combo. I discovered this recipe back when I wanted a show-stopping dessert for my husband’s birthday, but I was short on time and, well, not really in the mood to turn on the oven in July. Turns out, this pie is not only quick to make but so decadent, you’d swear it took hours.
This Reese’s Peanut Butter Cup Pie recipe is perfect for busy families, potlucks, or anyone who wants a wow-worthy treat without the hassle. I’ve tested it on birthdays, holidays, and even midnight snack runs—every time, it delivers. Plus, you only need a handful of ingredients, most of which you probably have hiding in your pantry right now. If you’re looking for an easy no bake dessert that’s guaranteed to please any chocolate lover, you’re in the right place!
Why You’ll Love This Reese’s Peanut Butter Cup Pie Recipe
- Quick & Effortless: You can whip this pie together in about 20 minutes—no baking, no water baths, no complicated steps. It’s the ultimate “last-minute dessert” when you’re short on time but want big flavor.
- No Fancy Ingredients: Everything comes straight from a regular grocery store. That means no running around for hard-to-find items. You probably already have most of the basics: peanut butter, cream cheese, chocolate cookies, and of course, Reese’s Peanut Butter Cups.
- Perfect for Any Occasion: This Reese’s Peanut Butter Cup Pie recipe has been a hit at summer BBQs, holiday gatherings, and even just as a weeknight treat. It travels well and makes for a show-stopping centerpiece on any dessert table.
- Crowd-Pleaser: Kids, adults, picky eaters—everyone goes back for seconds. It’s one of those desserts that gets people talking (and sneaking another slice when they think no one’s looking).
- Unbelievably Delicious: The filling is creamy and rich, but not too sweet. The crust is chocolatey and crisp, and the topping of chopped mini Reese’s cups puts it right over the top. Every bite is like a giant peanut butter cup, only better.
What truly sets this Reese’s Peanut Butter Cup Pie recipe apart is the texture—ultra-creamy, thanks to blending the peanut butter with cream cheese and whipped topping. I’ve tried versions with just peanut butter, and they’re never quite as smooth. My secret? A bit of softened cream cheese for that perfect balance, and a simple chocolate cookie crust that stays crisp even after chilling. Plus, loading the top with chopped Reese’s cups gives you little pockets of chocolate-peanut butter goodness in every slice.
This recipe isn’t just a treat—it’s comfort food for the soul. Whether you’re celebrating a birthday, hosting a party, or just need a sweet pick-me-up, it’ll make you (and your taste buds) ridiculously happy. And if you’re like me and love desserts that taste even better the next day, you’ll be thrilled to know this pie is even creamier after a night in the fridge. No stress, no fuss, just pure chocolate-peanut butter bliss every time.
What Ingredients You Will Need for Reese’s Peanut Butter Cup Pie
This Reese’s Peanut Butter Cup Pie recipe keeps things simple yet totally decadent. Most of these ingredients are pantry staples or easy to grab at your local store. Here’s what you’ll need:
- For the Crust:
- Chocolate sandwich cookies (like Oreos), finely crushed (about 24 cookies or 250g) – These give you that rich, crunchy base. I use classic Oreos, but any chocolate sandwich cookie will work.
- Unsalted butter, melted (1/2 cup or 115g) – Helps bind the crust and adds a lovely buttery flavor. Salted butter works in a pinch for a bit of contrast.
- For the Peanut Butter Filling:
- Cream cheese, softened (8 oz or 225g) – Go for full-fat for the creamiest result. I’ve tried lower fat, and while it works, the texture isn’t as dreamy.
- Creamy peanut butter (1 cup or 250g) – I love using Jif or Skippy for classic flavor. Natural peanut butter can separate, so stick with regular for best results.
- Powdered sugar (1 cup or 125g) – Sweetens the filling without making it grainy.
- Whipped topping (like Cool Whip, 8 oz or 225g), thawed – Makes the filling light and fluffy. Homemade whipped cream also works if you’re feeling fancy (use about 3 cups whipped).
- For the Topping:
- Mini Reese’s Peanut Butter Cups (about 12-16, chopped) – The best part! I scatter them all over the top for extra crunch and chocolatey bursts.
- Chocolate syrup or melted chocolate chips (optional, for drizzling) – Totally optional, but it makes the pie look even more irresistible.
Ingredient Notes & Substitutions:
- If you want a gluten-free version, swap the cookies for gluten-free chocolate sandwich cookies (like Glutino or Kinnikinnick brands).
- Dairy-free? Use vegan cream cheese (I like Kite Hill or Tofutti), coconut whipped topping, and plant-based butter.
- You can use crunchy peanut butter if you want a bit of texture in the filling, though creamy is classic for that smooth, truffle-like finish.
- Out of mini Reese’s cups? Chop up full-sized ones, or use peanut butter chips and chocolate chips in a pinch.
- Want extra chocolate? Add a handful of mini chocolate chips to the filling for a double chocolate hit.
Honestly, the only “must” here is the peanut butter—everything else can flex based on your pantry. That’s why I love this Reese’s Peanut Butter Cup Pie recipe so much!
Equipment Needed for Reese’s Peanut Butter Cup Pie
- 9-inch pie dish – Glass, ceramic, or metal all work. I’ve even used a springform pan for easy slicing—just line the bottom with parchment so the crust pops out cleanly.
- Food processor or rolling pin – For crushing the cookies. If you don’t have a food processor, just toss the cookies in a zip-top bag and bash with a rolling pin (bonus stress relief!).
- Mixing bowls (medium & large) – One for the crust, one for the filling.
- Electric hand mixer or stand mixer – This makes the filling super creamy, but you can mix by hand if you’re patient and don’t mind a little arm workout.
- Measuring cups and spoons – To keep everything precise (especially the peanut butter and powdered sugar).
- Rubber spatula – For scraping every last bit of that luscious filling into the crust.
- Offset spatula or butter knife – To smooth the top before adding the chopped Reese’s cups.
If you’re just starting out, don’t stress about having fancy gear. I’ve made this pie with nothing but a whisk and a sturdy bowl! For easy cleaning, I recommend silicone spatulas, especially when dealing with sticky peanut butter. If you use a nonstick pie pan, avoid metal knives for serving—plastic or silicone utensils keep your pan scratch-free. And honestly, if you’re on a budget, dollar store pie pans work perfectly fine for this no bake dessert!
How to Make Reese’s Peanut Butter Cup Pie (Step-by-Step Instructions)
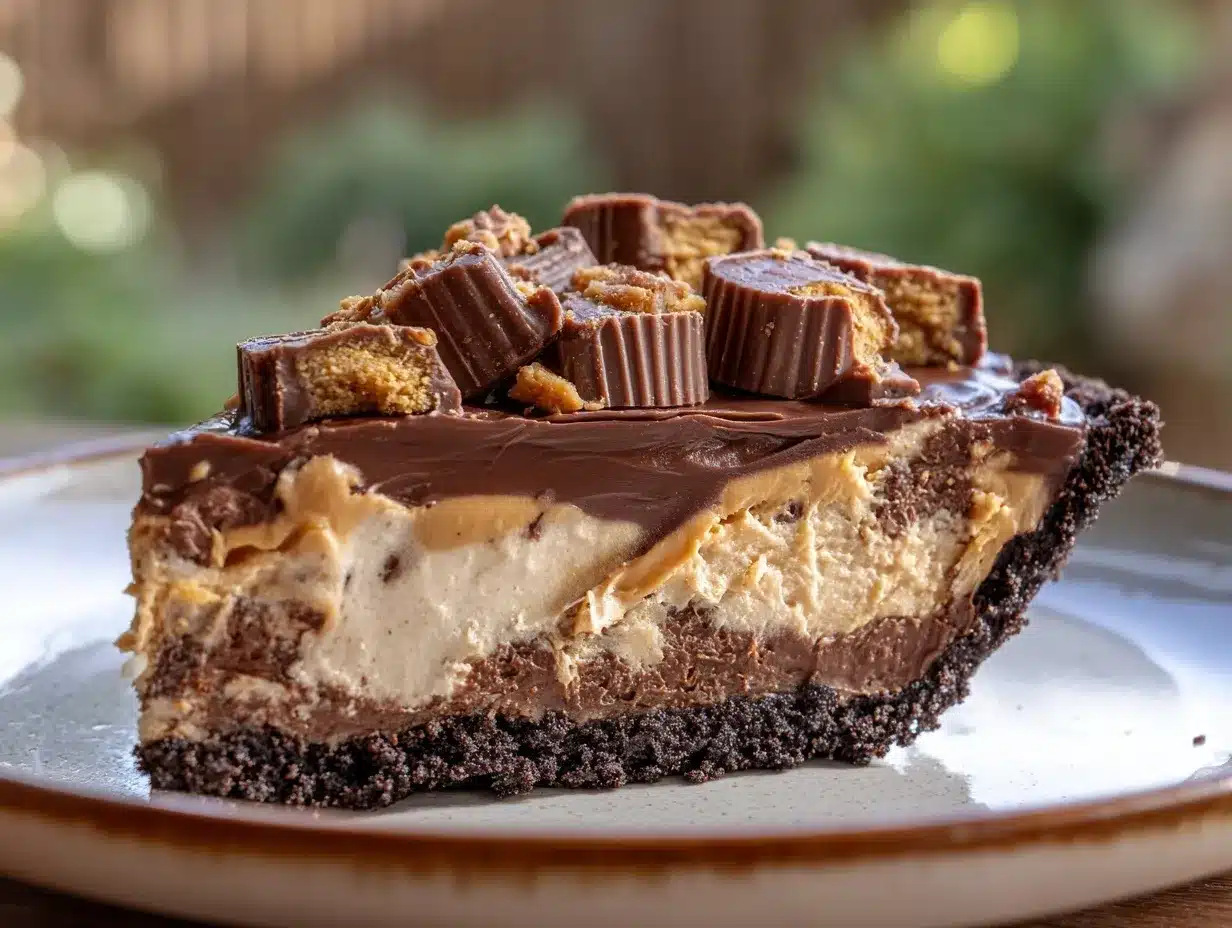
- Prep the crust: Crush 24 chocolate sandwich cookies (about 250g) into fine crumbs using a food processor. No processor? Place cookies in a zip-top bag and crush with a rolling pin until sandy. Pour crumbs into a medium bowl.
- Add melted butter: Mix in 1/2 cup (115g) melted unsalted butter. Stir until the mixture resembles wet sand and holds together when pressed. If it’s too dry, add another tablespoon of butter.
- Form the crust: Press the cookie mixture firmly into the bottom and sides of a 9-inch pie dish. Use the bottom of a glass or measuring cup to get an even layer. Chill in the fridge for at least 15 minutes to set.
- Make the filling: In a large bowl, beat 8 oz (225g) softened cream cheese until smooth and fluffy (about 1-2 minutes). Scrape down the bowl.
- Add 1 cup (250g) creamy peanut butter and 1 cup (125g) powdered sugar. Beat until well combined and creamy—mixture will be thick.
- Fold in 8 oz (225g) thawed whipped topping (or about 3 cups homemade whipped cream) with a spatula, gently mixing until no streaks remain. The filling should be light and fluffy.
- Fill the crust: Spoon the peanut butter mixture into the chilled crust. Use an offset spatula or butter knife to smooth the top.
- Add toppings: Sprinkle the top generously with chopped mini Reese’s Peanut Butter Cups (about 12-16, or as many as you like). For extra “wow,” drizzle with chocolate syrup or melted chocolate chips.
- Chill the pie: Refrigerate for at least 4 hours, or overnight, to allow the flavors to meld and the filling to set. Longer chilling gives you cleaner slices.
- Serve: Slice with a sharp knife (wiping between slices for the cleanest look), and enjoy cold. If the pie is too firm straight from the fridge, let it sit at room temp for 10 minutes before slicing.
Troubleshooting & Tips:
- If your crust crumbles, add another tablespoon of melted butter and press down firmly.
- Filling too soft? Make sure your whipped topping is fully thawed but still cold. Also, chill the pie long enough for it to set.
- For extra clean slices, dip your knife in hot water and wipe clean between cuts.
- If you’re impatient (guilty as charged), you can freeze the pie for 45 minutes to speed up chilling, but don’t let it freeze solid or the texture will change.
I’ve made this pie at least a dozen times, and it’s honestly hard to mess up. Just be patient with chilling, and you’ll have a sliceable, creamy masterpiece every single time!
Pro Tips & Techniques for the Perfect Reese’s Peanut Butter Cup Pie
- Chill, Chill, Chill: Don’t rush the chilling process. The flavors meld, the texture firms up, and you get those perfect, bakery-style slices. I learned this the hard way when I tried to serve it “early” at a party and ended up with delicious, but messy, scoops instead of slices.
- Cookie Crust Consistency: Make sure your cookie crumbs are fine—big chunks can make the crust fall apart. If you’re using a rolling pin, really go to town with it!
- Use Room Temp Cream Cheese: Cold cream cheese will leave lumps in your filling. Let it soften for at least 30 minutes on the counter before beating.
- Don’t Overmix the Filling: Once you add the whipped topping, gently fold instead of beating. Overmixing can deflate the filling and make it dense.
- Neat Topping Placement: For a Pinterest-perfect look, arrange some Reese’s cups in a circular pattern and scatter the rest for a rustic vibe. Save a few whole cups for that “wow” factor in the center.
- Customize the Drizzle: Melted chocolate chips give a thicker drizzle, while chocolate syrup is glossy and easy to use. Sometimes I swirl a little peanut butter into the chocolate for extra flair!
- Make Ahead: This Reese’s Peanut Butter Cup Pie recipe is even better the next day, so it’s ideal for prepping ahead of time. Just cover tightly with plastic wrap in the fridge.
Honestly, the only real mistake you can make is not letting the pie chill long enough—resist the urge to cut in too soon! And if you ever forget to buy the mini Reese’s cups, don’t panic. I’ve chopped up regular bars, peanut butter chips, and even tossed on some crushed pretzels for a sweet-salty twist. This pie is pretty forgiving and always a crowd-pleaser.
Variations & Adaptations for Reese’s Peanut Butter Cup Pie
- Gluten-Free Version: Swap the regular chocolate cookies for a gluten-free brand (like Glutino). You won’t taste the difference, and everyone can enjoy a slice.
- Vegan/Dairy-Free Option: Use plant-based cream cheese, coconut whipped topping, and vegan butter. For the Reese’s cups, grab dairy-free peanut butter cups (Justin’s makes a great one!).
- Extra Chocolate Lover’s Pie: Add 1/2 cup mini chocolate chips to the filling, or layer a thin sheet of melted chocolate on the crust before adding the peanut butter layer.
- Crunchy Variation: Use crunchy peanut butter or stir in 1/2 cup chopped salted peanuts for a bit of crunch in every bite. I tried this once when I ran out of creamy PB, and it was a hit!
- Seasonal Twist: Top the pie with seasonal candies (think Reese’s Pieces for Halloween, red and green M&Ms for Christmas, or pastel sprinkles for spring). It’s a fun way to make this pie festive for any occasion.
- No Peanut Butter Cups? Use chopped peanut butter M&Ms, peanut butter chips, or even a swirl of Nutella on top for an amazing (and nutty) finish.
One personal favorite: I once added a layer of sliced bananas between the crust and filling for a peanut butter “banana cream” vibe. It was gone in minutes—don’t be afraid to get creative with your Reese’s Peanut Butter Cup Pie recipe!
Serving & Storage Suggestions for Reese’s Peanut Butter Cup Pie
This Reese’s Peanut Butter Cup Pie is best served cold, straight from the fridge. For super sharp slices, let it sit out for about 5-10 minutes before cutting. Use a hot knife (run under hot water, then dry) for the neatest edges—especially important if you want those perfect Pinterest-worthy photos!
- Serving Ideas: Pair with a cold glass of milk, coffee, or even a scoop of vanilla ice cream for full decadence. Sometimes, I add a sprinkle of flaky sea salt on top for a sweet-salty hit.
- Presentation: For parties, serve on a cake stand and garnish with extra whole peanut butter cups in the center. For casual nights, just leave it in the pie pan and let everyone help themselves.
- Storage: Cover tightly with plastic wrap or foil and store in the refrigerator for up to 5 days. The crust stays crisp and the filling gets even creamier over time.
- Freezing: You can freeze the whole pie (before topping) for up to 2 months. Wrap tightly in plastic and then foil. Thaw overnight in the fridge before decorating and serving.
- Reheating: This pie is best enjoyed cold, but if you like it a bit softer, let it sit briefly at room temp. Don’t microwave or the filling will melt!
Pro tip: The flavors get even more intense after a day or two in the fridge, so don’t hesitate to make this ahead for gatherings or holiday feasts!
Nutritional Information & Benefits of Reese’s Peanut Butter Cup Pie
While this Reese’s Peanut Butter Cup Pie is definitely an indulgence, it does have a few redeeming qualities. Each slice (1/10th of the pie) has approximately 420 calories, 28g fat, 38g carbs, and 7g protein. Peanut butter adds some healthy fats and protein, while the cream cheese offers a bit of calcium. If you use gluten-free or dairy-free swaps, it’s easy to accommodate various dietary needs.
Keep in mind, the pie does contain peanuts, dairy, and gluten (unless you use the substitutions above), so check with guests for allergies. I always remind my friends that this is a “sometimes” treat—perfect for celebrations or whenever you need a little pick-me-up. And, honestly, sometimes a slice of chocolate-peanut butter pie is good for the soul!
Conclusion: Why Reese’s Peanut Butter Cup Pie Is Worth Every Bite
If you’re searching for the ultimate easy no bake dessert for chocolate lovers, this Reese’s Peanut Butter Cup Pie recipe is it. It’s rich, creamy, and loaded with all the chocolate-peanut butter goodness you crave—with zero oven time required. Whether you’re making it for a birthday, a barbecue, or just because, it’s guaranteed to make everyone smile (and maybe even fight over the last slice).
I love how customizable this pie is, and the fact that you can tweak it for nearly any dietary need or occasion. Honestly, it’s one of those recipes I come back to again and again—simple, reliable, and always delicious. If you try it, let me know what twist you put on it! Drop a comment, share your masterpiece on social, or send it to a fellow chocolate fanatic. Happy no-baking—enjoy every creamy, chocolatey bite!
Frequently Asked Questions About Reese’s Peanut Butter Cup Pie
How far in advance can I make this Reese’s Peanut Butter Cup Pie?
You can make the pie up to 2 days ahead—just keep it chilled and wait to add the toppings until just before serving for the freshest look.
Can I freeze leftovers?
Yes! Wrap slices tightly in plastic wrap and freeze for up to 2 months. Thaw in the fridge overnight before eating.
What if I don’t have whipped topping?
You can use homemade whipped cream (about 3 cups, whipped to stiff peaks) as a substitute. Just be sure to fold it gently into the filling.
Can I use crunchy peanut butter instead of creamy?
Absolutely! Crunchy peanut butter adds a little texture to the filling. Just be sure to stick with a no-stir variety for best results.
How do I get neat, clean slices?
Chill the pie thoroughly, then use a hot, sharp knife (dip in hot water, then dry) and wipe between slices. This helps keep the layers tidy and gorgeous for serving!
Pin This Recipe!

Reese’s Peanut Butter Cup Pie (Easy No Bake Dessert)

This no bake Reese’s Peanut Butter Cup Pie is a chocolate lover’s dream, featuring a creamy peanut butter filling, crunchy chocolate cookie crust, and a crown of chopped Reese’s cups. It’s quick, easy, and perfect for any occasion—no oven required!
- Prep Time: 20 minutes
- Cook Time: 0 minutes
- Total Time: 4 hours 20 minutes
- Yield: 10 servings 1x
- Category: Dessert
- Cuisine: American
Ingredients
- 24 chocolate sandwich cookies (like Oreos), finely crushed (about 250g)
- 1/2 cup (1 stick, 115g) unsalted butter, melted
- 8 oz (225g) cream cheese, softened
- 1 cup (250g) creamy peanut butter
- 1 cup (125g) powdered sugar
- 8 oz (225g) whipped topping (like Cool Whip), thawed (or about 3 cups homemade whipped cream)
- 12–16 mini Reese’s Peanut Butter Cups, chopped (plus more for garnish, optional)
- Chocolate syrup or melted chocolate chips, for drizzling (optional)
Instructions
- Crush 24 chocolate sandwich cookies into fine crumbs using a food processor or by placing them in a zip-top bag and crushing with a rolling pin.
- In a medium bowl, mix the cookie crumbs with 1/2 cup melted unsalted butter until the mixture resembles wet sand and holds together when pressed.
- Press the mixture firmly into the bottom and sides of a 9-inch pie dish. Chill in the fridge for at least 15 minutes to set.
- In a large bowl, beat the softened cream cheese until smooth and fluffy (about 1-2 minutes).
- Add the creamy peanut butter and powdered sugar. Beat until well combined and creamy.
- Fold in the thawed whipped topping (or homemade whipped cream) with a spatula until no streaks remain and the filling is light and fluffy.
- Spoon the peanut butter mixture into the chilled crust and smooth the top with an offset spatula or butter knife.
- Sprinkle the top generously with chopped mini Reese’s Peanut Butter Cups. Drizzle with chocolate syrup or melted chocolate chips if desired.
- Refrigerate for at least 4 hours, or overnight, to allow the flavors to meld and the filling to set.
- Slice with a sharp knife (wiping between slices for clean cuts) and serve cold. Let sit at room temperature for 10 minutes if too firm.
Notes
For a gluten-free version, use gluten-free chocolate sandwich cookies. For dairy-free, use vegan cream cheese, coconut whipped topping, and plant-based butter. Chill the pie thoroughly for clean slices. You can make this pie up to 2 days ahead. For extra chocolate, add mini chocolate chips to the filling. The pie is best served cold and gets even creamier after a night in the fridge.
Nutrition
- Serving Size: 1 slice (1/10th of pie)
- Calories: 420
- Sugar: 26
- Sodium: 270
- Fat: 28
- Saturated Fat: 13
- Carbohydrates: 38
- Fiber: 2
- Protein: 7
Keywords: Reese's pie, peanut butter cup pie, no bake dessert, chocolate peanut butter pie, easy pie recipe, no bake pie, chocolate lovers dessert, holiday dessert, potluck dessert, cream cheese pie



