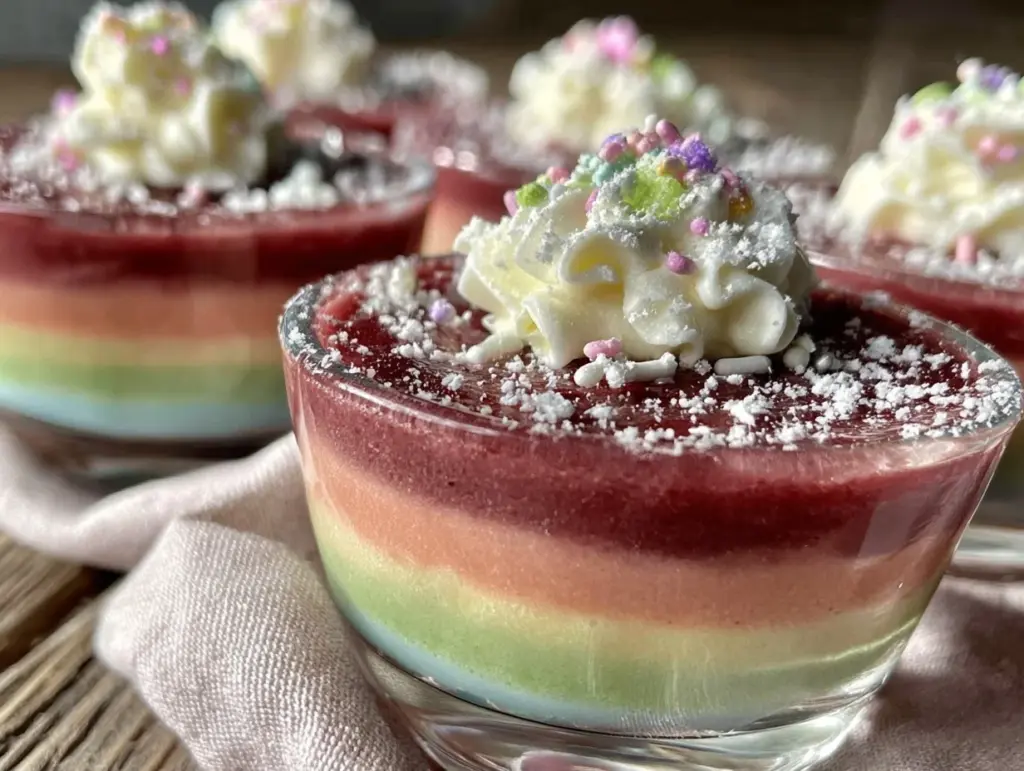
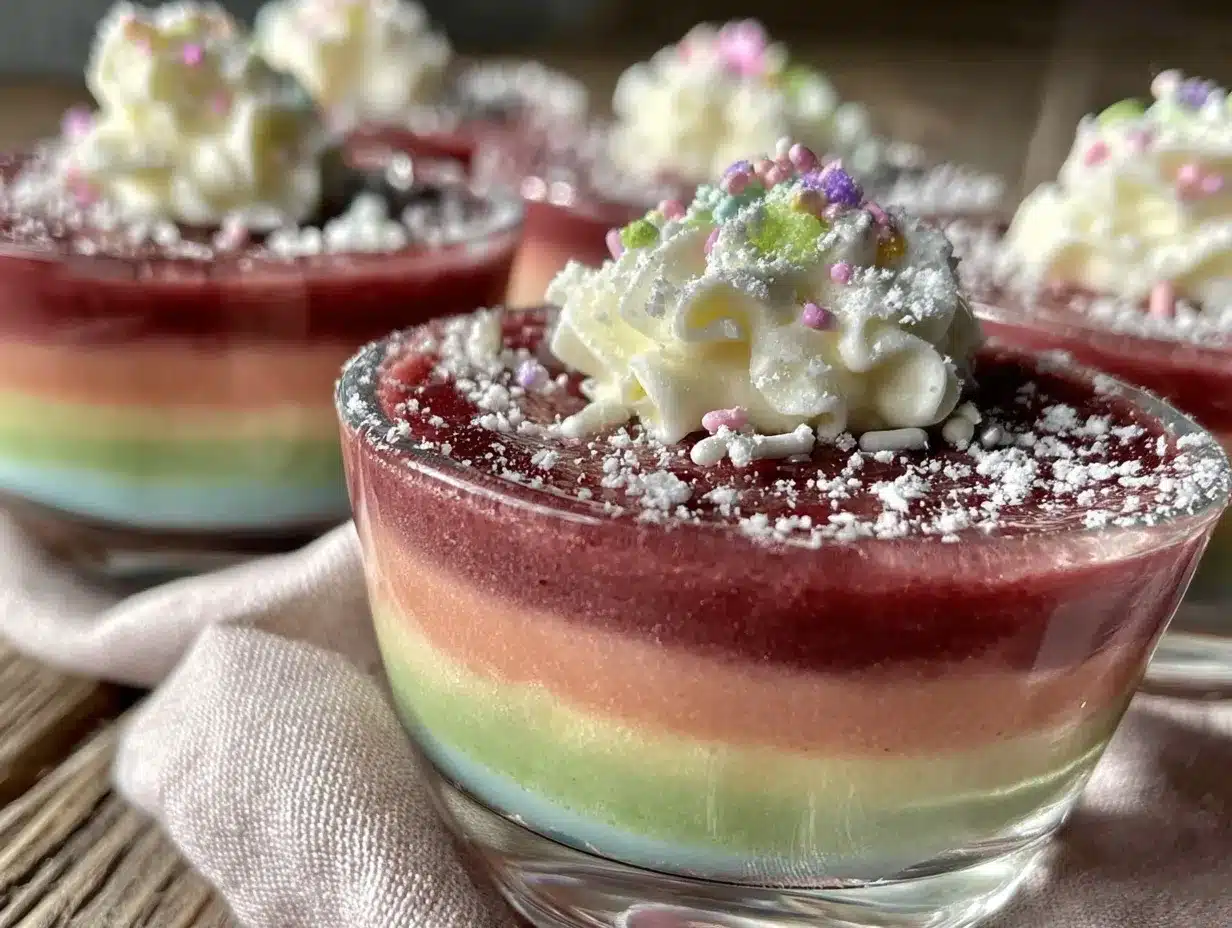
The first time I made these Vibrant Dr. Seuss Rainbow Meltaway Pudding Cups, I was honestly blown away by how much fun they were to create—and eat! The colors pop like a carnival of joy, and the pudding just melts in your mouth, leaving this light, refreshing sweetness that kids absolutely adore. You know, it reminds me of those whimsical Dr. Seuss books I read as a kid, where everything is bright, cheerful, and slightly magical. These pudding cups capture that same spirit perfectly.
I’ve whipped up this recipe countless times for kids’ parties and family gatherings, and it never fails to bring smiles and “oohs” from everyone around. It’s not just about the looks—although, come on, the rainbow layers are eye candy—it’s also about creating a treat that’s easy to make and fun to eat. Plus, it’s a great way to sneak some light dairy goodness into a dessert that feels like a party in a cup.
Whether you’re a busy parent looking for an easy, colorful dessert, or a party planner who wants something that stands out on the table, these Vibrant Dr. Seuss Rainbow Meltaway Pudding Cups fit the bill. Trust me, once you try making them, you’ll want to bring a little Seuss-inspired magic into your kitchen more often.
Why You’ll Love This Recipe
- Quick & Easy: These pudding cups come together in under 30 minutes, so they’re perfect when time is tight but you want to impress.
- Simple Ingredients: Most of the items are pantry staples, and you won’t need to hunt down anything exotic—just a few food colorings and basic pudding mixes.
- Perfect for Kids’ Parties: The bright rainbow layers bring a playful vibe that’s sure to light up any birthday or celebration.
- Crowd-Pleaser: Both kids and adults love the creamy texture combined with the fun, colorful presentation.
- Unbelievably Delicious: The pudding melts away on your tongue, balanced with the light sweetness and a hint of vanilla that keeps everyone coming back for more.
What sets this recipe apart is the layering technique that creates those distinct, vibrant rainbow colors without mixing into a muddy mess. I’ve tried a few methods before settling on this one, and it’s the easiest way to get that eye-popping effect while keeping the pudding silky smooth. Plus, you can customize the colors or even the flavors, which really makes it feel like a personal creation.
Honestly, this recipe is the kind that makes you smile after the first bite and remember childhood whimsy in every spoonful. It’s comfort food with a playful twist—ideal for turning any party into a colorful celebration.
What Ingredients You Will Need
This recipe uses simple, wholesome ingredients to deliver bold flavor and satisfying texture without the fuss. Most of these are basic pantry staples, but together they create a dreamy, rainbow-hued dessert.
- Instant vanilla pudding mix: About 3.4 ounces (96 grams) per batch, for that smooth, creamy base. I prefer Jell-O for consistent texture.
- Cold whole milk: 3 cups (720 ml) to mix with the pudding powder. Whole milk gives a richer taste, but 2% works fine too.
- Heavy cream: 1 cup (240 ml), whipped to soft peaks to fold in and add fluffiness.
- Gel food coloring: In red, orange, yellow, green, blue, and purple. Gel colors are vibrant and don’t thin the pudding like liquid dyes.
- Vanilla extract: 1 teaspoon for a warm, inviting flavor.
- Clear plastic or glass serving cups: About 8 to 10, depending on size.
If you want to tweak it a bit, you can swap the whole milk for almond or oat milk for a dairy-free version (just use a pudding mix labeled dairy-free). For color, natural alternatives like beet powder or turmeric work, but the hues won’t be as vivid. Also, a touch of cream cheese or mascarpone blended in can add a slight tang and extra creaminess if you’re feeling fancy.
Equipment Needed
- Mixing bowls – at least two medium-sized bowls to prepare pudding and whip cream separately.
- Whisk – for blending pudding mix smoothly with milk.
- Electric hand mixer or stand mixer – necessary for whipping heavy cream to perfect soft peaks.
- Spoons or small spatulas – for folding whipped cream into pudding and layering the cups.
- Measuring cups and spoons – for accuracy, especially with liquid ingredients.
- Clear serving cups – I like using 6 to 8-ounce (180-240 ml) plastic cups for easy layering and serving.
Don’t sweat it if you don’t have a mixer; a sturdy whisk and some elbow grease can get the cream whipped, although it might take a bit longer. For budget-friendly options, look for reusable silicone spatulas and affordable glass bowls—they make cleanup easier and last forever. I’ve found that using clear cups really makes the rainbow pop, so it’s worth investing in those if you want the full effect.
Detailed Preparation Method
- Prepare the vanilla pudding base: In a medium bowl, whisk together 3.4 ounces (96 grams) of instant vanilla pudding mix and 3 cups (720 ml) of cold whole milk until thickened—about 2 minutes. Let it sit for 5 minutes to fully set.
- Whip the heavy cream: In a separate chilled bowl, beat 1 cup (240 ml) heavy cream with 1 teaspoon vanilla extract until soft peaks form. This will give your pudding cups that meltaway, fluffy texture.
- Fold the cream into the pudding: Gently fold about half of the whipped cream into the pudding base until combined, keeping it light and airy.
- Divide the pudding mixture evenly: Split the pudding mixture into six smaller bowls (roughly 1 cup or 160 ml each).
- Add colors: Add a different gel food coloring to each bowl—red, orange, yellow, green, blue, and purple. Stir gently to get a smooth, vibrant color without bleeding.
- Layer the pudding cups: Starting with purple at the bottom, spoon a layer (about 2 tablespoons) into each clear cup. Chill for 10 minutes to set slightly before adding the next color.
- Continue layering in the order blue, green, yellow, orange, and finally red on top, chilling for 10 minutes between layers to prevent colors from mixing.
- Top with remaining whipped cream: Once all layers are set, add a dollop of the remaining whipped cream on top for a creamy finish.
- Chill before serving: Refrigerate the pudding cups for at least 1 hour to let flavors meld and layers firm up.
- Serve and enjoy: Use a small spoon to dig in and watch the colors melt away with every bite!
Pro tip: If you notice the layers blending too much, make sure to chill each layer well before adding the next. Also, avoid overmixing the colored puddings so the hues stay bold and distinct. The texture should be silky but fluffy, so folding the whipped cream gently is key.
Cooking Tips & Techniques
Getting these pudding cups just right is all about layering and texture. When mixing the pudding, whisk briskly to avoid lumps but don’t overdo it; you want a silky smooth base. Whipping the cream to soft peaks—not stiff—is crucial because it blends more easily with the pudding and keeps the whole cup light.
Layering is where the magic happens, but it’s also easy to mess up if you rush. Chill each layer thoroughly to prevent colors from bleeding. I learned this the hard way when my first batch looked more like a tie-dye mess than a rainbow! Using clear cups helps you see the layers build up beautifully.
Another handy trick is to use a spoon held close to the previous layer’s surface when adding the next color—this slows down the drop and reduces mixing. Timing matters too: prepping all the colors before starting layers saves you from scrambling to mix colors while the layers set.
Lastly, don’t skip the final chill. It really improves the texture and lets all those flavors cozy up together in the best way.
Variations & Adaptations
Want to switch things up? Here are some fun variations I’ve tried (and loved):
- Dairy-Free Rainbow Cups: Use coconut milk pudding mix and whip coconut cream instead of heavy cream. The colors stay vibrant, and the flavor is tropical and creamy.
- Fruit-Infused Layers: Add a teaspoon of fruit puree to each color layer—think strawberry puree with red or mango with yellow—for a fruity twist.
- Chocolate Rainbow: Add a tablespoon of cocoa powder to one or two layers for a surprising chocolate pop amidst the colors.
You can also swap the pudding flavors: try chocolate or butterscotch pudding bases for different vibes. For a gluten-free option, this recipe already works as-is (just check your pudding mix label). If you want to get fancy, top with sprinkles, edible glitter, or even mini marshmallows for extra fun.
One of my favorite personal twists is adding a splash of espresso powder to the blue layer—sounds odd, but it adds depth and balances the sweetness perfectly.
Serving & Storage Suggestions
Serve these pudding cups chilled for the best meltaway experience. They look fantastic straight from the fridge, so no need to fuss with warm-ups. You can garnish with fresh berries or a sprig of mint for a pop of freshness and contrast.
They pair wonderfully with light, fizzy drinks like sparkling lemonade or a simple iced tea to cleanse the palate between bites. For party settings, arrange them on a bright tray to emphasize those rainbow vibes.
Storage is straightforward: cover the cups loosely with plastic wrap or lids and refrigerate for up to 3 days. The layers hold up well, and the flavors actually deepen over time. If you want to prep in advance, just wait to add the whipped cream topping until serving day for best texture.
Reheating isn’t recommended since the pudding is best enjoyed cold and creamy. Just pull from the fridge about 10 minutes before serving to take the chill off slightly without losing that refreshing feel.
Nutritional Information & Benefits
Each Vibrant Dr. Seuss Rainbow Meltaway Pudding Cup contains approximately 180-220 calories, depending on portion size and ingredients used. They offer a good source of calcium and protein from the milk and cream, making them a bit more nourishing than your average sugary treat.
Using whole milk and heavy cream adds richness and healthy fats, which can keep kids fuller longer compared to lighter desserts. If you opt for dairy-free versions, you’ll still get a creamy texture with plant-based fats and vitamins.
While these pudding cups are a sweet treat, they’re versatile enough to fit into balanced eating plans, especially when paired with fresh fruit or served in smaller portions. Just watch out for any food allergies related to dairy or artificial colorings—gel food colors are generally safe, but some sensitive kids may react.
From a wellness perspective, I love that this recipe encourages colorful eating—visual appeal can make nutritious choices more exciting, even in dessert! Plus, it’s a great way to introduce kids to fun food prep, which can spark lifelong healthy habits.
Conclusion
If you’re looking for a fun, colorful, and downright delicious dessert that kids (and adults!) will rave about, these Vibrant Dr. Seuss Rainbow Meltaway Pudding Cups are your go-to. They’re simple enough to whip up on a busy day but special enough to make any occasion feel like a celebration.
Feel free to tweak the colors, flavors, or toppings to match your party theme or personal taste. I love how adaptable this recipe is—each time I make it, it feels fresh and exciting. Honestly, it’s one of those desserts that brings back the joy of childhood with every spoonful.
Give it a try, and don’t forget to share how your pudding cups turned out! I’d love to hear your fun variations or party stories. Happy layering and happy eating!
Frequently Asked Questions
Can I make these pudding cups ahead of time?
Yes! You can prepare the pudding and layer the cups up to a day in advance. Just add the whipped cream topping right before serving for the best texture.
What if I don’t have gel food coloring?
You can use liquid food coloring, but the colors might be less vibrant, and it may thin out the pudding slightly. Gel colors are best for bright, bold layers.
Is there a way to make these pudding cups vegan?
Absolutely! Use a plant-based pudding mix and substitute heavy cream with whipped coconut cream. Make sure your food coloring is vegan-friendly too.
Can I use homemade pudding instead of instant mix?
Homemade pudding can work, but it’s usually thicker and sets differently. Instant pudding mix is easier and gives that meltaway texture that’s key to this recipe.
How do I prevent the layers from mixing?
Chill each layer for at least 10 minutes before adding the next, and spoon the pudding gently onto the previous layer’s surface to keep the colors distinct.
Pin This Recipe!
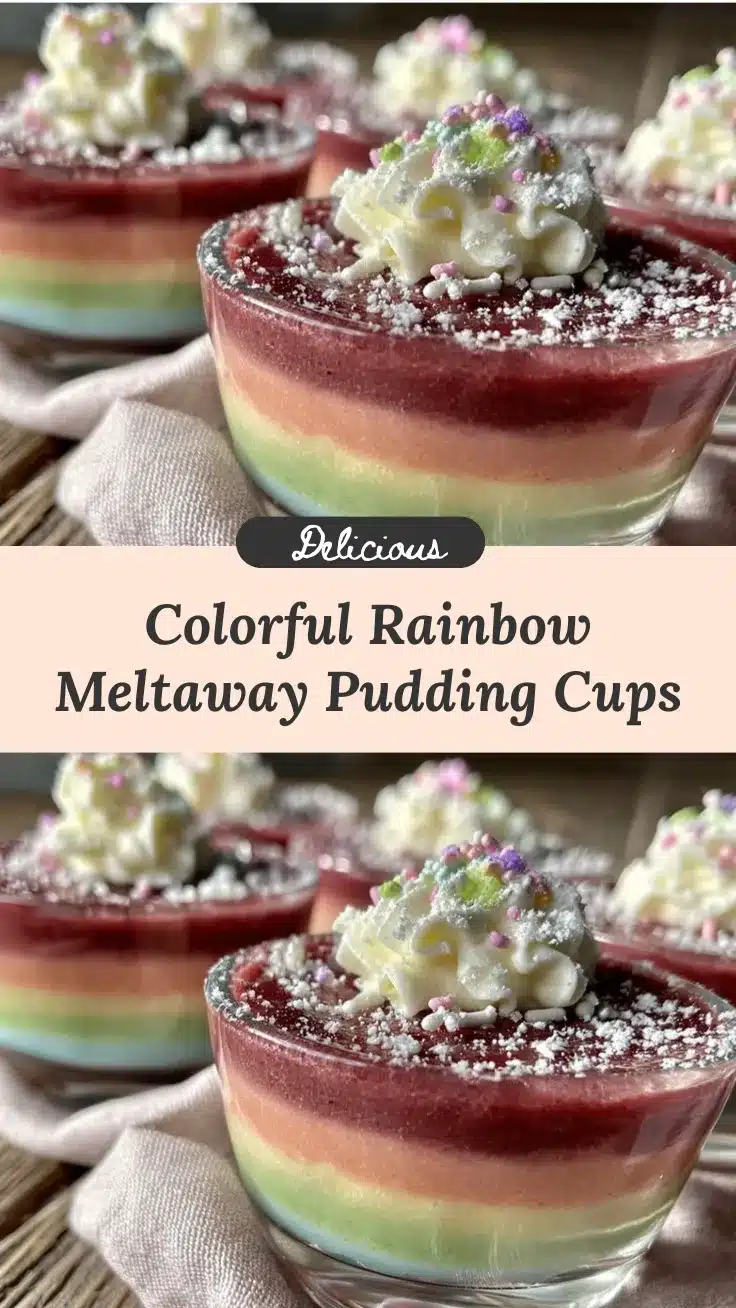
Vibrant Dr. Seuss Rainbow Meltaway Pudding Cups

A fun, colorful, and easy-to-make layered pudding dessert perfect for kids’ parties, featuring vibrant rainbow colors and a light, fluffy texture.
- Prep Time: 10 minutes
- Cook Time: 20 minutes
- Total Time: 30 minutes
- Yield: 8 to 10 servings 1x
- Category: Dessert
- Cuisine: American
Ingredients
- 3.4 ounces (96 grams) instant vanilla pudding mix
- 3 cups (720 ml) cold whole milk
- 1 cup (240 ml) heavy cream, whipped to soft peaks
- Gel food coloring in red, orange, yellow, green, blue, and purple
- 1 teaspoon vanilla extract
- 8 to 10 clear plastic or glass serving cups
Instructions
- In a medium bowl, whisk together 3.4 ounces (96 grams) of instant vanilla pudding mix and 3 cups (720 ml) of cold whole milk until thickened, about 2 minutes. Let it sit for 5 minutes to fully set.
- In a separate chilled bowl, beat 1 cup (240 ml) heavy cream with 1 teaspoon vanilla extract until soft peaks form.
- Gently fold about half of the whipped cream into the pudding base until combined, keeping it light and airy.
- Divide the pudding mixture evenly into six smaller bowls (roughly 1 cup or 160 ml each).
- Add a different gel food coloring to each bowl—red, orange, yellow, green, blue, and purple. Stir gently to get a smooth, vibrant color without bleeding.
- Starting with purple at the bottom, spoon a layer (about 2 tablespoons) into each clear cup. Chill for 10 minutes to set slightly before adding the next color.
- Continue layering in the order blue, green, yellow, orange, and finally red on top, chilling for 10 minutes between layers to prevent colors from mixing.
- Once all layers are set, add a dollop of the remaining whipped cream on top for a creamy finish.
- Refrigerate the pudding cups for at least 1 hour to let flavors meld and layers firm up.
- Serve chilled and enjoy.
Notes
Chill each layer for at least 10 minutes before adding the next to prevent colors from mixing. Fold whipped cream gently to keep pudding light and airy. Use gel food coloring for vibrant colors. For dairy-free versions, substitute with plant-based pudding mix and coconut cream.
Nutrition
- Serving Size: One pudding cup (abo
- Calories: 180220
- Sugar: 18
- Sodium: 150
- Fat: 10
- Saturated Fat: 6
- Carbohydrates: 22
- Protein: 4
Keywords: rainbow pudding cups, kids party dessert, layered pudding, colorful dessert, easy pudding recipe, Dr. Seuss dessert