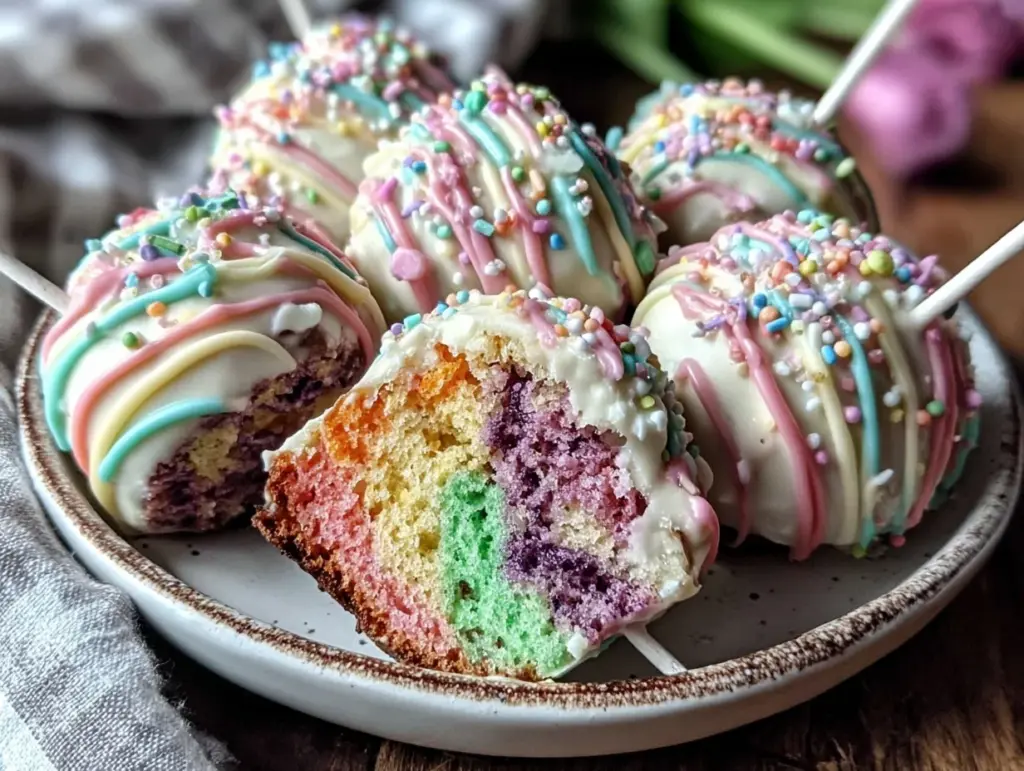
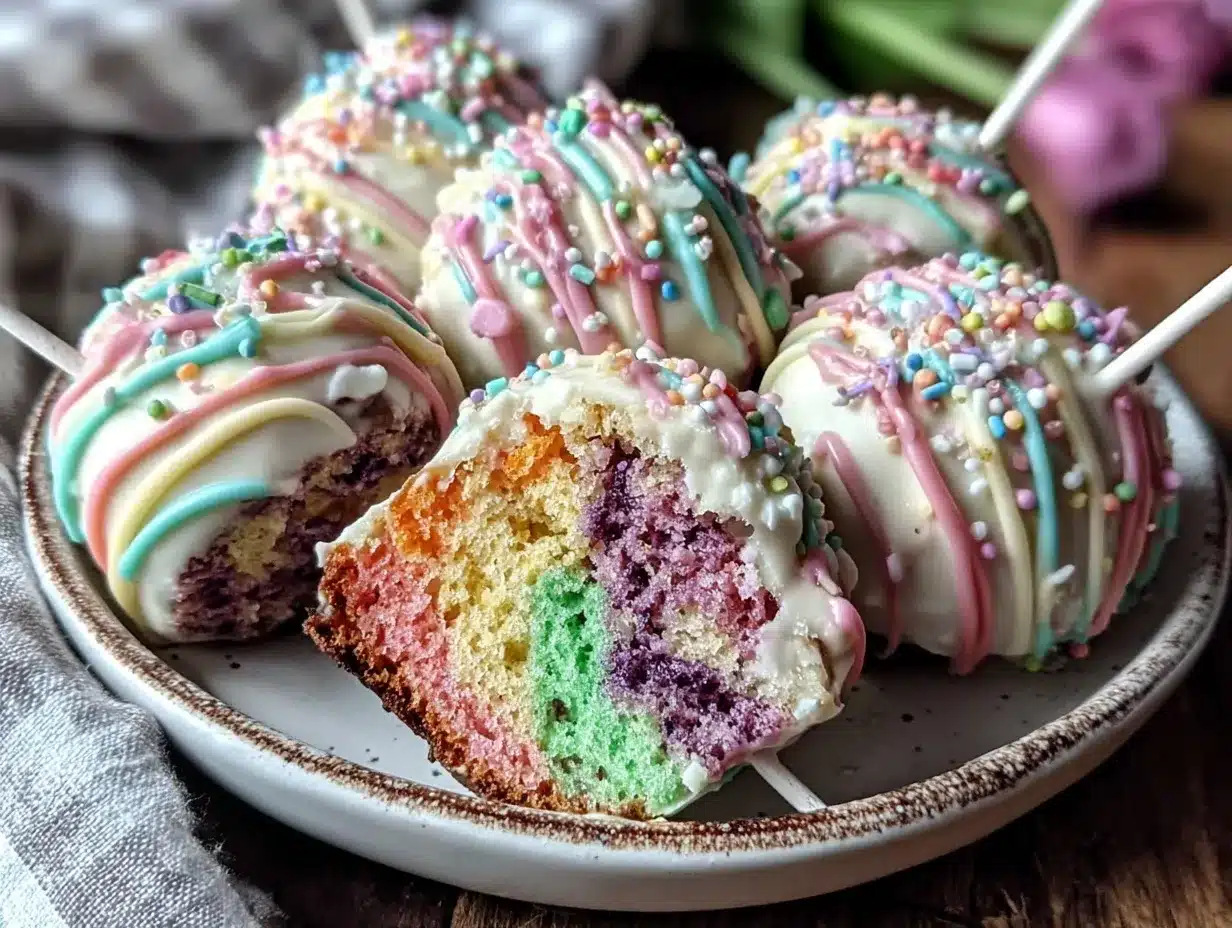
The moment you bite into a Vibrant Dr. Seuss Rainbow Sponge Cake Pop, you’re hit with a burst of color and playful sweetness that instantly takes you back to childhood. Honestly, these cake pops are like a party on a stick — bright, fun, and totally irresistible. I first stumbled upon this recipe while trying to make a whimsical treat for my niece’s birthday. She’s a huge Dr. Seuss fan, and I wanted something as lively and imaginative as his stories.
This recipe quickly became a favorite in my kitchen, not just because it looks amazing but because it’s surprisingly easy to bring to life. The rainbow layers remind me of those classic, colorful Dr. Seuss illustrations — so vibrant they practically jump off the page. Whether you’re baking for a kid’s party, a festive gathering, or just because you want to brighten up your day, these cake pops deliver joy in every bite.
After testing this Vibrant Dr. Seuss Rainbow Sponge Cake Pops recipe multiple times, I’m confident it’s a winner for everyone — beginners and seasoned bakers alike. Plus, it’s a fantastic way to sneak in some homemade fun without spending hours in the kitchen. You’ll love how the light sponge layers blend perfectly with the creamy frosting to create a texture that’s dreamy and just the right amount of sweet.
Why You’ll Love This Recipe
- Quick & Easy: The entire process, from baking to decorating, takes about 2 hours — perfect for a weekend project or a last-minute celebration.
- Simple Ingredients: You probably have most of the pantry staples on hand, so no extra trips needed.
- Perfect for Parties: These cake pops are a showstopper, ideal for birthdays, themed events, or a fun family dessert.
- Crowd-Pleaser: Kids and adults alike rave about these — the rainbow colors and bite-sized format make them super shareable.
- Unbelievably Delicious: The sponge cake is moist and tender, while the frosting adds just the right creamy touch without overpowering the cake.
This isn’t just your average cake pop recipe. The secret is in layering the sponge cake with different colors and carefully blending them with frosting to get that perfect pop shape and taste. Plus, the colors come out so bright and cheerful, they make any occasion feel special — I can’t tell you how many times these have stolen the show at parties!
What sets this apart is the balance between fun and flavor. Sure, it looks whimsical, but it’s also a solid, tasty treat you’ll want to make again and again.
What Ingredients You Will Need
To create these charming Vibrant Dr. Seuss Rainbow Sponge Cake Pops, we use simple, straightforward ingredients that pack a punch in flavor and texture. The ingredients are easy to find and mostly pantry staples, which means you can whip up this recipe without fuss.
- For the Sponge Cake Batter:
- All-purpose flour – 2 ½ cups (315 g), sifted for lightness
- Baking powder – 2 ½ teaspoons (10 g) for that perfect rise
- Salt – ¼ teaspoon (1.5 g) to balance flavors
- Unsalted butter – ¾ cup (170 g), softened (I love using Land O Lakes for richness)
- Granulated sugar – 1 ¾ cups (350 g) for sweetness
- Large eggs – 4, room temperature (helps the batter come together smoothly)
- Pure vanilla extract – 2 teaspoons (10 ml) for that classic flavor
- Whole milk – 1 cup (240 ml), room temperature (adds moisture)
- Gel food coloring – red, orange, yellow, green, blue, purple (use AmeriColor for vibrant, bold hues)
- For the Frosting & Assembly:
- Cream cheese – 8 oz (225 g), softened (for tang and creaminess)
- Unsalted butter – ½ cup (115 g), softened
- Powdered sugar – 3 cups (360 g), sifted to avoid lumps
- Pure vanilla extract – 1 teaspoon (5 ml)
- Rainbow sprinkles – for decoration
- White chocolate melts or candy melts – 12 oz (340 g) for coating the pops
- Wooden lollipop sticks – about 20, sturdy enough to hold the cake pops
If you’re looking for gluten-free options, almond flour works well for the sponge, though the texture shifts a bit (I’ve tried it, and it’s a tasty twist). For dairy-free needs, swap the butter and cream cheese with plant-based alternatives — just make sure they’re firm enough to hold the cake pop shape.
Equipment Needed
- Mixing bowls – I prefer glass or stainless steel for easy mixing and cleanup
- Electric mixer or stand mixer – essential for getting that fluffy cake batter and smooth frosting
- 6-cup bundt pan or six 8-inch round cake pans – for baking the layered sponge cake
- Cooling racks – to cool the cake evenly
- Large bowl and fork or food processor – for crumbling the baked cake when making cake pops
- Microwave-safe bowl – to melt chocolate or candy melts
- Lollipop sticks – sturdy wooden sticks designed for cake pops
- Styrofoam block or cake pop stand – to hold pops upright while drying
If you don’t have a stand, a simple Styrofoam block from a craft store works wonders and doesn’t cost much. Also, if you’re new to cake pops, a food processor can speed up the crumbling process, but a fork and some elbow grease do just fine (I’ve made plenty of batches without fancy tools!).
Detailed Preparation Method
- Preheat and Prepare: Preheat your oven to 350°F (175°C). Grease and flour your cake pans or bundt pan to prevent sticking. This step is crucial, or you’ll be sad when your beautiful layers don’t come out cleanly.
- Mix Dry Ingredients: In a medium bowl, whisk together 2 ½ cups (315 g) all-purpose flour, 2 ½ teaspoons (10 g) baking powder, and ¼ teaspoon (1.5 g) salt. Set aside. This keeps your leavening even throughout the batter.
- Cream Butter and Sugar: Using a mixer on medium speed, beat ¾ cup (170 g) softened unsalted butter with 1 ¾ cups (350 g) granulated sugar until light and fluffy—about 3-5 minutes. You’ll know it’s ready when the mixture is pale and airy.
- Add Eggs and Vanilla: Beat in 4 large eggs, one at a time, mixing well after each addition. Stir in 2 teaspoons (10 ml) pure vanilla extract.
- Alternate Dry Ingredients and Milk: Reduce mixer speed to low. Add the dry ingredients in three parts, alternating with 1 cup (240 ml) whole milk, starting and ending with the flour mixture. Mix just until combined—don’t overmix or the cake gets tough.
- Divide and Color Batter: Divide the batter evenly into six small bowls. Add a different gel food coloring to each bowl (red, orange, yellow, green, blue, purple). Stir gently until the colors are vibrant but don’t overmix to keep the texture light.
- Layer and Bake: Spoon each colored batter layer carefully into your prepared pan(s), starting with red and ending with purple. Smooth each layer gently with the back of a spoon. Bake for 35-40 minutes or until a toothpick inserted comes out clean. The layers will bake into a stunning rainbow sponge.
- Cool Completely: Let the cake cool in the pan for 15 minutes, then invert onto a cooling rack. Cool completely before proceeding — trust me, this step avoids a soggy mess later on.
- Make the Frosting: Beat 8 oz (225 g) softened cream cheese and ½ cup (115 g) softened butter until smooth and creamy. Gradually add 3 cups (360 g) powdered sugar and 1 teaspoon (5 ml) vanilla extract. Beat until fluffy and spreadable.
- Prepare Cake Pops: Crumble the cooled cake into a large bowl. Add ½ cup (120 g) of frosting and mix well until the mixture holds together when pressed. Adjust frosting as needed — too little, and the pops fall apart; too much, and they get too sweet.
- Shape Cake Pops: Roll the mixture into 1 ½-inch (4 cm) balls and place on a parchment-lined tray. Chill in the fridge for at least 30 minutes to firm up.
- Insert Sticks and Dip: Melt 12 oz (340 g) white chocolate or candy melts in a microwave-safe bowl in 30-second intervals, stirring in between. Dip the tip of each wooden stick into melted chocolate, then insert halfway into each cake ball. Dip each pop fully into the melted chocolate, letting excess drip off.
- Decorate: While the coating is still wet, sprinkle rainbow sprinkles or other fun decorations. Stick pops upright into a Styrofoam block and refrigerate until set, about 30 minutes.
Pro tip: If your chocolate thickens while dipping, microwave briefly to re-melt. Also, don’t skip chilling the cake balls before dipping — it helps them keep their shape and makes dipping easier.
Cooking Tips & Techniques
One thing I learned the hard way is that the batter needs gentle handling. Overmixing is the sneaky villain that makes the sponge dense instead of light and airy. So, when you add the dry ingredients and milk, just fold them in carefully.
When coloring the batter, gel food coloring is your best friend. Liquid colors can thin the batter and mess with the texture. Also, don’t be shy with the colors — this recipe thrives on vibrancy.
Chilling the cake balls before coating is a non-negotiable. I once tried skipping this step, and the balls fell apart mid-dip — not fun! A solid chill helps the pops hold on to their stick and keeps the coating smooth.
Another tip: melt your chocolate slowly in the microwave at 30-second bursts, stirring between each. Chocolate can seize or get grainy if overheated, and that ruins the glossy finish you want.
Lastly, be patient — letting the cake cool completely before crumbling and frosting ensures your pops won’t turn mushy. It’s tempting to rush, but trust me, it pays off.
Variations & Adaptations
Want to mix things up? Here are a few fun twists I’ve tried that work like a charm:
- Chocolate Rainbow: Add cocoa powder to the batter to make a chocolate version of the rainbow layers. The contrast with the bright frosting is stunning.
- Fruit-Infused: Swap half the milk for pureed strawberries or mango for fruity layers. I tried this last summer, and it added a fresh, natural sweetness.
- Vegan Version: Use flax eggs, dairy-free butter, and coconut cream cheese alternatives. The texture changes slightly but still tastes delightful.
- Different Coatings: Try dipping in dark or milk chocolate instead of white for a richer flavor. You can also swirl a bit of colored candy melts on top for extra flair.
Feel free to customize colors based on your event or personal style. I once made a pastel version for a baby shower, and it was just as gorgeous and tasty!
Serving & Storage Suggestions
Serve these cake pops chilled or at room temperature for best flavor. They make a perfect handheld treat for parties or a colorful dessert centerpiece. Pair them with a simple glass of milk or a light tea to balance the sweetness.
Store leftover cake pops in an airtight container in the refrigerator for up to 5 days. They hold up well but can dry out if left uncovered — so cover is key. For longer storage, freeze them in a single layer on a baking sheet, then transfer to a freezer-safe container for up to 2 months.
To enjoy after freezing, thaw in the fridge for a few hours before serving. The flavors actually deepen a bit after sitting, making them taste even better the next day!
Nutritional Information & Benefits
Each cake pop contains approximately 180 calories, 10 g fat, 22 g carbohydrates, and 2 g protein. While these treats are definitely a sweet indulgence, the recipe uses real butter and cream cheese, providing a richer flavor and a bit more nutrition than store-bought cake pops loaded with artificial additives.
The homemade sponge cake lets you control the sugar levels and avoid preservatives. Plus, the portion size keeps things reasonable — just the right amount for a fun treat without going overboard.
For those mindful of allergens, this recipe does contain gluten, dairy, and eggs, but substitutions can be made for most dietary needs, as mentioned earlier.
Conclusion
The Vibrant Dr. Seuss Rainbow Sponge Cake Pops recipe is a delightful mix of nostalgia, color, and fun that anyone can make at home. It’s a surefire way to bring smiles and brighten any occasion with a treat that’s as tasty as it is eye-catching.
I love this recipe because it combines creativity with simplicity — plus, it’s a great way to get kids involved in baking. The joy on their faces when they see those rainbow layers come together is priceless.
Give it a try and play around with your own colors and flavors! Don’t forget to share your creations and let me know how your cake pops turn out — I’m always excited to hear your twists on this recipe.
Happy baking, friends!
FAQs
How long do these cake pops last?
Stored properly in an airtight container in the fridge, they last up to 5 days. You can also freeze them for up to 2 months.
Can I make the sponge cake layers ahead of time?
Yes! You can bake the layers a day or two ahead and keep them wrapped tightly in plastic wrap at room temperature or refrigerated.
What if I don’t have gel food coloring?
Gel colors work best for vibrant hues without thinning the batter. If you only have liquid food coloring, use less and be aware it may affect the cake texture.
Can I use a different type of frosting for the cake pops?
Buttercream or chocolate ganache can work, but cream cheese frosting provides the perfect tang and texture for this recipe.
How do I prevent the cake pops from falling off the sticks?
Chill the cake balls well before dipping, and dip the stick tip in melted chocolate before inserting into the cake ball to help them stick better.
Pin This Recipe!
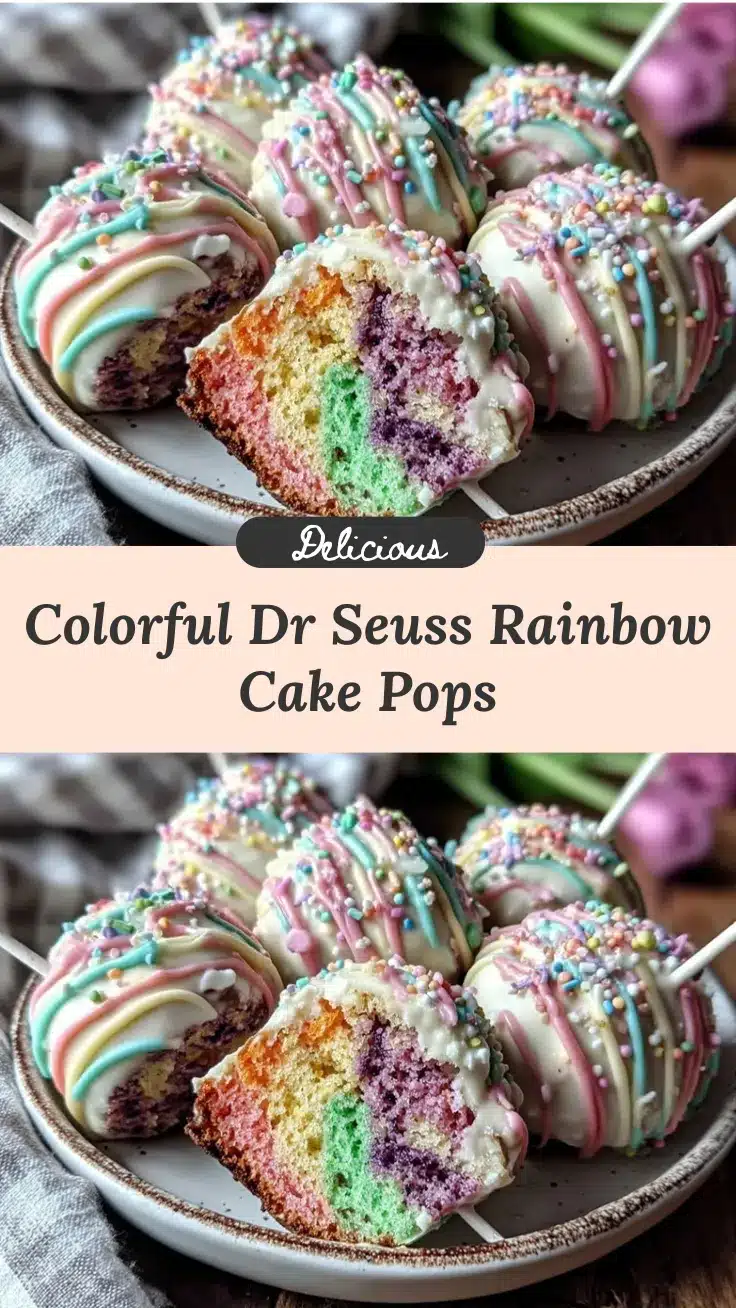
Vibrant Dr. Seuss Rainbow Sponge Cake Pops

These cake pops are a colorful, playful treat inspired by Dr. Seuss, featuring vibrant rainbow sponge layers combined with creamy frosting and coated in white chocolate. Perfect for parties and easy to make, they deliver joy in every bite.
- Prep Time: 45 minutes
- Cook Time: 40 minutes
- Total Time: 2 hours
- Yield: About 20 cake pops 1x
- Category: Dessert
- Cuisine: American
Ingredients
- 2 ½ cups (315 g) all-purpose flour, sifted
- 2 ½ teaspoons (10 g) baking powder
- ¼ teaspoon (1.5 g) salt
- ¾ cup (170 g) unsalted butter, softened
- 1 ¾ cups (350 g) granulated sugar
- 4 large eggs, room temperature
- 2 teaspoons (10 ml) pure vanilla extract
- 1 cup (240 ml) whole milk, room temperature
- Gel food coloring: red, orange, yellow, green, blue, purple
- 8 oz (225 g) cream cheese, softened
- ½ cup (115 g) unsalted butter, softened
- 3 cups (360 g) powdered sugar, sifted
- 1 teaspoon (5 ml) pure vanilla extract
- Rainbow sprinkles for decoration
- 12 oz (340 g) white chocolate melts or candy melts
- About 20 wooden lollipop sticks
Instructions
- Preheat oven to 350°F (175°C). Grease and flour cake pans or bundt pan.
- Whisk together flour, baking powder, and salt in a medium bowl; set aside.
- Beat softened butter and granulated sugar on medium speed until light and fluffy, about 3-5 minutes.
- Add eggs one at a time, mixing well after each addition, then stir in vanilla extract.
- Reduce mixer speed to low; add dry ingredients in three parts alternating with milk, starting and ending with flour mixture. Mix until just combined.
- Divide batter evenly into six bowls; add a different gel food coloring to each and stir gently.
- Layer each colored batter into prepared pan(s) starting with red and ending with purple. Smooth layers gently.
- Bake 35-40 minutes or until toothpick inserted comes out clean.
- Cool cake in pan 15 minutes, then invert onto cooling rack and cool completely.
- Beat cream cheese and softened butter until smooth. Gradually add powdered sugar and vanilla extract; beat until fluffy.
- Crumble cooled cake into a large bowl. Add ½ cup frosting and mix until mixture holds together when pressed. Adjust frosting as needed.
- Roll mixture into 1 ½-inch balls; place on parchment-lined tray and chill at least 30 minutes.
- Melt white chocolate or candy melts in microwave-safe bowl in 30-second intervals, stirring between.
- Dip tip of each wooden stick into melted chocolate, insert halfway into each cake ball.
- Dip each cake pop fully into melted chocolate, letting excess drip off.
- Sprinkle rainbow sprinkles on wet coating. Place pops upright in Styrofoam block and refrigerate until set, about 30 minutes.
Notes
Use gel food coloring for vibrant colors without thinning batter. Chill cake balls before dipping to prevent falling apart. Melt chocolate slowly in microwave at 30-second intervals, stirring between. Avoid overmixing batter to keep sponge light and airy. For gluten-free, substitute almond flour; for dairy-free, use plant-based butter and cream cheese.
Nutrition
- Serving Size: 1 cake pop
- Calories: 180
- Fat: 10
- Carbohydrates: 22
- Protein: 2
Keywords: cake pops, rainbow cake, Dr. Seuss cake, sponge cake, party dessert, colorful cake pops, easy cake pops, cream cheese frosting