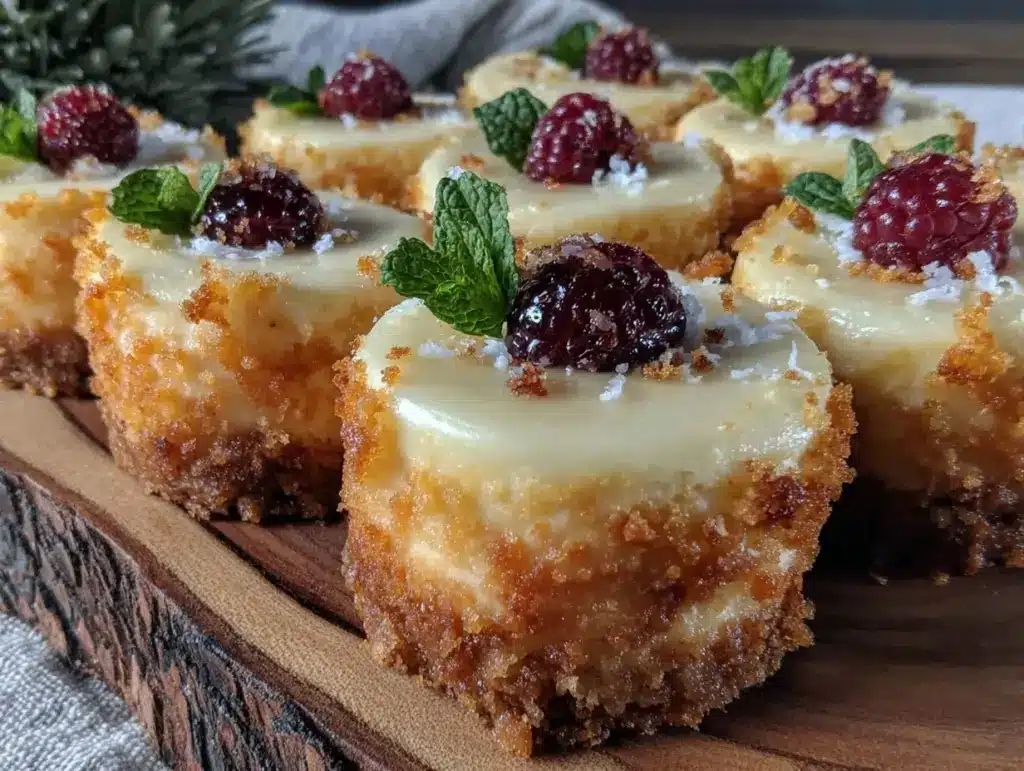
“You really think these tiny things are homemade?” my friend asked, eyebrows raising as she popped a creamy mini cheesecake bite into her mouth. Honestly, I felt the same the first time I whipped up this recipe. It all started one chaotic weekend when I had promised to bring dessert to a last-minute gathering. I was juggling a million things—kids running around, phone buzzing nonstop, and barely enough time to breathe, let alone bake. I grabbed some cream cheese, a few pantry staples, and figured I’d try a mini cheesecake bite recipe I’d scribbled down months ago.
What happened next was pure surprise. These little bites turned out so smooth, rich, and irresistible that my skepticism quickly melted away. The party guests kept reaching back for more, and I caught myself making the recipe again three times that week just to satisfy cravings. The creamy mini cheesecake bites party platter became my go-to, no-stress dessert that looks fancy but comes together with barely any fuss. That quiet moment in my cluttered kitchen, smelling the sweet vanilla and baked crusts, is when I realized this recipe wasn’t just good—it was a keeper for every occasion.
Why You’ll Love This Recipe
Having tested this creamy mini cheesecake bites recipe more than a handful of times (yes, even on busy school nights), I can confidently say it’s a real crowd-pleaser. Here’s why it might just become your new favorite party treat:
- Quick & Easy: Ready in under an hour, including baking and cooling—perfect for those last-minute dessert emergencies.
- Simple Ingredients: No need to hunt down fancy stuff; you probably have most of these in your pantry already.
- Perfect for Parties: Whether it’s a birthday, holiday gathering, or casual get-together, these mini bites fit right in.
- Crowd-Pleaser: Kids, adults, picky eaters—everyone loves the creamy texture and buttery crust.
- Unbelievably Delicious: The smooth cream cheese filling balanced with a buttery, slightly crunchy base makes every bite melt in your mouth.
What sets this recipe apart? It’s the secret of blending cream cheese until it’s silky smooth and folding in just the right amount of sour cream for that subtle tang that balances sweetness. Plus, these mini bites are fully portable—easy to pop in your mouth without the mess. For a slightly different twist, I often swap out classic vanilla for a hint of lemon zest or a splash of almond extract. It’s comfort food reinvented with a refined touch, and honestly, it’s the kind of treat that makes you close your eyes and savor the moment.
What Ingredients You Will Need
This recipe uses simple, wholesome ingredients to deliver bold flavor and satisfying texture without the fuss. Most of these are pantry and fridge staples, and substitutions are easy if you’re catering to dietary needs.
- For the crust:
- 1 1/2 cups (150g) graham cracker crumbs (or digestive biscuits, finely crushed)
- 1/4 cup (50g) granulated sugar
- 6 tablespoons (85g) unsalted butter, melted (I prefer Kerrygold for its rich flavor)
- For the filling:
- 16 oz (450g) cream cheese, softened (Philadelphia brand works well for consistency)
- 1/2 cup (120g) sour cream (adds that classic tang and creaminess)
- 2/3 cup (135g) granulated sugar
- 2 large eggs, room temperature
- 1 teaspoon pure vanilla extract (use a good-quality extract for best aroma)
- Optional: zest of 1 lemon for a bright twist
- For topping (optional):
- Fresh berries (strawberries, blueberries, or raspberries)
- Fruit compote or preserves
- Light dusting of powdered sugar
For a gluten-free crust, simply swap graham crackers with almond flour or gluten-free cookie crumbs. If dairy is a concern, Greek yogurt can replace sour cream, and vegan cream cheese works in a pinch, though texture may vary slightly. When fresh berries are in season, I love topping the bites with juicy, vibrant fruit to add a pop of color and freshness.
Equipment Needed
- Mini muffin pan (12 or 24-cup size; non-stick is a lifesaver here)
- Electric hand mixer or stand mixer (for perfectly smooth cream cheese filling)
- Mixing bowls (preferably glass or stainless steel)
- Measuring cups and spoons (accuracy is key for baking)
- Spatula (for folding ingredients gently)
- Optional: silicone muffin liners (makes removal cleaner and easier)
If you don’t have a mini muffin pan, you can use a regular muffin pan but expect larger bites and slightly longer baking time. I’ve also tried silicone molds, and they work well but watch the baking time carefully—they tend to brown the crust faster. For mixers, a handheld electric mixer is fine, but a stand mixer really smooths out the cream cheese with less effort. After frequent use, I recommend wiping down your tools promptly; cream cheese can be stubborn once dried.
Preparation Method
- Preheat your oven to 325°F (165°C). This moderate temperature lets the cheesecakes bake gently, preventing cracks.
- Make the crust: In a medium bowl, combine 1 1/2 cups graham cracker crumbs and 1/4 cup sugar. Pour in the melted butter and stir until crumbs are evenly coated and resemble wet sand.
- Press crust into mini muffin cups: Use about a teaspoon of crust mixture per cup. Press firmly with your fingers or the bottom of a small glass to form an even base. This step is important for a sturdy crust that won’t crumble apart.
- Bake crust for 7 minutes. This “pre-bake” sets the crust so it stays crisp under the creamy filling. Remove from oven and let cool slightly while you prepare the filling.
- Prepare the filling: In a large bowl, beat 16 oz softened cream cheese with an electric mixer on medium speed until smooth and creamy (around 2-3 minutes). Scrape down the sides occasionally to avoid lumps.
- Add 1/2 cup sour cream and 2/3 cup sugar, then beat until just combined. Overmixing here can incorporate too much air, causing cracks during baking.
- Beat in 2 large eggs, one at a time. Mix on low speed until blended. Stir in 1 teaspoon vanilla extract and, if using, lemon zest.
- Fill each crust-lined muffin cup: Spoon the cream cheese filling evenly, about 2 tablespoons per cup. Avoid overfilling to prevent overflow.
- Bake at 325°F (165°C) for 18-22 minutes. The edges should be set, but the centers will still jiggle slightly when you gently shake the pan. This ensures creamy texture after cooling.
- Cool the cheesecake bites: Let the pan rest at room temperature for 30 minutes, then refrigerate for at least 2 hours before serving. Chilling helps the flavors meld and the texture firm up perfectly.
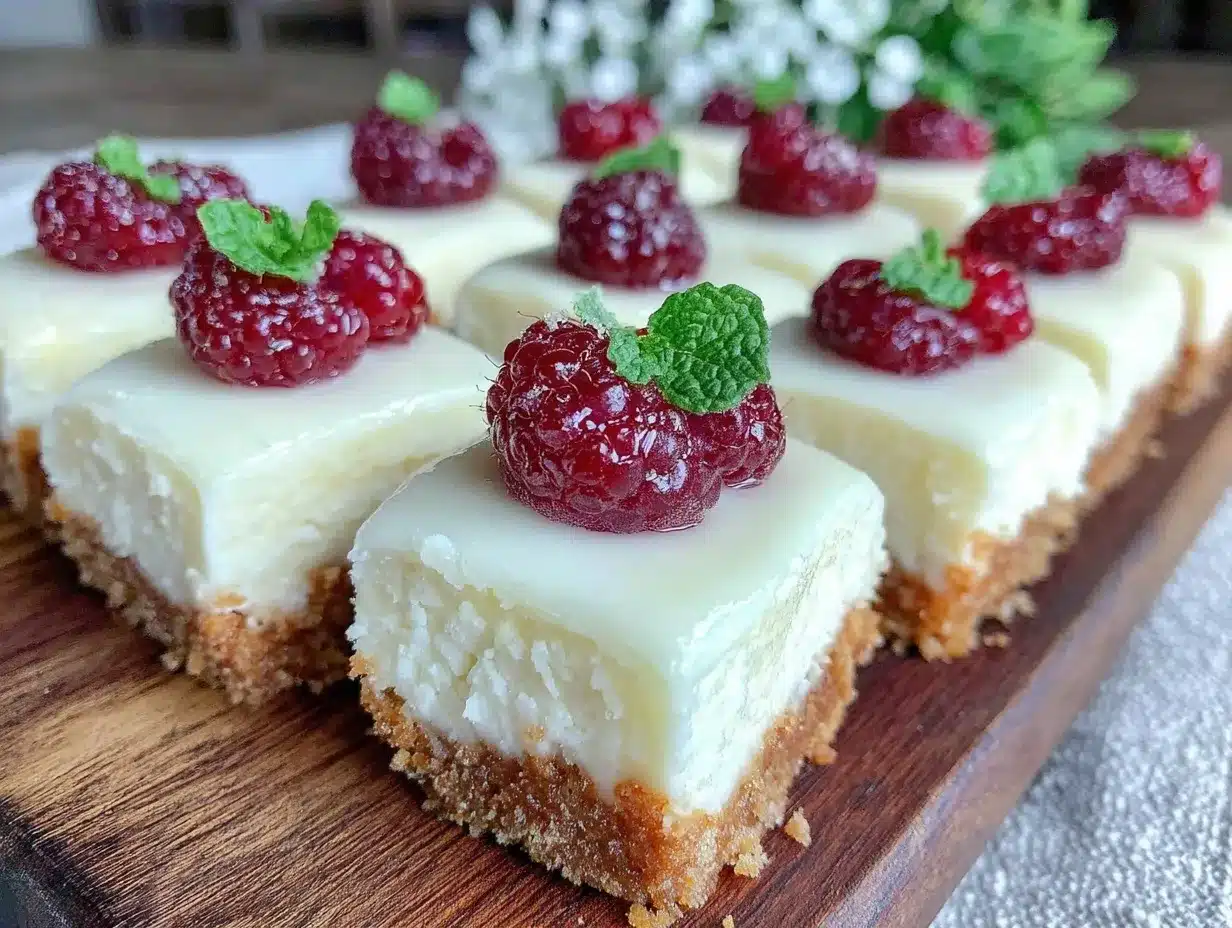
- Add toppings just before serving: Fresh berries, fruit preserves, or a light dusting of powdered sugar all work beautifully.
If you notice cracking on the surface, it’s usually due to overmixing or baking at too high a temperature. Keeping the oven steady at 325°F and mixing gently can help prevent this. Using room temperature ingredients also makes the batter smoother and reduces risk of bumps or cracks. One quick tip: I often place a shallow pan of water on the bottom rack while baking to add moisture, which keeps the cheesecake extra creamy.
Cooking Tips & Techniques
Cheesecake can be a bit intimidating, but these tips will help you nail this recipe every time:
- Softened Cream Cheese is key: Take it out of the fridge at least an hour before baking. Cold cream cheese lumps won’t blend well and cause a grainy texture.
- Beat gently: Overbeating air into the mixture can cause cracks. Mix until just combined for a silky smooth filling.
- Room temperature eggs: These blend better and prevent curdling or uneven texture.
- Pre-bake crust: This extra step keeps your crust crisp even after adding the wet filling.
- Don’t overbake: The little jiggle in the center means it’s done. Residual heat will finish setting during cooling.
- Chill thoroughly: Refrigeration is essential for the creamy texture and ease of serving.
- Use silicone liners: They make removal effortless and keep those bites intact.
I learned the hard way that skipping the pre-bake crust step leads to soggy bottoms, and rushing the chilling time makes the bites fall apart when you try to lift them. Also, adding lemon zest was a happy accident that brightened the flavor more than I expected. If you’re multitasking, prep your crust the night before and store it in the fridge to save time on party day.
Variations & Adaptations
If you want to switch things up or cater to different tastes, these mini cheesecake bites are really versatile:
- Chocolate Lovers: Add 2 tablespoons unsweetened cocoa powder to the filling for a rich twist. Top with mini chocolate chips or a drizzle of melted dark chocolate.
- Fruit Infusion: Fold in finely chopped fresh strawberries or blueberries into the batter before baking for bursts of natural sweetness.
- Gluten-Free: Use almond meal or gluten-free cookie crumbs for the crust. Make sure your toppings are gluten-free too.
- Vegan Adaptation: Try vegan cream cheese and coconut yogurt in place of dairy, and an egg replacer like flax eggs. Baking time might vary slightly, so watch closely.
- Spiced Bites: Add a pinch of cinnamon or pumpkin pie spice to the crust or filling for a cozy seasonal vibe.
Personally, I once made a batch with a swirl of raspberry preserves folded into the filling, and it was a total hit at a summer barbecue. For a no-bake option, check out the creamy no-bake strawberry pretzel salad recipe on this site, which delivers a similar tangy cheesecake flavor with less oven time.
Serving & Storage Suggestions
These mini cheesecake bites are best served chilled but not ice-cold—letting them sit out for 5-10 minutes before serving helps soften the texture and release the flavors. Arrange them on a decorative platter with a mix of fresh berries or a dusting of powdered sugar for a party-ready display.
To complement the bites, a bright, fruity beverage like the copycat Starbucks strawberry acai refresher pairs perfectly, cutting through the richness with its crispness.
Store leftovers in an airtight container in the refrigerator for up to 4 days. They freeze well too—wrap each bite individually in plastic wrap and place in a freezer bag for up to 2 months. Thaw overnight in the fridge before serving. Reheating isn’t recommended, but you can let them sit at room temperature for 15 minutes to soften after refrigeration.
Flavors deepen after a day or two, so if you have the patience, making these in advance actually improves taste and texture.
Nutritional Information & Benefits
Each creamy mini cheesecake bite contains approximately:
| Calories | 110 kcal |
|---|---|
| Fat | 7 g |
| Carbohydrates | 10 g |
| Protein | 2 g |
| Sugar | 7 g |
The cream cheese and sour cream provide a good source of calcium and protein, while the graham cracker crust adds carbohydrates for energy. If you’re watching carbs, swapping the crust for almond flour reduces sugar and gluten. Just be mindful of the sugar content in toppings.
This recipe isn’t dairy-free or gluten-free by default, but it’s easy to adapt. The wholesome ingredients make it a more satisfying treat than store-bought mini cheesecakes, which often contain preservatives and artificial flavors.
Conclusion
These creamy mini cheesecake bites are the kind of recipe that feels like a secret weapon for any host or dessert lover. They’re easy enough to throw together when time is short but impressive enough to wow guests. I love how customizable they are—whether you keep them classic or add your favorite flavors, they never disappoint.
Next time you want to bring something sweet that’s both elegant and approachable, this party platter recipe has your back. Don’t hesitate to tweak it with your personal touch—maybe a splash of almond extract or a dusting of cinnamon. I’d love to hear how you make them yours, so feel free to share your experiences or photos in the comments below. Remember, the best recipes are the ones that bring a little joy with every bite.
FAQs About Creamy Mini Cheesecake Bites Party Platter
Can I make these mini cheesecakes ahead of time?
Absolutely! They taste even better after chilling for a few hours or overnight. Just keep them covered in the fridge until serving.
What’s the best way to remove the bites from the pan?
Using silicone liners makes removal easy. If using a non-stick pan, a small offset spatula or butter knife gently loosen edges before lifting.
Can I freeze the mini cheesecake bites?
Yes, wrap each bite individually and freeze for up to 2 months. Thaw in the fridge overnight before serving.
How do I prevent cracks on the cheesecake surface?
Make sure not to overbeat the batter and bake at 325°F (165°C). Also, avoid overbaking; a slight jiggle in the center means it’s done.
Are there any good topping ideas besides berries?
Sure! You can use chocolate shavings, caramel drizzle, chopped nuts, or even a dollop of whipped cream for extra indulgence.
Pin This Recipe!

Creamy Mini Cheesecake Bites

These creamy mini cheesecake bites are a quick and easy party treat with a smooth cream cheese filling and buttery crust, perfect for any occasion.
- Prep Time: 15 minutes
- Cook Time: 30 minutes
- Total Time: 2 hours 45 minutes
- Yield: 24 mini cheesecake bites 1x
- Category: Dessert
- Cuisine: American
Ingredients
- 1 1/2 cups (150g) graham cracker crumbs (or digestive biscuits, finely crushed)
- 1/4 cup (50g) granulated sugar
- 6 tablespoons (85g) unsalted butter, melted
- 16 oz (450g) cream cheese, softened
- 1/2 cup (120g) sour cream
- 2/3 cup (135g) granulated sugar
- 2 large eggs, room temperature
- 1 teaspoon pure vanilla extract
- Optional: zest of 1 lemon
- Optional toppings: fresh berries (strawberries, blueberries, raspberries), fruit compote or preserves, light dusting of powdered sugar
Instructions
- Preheat your oven to 325°F (165°C).
- In a medium bowl, combine graham cracker crumbs and 1/4 cup sugar. Pour in melted butter and stir until crumbs are evenly coated and resemble wet sand.
- Press about a teaspoon of crust mixture into each mini muffin cup to form an even base.
- Bake crust for 7 minutes. Remove from oven and let cool slightly.
- In a large bowl, beat softened cream cheese with an electric mixer on medium speed until smooth and creamy (2-3 minutes).
- Add sour cream and 2/3 cup sugar, then beat until just combined.
- Beat in eggs one at a time on low speed. Stir in vanilla extract and lemon zest if using.
- Spoon about 2 tablespoons of filling into each crust-lined muffin cup, avoiding overfilling.
- Bake at 325°F (165°C) for 18-22 minutes until edges are set but centers jiggle slightly.
- Let pan rest at room temperature for 30 minutes, then refrigerate for at least 2 hours before serving.
- Add optional toppings just before serving.
Notes
Use softened cream cheese and room temperature eggs for best texture. Avoid overmixing to prevent cracks. Pre-bake crust to keep it crisp. Chill thoroughly before serving. Silicone liners make removal easier. For gluten-free, substitute crust with almond flour or gluten-free crumbs. Vegan adaptations possible with vegan cream cheese and egg replacers.
Nutrition
- Serving Size: 1 mini cheesecake bi
- Calories: 110
- Sugar: 7
- Fat: 7
- Carbohydrates: 10
- Protein: 2
Keywords: mini cheesecake bites, creamy cheesecake, party dessert, easy cheesecake recipe, bite-sized cheesecake