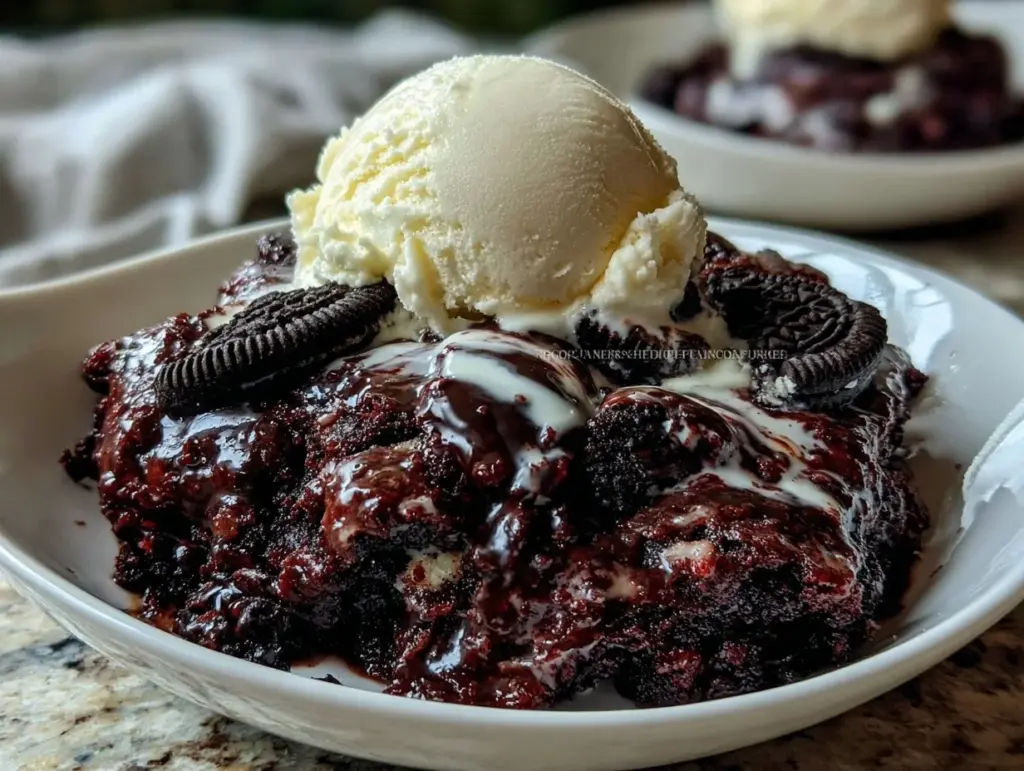
Imagine a dessert that combines the gooey richness of chocolate cake, the crunch of Oreo cookies, and the creamy goodness of pudding—all in one pan. That’s exactly what you get with this decadent Oreo Dump Cake recipe. It’s the perfect sweet treat for when you’re craving something indulgent but don’t want to spend hours in the kitchen. The best part? You don’t need to be a pro baker to pull this off, and it all comes together with minimal effort!
I first made this dessert for a last-minute family gathering, and I swear, it was the star of the show. The way the melted chocolate chips mixed with the creamy pudding and the surprise crunch of Oreos—everyone was asking for seconds. Trust me, this is one of those recipes you’ll want to keep in your back pocket for any occasion. Whether it’s a birthday, a potluck, or just a cozy night at home, this Oreo Dump Cake delivers indulgence in every bite.
Why You’ll Love This Recipe
- Quick & Easy: This recipe is a lifesaver when you’re short on time. No complicated steps or fancy equipment—just dump, bake, and enjoy!
- Minimal Ingredients: You’ll only need a handful of simple items, most of which you probably already have in your pantry.
- Perfect for Any Occasion: Whether you’re hosting a party or just want to treat yourself, this cake is a guaranteed hit.
- Kid-Friendly: The Oreos make this a huge favorite among kids, but trust me, adults love it just as much!
- Sweet & Gooey: Each bite is packed with chocolatey, creamy goodness that’s hard to resist.
What makes this Oreo Dump Cake stand out is how it transforms simple, store-bought ingredients into a dessert that feels gourmet. The layers of texture—from the crunch of the Oreos to the melt-in-your-mouth chocolate chips—are what make this recipe so irresistible. Plus, there’s no need to stress about perfection; the “dump” method is as forgiving as it gets.
What Ingredients You’ll Need
This recipe uses a handful of ingredients that work together to create a dessert that’s as easy as it is indulgent. Here’s what you’ll need:
- Oreos: About 24 crushed Oreos (you can use original or double-stuffed for extra creaminess).
- Chocolate pudding mix: Instant pudding works best—choose your favorite brand.
- Milk: Whole milk is ideal for a creamy texture, but you can use almond milk or oat milk for a dairy-free option.
- Chocolate cake mix: Any boxed chocolate cake mix will do; just make sure it’s your favorite kind.
- Butter: ½ cup (1 stick), melted—unsalted butter is best, but salted works too if you skip adding extra salt.
- Chocolate chips: Semi-sweet or dark chocolate chips for those melty pockets of chocolate.
- Whipped cream: Optional, but highly recommended for topping after baking.
Feel free to make substitutions. For example, use gluten-free cake mix if needed or swap out Oreos for another sandwich cookie if that’s your jam. You can even throw in some peanut butter chips or crushed pretzels for extra flair!
Equipment Needed
You don’t need much to make this Oreo Dump Cake, which is one of the reasons I love it so much! Here’s what you’ll need:
- Baking dish: A 9×13-inch dish works perfectly. If you don’t have one, a large casserole dish will do.
- Mixing bowls: You’ll need a couple of bowls to mix the pudding and cake batter.
- Whisk: For mixing the pudding and milk together.
- Spatula: To spread the batter and smooth it out.
- Measuring cups: For precise measurements of milk, butter, and other ingredients.
If you don’t have a whisk, a fork will work just fine to mix the pudding. And if you’re missing a 9×13-inch dish, try splitting the recipe between two smaller pans.
Preparation Method
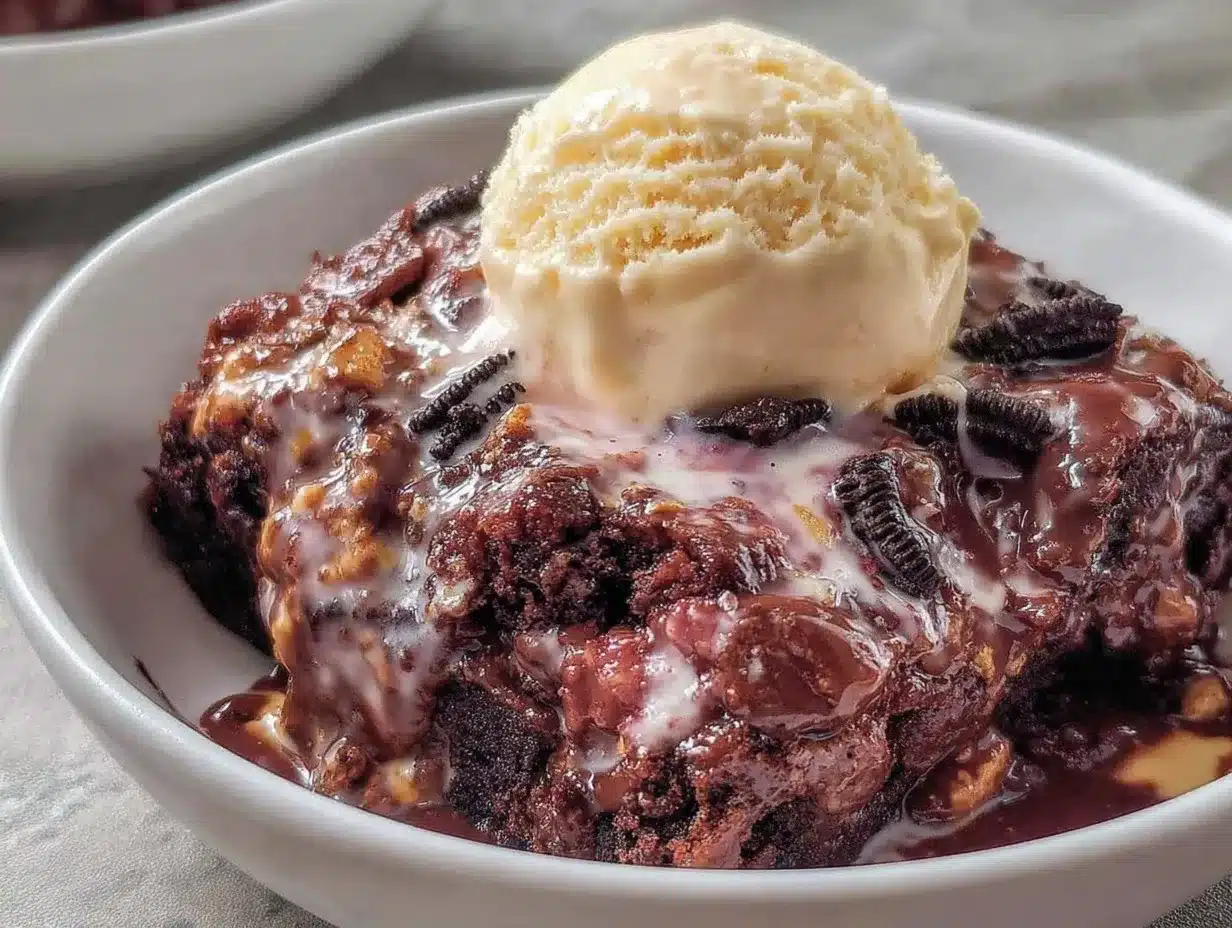
Ready to make your Oreo Dump Cake? Follow these simple steps:
- Preheat your oven: Set it to 350°F (175°C). This will ensure even baking and a perfectly gooey texture.
- Prepare the pudding: In a mixing bowl, whisk together the instant chocolate pudding mix and 2 cups (480ml) of milk until smooth. Let it sit for 5 minutes to thicken.
- Crush the Oreos: Place your Oreos in a zip-top bag and crush them using a rolling pin or your hands. You want a mix of chunks and smaller crumbs for texture.
- Layer the Oreos: Spread the crushed Oreos evenly across the bottom of your baking dish. This will be the crispy base of your dump cake.
- Pour the pudding: Spread the thickened pudding over the Oreos, making sure it covers the cookies completely.
- Add the cake mix: Sprinkle the dry chocolate cake mix evenly over the pudding layer. Don’t mix it—just let it sit on top.
- Add the melted butter: Drizzle the melted butter over the dry cake mix, trying to cover as much surface area as possible.
- Top it off: Sprinkle the chocolate chips evenly on top for an extra layer of chocolatey goodness.
- Bake: Place the dish in the preheated oven and bake for 35-40 minutes. The top should be set, but the inside will still be gooey.
- Cool slightly: Let the cake cool for about 10 minutes before serving. This helps the layers set just enough to scoop easily.
- Serve: Scoop out generous portions and top with whipped cream for ultimate indulgence.
Cooking Tips & Techniques
Here are some tips to ensure your Oreo Dump Cake turns out perfectly every time:
- Don’t overmix: Resist the urge to mix the cake batter and pudding layers. The “dump and layer” technique is what gives this cake its signature texture.
- Use room-temperature butter: Melted butter works best when it’s not piping hot. Let it cool slightly before drizzling it over the cake mix.
- Watch the baking time: Keep an eye on the oven in the last 5 minutes. You want the top to be set but still gooey underneath.
- Customize the crunch: If you prefer more Oreo crunch, don’t crush the cookies too finely. Bigger chunks will give you that satisfying bite.
- Let it rest: Let the cake cool for a few minutes after baking. The layers will settle, making it easier to scoop.
The beauty of a dump cake is its simplicity, so don’t overthink it. Even if your layers don’t look perfect, it’ll taste amazing!
Variations & Adaptations
Want to mix things up? Here are some variations and adaptations to try:
- Gluten-Free: Use a gluten-free chocolate cake mix and gluten-free sandwich cookies.
- Seasonal Twist: Add crushed peppermint candies or candy canes during the holidays for a festive touch.
- Peanut Butter Lovers: Swap the chocolate pudding for peanut butter pudding and add peanut butter chips on top.
- Dairy-Free: Use almond or oat milk for the pudding and dairy-free butter and chocolate chips.
- Extra Chocolaty: Try double chocolate Oreos and dark chocolate cake mix for a deeper flavor.
I’ve tried the peanut butter variation, and let me tell you, it’s a game-changer. The salty-sweet combo is out of this world!
Serving & Storage Suggestions
Here’s how to serve and store your Oreo Dump Cake:
- Serving Temperature: Serve warm for the best gooey texture. It’s amazing with a scoop of vanilla ice cream or a dollop of whipped cream.
- Presentation Tip: Sprinkle crushed Oreos or drizzle chocolate sauce over the top for a picture-perfect finish.
- Storage: Cover leftovers tightly and store in the refrigerator for up to 3 days.
- Freezing: You can freeze portions in an airtight container for up to 1 month. Thaw in the fridge overnight and reheat in the oven.
- Reheating: Warm up individual servings in the microwave for 30 seconds or reheat the whole dish in the oven at 300°F (150°C) for 10 minutes.
The flavors only get richer as the cake sits, making it a great make-ahead dessert!
Nutritional Information & Benefits
This Oreo Dump Cake is all about indulgence, but here’s a quick look at its nutritional profile:
- Calories: Approximately 320 per serving.
- Fat: Packed with satisfying fats from butter and chocolate.
- Sugar: It’s a dessert, so enjoy it in moderation.
- Protein: A small amount from the milk and pudding.
- Dietary Considerations: Easily adaptable for gluten-free or dairy-free diets.
While it’s not the healthiest option, it’s perfect for treating yourself or celebrating a special occasion.
Conclusion
This Decadent Oreo Dump Cake recipe is the ultimate easy dessert for anyone who loves chocolate and Oreos. It’s fast, foolproof, and ridiculously delicious. Whether you’re making it for a party or just to satisfy a craving, this recipe is one you’ll turn to again and again.
I love how customizable this cake is—you can change up the flavors or add your own twist. It’s one of those recipes that lets you have fun in the kitchen without stressing over perfection.
Have you tried this recipe? Let me know how it turned out for you in the comments below! Don’t forget to share this recipe with your friends and save it for your next sweet craving.
FAQs
Can I use a different type of cookie?
Yes, you can swap Oreos for other sandwich cookies like Nutter Butters or chocolate-filled wafers.
Do I need to refrigerate leftovers?
Yes, you should store leftovers in the refrigerator, covered, to keep them fresh.
Can I make this ahead of time?
Absolutely! You can make it a day in advance and store it in the fridge. Reheat before serving for the best texture.
Can I reduce the sugar content?
You can try using sugar-free pudding mix and sugar-free cookies to lower the sweetness, but keep in mind that it may slightly affect the flavor.
What’s the best way to crush the Oreos?
Place them in a zip-top bag and use a rolling pin or your hands to crush them. Aim for a mix of crumbs and chunks for texture.
Pin This Recipe!

Decadent Oreo Dump Cake Recipe Easy to Make

A gooey, indulgent dessert combining chocolate cake, Oreo cookies, and pudding—all in one pan. Perfect for any occasion and easy to make.
- Prep Time: 15 minutes
- Cook Time: 40 minutes
- Total Time: 55 minutes
- Yield: 12 servings 1x
- Category: Dessert
- Cuisine: American
Ingredients
- 24 crushed Oreos
- 1 box instant chocolate pudding mix
- 2 cups whole milk
- 1 box chocolate cake mix
- 1/2 cup unsalted butter, melted
- 1 cup semi-sweet or dark chocolate chips
- Whipped cream (optional)
Instructions
- Preheat your oven to 350°F (175°C).
- In a mixing bowl, whisk together the instant chocolate pudding mix and 2 cups of milk until smooth. Let it sit for 5 minutes to thicken.
- Place Oreos in a zip-top bag and crush them using a rolling pin or your hands.
- Spread the crushed Oreos evenly across the bottom of a 9×13-inch baking dish.
- Spread the thickened pudding over the Oreos, covering them completely.
- Sprinkle the dry chocolate cake mix evenly over the pudding layer without mixing.
- Drizzle the melted butter over the dry cake mix, covering as much surface area as possible.
- Sprinkle the chocolate chips evenly on top.
- Bake in the preheated oven for 35-40 minutes until the top is set but the inside remains gooey.
- Let the cake cool for about 10 minutes before serving.
- Serve warm with whipped cream or ice cream for ultimate indulgence.
Notes
[“Don’t overmix the layers; the ‘dump and layer’ technique creates the signature texture.”, ‘Use room-temperature melted butter for best results.’, ‘Let the cake cool slightly after baking to help the layers set.’, ‘Customize the crunch by leaving larger Oreo chunks for texture.’]
Nutrition
- Serving Size: 1 portion
- Calories: 320
- Sugar: 28
- Sodium: 250
- Fat: 15
- Saturated Fat: 8
- Carbohydrates: 42
- Fiber: 2
- Protein: 4
Keywords: Oreo Dump Cake, Chocolate Dessert, Easy Dessert Recipe, Kid-Friendly Dessert, Party Dessert



