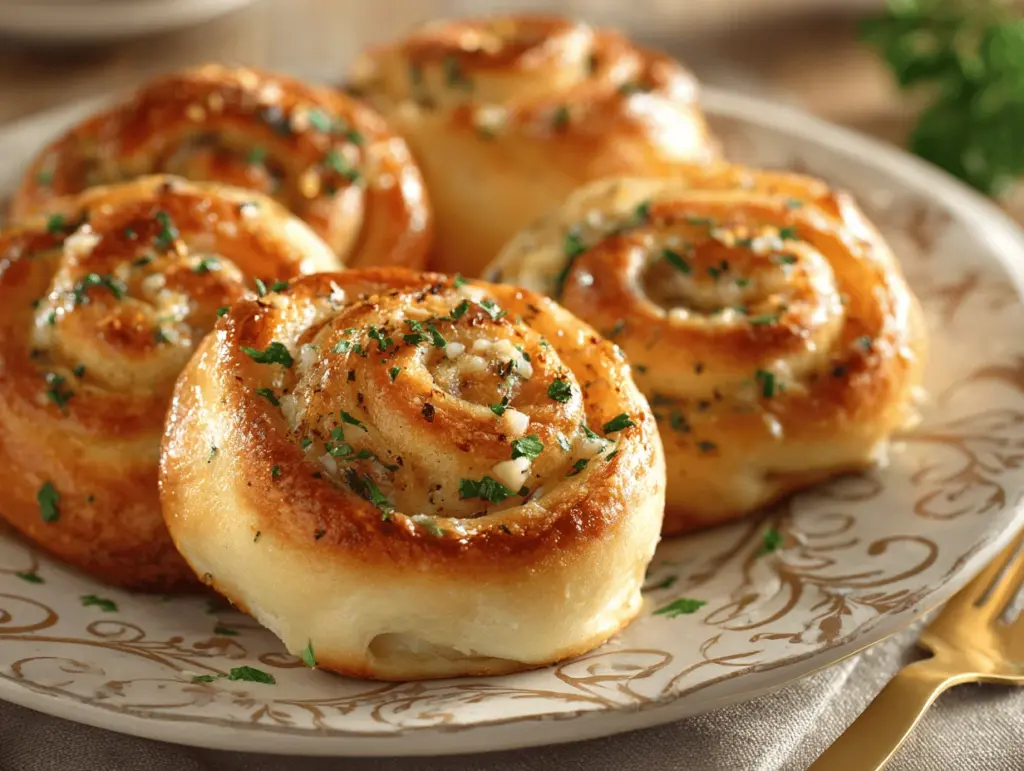
The scent of fresh, golden garlic swirl rolls wafting through my kitchen is basically my idea of happiness in bread form. Picture this: pillowy soft dough, rich with buttery layers, each bite swirled with roasted garlic and herbs—honestly, it’s impossible to resist tearing into them the moment they come out of the oven. My family barely lets these savory dinner rolls cool before they start disappearing, one by one. There’s something downright magical about homemade garlic swirl rolls, especially when you see those beautiful spirals and get hit with that toasty garlicky aroma.
I first started baking these garlic swirl rolls for Sunday dinners, trying to re-create the flavor of those addictive garlic knots from our favorite Italian spot. But, you know, with a little more wow factor and a whole lot more fluff. Over the years, I’ve tweaked and tested this recipe more times than I can count—sometimes with fresh herbs from my garden, sometimes with a pinch of cheese for extra richness. The result? The best savory dinner rolls recipe I’ve ever made, hands down.
What I love most is how these rolls manage to be both comfortingly familiar and just a little bit special. They’re fancy enough for a holiday table but simple enough to whip up on a regular weeknight. Plus, with every swirl packed full of flavor, even picky eaters come back for seconds (and thirds). If you’re looking for a way to impress guests or just treat yourself to some serious homemade bread bliss, these garlic swirl rolls are the answer. Whether you’re a seasoned baker or a newbie, you’ll find this recipe approachable, reliable, and, honestly, kind of addictive. Let’s get rolling!
Why You’ll Love This Recipe
After baking batch after batch of these garlic swirl rolls—sometimes for family gatherings, sometimes just to make a regular dinner feel special—I can promise you, they’re a real crowd-pleaser. Here’s why you’ll want to keep this best savory dinner rolls recipe on repeat:
- Unbeatable Garlic Flavor: Each roll is packed with a swirl of buttery garlic and fresh herbs, so every bite bursts with savory goodness.
- Soft, Fluffy Texture: The dough is tender and airy, thanks to a well-tested rising method and just the right balance of ingredients.
- Simple, Familiar Ingredients: No need for any hard-to-find items—you probably have most of what you need already in your kitchen.
- Quick for Yeast Bread: With a streamlined dough process, you can have these rolls warm and ready in under two hours (most of it is hands-off rising time).
- Perfect for Any Occasion: They’re just as welcome at a holiday feast as they are on a weeknight alongside soup or salad.
- Make-Ahead Friendly: You can prep them ahead and bake when you’re ready—so handy for busy schedules or dinner parties.
What really sets this garlic swirl rolls recipe apart is the swirl method. Instead of just brushing garlic butter on top, the filling gets rolled up inside, so every layer is garlicky and tender—not just the crust. I’ve tried dozens of dinner roll recipes, but these have a unique look and taste that always gets people talking (and asking for the recipe). They’re the kind of bread that makes you close your eyes in happiness after the first bite—seriously, it’s that good.
This isn’t just another bread recipe; it’s one you’ll actually crave. Whether you’re trying to impress your guests without breaking a sweat, need a reliable side for holiday ham, or just want something special for yourself, these garlic swirl rolls deliver every time. Trust me, once you make them, you’ll be dreaming about that buttery garlic goodness for days.
What Ingredients You Will Need
This garlic swirl rolls recipe is all about simple, classic ingredients coming together to make something extraordinary. Most of what you need might already be in your pantry or fridge—which is honestly the best kind of baking. Here’s what you’ll need for the best savory dinner rolls recipe:
- For the Dough:
- All-purpose flour (3 1/2 cups / 440g): gives the rolls structure and softness; I like King Arthur or Gold Medal
- Granulated sugar (2 tablespoons / 25g): helps activate the yeast and adds a subtle sweetness
- Active dry yeast (2 1/4 teaspoons / 7g): makes the dough rise and get fluffy
- Warm milk (1 cup / 240ml, about 110°F/43°C): activates the yeast and adds richness (whole milk is best, but 2% works)
- Unsalted butter (1/4 cup / 60g, melted): for tenderness and flavor
- Large egg (1, room temperature): binds the dough and adds color
- Kosher salt (1 teaspoon / 6g): balances the sweetness and brings out the flavors
- For the Garlic-Herb Swirl:
- Unsalted butter (1/3 cup / 75g, softened): for spreading and that rich, classic flavor
- Fresh garlic (4–5 cloves, finely minced): the star of the show—use more if you’re a garlic fanatic
- Fresh parsley (2 tablespoons, chopped): adds color and a fresh, herby kick (substitute with dried if needed)
- Fresh chives (1 tablespoon, chopped): optional, but so good for a hint of onion flavor
- Kosher salt (1/2 teaspoon): boosts the savory swirl
- Black pepper (1/4 teaspoon): just a pinch for warmth
- Optional Toppings:
- Grated Parmesan cheese (2 tablespoons): totally optional, but adds a tasty finish
- Extra melted butter (for brushing after baking): makes those rolls glossy and irresistible
- Flaky sea salt (for sprinkling): for a little crunch and pop of flavor
For substitutions: you can swap in bread flour for a slightly chewier roll, or use plant-based milk and vegan butter to make these dairy-free. If you’re out of fresh herbs, dried ones work—just use half the amount. For a gluten-free version, I’ve had decent luck with King Arthur’s measure-for-measure GF flour, though the texture is a bit different. Don’t stress if you’re missing an herb or two; the garlic is what really matters here!
Equipment Needed
You don’t need a fancy bakery setup to make these garlic swirl rolls—just a few trusty kitchen basics. Here’s what I always reach for:
- Large mixing bowl: For combining and kneading the dough. Glass or stainless steel both work well.
- Measuring cups and spoons: Accuracy matters for baking, so use dry measuring cups for flour and liquid ones for milk.
- Kitchen scale (optional): For the most consistent results, especially if you bake often. It really makes a difference!
- Wooden spoon or silicone spatula: Handy for mixing before kneading.
- Stand mixer with dough hook (optional): Speeds up kneading, but kneading by hand is totally fine (and a bit therapeutic, honestly).
- Rolling pin: For rolling out the dough evenly. A wine bottle works in a pinch—no judgment here.
- Baking dish or 9×13-inch (23x33cm) pan: For a classic batch, I use a ceramic or metal pan. If you only have round cake pans, just split the rolls between two.
- Sharp knife or bench scraper: For slicing the rolled dough into neat spirals.
- Clean kitchen towel or plastic wrap: To cover the dough while it rises.
- Pastry brush: For brushing on melted butter and finishing touches.
If you’re tight on space or budget, don’t worry—my first batch was made with just a bowl, spoon, and a baking sheet lined with parchment. Just be sure to keep your tools clean, especially if you use a stand mixer (dough can get stubborn in the hook!).
Preparation Method
-
Mix the Dough (10 minutes):
In a large mixing bowl, combine 1 cup (240ml) warm milk (about 110°F/43°C), 2 tablespoons (25g) sugar, and 2 1/4 teaspoons (7g) active dry yeast. Stir gently and let sit for 5 minutes, until foamy—if it doesn’t bubble, your yeast might be old.
Add 1 large egg, 1/4 cup (60g) melted unsalted butter, and 1 teaspoon (6g) kosher salt. Stir to combine.
Gradually add 3 1/2 cups (440g) all-purpose flour, one cup at a time, mixing until a shaggy dough forms. -
Knead the Dough (8–10 minutes):
Turn the dough out onto a lightly floured surface and knead for 8–10 minutes, or use a stand mixer with dough hook on low speed for 5–6 minutes. The dough should be smooth, elastic, and slightly tacky but not sticky. If it’s too sticky, add more flour, a tablespoon at a time.
(Tip: If you poke it, it should spring back slowly.) -
First Rise (45–60 minutes):
Place the dough in a clean, lightly greased bowl. Cover with a kitchen towel or plastic wrap. Let rise in a warm, draft-free spot until doubled in size, about 45–60 minutes.
(If your kitchen is chilly, place the bowl in a turned-off oven with the light on.) -
Make the Garlic Filling (While Dough Rises):
In a small bowl, mix 1/3 cup (75g) softened butter, 4–5 minced garlic cloves, 2 tablespoons chopped parsley, 1 tablespoon chopped chives, 1/2 teaspoon kosher salt, and 1/4 teaspoon black pepper.
(I sometimes mash everything together with a fork for a rustic vibe.) -
Roll Out the Dough (5 minutes):
Once doubled, punch down the dough gently. Turn it onto a floured surface and roll into a 12×16-inch (30x40cm) rectangle.
(Aim for even thickness so the rolls bake uniformly. If the dough keeps shrinking, let it rest for 5 minutes, then try again.) -
Spread the Filling and Shape (5 minutes):
Spread the garlic-herb butter evenly across the dough, right to the edges.
Starting from the long side, roll the dough up tightly into a log. Pinch the seam to seal. -
Slice and Arrange (5 minutes):
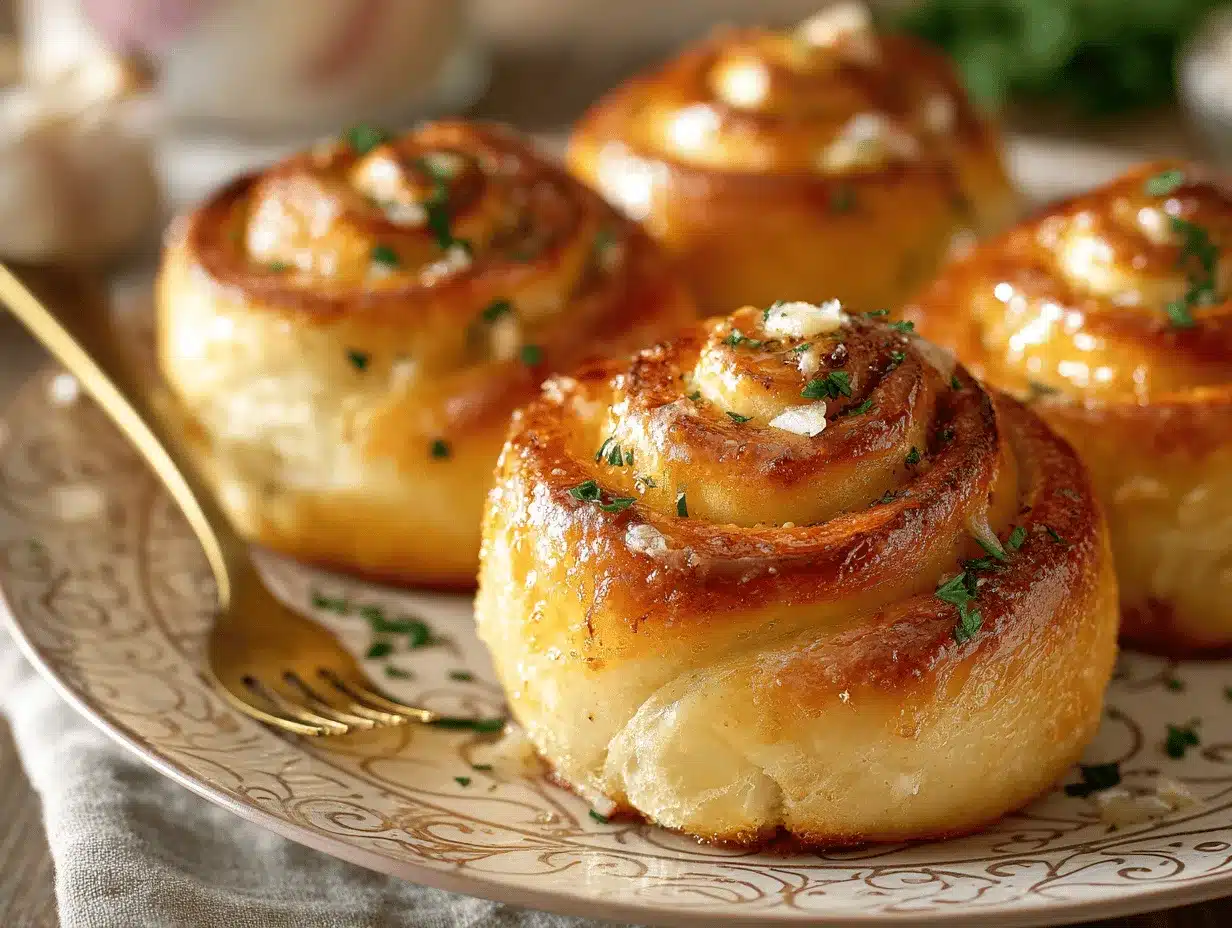
Use a sharp knife or bench scraper to cut the log into 12 even rolls. Place them, swirl-side up, in a greased 9×13-inch (23x33cm) baking dish.
(If your swirls look messy, don’t stress—they’ll puff up beautifully as they bake.) -
Second Rise (30–40 minutes):
Cover the pan with a towel or plastic wrap and let the rolls rise until puffy and nearly doubled, about 30–40 minutes.
(They should be touching or almost touching each other.) -
Bake (20–24 minutes):
Preheat your oven to 350°F (175°C). Bake the rolls for 20–24 minutes, until golden brown and the tops sound hollow when tapped.
(If they brown too quickly, tent with foil for the last 5 minutes.) -
Add Finishing Touches:
Immediately brush hot rolls with extra melted butter and sprinkle with Parmesan and flaky sea salt, if using.
Let cool in the pan for 10 minutes before serving—if you can wait that long!
Note: If your dough seems sluggish to rise, give it extra time—yeast can be finicky on cold days. And if you want to prep ahead, you can refrigerate the shaped rolls overnight after the second rise, then bake them off the next day. Honestly, the hardest part is waiting for them to cool down enough to pull apart!
Cooking Tips & Techniques
Baking bread at home might seem daunting, but with a few simple tricks, you’ll get perfect garlic swirl rolls every time. Here’s what I’ve learned (sometimes the hard way!):
- Get Your Yeast Bubbling: Always check that your yeast foams up when mixed with warm milk and sugar. If it doesn’t, your dough won’t rise properly, and you’ll end up with dense rolls (been there, done that).
- Don’t Over-Flour the Dough: It’s tempting to add extra flour if the dough feels sticky, but a little tackiness is good. Too much flour leads to dry rolls. Dust your hands and surface instead of dumping more into the mix.
- Even Rolling for Even Baking: Try to keep your rectangle of dough an even thickness—otherwise, some rolls will bake faster than others. If the dough keeps snapping back, let it rest for a few minutes to relax the gluten.
- Use Room-Temperature Butter for the Filling: It spreads so much easier and won’t rip the dough. I learned this the hard way after trying to rush it with cold butter—total mess.
- Mind the Rise: Letting the dough rise long enough makes a huge difference in fluffiness. If you cut the rise short, the rolls will be dense. But don’t let them over-proof, or they’ll collapse.
- Finish with Butter Right Out of the Oven: Brushing the rolls while hot gives them that glossy, bakery-style finish and keeps them soft.
- Customize Your Swirl: You can add a sprinkle of cheese, extra herbs, or even a pinch of chili flakes to the filling for a fun twist. The swirl method means every bite is flavorful.
- Don’t Rush the Cooling: Letting the rolls cool slightly before pulling them apart keeps the centers soft and lets the flavors settle. (Even though it’s hard to wait!)
I’ve had my share of flat, tough, or bland rolls—usually from old yeast, over-flouring, or rushing the proof. Go slow, trust the process, and your garlic swirl rolls will be bakery-worthy every single time.
Variations & Adaptations
One of the best things about this garlic swirl rolls recipe is how flexible it is. Whether you’re dealing with allergies, want to change up the flavors, or just need to use what’s in your pantry, there’s a variation for you. Here are a few of my favorites:
- Cheesy Garlic Swirl Rolls: Sprinkle shredded mozzarella, cheddar, or Gruyère over the garlic filling before rolling up the dough. The cheese melts into gooey pockets—just don’t blame me if you end up eating half the pan yourself.
- Herb Explosion: Swap or add in fresh rosemary, basil, or thyme for a different flavor profile. Dried Italian seasoning works in a pinch, too—use about 1 tablespoon mixed into the filling.
- Gluten-Free Version: Use a 1:1 gluten-free flour blend (like King Arthur’s). The rolls will be a bit denser but still totally delicious. Add 1/2 teaspoon xanthan gum if your blend doesn’t contain it.
- Dairy-Free: Substitute unsweetened plant milk and vegan butter for the dairy ingredients. I’ve made these with oat milk and Earth Balance, and they’re still fluffy and flavorful.
- Spicy Kick: Add 1/2 teaspoon red pepper flakes to the garlic filling for a gentle heat. This is my go-to when serving with tomato-based dishes.
- Make-Ahead: Shape the rolls, cover, and refrigerate overnight for a slow rise. Bake straight from the fridge, adding 5–10 extra minutes to the baking time.
I’ve even tried swirling in caramelized onions and a touch of Dijon mustard for a French onion twist—it was a total hit. Don’t be afraid to play around with what you have; this dough is very forgiving!
Serving & Storage Suggestions
Garlic swirl rolls are best served warm, fresh from the oven, with the butter still glistening and the aroma filling the room. Here’s how I like to serve and store them:
- Serving: Serve the rolls as a side for soups, stews, or pasta dishes. They’re a classic match for lasagna, chicken parmesan, or a big green salad. For brunch, pair with scrambled eggs and roasted veggies. Always put them in a bread basket lined with a towel to keep them warm at the table.
- Presentation: Sprinkle extra herbs or a pinch of flaky sea salt on top just before serving for a pretty finish. If you’re feeling fancy, serve with a small bowl of olive oil and balsamic for dipping.
- Storage: Store leftover rolls in an airtight container at room temperature for up to 2 days. For longer storage, keep them in the fridge for up to 5 days.
- Freezing: These rolls freeze beautifully! Wrap tightly in plastic and freeze for up to 2 months. To reheat, thaw at room temp and warm in a 300°F (150°C) oven for about 10 minutes.
- Reheating: To keep rolls from drying out, wrap them in foil and heat in a low oven. Or microwave for 10–15 seconds with a damp paper towel.
- Flavor Tip: The garlic flavor deepens after a day, so leftovers are fantastic sliced and toasted with a little cheese on top.
If you somehow have leftovers (rare in my house!), they make an amazing base for mini sandwiches or sliders the next day.
Nutritional Information & Benefits
Here’s a quick look at what you’re getting with every garlic swirl roll (based on a batch of 12):
- Calories: ~210 per roll
- Fat: 8g (includes healthy fats from butter)
- Carbohydrates: 30g
- Protein: 5g
- Sodium: ~240mg
Key Benefits: Garlic is loaded with antioxidants and may support heart health. Using fresh herbs boosts the vitamin content, and homemade means you control the salt and fat. These rolls can be made to suit vegetarian, dairy-free, or gluten-free diets with a few simple swaps.
Allergens: Contains wheat, eggs, and dairy as written—see adaptations for substitutions. I like knowing exactly what’s in my bread, and honestly, homemade rolls just feel better than store-bought, both for taste and wellness. If you’re watching carbs or sodium, enjoy in moderation (but don’t skip the experience—it’s so worth it!).
Conclusion
If you’re craving warm, flavorful bread that’s a little bit special but totally doable, this garlic swirl rolls recipe is it. Every swirl is packed with garlicky, herby goodness, and the soft, fluffy dough is pure comfort. I love how these rolls turn any meal into an occasion—plus, they’re just plain fun to make (and eat!).
Don’t be afraid to make this recipe your own, whether you add cheese, swap herbs, or tweak the swirl filling. That’s the best part of homemade bread—there’s always room for a personal touch. For me, pulling a tray of golden, buttery garlic swirl rolls out of the oven never gets old, and it’s a tradition I hope you’ll enjoy too.
If you try this best savory dinner rolls recipe, let me know how it goes! Leave a comment with your tweaks, share your photos, or pass the recipe along to a fellow bread lover. Here’s to many batches of irresistible garlic swirl rolls—your kitchen is about to smell amazing!
Frequently Asked Questions
How do I know if my dough has risen enough?
The dough is ready when it’s doubled in size and springs back slowly when poked with a finger. Don’t rush it—cold kitchens may take longer, so give it time!
Can I use instant yeast instead of active dry yeast?
Yes! Swap in the same amount of instant yeast and skip the proofing step. Just mix it directly into the flour before adding wet ingredients.
Can I make these rolls ahead of time?
Definitely. Shape the rolls, cover, and refrigerate overnight. Let them come to room temp while you preheat the oven, then bake as usual.
How can I make these garlic swirl rolls gluten-free?
Use a 1:1 gluten-free flour blend and add xanthan gum if needed. The rolls will be a bit denser but still taste delicious!
What’s the best way to reheat leftover rolls?
Wrap them in foil and warm in a 300°F (150°C) oven for about 10 minutes, or microwave with a damp paper towel for 10–15 seconds for soft, steamy rolls.
Pin This Recipe!

Garlic Swirl Rolls

These homemade garlic swirl rolls are pillowy soft dinner rolls filled with buttery garlic and fresh herbs, perfect for any occasion. With a tender, fluffy texture and irresistible garlicky aroma, they’re sure to be a crowd-pleaser at your table.
- Prep Time: 30 minutes
- Cook Time: 24 minutes
- Total Time: 2 hours
- Yield: 12 rolls 1x
- Category: Bread
- Cuisine: Italian-American
Ingredients
- 3 1/2 cups all-purpose flour (440g)
- 2 tablespoons granulated sugar (25g)
- 2 1/4 teaspoons active dry yeast (7g)
- 1 cup warm milk (240ml, about 110°F)
- 1/4 cup unsalted butter, melted (60g)
- 1 large egg, room temperature
- 1 teaspoon kosher salt (6g)
- 1/3 cup unsalted butter, softened (75g)
- 4–5 cloves fresh garlic, finely minced
- 2 tablespoons fresh parsley, chopped
- 1 tablespoon fresh chives, chopped (optional)
- 1/2 teaspoon kosher salt
- 1/4 teaspoon black pepper
- 2 tablespoons grated Parmesan cheese (optional, for topping)
- Extra melted butter (for brushing after baking, optional)
- Flaky sea salt (for sprinkling, optional)
Instructions
- In a large mixing bowl, combine warm milk, sugar, and yeast. Stir gently and let sit for 5 minutes until foamy.
- Add egg, melted butter, and salt. Stir to combine.
- Gradually add flour, one cup at a time, mixing until a shaggy dough forms.
- Turn dough onto a lightly floured surface and knead for 8–10 minutes (or use a stand mixer with dough hook for 5–6 minutes) until smooth, elastic, and slightly tacky.
- Place dough in a clean, lightly greased bowl. Cover and let rise in a warm spot until doubled in size, about 45–60 minutes.
- While dough rises, mix softened butter, minced garlic, parsley, chives, salt, and pepper in a small bowl to make the garlic filling.
- Punch down the risen dough. Turn onto a floured surface and roll into a 12×16-inch rectangle.
- Spread garlic-herb butter evenly over the dough.
- Starting from the long side, roll dough up tightly into a log. Pinch seam to seal.
- Cut the log into 12 even rolls. Place swirl-side up in a greased 9×13-inch baking dish.
- Cover and let rolls rise until puffy and nearly doubled, about 30–40 minutes.
- Preheat oven to 350°F (175°C). Bake rolls for 20–24 minutes, until golden brown.
- Immediately brush hot rolls with extra melted butter and sprinkle with Parmesan and flaky sea salt, if using.
- Let cool in the pan for 10 minutes before serving.
Notes
For best results, use fresh yeast and avoid over-flouring the dough. Let the dough rise until doubled for maximum fluffiness. Customize the filling with extra cheese, herbs, or chili flakes. Rolls can be made ahead and refrigerated overnight before baking. For a dairy-free or gluten-free version, substitute plant-based milk and butter or use a 1:1 gluten-free flour blend.
Nutrition
- Serving Size: 1 roll
- Calories: 210
- Sugar: 3
- Sodium: 240
- Fat: 8
- Saturated Fat: 5
- Carbohydrates: 30
- Fiber: 1
- Protein: 5
Keywords: garlic swirl rolls, savory dinner rolls, homemade bread, garlic bread, Italian rolls, holiday bread, easy yeast rolls, herb rolls, fluffy dinner rolls, garlic knots



