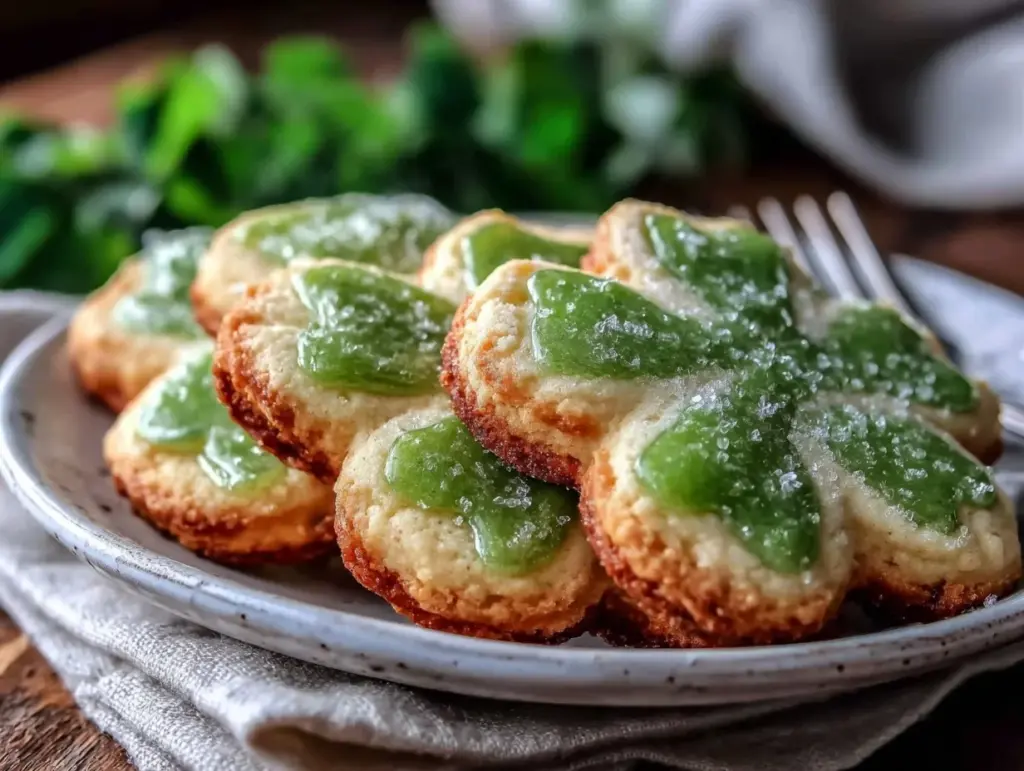
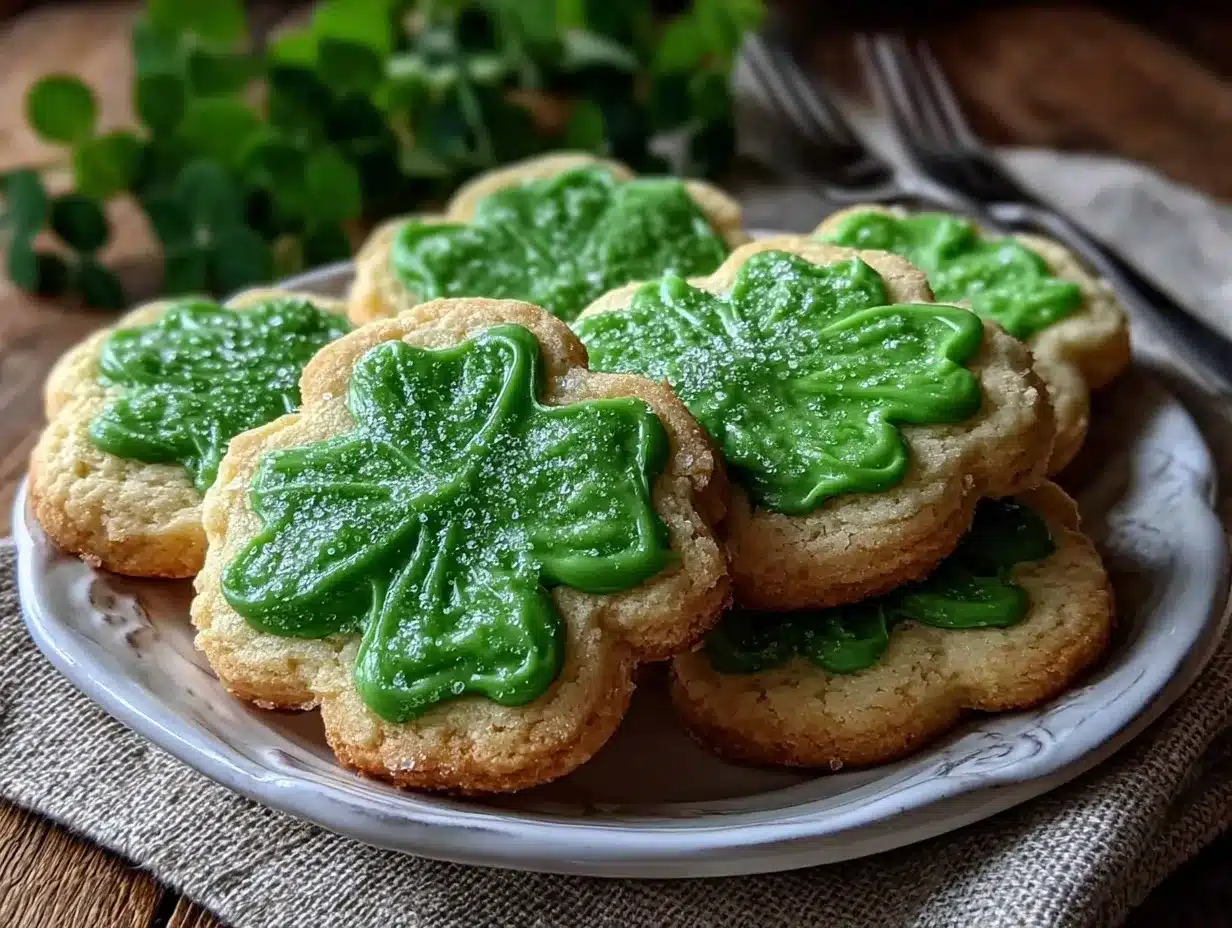
It was one of those rare, quiet Sunday afternoons when I found myself craving something sweet but not too fussy. The kitchen was filled with the faint scent of melted butter and vanilla—a cozy kind of warmth that you don’t always get on a hectic day. Honestly, I wasn’t even planning on making cookies that day. But then, out of nowhere, my friend texted me a picture of the cutest shamrock-shaped sugar cookies she’d baked for St. Patrick’s Day. That glossy green icing? Irresistible. I figured, why not give it a shot myself? What started as a casual experiment quickly turned into an obsession—I made these soft shamrock sugar cookies with glossy green icing multiple times that week.
At first, I was skeptical. I mean, sugar cookies can be hit or miss—sometimes dry, sometimes too sweet, sometimes just plain boring. But these? They surprised me with their tender crumb and that smooth, shiny icing that wasn’t just for show. You know that feeling when you bite into something and it’s just right? That’s what these cookies deliver. They’re soft, buttery, and have just the perfect hint of vanilla combined with that playful pop of green that makes them feel festive without being over the top.
What stuck with me, though, was how simple the process was—no complicated techniques, no weird ingredients. Just good old-fashioned baking with a little twist to make these shamrock sugar cookies stand out. And honestly, it became a little ritual for me—rolling out the dough, cutting those shamrocks, and carefully glazing them with that glossy green icing while humming some easy tunes in the background. It felt like a quiet celebration, even if it was just me in the kitchen.
So here’s the thing: these cookies aren’t just for St. Patrick’s Day. They’re the kind of treat that makes any day a bit brighter. The kind you want to share, but also keep a few for yourself. And if you’ve ever doubted sugar cookies can be both soft and beautifully decorated? Well, this recipe might just change your mind.
Why You’ll Love This Recipe
- Quick & Easy: Comes together in under 45 minutes, perfect for last-minute baking sessions or holiday prep.
- Simple Ingredients: Uses pantry staples—no fancy or hard-to-find items required.
- Perfect for Celebrations: Great for St. Patrick’s Day parties, family gatherings, or festive gift-giving.
- Crowd-Pleaser: Always a hit with kids and adults alike, thanks to the soft texture and eye-catching glossy icing.
- Unbelievably Delicious: The balance of buttery richness and sweet vanilla, combined with that glossy green icing, creates a treat that’s both comforting and fun.
This recipe stands out because the sugar cookies stay soft even after baking and cooling—a rare find! Plus, the glossy green icing isn’t just for looks. It dries with a subtle shine and a melt-in-your-mouth texture that complements the cookie perfectly. Unlike some cookie recipes where the icing can feel heavy or chalky, this one strikes just the right balance.
What I love most is how approachable this recipe is. Whether you’re an experienced baker or just starting out, you can whip these up without stress. The recipe is forgiving and easy to customize, too—like swapping in natural food coloring or tweaking the icing sweetness. Honestly, making these cookies became a little moment of joy in my week, and I’m betting they’ll do the same for you.
What Ingredients You Will Need
This recipe uses simple, wholesome ingredients to deliver bold flavor and a soft, tender texture without any fuss. Most of these are likely already in your pantry, which makes it easy to pull together whenever the craving hits.
- For the Cookie Dough:
- All-purpose flour (2 ½ cups / 315g) – the base for the soft, tender cookie
- Baking powder (1 teaspoon) – helps the cookies rise just enough without getting cakey
- Salt (½ teaspoon) – balances the sweetness
- Unsalted butter (1 cup / 227g), softened – the secret to buttery richness (I prefer using Land O’Lakes for consistent results)
- Granulated sugar (1 cup / 200g) – for that classic sweetness
- Large eggs (2), room temperature – adds structure and moisture
- Pure vanilla extract (2 teaspoons) – don’t skimp on quality here; it really shines in the flavor
- For the Glossy Green Icing:
- Powdered sugar (2 cups / 240g) – the base for smooth, sweet icing
- Milk (3-4 tablespoons / 45-60ml), whole or 2% – adjusts the icing consistency
- Light corn syrup (1 tablespoon) – key for that signature glossy finish
- Pure vanilla extract (1 teaspoon) – for subtle flavor depth
- Green gel food coloring (a few drops) – provides vibrant color without thinning the icing (I prefer AmeriColor gels)
Pro tip: If you want to make these gluten-free, swapping the all-purpose flour for a trusted gluten-free blend works well. For a dairy-free option, use coconut oil instead of butter and a plant-based milk in the icing. The recipe is flexible, so feel free to tweak it to suit your pantry or dietary needs.
Equipment Needed
- Mixing bowls – one large for the dough, one medium for the icing
- Electric mixer or stand mixer – makes creaming the butter and sugar much easier
- Measuring cups and spoons – precise measurements matter here
- Rolling pin – to roll out the cookie dough evenly (a silicone one works great to prevent sticking)
- Shamrock-shaped cookie cutters – obviously crucial for the theme; a set with different sizes adds fun variety
- Baking sheets lined with parchment paper or silicone mats – helps prevent sticking and promotes even baking
- Wire cooling rack – allows the cookies to cool completely before icing
- Small bowls and a spoon or piping bag – for mixing and applying the icing
If you don’t have a stand mixer, no worries—an electric hand mixer or even a sturdy whisk can work, just takes a bit more elbow grease. For rolling, if you don’t have a rolling pin, a clean glass bottle can do the trick in a pinch. I’ve used these alternatives often when baking late at night and it still turned out great.
Preparation Method
- Preheat your oven to 350°F (175°C). Line two baking sheets with parchment paper or silicone baking mats.
- Mix dry ingredients: In a medium bowl, whisk together the all-purpose flour (2 ½ cups / 315g), baking powder (1 teaspoon), and salt (½ teaspoon). Set aside.
- Cream butter and sugar: In a large bowl, beat the softened unsalted butter (1 cup / 227g) and granulated sugar (1 cup / 200g) with an electric mixer on medium speed until light and fluffy, about 3-4 minutes. You’ll notice the texture becoming smoother and the color lightening—that’s your cue that air is incorporated for softness.
- Add eggs and vanilla: Beat in two large eggs, one at a time, ensuring each is fully mixed before adding the next. Stir in the 2 teaspoons of pure vanilla extract. The batter will look creamy and slightly glossy.
- Combine dry and wet: Gradually add the dry ingredients to the butter mixture, mixing on low speed just until combined. Don’t overmix here; you want the dough tender and soft. If it feels sticky, that’s okay—chilling later will firm it up.
- Chill the dough: Wrap the dough in plastic wrap and refrigerate for at least 30 minutes. This step is key to prevent spreading and helps the cookies keep their shape during baking.
- Roll out and cut shapes: Lightly flour your work surface and rolling pin. Roll the chilled dough to about ¼-inch (6mm) thickness. Use shamrock-shaped cookie cutters to cut out shapes, placing them about 1 inch (2.5cm) apart on the prepared baking sheets.
- Bake: Bake for 8-10 minutes or until the edges are just starting to turn golden but the centers look set. They’ll feel soft but not doughy—resist the urge to overbake! This short bake time is what keeps them soft.
- Cool completely: Transfer cookies to a wire rack and let cool for at least 15 minutes before icing. Patience here ensures the icing won’t melt when applied.
- Prepare the icing: In a medium bowl, whisk together 2 cups (240g) powdered sugar, 3 tablespoons (45ml) milk, 1 tablespoon light corn syrup, and 1 teaspoon vanilla extract until smooth. Add green gel food coloring a drop at a time until you get the desired vibrant color. Adjust thickness by adding more milk (thinner) or powdered sugar (thicker).
- Ice the cookies: Using a spoon or piping bag, spread or pipe the glossy green icing onto each cookie. For neat edges, start in the center and gently spread the icing outward. Let the icing set at room temperature for at least one hour before stacking or storing.
Tip: If you notice the icing starts to harden while you’re working, just add a few drops of milk and stir to loosen it up again. Also, try to work on one baking sheet at a time to keep the icing fresh and glossy.
Cooking Tips & Techniques
One of the trickiest things with sugar cookies is getting that perfect softness without losing shape. Here’s what I learned from trial and error:
- Don’t skip chilling: Chilling the dough is non-negotiable. It firms up the butter and makes the dough easier to roll and cut without sticking or spreading too much.
- Use gel food coloring: Liquid food coloring can thin your icing and dull the color. Gels keep the icing thick and vibrant.
- Watch the bake time closely: Even a minute or two too long can dry out these cookies. Pull them when the edges just start to turn golden but the center looks set.
- Mix icing thoroughly but gently: Overmixing can introduce air bubbles that cause the icing to crack. Stir until smooth but don’t whip it.
- Apply icing to completely cooled cookies: Warm cookies will melt the icing and you’ll lose that lovely glossy finish.
- Store cookies properly: Keep them in an airtight container at room temperature with parchment paper between layers to preserve softness and prevent sticking.
I once ignored the chilling step and ended up with flat, crispy cookies that were a sad disappointment. Lesson learned! Also, be patient while the icing sets—it takes time to dry to that perfect sheen, but it’s worth the wait.
Variations & Adaptations
- Flavor twists: Add a teaspoon of almond extract or lemon zest to the dough for a subtle flavor change that pairs beautifully with the green icing.
- Alternative icings: Swap the glossy green icing for a simple powdered sugar glaze with a splash of lime juice for a tangy finish. Or use cream cheese frosting tinted green for a richer touch.
- Dietary swaps: Use gluten-free flour blends in place of all-purpose flour for gluten sensitivity. Swap butter for vegan margarine or coconut oil to make these dairy-free.
- Seasonal shapes: While shamrocks are perfect for spring and St. Patrick’s Day, you can easily switch the cutters to hearts, stars, or flowers for year-round celebrations.
- Personal favorite: I once added a sprinkle of coarse sugar on top of the icing before it set—gave the cookies a delightful little crunch and shimmer that guests loved.
Serving & Storage Suggestions
Serve your soft shamrock sugar cookies at room temperature to enjoy their tender crumb and smooth icing at its best. They pair wonderfully with a cup of hot tea, coffee, or even a glass of cold milk if you’re feeling nostalgic.
If you’re presenting these at a party or gifting them, arrange them on a festive platter or wrap them in clear cellophane tied with a green ribbon for a charming touch.
For storage, keep the cookies in an airtight container layered with parchment paper between batches to prevent sticking. They’ll stay fresh for up to 4 days at room temperature. If you want to store them longer, freeze the undecorated cookies wrapped tightly for up to 3 months. Thaw and ice just before serving for best results.
Reheating isn’t really necessary, but if you prefer warm cookies, pop them in a 300°F (150°C) oven for 3-4 minutes. Avoid microwaving since it can melt the icing and make the texture gummy.
Interestingly, the flavors mellow and blend beautifully if you let the cookies rest overnight with the icing on. So if you can make them a day ahead, do it—you’ll thank yourself later.
Nutritional Information & Benefits
Each soft shamrock sugar cookie (about 2.5 inches in diameter) contains roughly:
| Calories | 150 kcal |
|---|---|
| Carbohydrates | 22g |
| Fat | 7g |
| Protein | 1.5g |
| Sugar | 12g |
While these cookies are definitely a treat, using real butter and eggs gives them some nutritional value beyond empty carbs. Butter provides fat-soluble vitamins and eggs add a bit of protein. The vanilla extract contributes antioxidants, and the small amount of corn syrup in the icing helps achieve that shine with minimal extra sugar.
These cookies are naturally gluten-containing but can be adapted easily for gluten-free diets. They are not suitable for those with dairy allergies unless you swap ingredients as suggested. For a balanced approach, pairing these with a protein-rich snack or fresh fruit helps round out indulgence with nutrition.
Conclusion
So, there you have it—soft shamrock sugar cookies with glossy green icing that are as delightful to make as they are to eat. This recipe is a blend of simplicity and charm that really sticks with you, whether it’s your first batch or your tenth.
Feel free to make it your own—tweak the flavors, try different icings, or switch up the shapes. What matters most is the joy of baking and sharing these sweet little moments.
Honestly, these cookies have become one of my go-to recipes when I want something both festive and comforting, without the fuss. I hope they bring a little magic to your kitchen too.
And hey, if you try them out, I’d love to hear how you customized your batch or what moments you baked them for. There’s a cozy little community around every recipe, and these shamrocks are ready to be part of yours.
FAQs
How do I keep the sugar cookies soft for longer?
Store them in an airtight container at room temperature with parchment paper between layers. Avoid refrigeration, which can dry them out. You can also add a slice of bread in the container to help maintain moisture.
Can I make the dough ahead of time?
Yes! The dough can be wrapped tightly and refrigerated for up to 2 days before rolling and cutting. You can also freeze it for up to 1 month; thaw overnight in the fridge before use.
What if I don’t have shamrock cookie cutters?
No worries! Use any cookie cutter shapes you have on hand. Stars, hearts, or circles work just as well and still look great with the green icing.
Can I use powdered food coloring instead of gel?
Gel food coloring is recommended to keep the icing thick and glossy. Powdered food coloring can be used but might require adjusting the icing consistency and won’t give quite the same vibrant color.
How long does it take for the icing to set?
At room temperature, the icing generally sets within 1-2 hours. For quicker results, you can place the cookies in a cool, dry area or a fan-assisted spot, but avoid the fridge to prevent condensation.
Pin This Recipe!
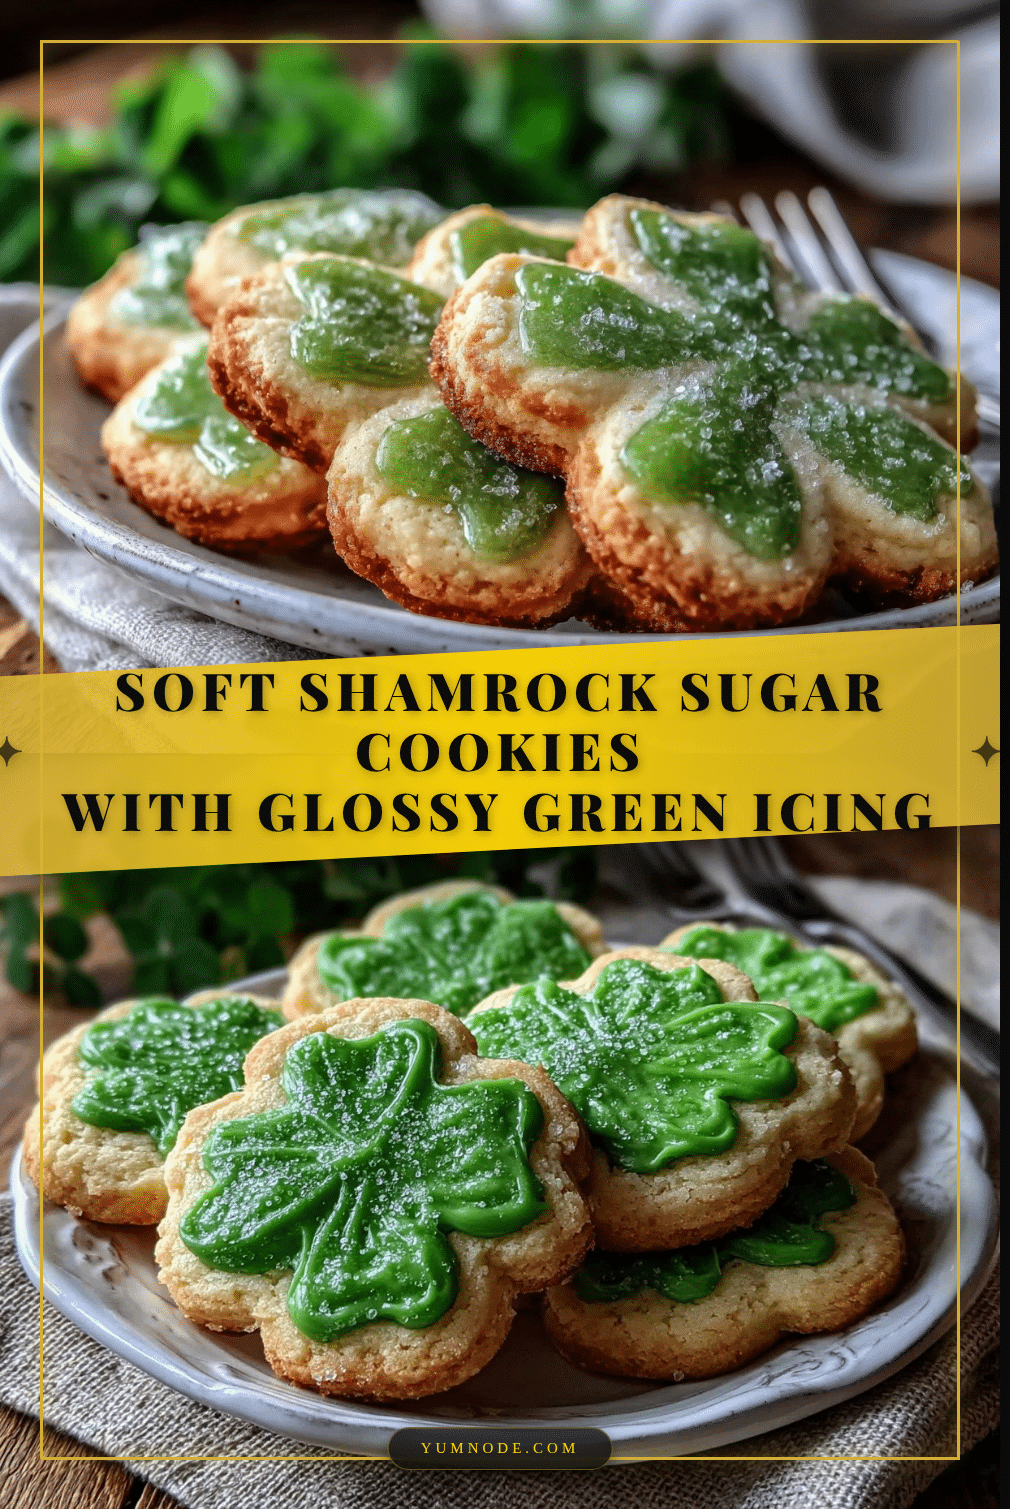
Soft Shamrock Sugar Cookies Recipe Easy Step-by-Step with Glossy Green Icing

Soft, buttery sugar cookies shaped like shamrocks with a tender crumb and glossy green icing that dries to a smooth, melt-in-your-mouth finish. Perfect for St. Patrick’s Day or any festive occasion.
- Prep Time: 15 minutes
- Cook Time: 10 minutes
- Total Time: 45 minutes
- Yield: 24 cookies 1x
- Category: Dessert
- Cuisine: American
Ingredients
- 2 ½ cups (315g) all-purpose flour
- 1 teaspoon baking powder
- ½ teaspoon salt
- 1 cup (227g) unsalted butter, softened
- 1 cup (200g) granulated sugar
- 2 large eggs, room temperature
- 2 teaspoons pure vanilla extract
- 2 cups (240g) powdered sugar
- 3–4 tablespoons (45-60ml) milk, whole or 2%
- 1 tablespoon light corn syrup
- 1 teaspoon pure vanilla extract
- Green gel food coloring, a few drops
Instructions
- Preheat your oven to 350°F (175°C). Line two baking sheets with parchment paper or silicone baking mats.
- In a medium bowl, whisk together the all-purpose flour, baking powder, and salt. Set aside.
- In a large bowl, beat the softened unsalted butter and granulated sugar with an electric mixer on medium speed until light and fluffy, about 3-4 minutes.
- Beat in two large eggs, one at a time, ensuring each is fully mixed before adding the next. Stir in the 2 teaspoons of pure vanilla extract.
- Gradually add the dry ingredients to the butter mixture, mixing on low speed just until combined. Do not overmix.
- Wrap the dough in plastic wrap and refrigerate for at least 30 minutes.
- Lightly flour your work surface and rolling pin. Roll the chilled dough to about ¼-inch (6mm) thickness. Use shamrock-shaped cookie cutters to cut out shapes, placing them about 1 inch (2.5cm) apart on the prepared baking sheets.
- Bake for 8-10 minutes or until the edges just start to turn golden but the centers look set. Avoid overbaking.
- Transfer cookies to a wire rack and let cool for at least 15 minutes before icing.
- In a medium bowl, whisk together powdered sugar, 3 tablespoons milk, light corn syrup, and vanilla extract until smooth. Add green gel food coloring a drop at a time until desired color is reached. Adjust thickness with more milk or powdered sugar as needed.
- Using a spoon or piping bag, spread or pipe the glossy green icing onto each cookie. Let the icing set at room temperature for at least one hour before stacking or storing.
Notes
Chilling the dough is essential to prevent spreading and maintain shape. Use gel food coloring for vibrant, thick icing. Bake cookies until edges just turn golden to keep them soft. Apply icing only to completely cooled cookies to avoid melting. Store cookies in an airtight container with parchment paper between layers to maintain softness. Dough can be refrigerated up to 2 days or frozen for 1 month. For gluten-free, substitute flour with gluten-free blend; for dairy-free, use coconut oil and plant-based milk.
Nutrition
- Serving Size: 1 cookie (about 2.5
- Calories: 150
- Sugar: 12
- Fat: 7
- Carbohydrates: 22
- Protein: 1.5
Keywords: sugar cookies, shamrock cookies, St. Patrick's Day, soft cookies, glossy icing, green icing, festive cookies, easy sugar cookies